nosted IGLAND DS 600 User manual

Igland DS 600 / DS 800 /
DS 1400 / DS 1600
Eierens instruksjonshefte
Owner’s manual

1
NO
Produkt no
IG500050
IG500053
IG500056
IG500062
IG500061
IG500063
IG500059
IG611007
IG611205
IG611109
IG610009
IG611009
IG611209
IG500066
IG610005
IG610006
IG610010
Ekstrautstyr
SMS-kobling (kun for DS 600/800)
Ålö type 3-kobling (kun for DS 600/800)
Kombi HMV og SMS-kobling (kun for DS 600/800)
Euro-kobling (kun for DS 600/800)
Euro-kobling (JD) (kun for DS 600/800)
3-punktsfeste (kun for DS 600/800)
Triangelkobling for Lyng Triangel (kun for DS 600/800)
Triangelkobling (anbefalt for DS 1400/1600)
HMV-kobling (anbefalt for DS 1400/1600)
Regntrekk DS 600
Regntrekk DS 800
Regntrekk DS 1400
Regntrekk DS 1600
3-punktsfeste, kategori II+III (anbefalt for DS 1400/1600)
Justeringsventil for utgangshastighet, fabrikkmontert
Justeringsventil for utgangshastighet, for ettermontering
Dekkplate, for 50% lavere spredningsbredde (DS 800/1400)
Revidert
Publisert
P/N
Adresse
Nettside
Email
Telefon
Fax
23.03.2023
23.03.2023
IG390581
Doneheia 17, 4516 Mandal
nosted.com/en/igland
+47 37 25 62 00
+47 37 25 62 01
Finn mer informasjon på
www.nosted.com
Reproduksjon av tekst eller illustrasjoner
uten tillatelse er forbudt
Innholdsfortegnelse Side
Sikkerhetsregler 2
Hovedkomponenter 3
Tekniske spesifikasjoner 4
Montering og Forberedelse 5
Bruk av utstyr 5
Vedlikehold 6
Produkt no
IG611100
IG610000
IG611000
IG611200
Igland Sandstrøere
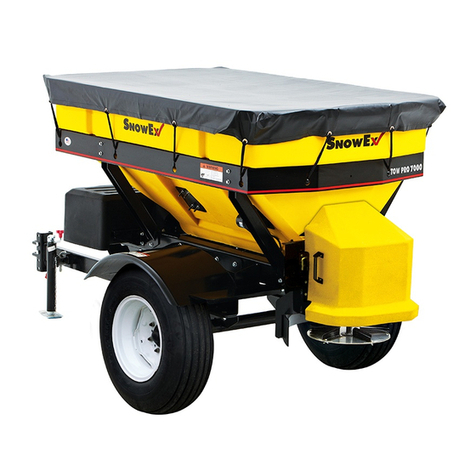
Igland DS 600
Igland DS 800
Igland DS 1400
Igland DS 1600

2
NO
Sikkerhetsinstruksjoner
Generell sikkerhet
• Les manualen før du bruker maskinen.
• Kun for opplært personell.
• Bruk ikke til feil oppgaver.
• Kun til spredning av sand.
• Misbruk kan føre til alvorlige skader og skadet
utstyr.
• Hold barn borte fra arbeidsområdet.
• Bruk alltid verneutstyr.
Drift og vedlikehold
• Hold en trygg avstand til bevegelige deler.
• Aldri bruk løse klær, som skjerf, sjal, osv.
• Aldri utfør vedlikehold eller justeringer mens
kraftforsyningen (traktor) går.
• Bruk ikke maskinen hvis noen komponenter
mangler eller er defekte.
• Start ikke traktoren eller hjullasteren med
hydraulisk uttak aktivert.
Lasting og kjøring
• Vær oppmerksom på vektfordeling og stabilitet
når du laster og kjører med en fylt
sandspreder.
• Alltid ha minst 20 prosent av totalvekten på
forhjulene.
Parkering og lagring
• Før du forlater maskinen uten tilsyn, senk
utstyret til bakken, aktiver bremsen og slå av
strømforsyningen.
• Lagre tørt.
• Parker på fast og jevnt underlag når du lagrer.
• Fyll ikke maskinen når den er parkert eller
parker en fylt maskin.
Personlig verneutstyr (PVU)
• Bruk alltid riktig PVU, som sikkerhetsbriller,
hansker, ståltåstøvler og godt synlige klær.
• Bruk hørselsvern når du jobber i støyende
omgivelser.
Inspeksjon og vedlikehold
• Gjennomfør regelmessige inspeksjoner av
sandsprederen, og sjekk for slitasje, løse bolter
eller andre potensielle problemer.
• Følg produsentens retningslinjer for planlagt
vedlikehold og utskifting av deler.
Beredskap
• Ha et førstehjelpssett tilgjengelig på stedet.
• Bli kjent med nødstopp-prosedyrer for traktor og
sandsprederen.
• Vær oppmerksom på plasseringen av
brannslukningsapparater og vet hvordan du
bruker dem i tilfelle brann.

3
NO
No.
1
2
3
4
5
6
7
8
Hovedkomponenter
Parkeringsbein
Sandkasse
Røreverk
Betjeningsspak
Deksel
Umatingsfals
Gummiflapper
Hydraulisk motor
1
2
3
4
5
6
7
8

4
NO
Tekniske spesikasjoner
Felles spesikasjoner
Drift
Maksimal tillatt oljetrykk
Maksimal tillatt oljestrøm
Maksimal kornstørrelse
Igland DS 600
Kapasitet
Spredningsbredde
Høyde / bredde / lengde
Vekt
Igland DS 800
Kapasitet
Spredningsbredde
Høyde / bredde / lengde
Vekt
Igland DS 1400
Kapasitet
Spredningsbredde
Høyde / bredde / lengde
Vekt
Igland DS 1600
Kapasitet
Spredningsbredde
Høyde / bredde / lengde
Vekt
Hydraulisk
210 bar
60 L/min
4 mm
600 L
1.5 m
90 / 170 / 95 cm
300 kg
800 L
2.0 m
90 / 220 / 95 cm
360 kg
1400 L
2.0 m
115 / 220 / 112 cm
450 kg
1600 L
2.2 m
115 / 240 / 112 cm
520 kg

5
NO
Bruk av Utstyr
Fyll sandstrøeren
Fyll sandstrøeren med sand og/eller grus med en
maksimal kornstørrelse på 3-4 mm.
For å fylle sandstrøeren, vipp den nedover og kjør
inn i sandhaugen som en skue. Vær
oppmerksom på hydraulikkslangene når du tipper
maskinen!
Alternativt kan du bruke annet egnet utstyr for å
fylle maskinen i oppreist stilling.
Påfør hydraulisk trykk på sandstrøeren for å starte
matingen.
Juster spredningsmengde
1. Reguler oljestrømmen eller motorens turtall på
traktoren eller hjullasteren for å kontrollere
hastigheten til utmatervalsen.
2. Bruk justeringshendelen for spredningsmengde,
som har 5 forskjellige innstillinger.
3. Hvis den er utstyrt med en oljereguleringsventil
(ekstrautsyr), juster oljestrømmen for å
kontrollere hastigheten til utmatervalsen.
Husk å alltid overvåke hydraulikkslangene
når du bruker maskinen, og foreta eventuelle
nødvendige justeringer for å sikre optimal
ytelse.
Montering og Forberedelse
1. Monter redskapfeste til sandstrøeren ved bruk
av 4 eller 6 bolter. Fest sandstrøeren til en
traktor eller hjullaster ved hjelp av 3-
punktskoblingen eller valgt hurtigkobling.
2. Løft maskinen. Ta ut låsepinnen til
parkeringsbein, trekk ut håndtaket og skyv
parkeringsbenet opp. Fest det på plass ved
hjelp av håndtaket og pinnen.
3. Koble til hydraulikkslangene. Slangen med den
røde hetten er for trykk, mens slangen med
den blå hetten er for retur/tank.
4. Test og gjør deg kjent med alle
maskinfunksjoner uten sand i beholderen.
5. Sørg for at alle advarselsskilt er synlige og
lesbare til enhver tid.
6. Før du bruker sandstrøeren, inspiser alle
deksler for å sikre at de fungerer riktig og er
plassert på riktig måte.

6
NO
Vedlikehold
• Senk sandstrøeren og slå av traktoren eller
hjullasteren før du utfører vedlikeholds-
oppgaver.
• Fjern dekslene på begge sider av sandstrøeren
for å få tilgang til kjedet og lagrene.
• Smør kjedet med fett eller tykk olje på ukentlig
basis.
•
• Påfør fett på lagrene og andre bevegelige deler
hver uke.
• Etter første dags bruk, stram alle bolter.
Deretter sjekk og stram boltene årlig.
• Rengjør og skyll sandstrøeren etter hver bruk.
Smør maskinen etter vask for å forhindre rust
og opprettholde optimal ytelse.
• Før lagring, smør maskinen. For
langtidsoppbevaring, mal på nytt eller smør
overater der malingen har slitt bort for å
beskytte utstyret mot rust.

7
EN
Product no
IG500050
IG500053
IG500056
IG500062
IG500061
IG500063
IG500059
IG611007
IG611205
IG611109
IG610009
IG611009
IG611209
IG500066
IG610005
IG610006
IG610010
Optional equipment
SMS-hitch (only for DS 600/800)
Ålö type 3 hitch (only for DS 600/800)
Combi HMV and SMS-hitch (only for DS 600/800)
Euro-hitch (only for DS 600/800)
Euro-hitch (JD) (only for DS 600/800)
3-point hitch (only for DS 600/800)
Triangle hitch for Lyng Triangel (only for DS 600/800)
Triangle hitch (recommended for DS 1400/1600)
HMV-hitch (recommended for DS 1400/1600)
Rain cover DS 600
Rain cover DS 800
Rain cover DS 1400
Rain cover DS 1600
3-point hitch, category II+III (recommended for DS 1400/1600)
Adjustment valve for output speed, factory installed
Adjustment valve for output speed, self-installed
Covering plate, 50% spread width reduction (DS 800/DS 1400)
Revised
Published
P/N
Address
Website
Email
Phone
Fax
23.03.2023
23.03.2023
IG390581
Doneheia 17, 4516 Mandal
nosted.com/en/igland
+47 37 25 62 00
+47 37 25 62 01
Find more information at
www.nosted.com
Reproduction of text or illustrations
without permission is prohibited
Product no
IG611100
IG610000
IG611000
IG611200
Igland Sand spreaders
Igland DS 600
Igland DS 800
Igland DS 1400
Igland DS 1600
Table of Contents Page
Safety precautions 8
Main components 9
Technical specifications 10
Assembly and Preparation 11
Use of equipment 11
Maintenance 12

8
EN
Safety Instructions
General Safety
• Read the manual before using the machine.
• For trained personnel only.
• Do not use for improper tasks.
• Only to be used for spreading sand.
• Misuse can lead to serious injuries and
damaged equipment.
• Keep children away from the work area.
• Always wear safety equipment.
Operation and Maintenance
• Keep a safe distance to movable parts.
• Never wear loose items of clothing, such as
scarves, shawls, etc.
• Never perform maintenance or adjustments
while the power supply (tractor) is running.
• Do not use the machine if any components are
missing or defective.
• Do not start the tractor or wheel loader with
the hydraulic output activated.
Loading and Driving
• Pay attention to weight distribution and
stability when loading and driving with a lled
sand spreader.
• Always have at least 20 per cent of the total
weight on the front wheels.
Parking and Storage
• Before leaving the machine unattended, lower
the equipment to the ground, engage the
brake and shut o the power supply.
• Store dry.
• Park on a rm and level ground when stored.
• Do not ll the machine when it is parked or
park a lled machine.
Personal Protective Equipment (PPE)
• Always wear appropriate PPE, such as safety
glasses, gloves, steel-toed boots, and high-
visibility clothing.
• Use hearing protection when working in noisy
environments.
Inspection and Maintenance
• Perform regular inspections of the sand spreader,
checking for wear and tear, loose bolts, or other
potential issues.
• Follow the manufacturer's guidelines for
scheduled maintenance and part replacements.
Emergency Preparedness
• Have a rst aid kit readily available on-site.
• Familiarize yourself with emergency shut-o
procedures for the tractor and sand spreader.
• Be aware of the location of re extinguishers and
know how to use them in case of a re.

9
EN
1
2
3
4
5
6
7
8
No.
1
2
3
4
5
6
7
8
Main components
Parking leg
Sand container
Stirrer
Adjustment lever
Cover
Output roller
Rubber flaps
Hydraulic motor

10
EN
Technical specications
Shared specications
Operation
Maximum permitted oil pressure
Maximum permitted oil ow
Maximum grain size
Igland DS 600
Capacity
Spreading width
Height /width / length
Weight
Igland DS 800
Capacity
Spreading width
Height /width / length
Weight
Igland DS 1400
Capacity
Spreading width
Height /width / length
Weight
Igland DS 1600
Capacity
Spreading width
Height /width / length
Weight
Hydraulic
210 bar
60 L/min
4 mm
600 L
1.5 m
90 / 170 / 95 cm
300 kg
800 L
2.0 m
90 / 220 / 95 cm
360 kg
1400 L
2.0 m
115 / 220 / 112 cm
450 kg
1600 L
2.2 m
115 / 240 / 112 cm
520 kg

11
EN
Use of Equipment
Filling the Sand Spreader
Fill the sand spreader with sand and/or gravel with
a maximum grain size of 3-4 mm.
To ll the sand spreader, tilt it downwards and
drive into the sand pile like a bucket. Be cautious
of hydraulic hoses when tilting the machine!
Alternatively, use other suitable equipment to ll
the machine in an upright position.
Apply hydraulic pressure to the sand spreader to
initiate feeding.
Adjusting Spread Quantity
1. Regulate the oil ow or engine revolutions on
the tractor or wheel loader to control the speed
of the output roller.
2. Use the adjustment lever for spread quantity,
which oers 5 dierent settings.
3. If equipped with an oil regulator valve
(optional), adjust the oil ow to control the speed
of the output roller.
Remember to always monitor hydraulic hoses
when operating the machine, and make any
necessary adjustments to ensure optimal
performance.
Assembly and Preparation
1. Assemble the attachment frame to the sand
spreader using 4 or 6 bolts. Attach the sand
spreader to a tractor or wheel loader using the
3-point hitch or coupling frame.
2. To adjust the parking legs, lift the machine
and remove the locking pin. Pull the handle,
slide the parking leg up, and secure it in place
using the handle and pin.
3. Connect the hydraulic hoses. The hose with
the red cap is for pressure, while the hose with
the blue cap is for return/tank.
4. Test and familiarize yourself with all machine
functions without any sand in the container.
5. Ensure all warning signs are visible and
legible at all times.
6. Before using the sand spreader, inspect all
covers to ensure they are functioning correctly
and positioned properly.

12
EN
Maintenance
• Lower the sand spreader and turn o the tractor
or wheel loader before performing any
maintenance tasks.
• Remove the covers on both sides of the sand
spreader to access the chain and bearings.
• Lubricate the chain with grease or thick oil on a
weekly basis.
• Apply grease to bearings and other moving
parts every week.
• After the rst day of use, retighten all bolts.
Subsequently, check and retighten bolts annually.
• Clean and rinse the sand spreader after each
use. Lubricate the machine after washing to
prevent rust and maintain optimal performance.
• Prior to storage, lubricate the machine. For
long-term storage, repaint or lubricate surfaces
where the paint has worn away to protect the
equipment from rust.


Nøsted & AS
Jåbekk
Doneheia 17
4516 Mandal
Norway
www.nosted.com
This manual suits for next models
7
Table of contents
Languages:
