Notilo Plus Seasam ROV User manual

Quick Start Guide
Seasam ROV
1

Content
I - STARTING UP THE DRONE
●Prepare your equipment
●Connecting the battery
●Connecting the WiFi Reel to the drone
●Starting up the equipment
●Connecting to the WiFi Reel
○Delivery after September 2021
○Delivery before September 2021
●Connection of the controller
●Choice of configuration
●Checking the connections
●Seasam Control
●Set up and calibration
II - USING SEASAM
●Launching the drone
●Piloting tools
●Taking a picture or recording a sequence
●Recording annotations (Flags)
●Cleaning and storage
2

Content
III - RETRIEVING DIVES AND DATA FROM THE DRONE
●Retrieving dives and downloading data
●Basic configuration
●Drone Configuration
●Retrieving dives recorded in follow the diver
●Retrieving dives from the drone to the application
●Retrieve dives and download data
IV - SAVING DATA TO THE TABLET
●Retrieve your dives from the Seasam Control application to the tablet
V - IMPORT DATA TO NOTILO CLOUD
●Import your dives and data from Seasam Control App to Notilo Cloud
●Upload your dives from Seasam Control App to Notilo Cloud
3

I - STARTING
UP THE
DRONE
4

I - STARTING UP THE DRONE
ROV Mode
Prepare your equipment
Battery for SEASAM Drone WiFi Reel
Control Unit Controller
The day before the operation, charge all devices.
Charging
Time
Usage
Time
Waterproof
M Batteries 2,5 hours 1-2 hours NO
L Batteries 5 h (2,5 h*) 2-3 hours NO
XL Batteries 10 h (3,5 h*) 3-6 hours NO
WiFi Reel 6 hours 8 hours Rain
resistant
Control unit 3 hours 15 hours Rain
resistant
Controller 2 hours 14 hours NO
*Require a specific charger 5
The Navigator can replace the WiFi Reel in ROV mode, please check the
Cartography documentation to see how to connect it with the drone.

ROV Mode
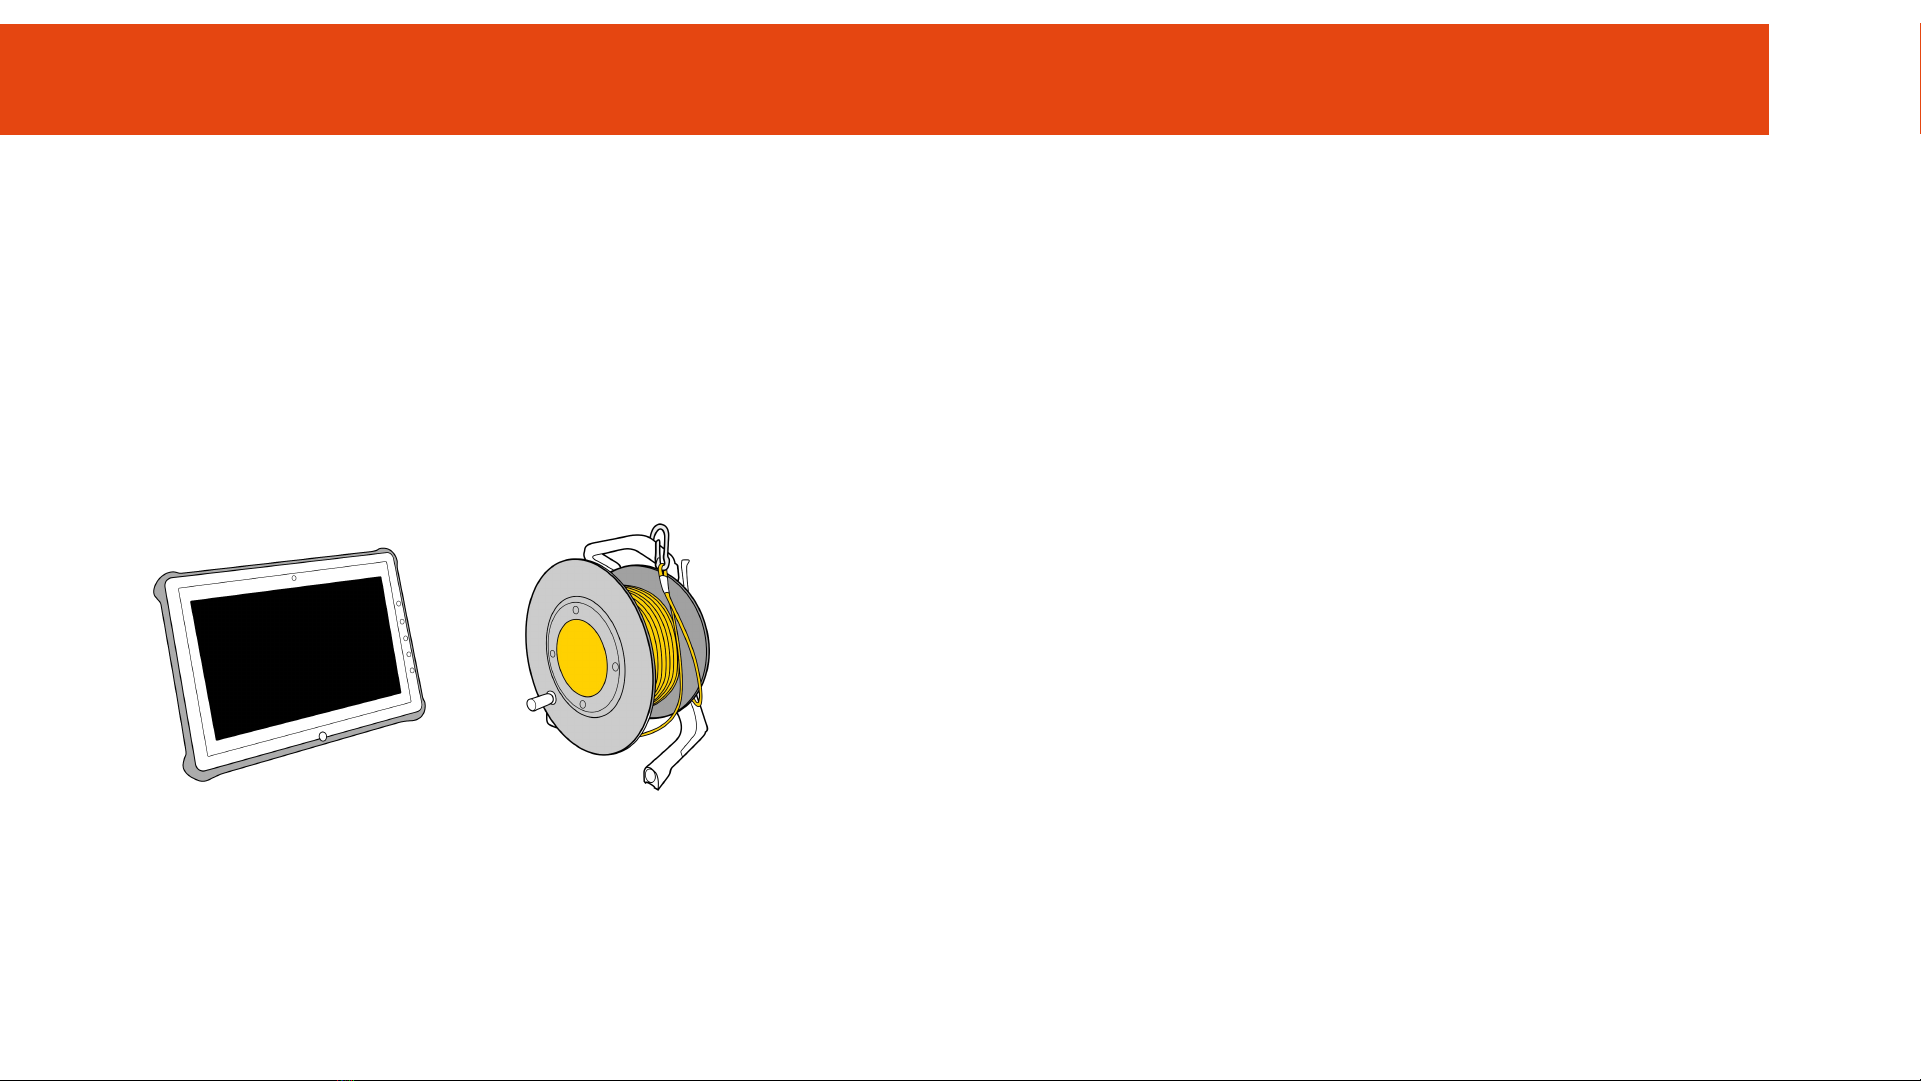
Prepare your equipment
The day of the operation, verify the check list to avoid forget anything
Main equipment
❏Seasam Drone
❏Battery for the drone
❏Opening tool for battery compartment
❏WiFi Reel
❏Controller
❏Control unit
❏Underwater remote control or Magnet to start the drone
Additional
❏Grease for the O-ring
❏Towel to dry the drone
❏Allen key for the float/weight for the drone (according to your battery)
I - STARTING UP THE DRONE
6
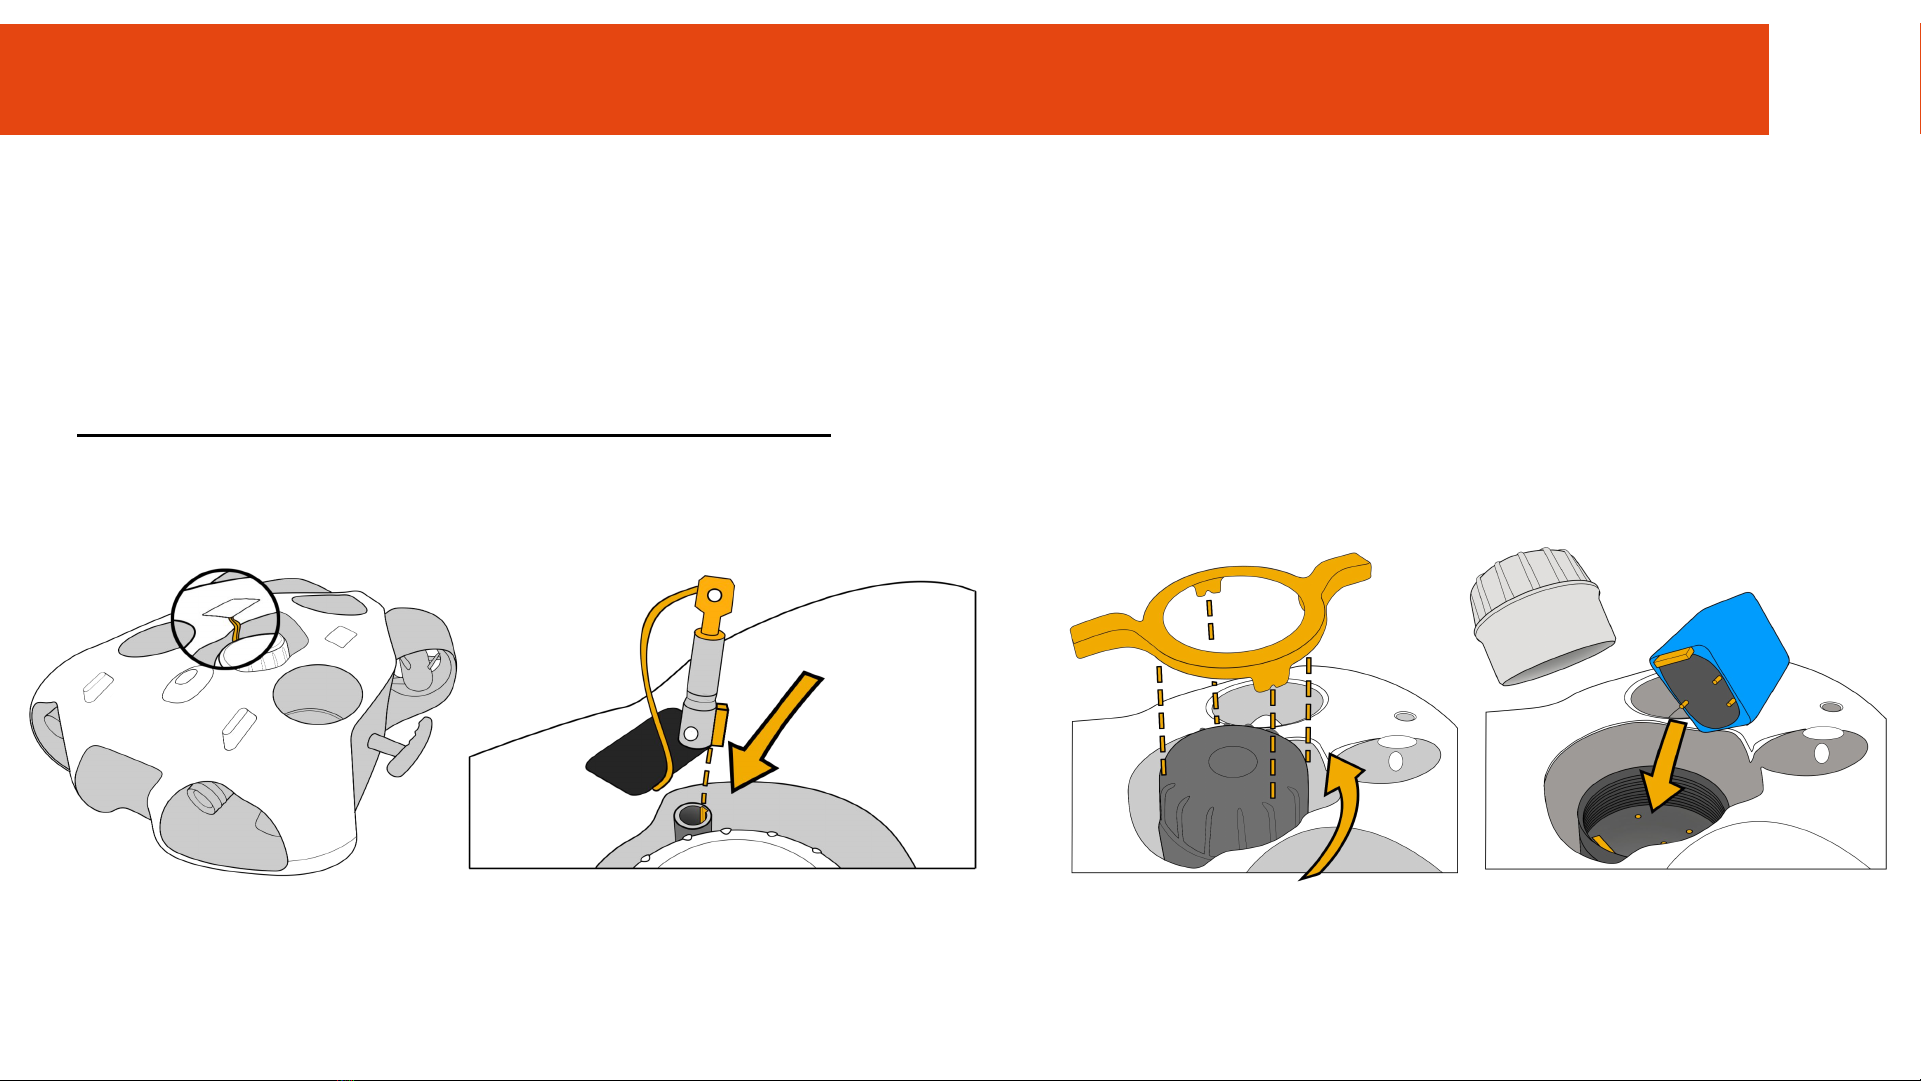
Connecting the battery
Make sure the battery compartment is properly closed.
Use the dedicated tool.
Ensure that the emergency stop on the underside of the drone is
properly inserted.
Make sure that the safety guide is aligned in the right direction
I - STARTING UP THE DRONE
7

Connecting the WiFi reel to the drone
Attach and lock the carabiner on the
drone to secure the Drone
Standard Connector
Subconn Connector
I - STARTING UP THE DRONE
8

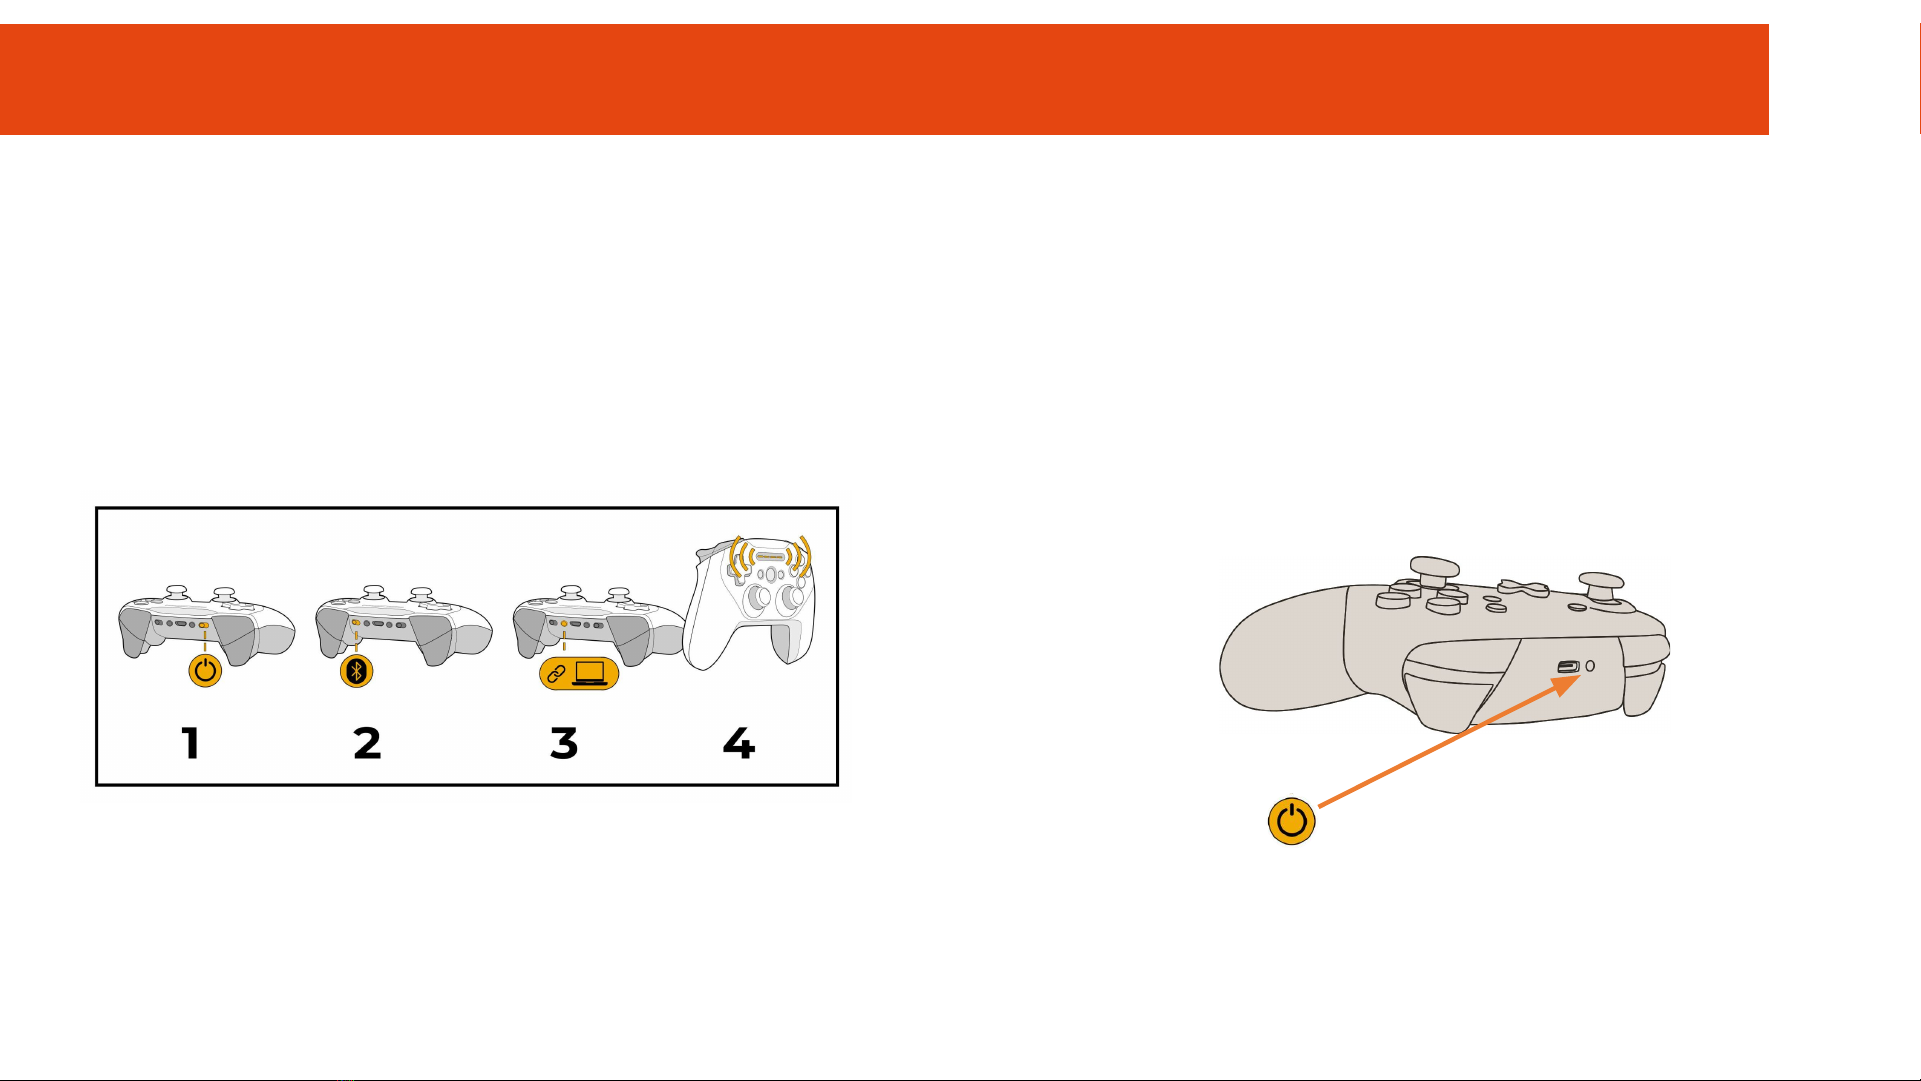
Starting up the equipment
Press the "On" button once. After
several seconds the LED flashes
quickly blue
Place the magnet on the "Power" icon on top of the drone.
The drone will turn on and test all its components. It will make
sounds and activate its lights.
Make sure that nothing is in the way and that the motors are
not jammed.
When this process is complete, the green front LED will be solid.
Turn on the controller.
I - STARTING UP THE DRONE
9
Connecting to the WiFi Reel
Delivery after September 2021
The wifi network is: "Seasam-WiFiReel-XXXX".
The password is @Notilo+
Continue directly to page 12
I - STARTING UP THE DRONE
10

Delivery before September 2021
The wifi network is: “notilo-beacon-XXXX”
●Connect the tablet to the WiFi network of the drone "Seasam-XXXX".
●In the configuration part choose "Drone".
●Go to the application settings
●Select "WiFi Reel".
●The network name and password are displayed
●Copy the password
●Connect the tablet to the notilo-beacon-XXX WiFi network
I - STARTING UP THE DRONE
Connecting to the WiFi Reel
11
Connection of the controller
Connect the tablet to the controller via Bluetooth
Steelseries controller
Device name: SteelSeries Stratus Duo
Switch Controller
Device name: Pro Controller
I - STARTING UP THE DRONE
12
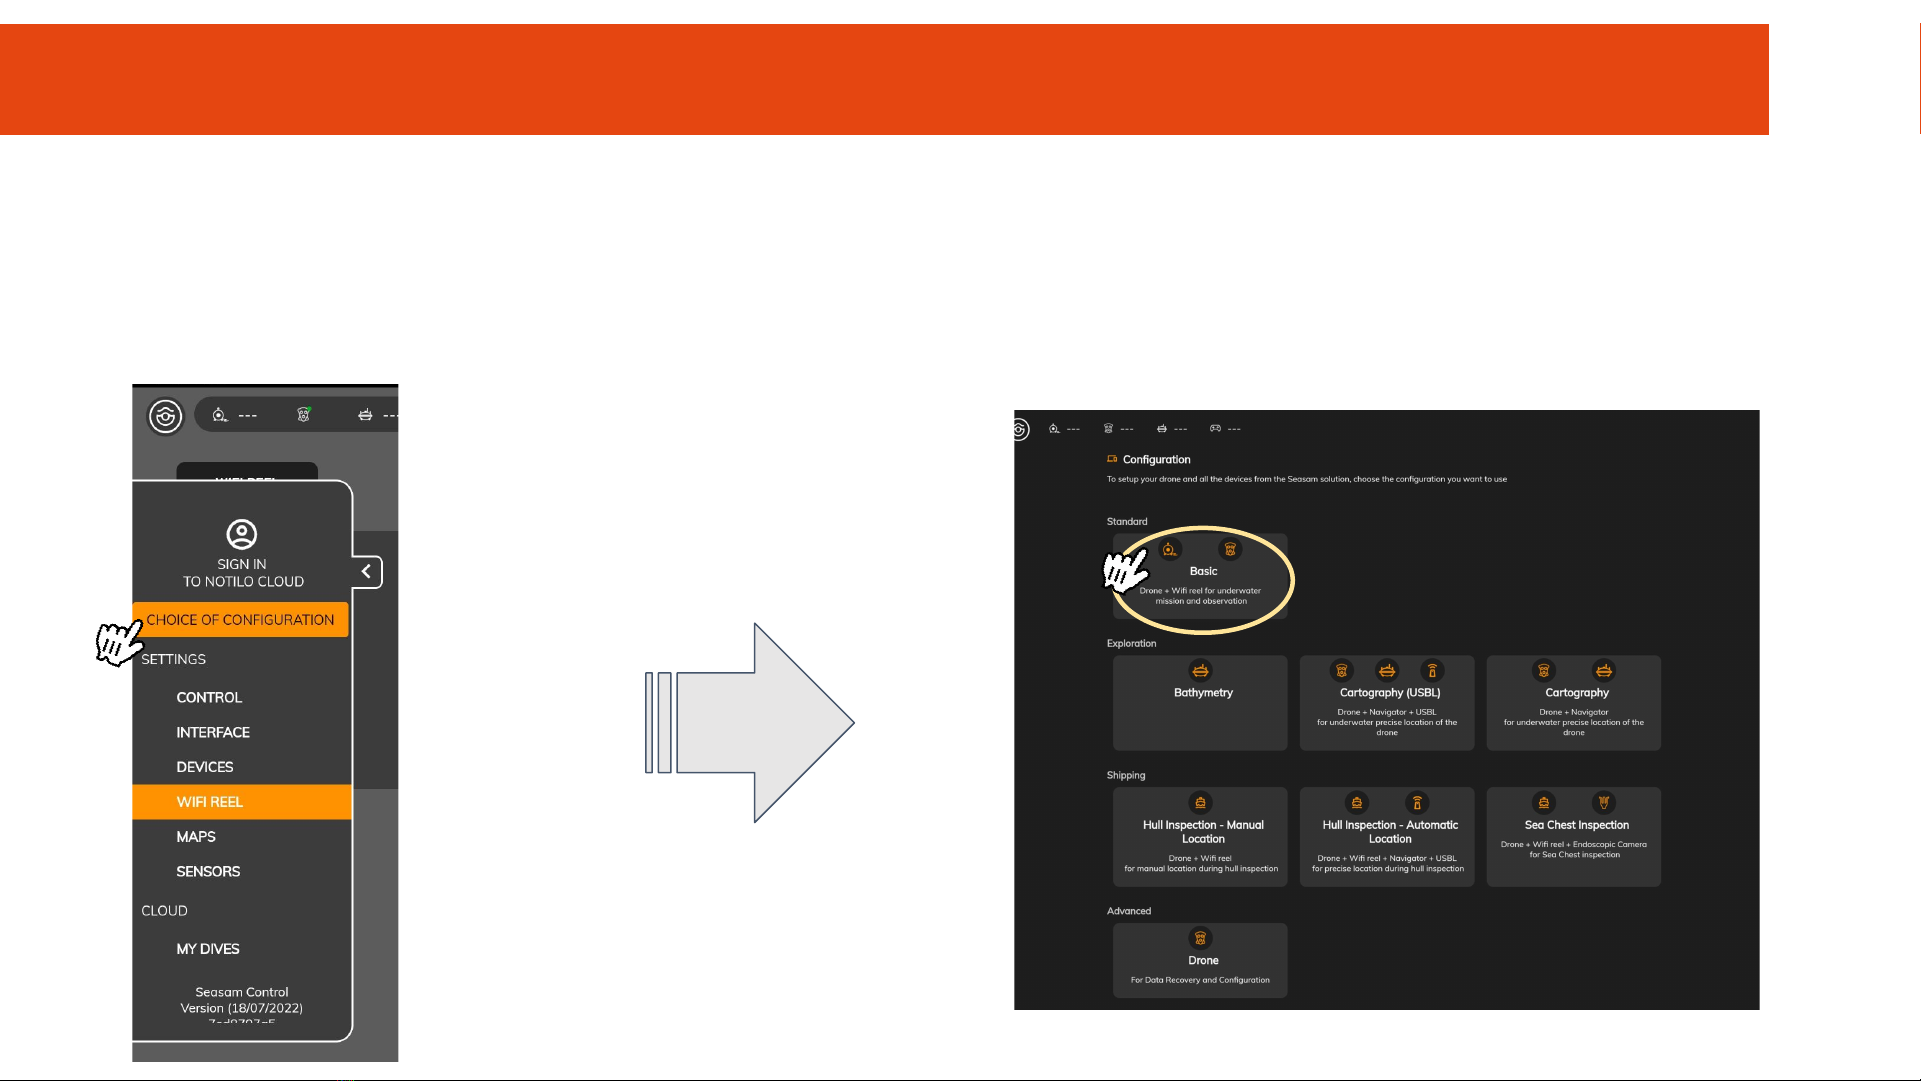
Choice of configuration
Start Seasam Control or select "Configuration Choice" if you have already opened the application.
In the configuration menu, select "Basic Configuration".
I - STARTING UP THE DRONE
13

Check that the indicated steps have been completed and select "Next".
Checking the connections
I - STARTING UP THE DRONE
14
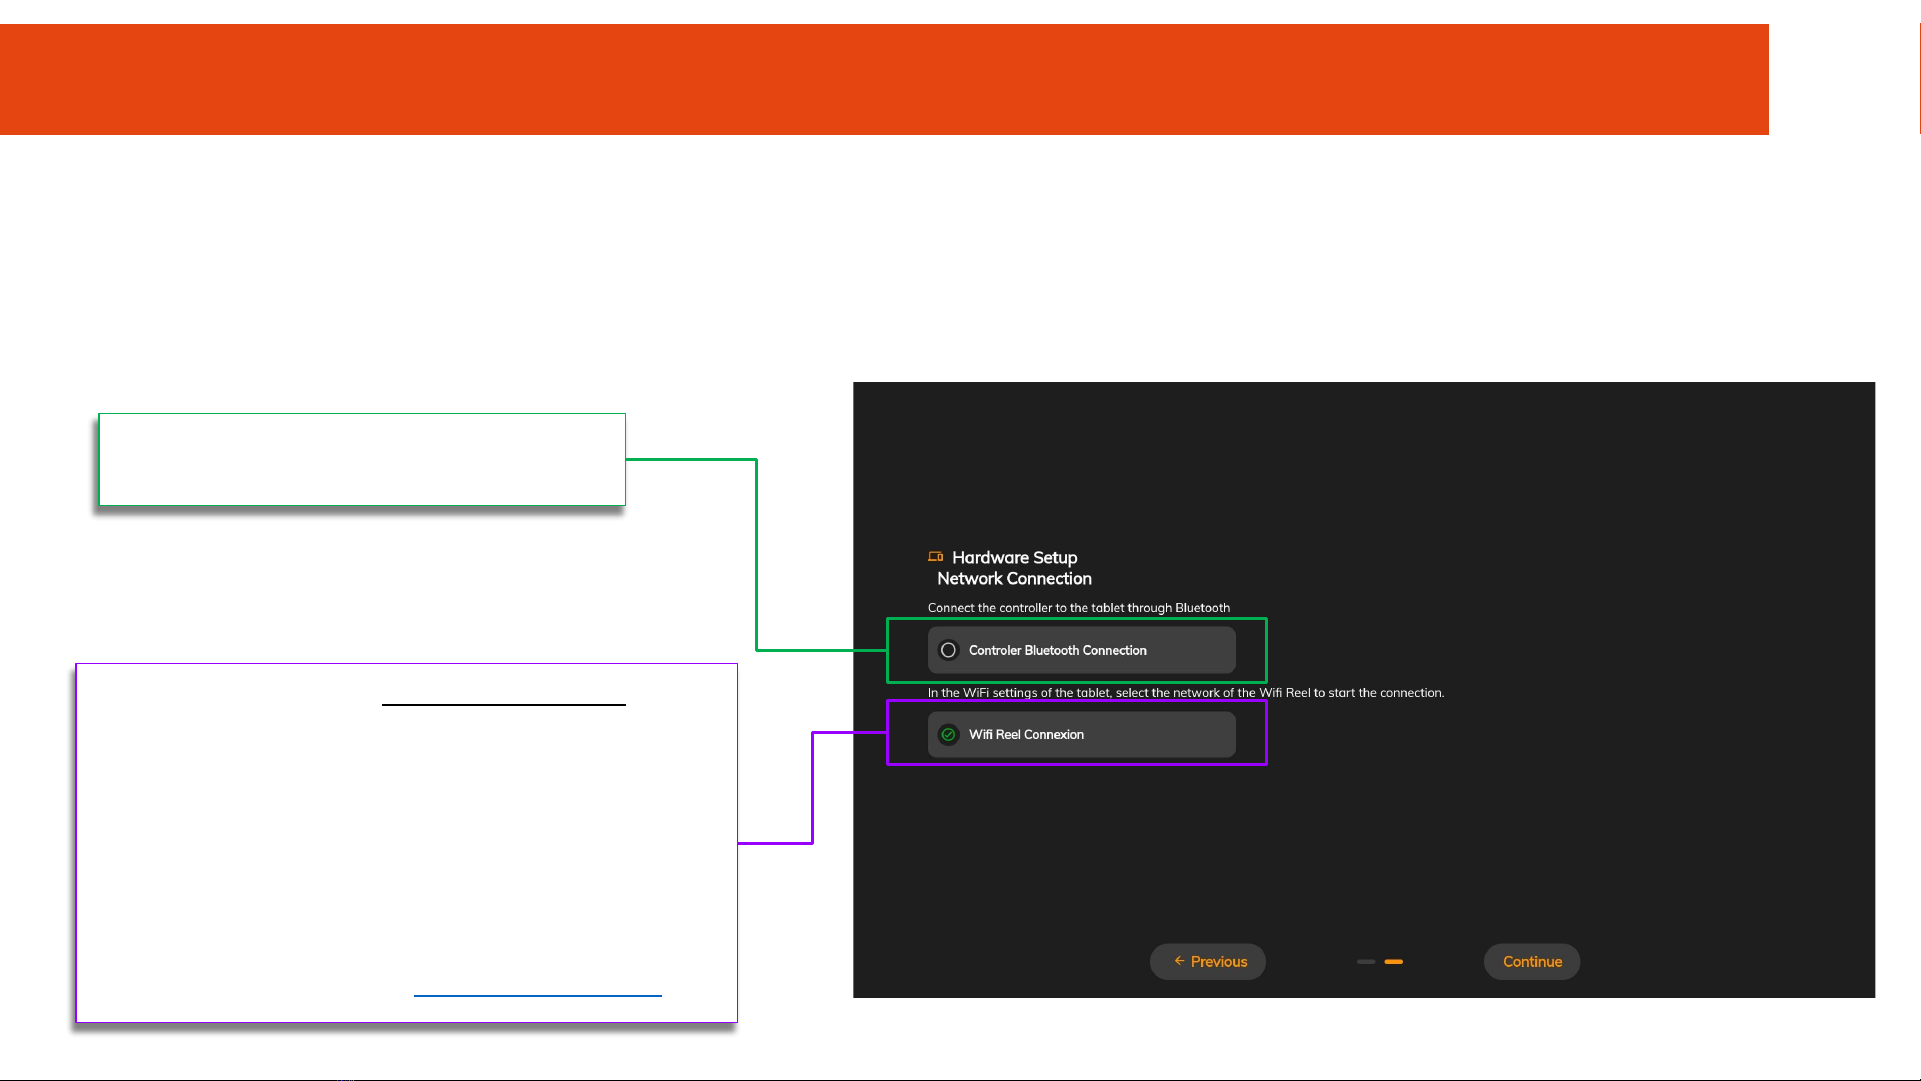
Checking the connections
This screen checks that all the equipment is connected correctly.
Once both connections are checked, click on "Continue" to access the control screen.
Move a joystick on the controller to have the
connection checked.
The system checks that the drone AND the WiFi Reel are
switched on and physically connected together.
If the green tick takes a long time to appear :
- Wait a few seconds
- Check the physical connections
- Make sure the drone is turned on
- Make sure the tablet is connected to the WiFi reel
network
- Go back to the previous page and press "Next" again
If the problem persists contact [email protected]
I - STARTING UP THE DRONE
15

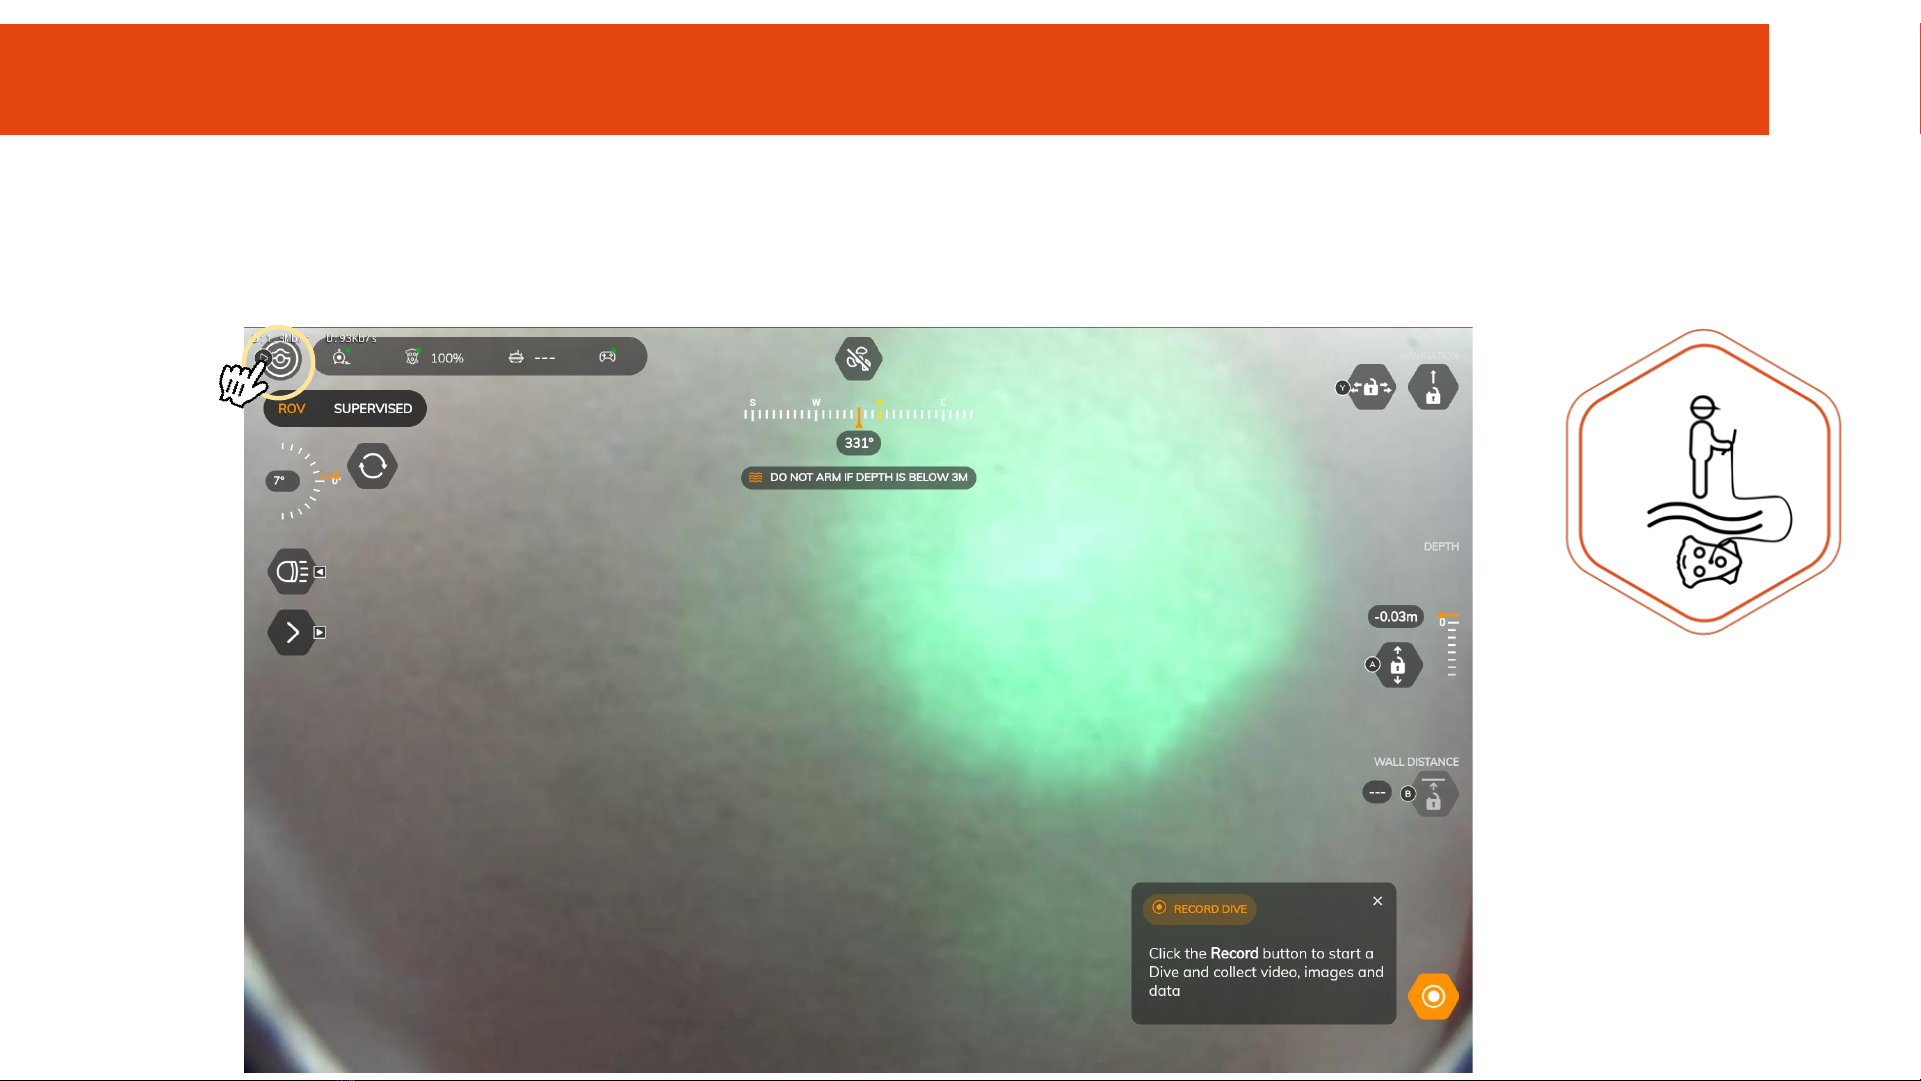
Seasam Control App
Device’s connectivity and the batteries levels
Arm/Disarm the drone
Settings
Pitch
Lights
Speed
Switch from
ROV to Supervised
Motion Lock
(Forward/backward and Yaw)
Pictures and Annotation
of point of interest
(only when the drone is recording)
Depth management
Start/Stop a Dive’s Record
Wall Servoing
Clickable compass to display
different indications
I - STARTING UP THE DRONE
16
Set up and Calibration
Go in the Settings menu by clicking on the Notilo Plus button
I - STARTING UP THE DRONE
17

Control Settings
Set up and Calibration
In the “Control” tab, if necessary, modify the speed
settings.
4 speed modes are available:
●Slow : for fine movement
●Medium : for standard inspection with low
current
●Fast : for standard inspection with high
current
●Turbo: for ultra fast current.
Be careful: This mode increases
drastically the battery consumption.
Click on “Save” to save the customized setting
I - STARTING UP THE DRONE
18

Controller Settings
Set up and Calibration
In the “Controller” tab.
Calibrate the controller before for each inspection.
Click on the button “Calibrate” and follow the indications.
Be careful: Maintain each joystick in position for 1 second.
Otherwise, the calibration will not be correct.
Check this video .
Seasam Control App View
On the bottom of the screen, you can find a reminder of
the dierent shortcuts controls from the controller.
Check the joystick indicator
for each direction
I - STARTING UP THE DRONE
19
II - USING
SEASAM
20
Table of contents
Other Notilo Plus Drone manuals


