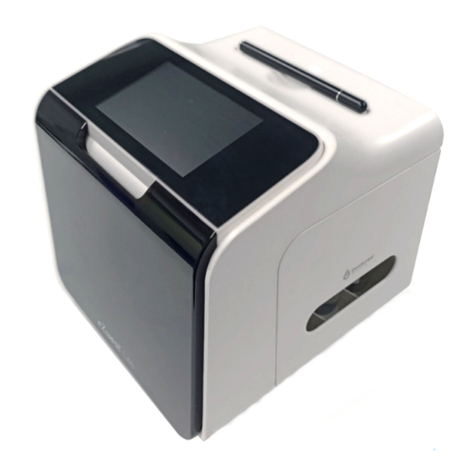
Novasina LabSwift-aw User manual

Operating Instructions
260 0195 003529.03
www.novasina.com
E
Leading the market thanks to INNOVATIVE solutions and sensor technology
aw-Messgerät / aw measuring instrument / Appareil de mesure aw

www.novasina.com
© Novasina AG, printed at 2010 in Switzerland
Technische Änderungen vorbehalten
Technical data subject to modification
Sous réserve de modifications techniques

English
www.novasina.com
INDEX
1. Introduction ..................................................................................................................................... 4
1.1 Starting out ................................................................................................................................... 4
1.2. Important Notes ............................................................................................................................ 4
2. General Product Description ........................................................................................................... 5
2.1. System Overview........................................................................................................................ 5
2.2. System Architecture .................................................................................................................. 6
2.3. Overview ..................................................................................................................................... 6
2.4. Standard scope of delivery ........................................................................................................ 8
2.5. Optional accessories ................................................................................................................. 8
3. Putting Into Operation ................................................................................................................... 9
3.1. Packaging / Installation ............................................................................................................ 9
3.2. Putting into Operation .............................................................................................................. 9
3.3. Quick Introduction .................................................................................................................... 9
4. Description of Instrument Functions ........................................................................................... 12
4.1. Measurement Instrument / Operation ....................................................................................... 12
4.2. Configuration menu .................................................................................................................. 13
4.3. Reset to factory settings .......................................................................................................... 16
5. Water activity measurement ......................................................................................................... 17
5.1. Carrying out aw-measurements ................................................................................................ 17
5.2. Activate the stability observation factor ................................................................................... 18
5.3. Important notes about the sensor ............................................................................................. 19
5.4. Function principle of stability observation ................................................................................20
5.5. Setting the analysing factor ...................................................................................................... 21
6. Calibration of the sensor .............................................................................................................. 21
6.1 Factory settings of the instrument ........................................................................................... 21
6.2 The calibration process............................................................................................................ 22
6.3 Clearing of the calibration points „CAL-CLR* ........................................................................... 23
6.4 Password setting of the sensor ................................................................................................ 23
7. The „SD“ card ................................................................................................................................. 24
7.1 Type and format of the SD card ............................................................................................... 24
7.2 Name and format of the files .................................................................................................... 25
8. The LiIon battery (option) .............................................................................................................. 25
8.1. Operation with the battery ........................................................................................................ 25
8.2. Battery charging ........................................................................................................................ 25
8.3. Life time of the battery .............................................................................................................. 25
9. Maintenance .................................................................................................................................... 26
9.1. Cleaning of the instrument........................................................................................................ 26
9.2. Cleaning of the CM-2 aw-cell ................................................................................................... 27
9.3. Cleaning of the IR sensor ......................................................................................................... 27
9.4. Periodic maintenance and test ................................................................................................. 27
9.5. Replaceing protection filter ....................................................................................................... 27
9.6. Changing of the CM-2 cell ........................................................................................................ 29
10. Technical data ............................................................................................................................... 30
10.1.Technical specification of LabSwift-aw .................................................................................... 30
10.2.Humidity / water acitvity standards .......................................................................................... 31
11. Troubleshooting ........................................................................................................................... 31
11.1. What is wrong, when....? ........................................................................................................... 31
11.2. Error message screens .............................................................................................................. 32
12. Menu structure of the LabSwift-aw ............................................................................................. 33

4
English
www.novasina.com
1. Introduction
1.1 Starting out
Thank you for having purchased an instrument of the Novasina LabSwift-aw
system for measuring water activity. You have opted for a highly accurate and
reliable instrument representing the latest state of the art in electronics and
software design when it comes to highest precision in aw (water activity)
measuring.
To get the most out of all the possibilities of your Novasina LabSwift-aw and
to guarantee safe, reliable operation, please read these operating instructions
before setting the unit into operation carefully.
Please keep this manual in a safe place where it will be at hand whenever you
need it. If you lose the manual, please contact your Novasina representative
for immediate replacement.
1.2. Important Notes
Intended use
The Novasina LabSwift-aw is exclusively intended for measuring WATER
ACTIVITY under strict adherence to the information and notes given in this
manual. Any use beyond this scope is considered to be a violation of the
intended purpose and may endanger your safety or could result in the product
being damaged. Any use of this Novasina instrument other than as intended
is at the customer’s own risk and by no means will the manufacturer or supplier
be liable for any resulting damage.
Safety instructions
• The Novasina LabSwift-aw system should be serviced, maintained and
repaired only by qualified people who are familiar with the equipment.
• The LabSwift-aw system must not be used in hazardous zones or similar
areas. The design was made only for the laboratory field.
• No explosive materials and no highly inflammable substances may be
measured in the measurement chamber system.
• Before connecting the unit to the mains, ensure that:
• The mains voltage is within 90...260V, at 50 or 60Hz. Please check the
type plate of the system!
• The power cable between the mains and the instrument is not damaged.
• The Novasina LabSwift-aw system may be used only under the specified
operating conditions (see chapter 10).
• Observe and strictly adhere to the local regulations regarding the handling
of mains- powered devices.
• Use only genuine accessories and spare parts available from your Novasina
supplier or visit the homepage www.novasina.com.
• This instrument must not be modified in any way without the written
consent of the manufacturer.
• Never open the instrument without removing the mains power cable first
to avoid any risk of dangerous currents.

5
English
www.novasina.com
LabSwift-aw
2. General Product Description
2.1. System Overview
The LabSwift-aw system has been specially developed for determining the
fraction of free water in a test sample like food, cosmetics or pharmaceuticals.
This fraction is also known as „water activity“ in the foodstuffs industry and
may not be confused with the water content (g water / g substrate). The water
activity of a sample is indicated by the so called aw-value and is within the range
of 0 (absolute dryness) and 1 (condensing humidity).
Only this part takes actively part to the exchange with the ambient humidity and
has a big importance regarding the microbiological stability respectively the
biological functions of microorganisms. The water activity is also influencing
considerably the chemical properties of foodstuff.
For the aw-value determination, the equilibrium air humidity over a sample
(water-vapour pressure) is measured . This behaves proportional to the aw-
value. The fundamental requisite for determining water activity quickly and
with extreme precision is an excellent moisture sensor that reaches an exact,
reproducible measurement over a very wide range (moisture from 0....100%
RH). Further important properties are an exact, reproducible measurement
result and a good chemical robustness. Novasina has been developing special
electrolytic moisture sensors that stand out for such unique properties for more
than 50 years.
The integrated, resistive electrolytic LabSwift-aw sensor is based on the new
chemical substance of the Novasina „Novalyte Technology“, which achieves
an outstanding accuracy and reproducibility.
The complete LabSwift-aw system comprises various software options and
can be optimally adapted to the customer and his requirements.

6
English
www.novasina.com
2.2. System Architecture
The LabSwift-aw consists of modular assemblies in combination with the
unique resistive electrolytic Novasina measurement technology, which is built
inside the aW sensor. The aW measurement signal is electronically processed
together with the IR (infrared) measurement and an additional temperature
measurement. Afterwards it is further processed by a high capacity micro
controller. This is handling the LCD display unit and stores data on an external
removable SD-card. The mains are supplying the whole electronics with
power.
The LabSwift-aw does not dispose of an internal temperature control, but has
a surface temperature sensor based on an infrared measurement. For che-
cking and adjusting the aW values, humidity standards (see chapter 6) can be
used.
2.3. Overview
2.3.1. Function keys
Each function key has 3 markings. On top the measurement mode function
(standard operation). The central mark shows the configuration menu function.
The lower, green symbol shows the function, which can be selected by pressing
the key during the measurement mode (approx. 1s).
2.3.2. Function key < Menu >
Measurement mode
- With this key the device is switched on
- Access to menu
- Device is switched off if pressed for a long time
Menu mode
- Carries out the selected function or enables the parameter setting
- Adapts the set parameters
- By pressing for a long time you get from each menu point directly to the
measurement mode

7
English
www.novasina.com
2.3.3. Function key < Actual/Stable >
Measurement mode
- Switches over between the actual measurement value and the
stable value
- By pressing for a long time you get the following view :
· upper display line; number of measurement
· lower display line; actual measuring time (actual) and
stability time (stable)
Menu mode
- Switches a menu point downwards
- Decreases a flashing displayed digit
2.3.4. Function key <Start Stop >
Measurement mode
- Starts the measurement
- Interrupts the current measurement
- By pressing for a long time the protocol of the actual measurement (actual)
is generated
Menu mode
- Switches a menu point upwards
- Increases a flashing displayed digit
2.3.5. Display - symbols
Displays the stability grade;
As soon as the measurement has started, the 1st symbol is displayed. When
the stability is reached, all 5 symbols are displayed contemporaneously.
Actual
Symbol appears, when the actual measurement is displayed.
The symbol is diplayed flashing.
Stable
Symbol appears, when the stable measurement value is displayed.
SD rec
The logger function is activated. The SD-card must not be removed.
The symbol flashes if the SD-card is not disposable.
A LabSwift-aw is used as a stand-alone device. The power supply for the
LabSwift-aw is done by an external power cable or by an optional Lithium-Ion
battery. This allows a versatile employment with continuous operation as well
as in places without electric supply.
The LabSwift-aw stores measurement data and protocols on a SD-card.
These data may be readout and processed on a PC or Notebook by an optional
Windows based software.

8
English
www.novasina.com
2.4. Standard scope of Delivery
Novasina LabSwift-aw
Aw- measurement instrument with accurate sample chamber. This instrument
stands out by its new design and its intuitive handling. Using the integrated SD-
card, measurement results can be stored and processed.
Standard accessories :
• Carrying case
• Power supply EU or USA
• 3 pcs various humidity standards : SAL-T 11, 58, 84%
• 40 pcs standardised disposable sample dishes
• Operating manual in English and German
• Factory calibration certificate
• SD-card 2 GB
• Tension ring
• 5 pcs pre-filter (white)
2.5. Optional accessories
Mechanical filter
Pre-filter white, which protects the measurement cell mechanically e.g. when
the sample cup is overfilled. This filter should be replaced when it is dirty as
otherwise it could influence the measurement.
Chemical protection filter
Depending on the application, the LabSwift-aw precision measuring cell has
to be protected from damaging, gaseous substances. Novasina provides for
this various filter systems. Please consult the data sheet for Novasina
protection filter systems or contact your local Novasina distribution partner.
Thanks to these filter systems the measurement cell lifetime can be extended
considerably. Should you use such filter systems, please make sure that they
are checked and if necessary replaced periodically. Especially chemical filters
have the property to saturate after a certain operation time and therefore to
become ineffective.
Note: Further information are available from your local distributor or on the
Novasina homepage (filter systems).
Lithium-Ion Battery
For the LabSwift-aw device a Lithium-Ion battery is available. This allows a
mobile use of the instrument for more than 20 hours at places without electric
supply.
The battery can, if ordered, be delivered already mounted inside the LabSwift-
aw or can be upgraded later by a Novasina distributor.
The later battery assembly may only be made by a Novasina distributor.
Novalog MC/SD Software
This optional Windows software allows the analysis and graphic design of the
stored data on the SD-card.

9
English
www.novasina.com
3. Putting into Operation
3.1. Packaging / Installation
The LabSwift-aw measurement instrument is delivered in a solid carrying
case including all necessary accessories. Please use this carrying case for the
transport of the device. Upon receipt, please check first to make sure
everything is present, and immediately notify your Novasina sales partner if
anything is missing or broken. Do not put damaged or incomplete measuring
instruments into operation.
The equipment must be installed in a laboratory on an even surface, avoiding
vibrations, strong heat radiation, air flow and dust.
The LabSwift-aw device shall be put on a sufficiently big and even surface.
Chose an installation place without any vibrations, heat and cold radiation, air
flow and dust.
3.2. Putting into Operation
• Check if the local mains voltage matches with the identification plate of the
supplied external power supply and plug it to the socket.
• Plug the external power supply cable to the instrument socket on the back
of the LabSwift-aw.
• Afterwards you can switch on the instrument by pushing the right function
key. A start display (self test) appears shortly and the software version is
displayed on the upper display line.
Note:
The LabSwift-aw is very efficient and requires only little electrical power. The
power supply fits with the latest norms (fulfills „energy star level IV“). That’s why
the instrument can be switched on permanently and kept ready for measurements
at any time. For accurate aw-value measurements the instrument should be
in a temperature equilibrium. For this reason the LabSwift-aw should be only
switched off, when no measurements are performed for a longer period.
3.3. Quick Introduction
3.3.1. Putting into operation
After switching on, the LabSwift-aw needs a certain time before the sensor is
heated up. During this time the display shows the „WARMUP“ message. After
this time (normally 2 minutes) the display switched automatically to the
measurement mode. During the warm up period the device can be configured
or measurements can be activated by pushing the „Start/Stop“ button. The
measurement though starts only after the termination of the warm up period.

10
English
www.novasina.com
3.3.2. Starting a measurement
Fill the sample dish with the sample. Make sure that the sample dish is well
filled but never above the upper rim. Do not compact orcompress the sample
which would reduce the surface area. The larger the ovall surface area, the
faster and more accurate the aw value detection. in no case the sample
material. Put the sample dish in the measurement chamber. Close the
chamber by pushing it down until the fastener engages. You can now read the
actual value in „aw / %RH“ or „°C / °F“ on the display.
The measurement is started by pushing the „Start/Stop“ button. When the
device is in the „Autostart“ mode, the measurement (analysis) starts after
closing the measurement chamber. With that the analysis function starts and
the flashing display shows „ANALIZING“.
As long as it is flashing alternately (Analizing/ ...°C) the aw-value and the
temperature are not stable. The result can be read at earliest when the
„stable“-value is displayed. Depending on the configuration also an acoustic
signal may sound. The analysis function can be optimised (see 5.4.).
During the analysis the display shows permanently the current aw-value and on
the 2nd display line alternately the sample temperature and stability setting. As
soon as the analysis function has terminated, the stable value is displayed.
Likewise the stability indicator arrows are displayed. Should the measurement
chamber be open or not completely closed, the analysis function will either not
start or will be interrupted immediately.
3.3.3. Switching over the measurement display
The LabSwift-aw has 2 different display modes for the current or stable aw-
value. The mode can be selected by the function button „Actual/Stable“. If no
stable value is reached, the symbol „ - -.- „ is displayed in the „Stable“-view.
Also the current measuring time respectively the stability time and sample
number can be called up by pushing the Actual/Stable button for a longer time.
The current mode is shown by an arrow in the lower right display area („Actual“
or „Stable“).
3.3.4. Stability parameter setting
For the measurement speed optimisation it is possible to set the measurement
stability criteria according to the sample. For that, various stability parameter
settings are available. On the one hand 3 fix settings are defined; mode S
(slow), A(average) or F(fast). On the other hand the stability parameter can
be set manually from 1 ... 30 min. (mode O). During the defined stability time
the measurement value variation must be < 0.001 aw. Otherwise a stable aw-
value won’t never be reached. The LabSwift-aw announces as soon as the
measurement is stable. For more information please see chapter 5.4.

11
English
www.novasina.com
MODE functions :
S= Slow measurement; stability time 6 min.
A= Average measurement; stability time 4 min.
F= Fast measurement; stability time 2 min.
0= The stability time can be set between 1 and 30 min. under
the menu point „OBSTIME“
Stability time
The stability is shown, when during the stability time the aw-value variation is
lower than +/- 0.001 aw.
Note :
When the measurement is started the last set stability parameter is taken over.
3.3.5. Switching off the system
Remove the sample from the measurement chamber (if applicable) and switch
off the device by pushing the „Menu / Enter“ button by a longer time.
In order to avoid any loss of data stored on the SD-card, switch always off the
LabSwift-aw before the power supply is interrupted.
Note:
Thanks to the use of modern technology, the power consumption is extremely
low. Therefore we recommend to always keep the LabSwift-aw switched on
when connected to the power supply.

12
English
www.novasina.com
4. Description of Instrument Functions
The LabSwift-aw system is a simple to use laboratory measurement instrument,
which can be powered with a Lithium-Ion rechargeable battery (option). The
device can be adjusted to the user’s needs by the parameter settings explained
in this chapter.
4.1. Measurement Instrument / Operation
4.1.1. Starting the system
The system performs an extensive function check of the internal modules as
well as of important software function during the start-up and operation.
Observed failures are shown on the display.
After a warm-up phase the device is ready and the display switches over to the
measurement mode.
In the measurement mode the following functions are available :
- Button [Start/Stop]: Start the measurement
o Starts a measurement -> „ANALYZE“
It is recommended to start the „ANALYZE“
function after the insert of each sample.
Note:
The instrument can be configured, in order to start „ANALYZE“
automatically after closing the cover. See also chapter 4.2.2.
Simultaneously with the beginning of the measurement also the LOG function
on the SD card get started.
o Stops ongoing measurements without stopping the LOG- function.
Note:
An ongoing measurement is stopped together with the LOG function as soon
as the measurement chamber is opened.
• Button [Start/Stop] (push button for a longer time):
Storage of the actual protocol
o A protocol with the current measurement values is stored on
the SD-card.
o Per each measurement, which means that max. 255 protocols
can be stored.

13
English
www.novasina.com
• Button [Actual/Stable]: Switchover of the display
o A switchover is made between the actual measurement values
and the stored stable value.
• Button [Actual/Stable] (push button for a longer time): Information display
o On the upper line of the info display, the measurement
number, which is used for the definition of the data name on
the SD-card is displayed.
o On the lower line the time since the start of the measurement
(actual) or the time until reaching the stability is displayed
(from 99:59:59h, —.—.— is displayed).
• Button [Menu]: Switch to configuration menu
o The various parameters are explained in the next chapter.
o The configuration menu can be quit at any time by pushing
the [Menu] button for a longer time.
• Button [Menu] (push button for a longer time): Switch off the device
o With this function all SD-card data are closed and the system
is shut down.
Note:
The instrument should not be switched off by just pulling out the power plug,
as otherwise problems with the SD-card (file system) may happen.
4.2. Configuration menu
By pushing the button [Menu] you get to the configuration menu, where you can
select the single menu points using the button (up) (down). Following the menu
points are described in detail.
4.2.1. Submenu „SD-Eject“ - „M EJECT“
SD-card data files are closed, so that the card can be taken out. The display
symbol „SD rec“ disappears and the SD-card can be removed safely.
Note :
Do not take out the SD-card whilst the SD symbol is displayed.

14
English
www.novasina.com
4.2.2. Submenu „Stability factor“ - „* STAB“
After starting a measurement, the analysis phase of the aw measurement is
activated. The observation time, during which the aw-value variation has to be
< 0.001 awcan be optimised for each sample. This is, together with a constant
temperature during the measurement, the most important criteria for an
accurate, reliable and stable value.
„MODE“
S(slow) :
Mode for samples with slow humidity exchange. Stability time is fixed at 6 min
setting.
A(average) :
Mode for samples with average humidity exchange. Stability time is fixed at
4 min setting.
F(fast) :
Mode for samples with fast humidity exchange. Stability time is fixed at 2 min
setting.
0
Mode for manual stability factor setting. The observation time can be set
between 1 and 30 min. under the submenu „OSBTIME“.
„—“
No mode defined. When the measurement starts the user is asked about the
mode to be used.
Note:
If the „Autostart“ function is activated, the user is asked about the wanted
stability mode immediately after closing the measurement chamber.
„OBSTIME“
If mode „0“ is selected, the stability time can be set manually. The „Observation
time“ time range is 1.... 30 min.
„AUTOST“
If the Autostart function is selected, the measurement starts immediately after
closing the measurement chamber. No other button has to be pushed. The
lastly used stability mode is kept.
Exception see „Note“ under Mode „—“.
„BEEPDUR“
Setting of the duration of the acoustic signal once the stability has been
reached.
Acoustig signal („beep“) at stability :
Duration of the acoustic signal („beep“) : 0...10 min; 0 = OFF

15
English
www.novasina.com
„EXIT“
Quit the submenu „Stability factor“.
4.2.3. Submenu „Calibration“ - „* CALIB“
With this function the LabSwift-aw can be checked periodically and if
necessary adjusted at different aw points with the Novasina humidity standards
„SAL-T“. For this purpose various SAL-T humidity standards are enclosed to
each LabSwift-aw. This multiple use salt tablets can be inserted at the place
of a sample inside the measurement chamber and generate well defined aw
values as for example 0.113 aw, 0.328 aw, 0.576 aw, 0.753 aw, 0.843 aw or
0.901 aw.
For further information please consult chapter 6.2..
„CAL XX“
The deviation between the actual measurement value and the chosen reference
value (=calibration point) is displayed. The instrument defines automatically
the used humidity reference as soon as the menu is activated. The temperature
influence on the humidity reference is also taken into account. With the buttons
[up] or [down] other calibration points can be selected. If a value has not been
calibrated, the display flashes. If then „Enter“ is pressed, the value is calibrated
after a query.
Note:
If a password is set, it will be asked prior to the calibration.
„CAL CLR“
Under this menu point single or all calibration points can be cancelled:
CLR Cxx = cancels a single point (xx)
ALL = cancels all calibration points
no = no calibration point is cancelled
„SET PSW“
It is possible to protect the calibration values stored on the sensor by a 4-digit
number code.
With setting „0 0 0 0“ the password is deactivated.
Attention:
A forgotten password can only be reset by Novasina!
Factory sensor setting: „ 8808 „
„EXIT“
Quit the submenu „Calibration“

16
English
www.novasina.com
4.2.4. Submenu „Display settings“- „* LCD“
Under this menu point the contrast and displayed units can be defined.
„CONTRA“
For an optimal display reading the contrast can be adapted individually.
LC-Display contrast: 0....9
„UNIT“
The LabSwift-aw can display the measured values (results) in various units.
„UNIT H“
Humidity / AW: aw-value or relative humidity in % RH
„UNIT T“
Temperature: °C or °F
„EXIT“
Quit the submenu „Display settings“
4.2.5. Submenu „SD-card“ - „* SD LOG“
„S NUMB“
Free number setting (format 0000-9999) as start number and for generation of
a data number in order to match the data to the correspondent measurement.
After each measurement this number is increased by 1.
„S INT“
The data storage interval on the SD-card can be selected in minutes and
seconds (0:00). For standard measurements and analysis with the Novalog
MC software a 10 seconds (0:10) interval is recommended. For data import to
Excel, longer interval periods might be wiser in order to reduce the data
quantity.
„EXIT“
Quits the submenu „SD-card“
4.3. Reset to factory settings
All settings are reset to factory settings except the stored calibration values on
the CM-2 measurement cells. This function can be performed as following:
For this purpose keep the button [up] whilst switching on the instrument. The
message „FA SET?“ appears on the display. Select „YES“ and the confirmation
message „Done“ appears and the device is switched off.
If you answer the question with „NO“, no data are reset and the device is
switched off „OFF“.

17
English
www.novasina.com
5. Water activity measurement
5.1. Carrying out „aw“-measurements
• Switch on the LabSwift-aw as described in chapter 3.2..
• The system carries out a self-test („S TST“). Thereby the software version
is shown on the upper display line.
• After the self-test the sensor is warming up („WARMUP“). Has the warm-
up finished the instrument is ready for the first aw-measurements of a
sample.
Note :
The warm-up time mainly depends on the present humidity and the ambient
temperature. Generally this time is 2 to 3 minutes.
• During the warm-up stage the measurement can be already started. But
there will be no output of measurement data until the warm-up is finished.
• Fill the sample cup with the material to be measured. The sample cup must
be completely clean and dry (rub dry with tissue paper if necessary)!
Ideally, always use a fresh cup and dispose of it after use.
Important!
Fill the sample cup to approximately 2/3 with the product to be measured. Do
not overfill the sample cups ! Bulkier material must be suitably crushed or
manually cut into small pieces. Products consisting of several layers, or an
outer coating, must also be crushed (e.g. confectionery products). Prolonged
hand contact with the product must be avoided (falsification of measured
value!). A grinder, if used, must not warm up the product.
• While placing the sample in the measuring chamber, open the cover and
place the sample dish carefully inside. Be aware about powder samples
that the product will not contact the measuring head or measuring cell.
Note:
Do not move the instrument while a sample is in it, to avoid overflow.
• Close the cover of the LabSwift-aw instantly again.

18
English
www.novasina.com
Important!
(only if no protection filter is inserted) After the closure of the instrument an IR
temperature measurement is done right away. Is the sample 4°C hotter than
the system, the information „OPEN CH“ is shown on the display. Simultaneously
a beep sounds for 30 seconds! (That can be interrupted by pushing any key)
In this case, the sample should be removed as quick as possible from the
measurement chamber of the LabSwift-aw to prevent a condensation inside
the chamber. Otherwise this could lead to a limitation of the measurement
accuracy for a longer period.
Let the sample cool down before you start another measurement.
Note:
This warning function is not working if the IR measurement is inactivated due
to an inserted protection filter (option).
The Display of the LabSwift-aw
The Novasina LabSwift-aw instrument shows on a big LC-display continuously
the actual water activity value (aw) and the temperature (°C) of the probe.
5.2. Activation of the stability function
Depending on the configuration the measurement will start automatically after
the closing of the cover. Otherwise the measurement starts manually by
pushing the „Start/Stop“ function key. The analysis function is activated and
the display shows alternating the indication „Analyzing“ and the temperature
(°C). Beside the temperature on the left, the mode of the stability parameter
is displayed. The top <stb> symbol appears. Automatically the actual aw-value
is shown.
With increasing stability more and more <stb> symbols appear. After the
achievement of the selected stability parameter all <stb> symbols are shown.
The display indication changes to the stable value. A beep sounds for several
seconds according to the menu setting. The stable protocol is saved
automatically on the SD-card.
Exchange of the test sample
Read first the measuring value before you open the instrument. The stable
value indication disappears as soon as the measurement chamber is opened.
• Open the measuring chamber after termination of the measurement.
• Remove the measured material from the measurement chamber and
close it immediately with the sample cover.
• Close the cover of the instrument.
Tip :
If the sample contains high concentrations of glycol, glycerine or different
acids, it would make sense to let open the measuring chamber during hours.
In this way the sensor can recover.

19
English
www.novasina.com
Tip :
Let the LabSwift-aw running all the time. In this way you safe time during the
warm-up of a restart. The energy consumption is very low.
5.3. Important Notes About The Sensor
The sensor supplied with the Novasina LabSwift-aw was factory tested and
then calibrated at the following six aw-value reference points : 0.11aw, 0.33aw,
0.58aw, 0.75aw, 0.84aw and 0.90aw.
Humidity sensors are subject to certain ageing phenomena, which manifest
themselves in deviations from the original value. For the most part, these
deviations can be compensated by recalibration. We therefore recommend
you to periodically check the accuracy at the humidity reference points and to
recalibrate the instrument if required. The standards are reusable and have a
long lifetime with adequate handling. All calibration data are stored on the
intelligent sensor. Thus a new sensor can be used directly without calibrating
the LabSwift-aw afterwards.
Correct handling of the sensor :
Note :
Before starting the measurement. The Novasina sensor is a highly sensitive
precision device. Please observe the following rules in order to avoid measuring
errors or even destruction of the sensor :
• Do not let fall the measurement element or the LabSwift-aw or physically
shock it. The sensor may not be moisturized (cleaning)
• Do not process a measurement if the white sinter filter is not mounted.
• Use Novasina protection filters, which can be mounted in front of the
sensor, if you may measure aggressive substances as acids, alcohols or
aromas. The protection filters help to keep away such substances. Otherwise
the system might drift away permanently. Contact your local Novasina
dealer for the suitable filter protection.
• Sensors that are not used should be stored in a dust free, neutral
atmosphere at room temperature and ambient humidity.
• At non-use of the LabSwift-aw the measurement chamber should be kept
empty and closed.
• Never open or take the measuring cell apart or clean the sensor with any
chemical or mechanical parts! The sensor itself cannot be cleaned. All
attempt will expire the warranty.
• Under no circumstances connect the sensor to an Ohmmeter or such like.
This may damage the sensor and will expire the warranty of the sensor!

20
English
www.novasina.com
"Stable" protocol "Actual" protocol
Any warranty will expire if one or more of the
previous mentioned points counteracts !!
Measurements up to +/- 1.000 aw
The new sensor of the LabSwift-aw is capable of measurements up to 1.00 aw
(100%rh). A built-in heating system protects the measuring cell from saturation
and therefore against destruction.
• The instrument must be switched on before a product sample is placed into
the measuring chamber.
•Always first remove the sample from the measuring chamber before the
instrument is switched off.
Note:
If possible always leave the LabSwift-aw switched ON. The integrated heating
system protects the sensor from saturation and the instrument is always ready
for the next measurement.
5.4. Function Principle of Stability Observation
The stability observation function, if activated, observes the changes in aw
over a time unit. Stability will be shown when the change of the aw-value within
a selected time frame is less than <0.001aw. The shortest time window
(„OBSTIME“) is 1 minute. This window can be increased up to 30 minutes or
a fix stability mode S, A and F can be selected. The optimal observation time
depends on the product sample and can be optimized stepwise.
Table of contents
Other Novasina Measuring Instrument manuals

