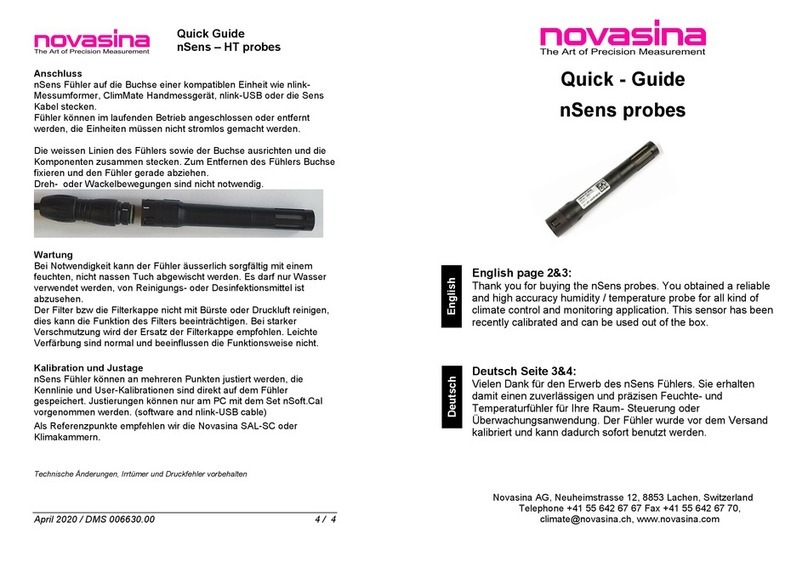
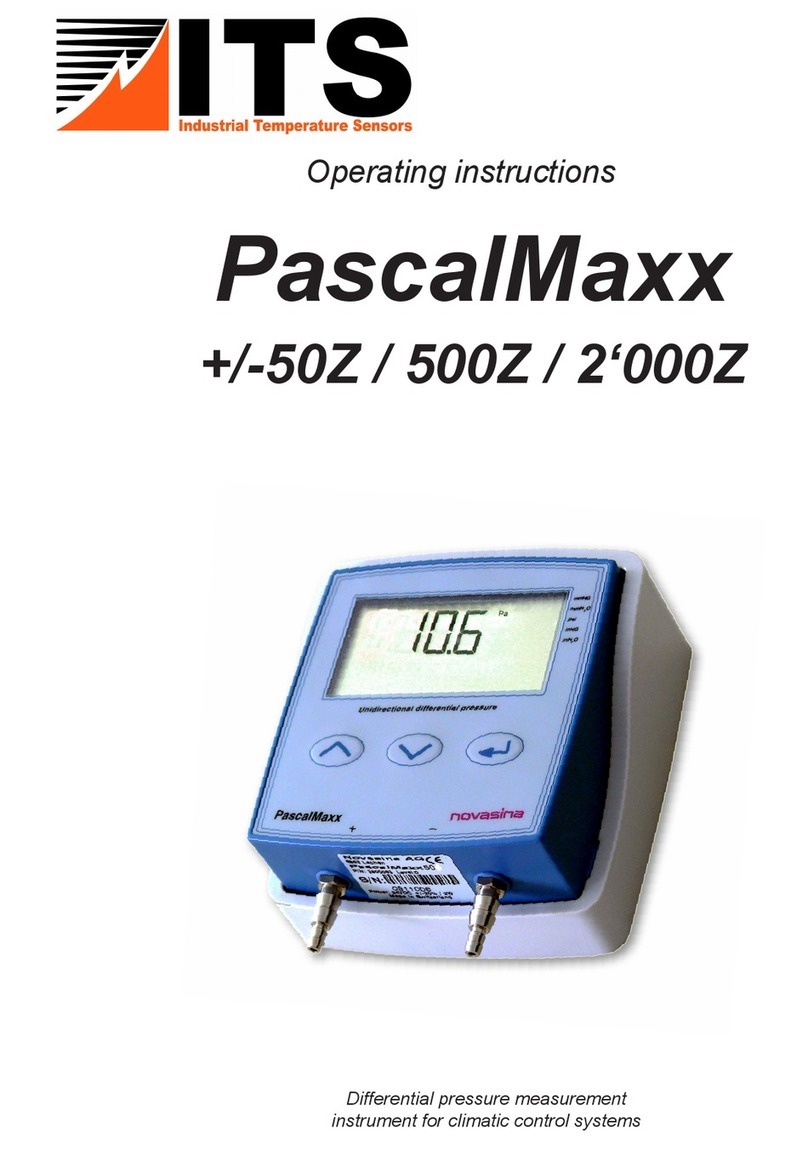
Novasina LabTouch-aw User manual

Operating Instructions
260 0775 Doc. : 004106.05
www.novasina.com
E
Leading the market thanks to INNOVATIVE solutions and sensor technology
aw-Messgerät / aw measuring instrument / Appareil de mesure aw

www.novasina.com
© 2019 by Novasina AG
Technische Änderungen vorbehalten
Technical data subject to modication
Sous réserve de modications techniques

English
www.novasina.com
INDEX
1. Introduction 4
1.1 You Are Awesome! 4
1.2 Important Notes 4
2. General Product Description 5
2.1 System Overview 5
2.2 System Architecture 6
2.3 Instrument Overview 6
2.4 Scope of Delivery 8
2.5 Optional Accessories 8
2.6 License Types 9
3. Putting into Operation 9
3.1 Installation 9
3.2 Putting into Operation 10
3.3 Basic Operations of the Instrument 10
4. Screens and Functions 12
4.1 Measurement Screen 12
4.2 Main Menu Screen 14
4.3 Navigation in Sub-Menus 16
4.4 Menu "Chamber Settings" 16
4.5 Menu "System Settings" 17
5. Temperature Control 18
5.1 Basics 18
5.2 Setting the Measurement Temperature 18
6. How to Perform Measurements 19
6.1 First Measurement 19
6.2 Stability System 20
7. Logging Functions 22
7.1 Automatic Logging of the Last 10 Measurements 22
7.2 Logging on SD-Card 22
8. Sensor Calibration 24
8.1 How to Handle SAL-T Standards Correctly 25
8.2 Values of SAL-T Standards 25
8.3 Factory Calibration, Delivery Status 25
8.4 Calibration and Verication 26
8.5. Deleting Calibration Points 27
8.6 Display Cal Points 27
8.7 Sensor Protection 28
8.8 Automatic Notication for Calibration 28
8.9 Automatic Notication for Filter Exchange 29
9. Additional Functions 29
9.1 Change Acoustic Signals 29
9.2 Reset to Default Values 29
9.3 Update of the System 30
9.4 Intensity of the Backlight 30
9.5 Touch Screen Calibration 30
9.6 Upgrade the LabTouch-aw 31
9.7 Communication Interface 31
10. Maintenance 31
10.1. Cleaning of the instrument 31
10.2. Cleaning of the aw-measurement cell „CM-2“ 32
10.3. Cleaning of the Infrared „IR“ sensor 32
10.4. Periodic Recalibration with Humidity Standards 32
10.5. Replacing Protective Filters 32
10.6. Replacing a CM-2 Sensor Unit 33
10.7. Important Notes About The Sensor 34
11. Error Codes, First Level Support 35
12. LabTouch Menu Structure 38

4
English
www.novasina.com
1. Introduction
1.1 You Are Awesome!
Thank you for having purchased a Novasina LabTouch-aw system for measuring
water activity. You have opted for a highly accurate and reliable instrument
representing the latest state-of-the-art in electronics and software design when
it comes to highest precision in aw (water activity) measuring.
To get the most out of all the possibilities of your Novasina LabTouch-aw and
to ensure safe and reliable operation, please read these operating instructions
carefully before setting the unit into operation.
Please keep this manual within reach of the installed instrument so that it will
be at hand whenever you need it. If you lose the manual, please contact your
Novasina representative for immediate replacement.
1.2 Important Notes
Intended use
The Novasina LabTouch-aw is intended to be used for measuring WATER
ACTIVITY under strict adherence to the information and notes given in this
manual. Any use beyond this scope is considered to be a violation of the
intended purpose and may endanger your safety or could result in irreversible
product damage and loss of all warranty claims. Any use of this Novasina
instrument other than intended is at the customer’s own risk and by no means
the manufacturer nor the supplier will be liable for any resulting damage.
Safety instructions
• The Novasina LabTouch-aw system should only be serviced, maintained
and repaired by qualied people who are familiar with the equipment.
• The LabTouch-aw system must not be used in hazardous zones or
similar areas. The design is made for the laboratory use only.
• No explosive materials and no highly inammable substances may be
measured in the measurement chamber system.
• Just use the original power adapter from Novasina (part number 2600505)
• Before connecting the unit to the mains, ensure that:
• The mains voltage is within 90...260V, at 50 or 60Hz.
Please check the type plate of the system!
• The power cable between the mains and the instrument is not
damaged.
• The Novasina LabTouch-aw system may only be used under the
specied operating conditions (see chapter 10).
• Observe and strictly adhere to the local regulations regarding the
handling of mains-powered devices.
• Use only genuine accessories and spare parts available from your
Novasina supplier or visit the homepage www.novasina.com.
• This instrument must not be modied in any way without the written
permission of the manufacturer.
• Never open the instrument without removing the mains power cable rst
This operating instructions is valid for software versions V2.21 or higher

5
English
www.novasina.com
2. General Product Description
2.1 System Overview
The LabTouch-aw system has been specically developed for determining the
water activity in a test sample like food, cosmetics or pharmaceuticals. Water
activity is dened as the availability of “free” water in a sample and should not
be directly compared with the water content (g water/ g sample). The water
activity is given as the aw – value and ranges between 0 (absolute dryness)
and 1 (100% relative humidity) and is a relative, sample-mass independent
measurement. Only this free water takes an active part in the exchange of
moisture with the ambient air and can possibly form the ideal medium for
microbiological growth on the surface and inuences the biological functions
of microorganisms which has an impact on the microbiological stability plus
chemical and physical properties of a product.
Special laboratory equipment is required for water activity (aw -value)
determination which quanties the air humidity over a sample in a closed
chamber after reaching the humidity equilibrium between free water in the
sample and water in the surrounding air.
The measured air humidity is directly proportional to the aw -value. An accurate
and reproducible measurement is only possible if the sample temperature is
kept constant (i.e. 25°C) and if the measurement is taken after reaching the
humidity equilibrium. It is obvious that the measurement of water activity always
take some time, means is not nished within a few seconds. The establishment
of the equilibrium is sample-dependent and can not be shortened anyhow due
to the fact that it is physics and chemistry.
An inevitable pre-requisite for determining water activity with extreme precision
is the use of an excellent humidity sensor that provides exact, reproducible
response over a very widerange (humidity from 0....100%rH), any hysteresis and
a good chemical robustness. Novasina has been developing special electrolytic
sensors that stand out for such unique properties for more than 50 years.
The integrated, resistive electrolytic LabTouch-aw sensor is based on the new
chemical substance the Novasina „Novalyte“, which achieves the required
accuracy and reproducibility for the daily sample measurement in the lab.

6
English
www.novasina.com
2.2 System Architecture
The LabTouch-aw consists of modular assemblies in combination with the
unique resistive-electrolytic Novasina measurement technology, which is part
of the aw-sensor. The aw-measurement signal is electronically processed tog-
ether with the IR (infrared)sample temperature measurement and an additional
temperature monitoring in the instrument's body. Recorded data can be stored
on an removable SD-card.
The touch screen allows intuitive programming of the instrument as well as
easy access to the various menus.
The LabTouch-aw comprises a semi-temperature stabilization of the measu-
rement chamber which allows heating but no cooling.
For checking and adjusting the instrument, humidity standards can be used.
2.3 Instrument Overview
Front view:
The measurement cell including infrared temperature measurement is located in the inner part of the
LabTouch-aw
Button to start-up the instrument
and open chamber
Touch screen
color display
Ventilation slits
(do not block)
Data storing slot
SD card reader

7
English
www.novasina.com
The inner part of the measurement chamber is equipped with all the characteristic sensors
White pre-lter in front
of the electrolytic
measurement cell (sensor)
Infrared temperature sensor
for sample surface temp.
measurement
Sealing to eliminate air ex-
change with environment
Metal indentation for lled
sample cup insertion
Power supply connector
USB connector for PC and Nova-
log MC communication
RS-232 interface for
connection to PC

8
English
www.novasina.com
2.4 Scope of Delivery
The LabTouch-aw instrument is delivered as followed:
LabTouch-aw:
• Instrument LabTouch
• Power supply with dierent insertion plugs
• 4 pcs of humidity standards : SAL-T: 33, 58, 75 and 84%rH
• 40 pcs standardized disposable sample dishes (ePW)
• Operating manual in English and German on a USB memory stick
• Factory calibration certicate
• SD-card 8 GB
• Tension ring
• 5 pcs pre-lter (white)
• USB and RS-232 cables
2.5 Optional Accessories
Mechanical lter
The white pre-lter provides mechanical protection of the measurement cell
e.g. in case the sample cup is overlled, sample will stick on the lter instead
of the measurement cell.
This lter should be replaced when it is dirty or at least on a yearly base,
otherwise it could inuence the measurement. 5 units are included in the
delivery of the instrument.
Chemical protection lter
Some samples do have volatiles components / ingredients thus the measuring
cell has to be protected from damaging, gaseous substances. This is done by
various lter systems which are provided by Novasina. To select an appropri-
ate lter system, consult the Novasina protection lter systems data sheet or
contact your local Novasina distribution partner.
Thanks to these lter systems, the lifetime of the measurement cell can be
extended considerably. As most of the lter material do absorb the volatile
component and get saturated by time, a regular check is mandatory to avoid
a contamination of the sensor by an ineective, saturated lter system

9
English
www.novasina.com
3. Putting into Operation
3.1 Installation
The LabTouch-aw measurement instrument is delivered with all necessary
accessories to operate the instrument properly. Upon receipt, please double-
check if everything is presentaccording to the scopeof delivery and immediately
notify your Novasina sales partner if anything is missing or broken. Do not put
damaged or incomplete measuring instruments into operation.
The equipment must be installed in a laboratory on an planar surface avoiding
vibrations, strong heat radiation, air ow, dust, direct sunlight exposure and
strong electromagnetic sources.
Make sure the power socket is not in too much distance to the instrument. It
is recommended to store the accessories in close proximity to the instrument.
3.2 Putting into Operation
• Use the Novasina power adapter only. Third party products can destroy
the instrument
• Check if the local mains voltage matches with the identication plate of
the supplied external power supply and plug it to the socket.
• Plug the external power supply cable to the instrument socket on the back
of the LabTouch-aw
Note:
The LabTouch-aw is very ecient and requires only little electrical power.
The power supply complies with the latest standard (fullls „energy star level
IV“) so the instrument can be switched-on permanently and kept ready for
measurements at any time. The LabTouch-aw should only be switched-o,
if no measurements are performed for a longer time period (i.e. more than
one week).
3.3 Basic Operations of the Instrument
This chapter describes the basic operations as starting-up and shutting-down
of the LabTouch-aw as well as other functions.
3.3.1 Start-up procedure
To start-up the instrument, proceed as follows:
• Close the instrument if it has been opened
• Power-up the instrument by hitting the black button in front of the instrument
which also can be used for opening the instrument. A beep indicates the
initialization of the starting sequence
• The system is started-up which is indicated by two dierent start-up screens
• The start-up sequence is nished after approx. 1 minute and the measu-
rement screen appears

10
English
www.novasina.com
• The current measurement values are displayed as soon as the sensor
is ready to measure
• The duration of the pre-heating phase depends on the existing humidity
and temperature in the measurement chamber. In general, it takes 2-3
minutes.
3.3.2 Shut-down procedure
To shut-down just press the red shut-down button on the main menu screen.
Conrm the shut-down process with "YES"
Important:
Always shut-down the instrument before you disconnect it from power other-
wise there might be a loss of data and settings.
4. Screens and Functions
This chapter describes the main screens which appear on the
display of the LabTouch-aw as well as the function of the symbols.
4.1 Measurement Screen
The measurement screen is displayed after the instrument has started up or
if a measurement has been started.
Status LED
Current values
(AW and surface
temperature)
Stable RESULTS
Information bar
Status of SD card

11
English
www.novasina.com
• The LED's (yellow or green) indicating the status of the measurement are
displayed in the rst line.
• If there is a ashing, yellow-coloured LED beside the "Analy.", a measu-
rement is on-going. If the green LED beside the "Stable" is activated,
measurement has been nished.
• If no measurement has been started, no LED is activated.
• The displayed temperature turn to red colour if temperature control has
been activated and the programmed temperature can not be reached.
• If a measurement has been started, the measurement time is displayed
in addition.
• The sample number is displayed as well below the measurement time if
the logging function is activated or if a protocol was stored. This allows an
allocation of the measured values to a specic sample.
• There is a stable indicator which changes its colour from yellow to green
and indicates the progress of the measurement. The greener the progress
bar, the closer the measurement is to be completed.
• After reaching a stable measurement value, the respective measurement
values at this point is displayed in green colour.
4.1.1 Information bar
The information bar is located in the footer of the measurement screen and
provides helpful information as operating conditions to the user.
The various information are displayed alternately.
Text or Symbol Description Remarks
Date / Time Current date and time
Please touch display to access the
menu!
Please touch display to access the
menu!
Press icon for more information! To gather more information about a
displayed symbol, press on it. Symbol
descriptions see further down
Press icon to abort beep! Press on the speaker symbol to stop
the beep
The beep appears once the mea-
surement is nished
SD Card is write protected! The SD card is write protected.
Please unlock the card by moving the
little bar on the left side of the SD card
This text is displayed in light red
colour
SD Card is not ready! The SD card is not ready for operation This text is displayed in light red
colour
Calibration validity expired The sensor of the respective chamber
needs to be recalibrated
This information appears only, if
a warning for next calibration has
been activated (see chapter 8.7).
This text is displayed in light red
colour
Filter exchange required The protection filter of the respective
chamber has to be exchanged
This text is displayed in light red
colour
Demo license expires in
XX:XX h
Demo license expires in
XX:XX h
The instrument will be rebooted
once the time has expired

12
English
www.novasina.com
4.1.2 Symbol SD-Card
The status of the SD card is displayed as a symbol on the right side of the
measurement screen footer
4.1.3 Symbols
Instead of the current measurement information in yellow colour, some symbols
might be displayed.
Those symbols have the following meaning:
Symbol Description Remarks
No symbol SD card is not inserted
SD card is inserted correctly
and ready for operation
It is allowed to remove the SD card in this status
SD card is accessed by the
system
SD card must no be removed, otherwise the le
system and structure could be damaged
-> loss of data
A problem with the SD card has
being recognized by the system
Remove SD card and re-insert the card after 10
sec. A re-initialization may solve the problem. If
not, replace the card
SD card has been write protec-
ted by the small bar on the left
side of the card
SD card can be removed without problems
Important:
Before a SD card is removed, always switch to the measurement screen and double-check, if it is safe to
remove the SD card. Please do not remove, if is displayed!
Symbol Description Remarks
The system detected a problem with
the respective chamber
Press on the symbol to gather more specic
information
Sensor will be put into operating condi-
tions
• Press on the symbol to gather more
specic information
• A measurement can be started even
if the symbol is present but data will
just be analyzed once the symbol has
disappeared
Based on a specic situation, no mea-
surement values can be established
(i.e. activated dew protection of the
sensor)
• Press on the symbol to gather more
specic information
• A dew protection can as well be activa-
ted, if the sensor has been calibrated
improperly and measures a much high-
er aw-value than the real one.
Danger of water condensation in the
chamber
• Remove the sample as soon as possi-
ble from the chamber
• In addition, there is a warning beep
which lasts till the opening of the cham-
ber or for 30 sec.

13
English
www.novasina.com
4.2 Main Menu Screen
The main menu screen provides easy access to programming and measurement
functions.
4.3 Navigation in Sub-Menus
Navigation through the sub-menus is simple and only 4 dierent icons are
available to do it:
Switch OFF
the instrument
Chamber
Status Settings
Start
functions
Switch
to measurement
screen
Symbol Description Remarks
Close a sub-menu and return to
the menu above
Close all sub-menus and return to
the measurement screen
Move one menu point upwards This icon is only displayed, if there are menu
points upwards the visible area
Move one menu point downwards This icon is only displayed, if there are menu
points downwards the visible area

14
English
www.novasina.com
Symbol Description Remarks
Start a measurement and switch automati-
cally to the measurement screen
If a measurement is on-going or nished
and the "Start" icon is pressed again, the
instrument will ask if you really want to start
a new one as the current data will no longer
be displayed
Abort a measurement and switch auto-
matically to the measurement screen
• A query is issued if the measurement
should really be stopped.
• Opening the chamber will immediately
stop an on-going measurement
Release a test protocol and switch auto-
matically to the measurement screen.
Adjustment of the way the chamber(s) are
displayed on the measurement screen
and switches to it afterwards:
- All chambers:
Multiple chambers will be
displayed.
Individual chamber view is changed au-
tomatically to all chambers view in case a
measurement has been nished in a non-
displayed chamber.
Switch from the main menu to the measu-
rement screen
This function is available in the sub-menus
as well
Access the submenu "system settings"
where all system parameters can be
programmed
Access can be restricted by setting pass-
word. Refer to chapter 9.8 for more
information
Access the sub-menu "chamber settings"
where all chamber parameters can be
programmed
Access can be restricted by setting pass-
word. Refer to chapter 9.8 for more
information
Shut-down / switch-o the instrument Please switch-o the instrument only by
using this function to avoid loss of data
(logging data etc.)
Status of chamber at a glance (ashing
LED's):
- Analyzing: Measurement is on-going
- Stable: Measurement is nished
This icon changes its size depending on
the number of connected chambers

15
English
www.novasina.com
4.4 Menu "Chamber Settings"
All chamber related settings as stable observation time or calibration can be
done in this menu.
Functions of the icons on the main menu screen once the icons are pressed:
The table below should give an overview about the available functions. Detailed
descriptions will be given thereafter.
Menu point Description Remark Factory default setting
Temperature
control
Setting of measurement tempera-
ture control (or switch o) Details see chapter 5.2. O
Stable mode Settings / Mode for stability obser-
vation time Details see chapter 6.2 A (Average)
Stability
observation time
Programmable stability time, only
available if stable mode "Manual"
and "Query" have been selected
Details see chapter 6.2.2 5 min
Stability check
temperature
Monitoring of adherence of nomi-
nal temperature, only available if
temperature control is activated
Details see chapter 6.2.2
available if temperature
control is switched on and
Stable Mode is not set
to"Quick"
On
Data logger Sub-menu for programming the
logger and/or logging functions. Details see chapter 7 Sample number: 0000
Interval recording: 10 sec
Sensor
calibration
Enter sub-menu for sensor
calibration Details see chapter 8
Menu point Description Remark Factory default
setting
Info
The following information will be displayed:
CHAMBER
Instrument:
Measurement chamber tag
Serial number:
Serial number of the measurement chamber
Firmware:
Firmware version
SENSOR
Version:
Sensor version
Serial number:
Serial number of the sensor
Firmware:
Info about the cability of the file system
Last calibration:
Date and time of the latest calibration.
PROTECTION FILTER
Last exchange:
Date of the last protection filter exchange if option activated

16
English
www.novasina.com
4.5 Menu "System Settings"
All system related settings as display settings, changing units etc can be done
in this menu.
5. Temperature Control
This chapter describes how the temperature control works on the LabTouch.
5.1 Basics
Most of the samples are signicantly inuenced by temperature. For this reason,
the instrument is equipped with a simple temperature-controlled measurement
chamber. As opposed to the LabMaster-aw, the LabTouch-aw does not oer
a cooling function which just allows measurement temperatures at least +2°C
but max. +10°C above environmental (lab) temperature
Furthermore, the instrument does not have an thoroughly isolated measurement
chamber. Thus the accuracy can get worse if the temperature inside the chamber
is signicantly higher than the environmental one, especially if the infrared
sensor is covered by an installed sensor protection lter.
5.2 Setting the Measurement Temperature
• Press "Chamber settings" on the main menu screen and select "Temperature
control afterwards, then enter the requested measurement temperature
there. If no value is entered, the temperature control is switched-o.
• A warning notice is displayed if the programmed temperature is less than
the required 2°C above the environmental one. In addition, the displayed
Menu point Description Remark Factory default setting
Date, Time Set current date and time
It is mandatory to set
the correct date and time,
otherwise the calibration
points management is
disturbed and reminders do
not work properly
aw, °C, DD.MM.YYYY
Units Sub-menu for changing units
(i.e. aw or %rH etc.).
Acoustic signals
Sub-menu for adjustments of
acoustic signals (as beep) for
end of measurement notica-
tion.
Printout protocol Sub-menu for protocol printout
conguration. see chapter 7.2 - 7.6
Maintenance Sub-menu to perform mainte-
nance tasks.
Info
Info about the rmware of the
instrument and display of the
license type

17
English
www.novasina.com
temperature in the measurement screen turns red in this case and the user
will be noticed in the status bar by a respective hint.
• Iftheenvironmentaltemperatureischangingduringanon-goingmeasurement
in a way that the programmed temperature can not be reached, the displayed
temperature turns red as well and the instrument will not reach stability,
means the measurement can not be nished.
The notice "retarded (temp)" appears below the stable indicator.
• Stability is foreclosed if nominal temperature cannot be reached plus if
"Stability check temperature" is activated . Retarded (temp) is displayed
in this case as well.
Note:
The programmed temperature must be between 15°C and 30°C!
6. How to Perform Measurements
Information about starting a measurement can be found in this chapter.
6.1 First Measurement
Prepare the sample by cutting it into small pieces and ll the sample cup till the
visible rst rim. This is approximately 2/3 of the sample cup. As the water activity
is a relative measurement, the amount of sample is negligible, means, it does
not matter how much sample is placed in the sample cup, the result will be the
same. Just note that the bottom of the sample cup should be covered at least
to achieve reasonable performance. Do not overll the sample cup, otherwise
some sample will be pressed into the white sensor protection lter which can
cause wrong measurements, thereby requires immediate lter replacement.
6.1.1 Insert a Sample
Place the prepared sample cup into the metal indentation of measurement
chamber and close it.
• If the sample is too hot (more than 4°C above environmental temperature),
an alarm is issued and the chamber has to be opened as soon as possible
to avoid condensation within the same. At the same time, a respective
symbol is displayed.
Condensation has to be avoided as water droplets are formed in the mea-
surement chamber and wrong measurement results for the current and the
following samples will be the consequence. The sensor itself is actively and
reliably protected by a dew protection as long as the instrument is switched on.

18
English
www.novasina.com
If the instrument is switched-o and hot sample is placed into the chamber,
the sensor might be destroyed, especially if additional vibrations are present.
Please do not place any sample into the measurement chamber while the
instrument is switched-o!
Note:
The condensation alarm does not work properly if the infrared temperature
sensor is blocked by an inserted, chemical sensor protection lter.
6.1.2 Start a Measurement
Program the respective stability parameters, depending on the sample proper-
ties (see chapter 6.2).
Start a measurement as follows:
• Switch to the main menu screen
• Press the "Start" button.
-> The measurement is started and the measurement screen is displayed
End of measurement :
If stability is reached, the instrument takes the reading which is as well the end
of the measurement. A "beep" indicates it acoustically.
Note:
• If the stability times are set in an inappropriate way, the readings might be
taken too early (stability not completely accomplished) or measurement
time is extended unnecessarily.
• Always remove the sample before shutting-down the instrument. The dew
protection is not active once the instrument is switched o and the sensor
might be damaged in this case. In addition, volatile substances in low
concentration can accumulate and deteriorate the sensor's performance.
To it, the warm-up phase is remarkably longer if a sample with high water
activity is not removed after nishing the measurement.
6.2 Stability System
The key to a successful and reliable water activity measurement is the fact
that the reading has to be taken once the equilibrium between the free water
in the sample and the surrounding air has been established. Even as dierent,
more or less successful approaches are present in the market, Novasina has
its own, unique equilibrium detecting system which is the most accurate and
reliable one, proven by hundreds of satised customers.
Theoretically, a full established equilibrium is reached after endless time period.
Of course, there must be a tradeo as the measurement results have to be
available within reasonable time. For that reason, the LabTouch-aw is equipped
with a so called stability indicator, which supports the user in nding the best
compromise between measurement duration and sucient accuracy.

19
English
www.novasina.com
6.2.1 Stable Indicator
What is a stable indicator? Well, it is not the same as a predictor which "predicts"
the residual measurement time in minutes and seconds. It is more a tool which
takes the previous measurement history of the sample into the account and
graphically outputs the progress. This can lead to the fact that the green bar is
getting smaller even if the measurement is developped if the establishment of
the equilibrium is interrupted by the evaporation of additional free water coming
from the inner part of the sample or if environmental temperature is changed
dramatically and temperature-control of the chamber is switched o.
How is it working? In simple terms, the system observes the change of the
measurement value within a programmable time. The maximal allowed deviation
in aw is 0.001aw. The programmable time is the one which can be set as "sta-
bility observation time" in minutes or which can be selected as "stability mode"
The progress bar indicates the already reached stability. The programed stability
parameters are displayed underneath the progress bar.
Thus, as closer the deviation comes to 0.001aw within the programmed stability
observation time frame, the greener the bar will get.
If the equilibrium has been established and thereby the values considered
as stable but questionable due to a remarkable temperature dierence bet-
ween sample surface (IR-sensor) and the second temperature sensor in the
instrument's body, the display of the stability values is retarded. A respective
notication below the stable indicator is shown.
A similar notication is issued if the values are considered as stable but the
programed temperature could not be reached and stability check temperature
has been activated.
If temperature control is switched-o, so will be "retarded (temp)".
6.2.2 Program Stability Time
The required stability time for a reliable water activity measurement is specic for
each product. To make your decision easier, you can nd some recommended
settings in the table below
Please feel free to contact the responsible Novasina distributor in your area
you need assistance in selecting an appropriate stability time for your sample.
Please provide as much information as possible about the ingredients, inclu-
ding volatiles.
You can choose from four pre-settings and two manual ones. To program the
stability time, respectively to select one of the predened stability settings, press
"chamber settings" on the main menu screen and select the menu "Stable mode
Pre-settings:
Quick Measurement is nished in maximum 10 minutes.
F Fast, stability observation time is set to approx. 2 minutes
A Average stability observation time is set to approx. 4 minutes
S Slow, stability observation time is set to approx. 6 minutes

20
English
www.novasina.com
Product Recommended settings
Production Line with reduced accuracy ex-
pectation but need for fast measurements
Quick
Powders, Jam, Tomato Sauce F
Dried Meat, Fruits, Cereals A
Chocolate, Fish, Cheese,
Bakery Products, Fresh Meat, Butter
S
The determination of the most appropriate stability time can be done as following
• Choose a suitable pre-set stability mode (F, A or S)
• Start a measurement with the sample which you want to optimize or nd out the
stability time.After stability is reached, do not open the chamber and take out
the sample, let it in for another 30-60 minutes. Now compare the stable value
with the current one (both values can be seen on the measurement screen)
• If the deviation is more than 0.005aw, choose the next higher stability
pre-setting level.
• If the measurement takes too long (more than 120 minutes), choose
the next lower stability pre-setting level.
Note:
Use Excel to display the stored measurement values on the SD-card on a
computer. With the help of the graph it is easier to nd the most appropriate
stability time for a specic product.
Manual setting and query
Beside the pre-settings, the instrument oers the ability to enter a stability time
manually. This feature should only be used by experienced users as the cor-
relation between water activity and product properties have to be understood.
• "Manual":
While selecting Manual in the menu "stable mode", an additional menu
"Stability observation time" appears right underneath. A stability time from
1-30min. can be entered there.
• "Query":
If "Query" is chosen in the stable mode menu, the user is asked every time
about the desired stability mode while starting a measurement. This option is
only useful, if various samples are measured with the instrument, so that the
operatordoes nothaveto change thisparametereverytime andadjustthe unit.
Other manuals for LabTouch-aw
1
Table of contents
Other Novasina Measuring Instrument manuals
Popular Measuring Instrument manuals by other brands
Viavi
Viavi SmartClass Fiber OLP-87 NG-PON2 Quick Card User Guide
Bacharach
Bacharach Neutronics 7100P Operation manual
EINHELL
EINHELL TC-LD 50 operating instructions
TPI
TPI SP620 user manual
Keysight Technologies
Keysight Technologies MXA N9020A Instruction
Holaday Industries
Holaday Industries HI-3604 user manual
