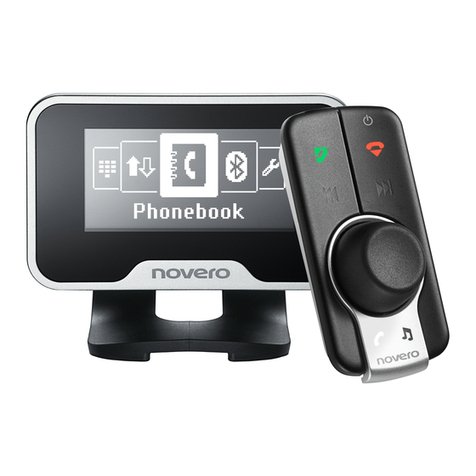
Novero TheTalkyOne User manual

welcome
TheTalkyOne
getting started
how to ...
signals
care
support
safety & disposal
certification &
safety approvals
glossary
welcome
Congratulations on your new speakerphone!
We hope you will enjoy TheTalkyOne by novero.
This user guide will help you get started and will
present you with all the outstanding features and
accessories that provide for the ultimate,
customized user experience.

TheTalkyOne
welcome
TheTalkyOne
getting started
how to ...
signals
care
support
safety & disposal
certification &
safety approvals
glossary
back
TheTalkyOne is ready to use and designed perfectly
for your car and your oce.
It talks in many dierent languages and it fits perfectly
into your car. You can make handsfree calls and stream
music while in your car. You can clip it onto the sun visor,
place it in the dashboard car holder, and use it as a
speakerphone in the oce.
accessories
_read more
install
_read more
box contents
_read more
technical specifications
_read more
Multi-function
button
Volume up
Microphone
(Front)
Volume down
USB connection
(Back)

accessories
To complete the concept of style, elegance and
convenience, TheTalkyOne comes with a sun visor
clip, a dashboard car holder and 3 Velcro®pads – one
on the holder and 2 spares.
Both the sun visor clip and dashboard car holder place
your speakerphone in arm’s reach.
dashboard car holder
_read more
sun visor clip
_read more
welcome
TheTalkyOne
getting started
how to ...
signals
care
support
safety & disposal
certification &
safety approvals
glossary
back

charging TheTalkyOne
Before you can use TheTalkyOne, you must charge it.
Please use only original novero charging devices. The
following charging options are possible:
• Car charger (DC): Connect the car charger to the
USB cable and to the DC outlet in your car. Connect
the USB cable to the speakerphone.
• PC via USB cable: Connect your PC and the
speakerphone with the USB cable.
charging signals
_read more
welcome
TheTalkyOne
getting started
how to ...
signals
care
support
safety & disposal
certification &
safety approvals
glossary
back

turning TheTalkyOne on/o
• To turn the speakerphone on, press and hold
(2 sec) the multi-function button.
• To turn the speakerphone o, press and hold
(2 sec) the multi-function button.
If your speakerphone is already paired with a device,
it will automatically attempt to connect with this
device when turned on.
power signals
_read more
welcome
TheTalkyOne
getting started
how to ...
signals
care
support
safety & disposal
certification &
safety approvals
glossary
back

If TheTalkyOne is not already paired with a Bluetooth
device, it will automatically enter pairing mode when
you turn it on.
• To pair the speakerphone with your mobile device,
activate the Bluetooth feature of your mobile device
and search for TheTalkyOne. See the user guide of
your mobile device for instructions.
When your mobile device finds TheTalkyOne, select
it and confirm your choice with the pass code or
PIN=0000. Your device will confirm when pairing is
complete.
Enable an automatic connection to prevent having
to repeat this procedure every time. This device will
now function as your primary device.
Pairing mode will time out after 10 minutes and
TheTalkyOne will automatically turn o. If pairing has
not been completed by then, simply turn the
speakerphone back on to re-enter pairing mode.
• To pair the speakerphone with a second mobile
device, simply repeat the pairing instructions with the
second device. This device will function as your
secondary device.
multipoint
_read more
pairing signals
_read more
software update
_read more
pairing TheTalkyOne
welcome
TheTalkyOne
getting started
how to ...
signals
care
support
safety & disposal
certification &
safety approvals
glossary
back

make calls
• To make a call, simply use your mobile device, and
the call will automatically transfer to your
speakerphone (subject to device settings).
• To make a call, you can also use voice dial by
pressing the multi-function button.
• To answer a call, press the multi-function button.
• To end a call, press the multi-function button.
• To redial the last number called, double-press the
multi-function button (applies to primary device only).
• To reject an incoming call, double-press the
multi-function button. – Depending on your mobile
device settings, the call will either be directed to
your voice mail or the caller will hear a busy signal.
call signals
_read more
voice dial
_read more
text-to-speech
_read more
welcome
TheTalkyOne
getting started
how to ...
signals
care
support
safety & disposal
certification &
safety approvals
glossary
back

adjust the volume
• To adjust the volume,pressvolumeup(••)or
volumedown(•).
• To mute the microphone, press and hold (2 sec)
volumeup(••).
• To unmute the microphone, press and hold (2 sec)
volumeup(••)again.
volume signals
_read more
Listening to loud music while driving can be dangerous. Please adjust the volume so that it does not interfere with your driving or prevent you
from hearing trac.
!
welcome
TheTalkyOne
getting started
how to ...
signals
care
support
safety & disposal
certification &
safety approvals
glossary
back

voice dial
TheTalkyOne supports and gives you easy access to the
voice recognition features on your mobile phone – from
voice dialing to more advanced features such as voice-
controlled SMS or e-mail.
• To activate voice dialing (if supported by the primary
device), press the multi-function button.
• To activate advanced voice features (if supported
by the primary device), press the multi-function
button – depending on the mobile phone, you will
hear a recognition tone.
The number of voice recognition features depends on
your mobile phone – please check the user guide for
your mobile phone for more information about voice
dialing and advanced voice features.
welcome
TheTalkyOne
getting started
how to ...
signals
care
support
safety & disposal
certification &
safety approvals
glossary
back

transfer call
• To transfer an active call from your speakerphone
to your mobile device, press and hold (2 sec) the
multi-function button until the speakerphone
switches o.
• To transfer an active call from your mobile phone
to your speakerphone, press the multi-function
button and turn the speakerphone on.
welcome
TheTalkyOne
getting started
how to ...
signals
care
support
safety & disposal
certification &
safety approvals
glossary
back

welcome
TheTalkyOne
getting started
how to ...
signals
care
support
safety & disposal
certification &
safety approvals
glossary
back
multipoint
With multipoint (multiple connections), you can connect
TheTalkyOne with two mobile devices at the same time.
With the primary device, you can access all advanced
functions, and with the secondary device you can access
the basic call functions.
• To assign the primary status to a specific device,
connect this device to your speakerphone first. The next
device will automatically be assigned secondary status.
• During an active call, only one phone can be
connected to TheTalkyOne.When an active call is
connected to your speakerphone, and the second
connected phone receives a call, your current call will
not be interrupted. After you have ended your call,
TheTalkyOne will reconnect to the second phone so
that they both are reachable again.
• If you make an outgoing call from the secondary
device, it will become the primary device for the
duration of the call.
• To change the priority of the primary and secondary
device, you must reset the pairing list. To do so, press
and hold (4 sec) the multi-function button and volume
up(••)atthesametime.Thenre-connectthedevices
to your speakerphone, starting with the one you want
as your primary device.
pairing
_read more
support
_read more
make advanced calls
_read more

When the speakerphone is turned on for the first time,
it will automatically set the language to English. After
you have paired your mobile device with your
speakerphone, it will automatically check the language
of your mobile device. If the language is available, the
speakerphone will automatically switch to this language.
• To change the language of the speakerphone,
press the multi-function button and volume down
(•)oncetohearthecurrentlanguagereadaloud.
Press the combination again for the next language.
Repeat until you hear the language you wish to
select. – Then simply stop to activate the next
language.
• To turn text-to-speech o, press the multi-function
buttonandvolumedown(•)atthesametime.
• To change the installed languages, please visit
www.novero.com and check the service section. The
novero software update tool allows software
updates with dierent languages.
You can also change the text-to-speech language with
the novero software update tool.
software update
_read more
text-to-speech
welcome
TheTalkyOne
getting started
how to ...
signals
care
support
safety & disposal
certification &
safety approvals
glossary
back

update software
TheTalkyOne supports software updates which
ensure that you always have the latest software and
can enjoy the latest features. The novero software
update tool is available on www.novero.com
• To update the software of TheTalkyOne, go to
www.novero.com and install the novero software
update tool. Please install it onto your PC, and then
connect TheTalkyOne with the USB cable to the PC.
For more information on updating the software, go to
www.novero.com and check the service section.
support
_read more
welcome
TheTalkyOne
getting started
how to ...
signals
care
support
safety & disposal
certification &
safety approvals
glossary
back

sun visor clip
• To attach TheTalkyOne to the sun visor, simply
clip it on. When attaching the clip to the sun visor,
make sure that the microphone points towards
your mouth and the clip fits tightly. If it does not,
please use the dashboard holder instead.
dashboard holder
_read more
welcome
TheTalkyOne
getting started
how to ...
signals
care
support
safety & disposal
certification &
safety approvals
glossary
back
Attaching TheTalkyOne can make small imprints on your sun visor, which usually disappear after detaching it. To avoid these imprints you can use the
dashboard car holder instead.
Please check that you can still use the sun visor after installing TheTalkyOne. If not, please use the dashboard car holder instead.
!

TheTalkyOne comes with a dashboard car holder,
which allows you to charge it via your car charger.
• To install the dashboard car holder in the right
place, first check that the microphone points
towards you. If you want to charge while driving,
you should also connect the car charger to the DC
outlet in your car. Then fasten the dashboard car
holder to the dashboard in a place where:
1) The dashboard car holder is not close to an airbag
or area where it could harm you in case of a
collision.
2) It will hold your speakerphone in arm’s reach from
the driver’s seat, and the microphone points
towards you.
3) You can easily detach the speakerphone
when leaving the car.
You can use the spare Velcro®pads to change the
positioning in the car.
sun visor clip
_read more
dashboard car holder
welcome
TheTalkyOne
getting started
how to ...
signals
care
support
safety & disposal
certification &
safety approvals
glossary
back
Table of contents
Other Novero Automobile Accessories manuals
Popular Automobile Accessories manuals by other brands

ECS Electronics
ECS Electronics HY-070-DH Fitting instructions electric wiring

Brodit
Brodit 511627 quick start guide

Improved Racing
Improved Racing FSM -RKIT Series instructions

Volvo
Volvo Alcoguard 30758207 installation instructions

Jegs
Jegs 40824 installation instructions

Thule
Thule 1200 Fitting instructions