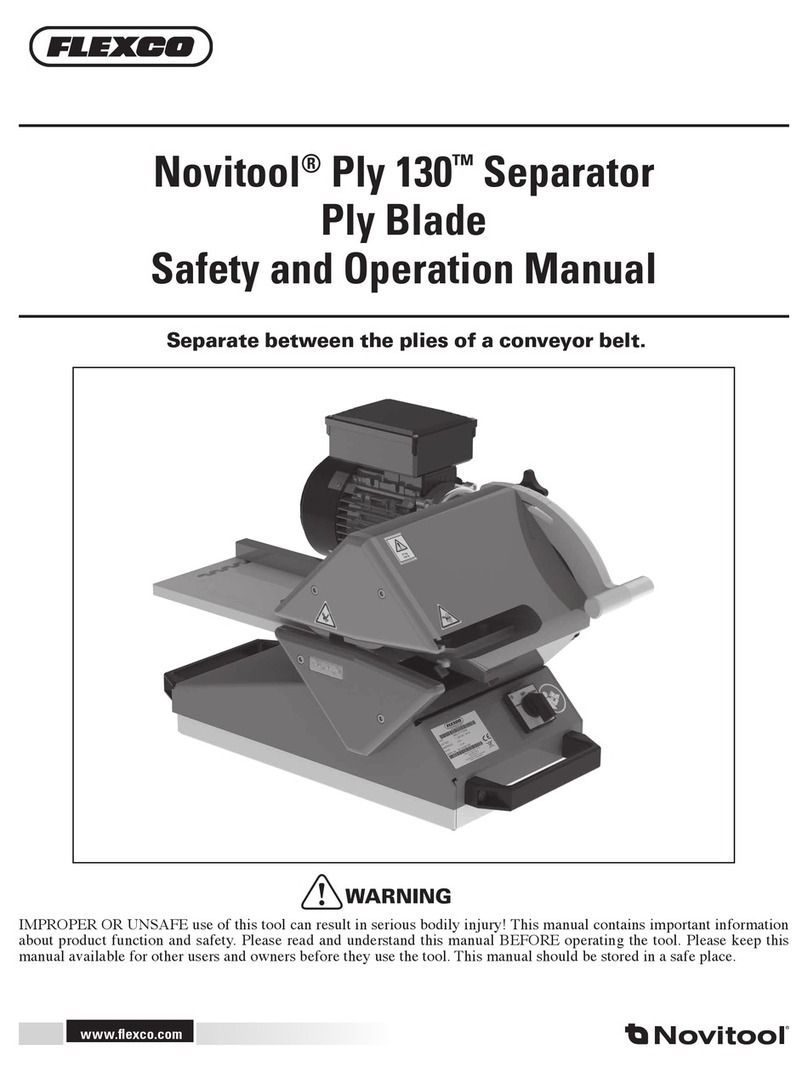
Novitool Ply 130 Guide

Ply 130™Step Cutter
Safety and Operation Manual
www.flexco.com
www.flexco.com
Preparing Stepped Belt Edges for Splicing
IMPROPER OR UNSAFE use of this tool can result in serious bodily injury! is manual contains important information
about product function and safety. Please read and understand this manual BEFORE operating the tool. Please keep this
manual available for other users and owners before they use the tool. is manual should be stored in a safe place.
WARNING

www.flexco.com
—2—
Table of Contents
Main Components Ply 130™ Step Cutter
.................................................3
Description..................................................................................................... 4
Specications.................................................................................................. 4
Tools Required for Installation....................................................................4
General Safety Rules...................................................................................... 5
Installation of New Faceplate....................................................................... 7
Installation of Scale .....................................................................................10
Installation of Step Cutting Blade..............................................................11
Installation of the Step Cutter....................................................................12
Operation of the Step Cutter......................................................................15
Troubleshooting...........................................................................................16
Warranty.......................................................................................................16
Disclaimer e Ply 130 Step Cutter has been tested successfully with the Ply 130 WB.
It is intended for use only with Ply130 ply separators manufactured by Flexco.

—3—
Main Components Ply 130™Step Cutter
No. Item No. Description
1 08501 PLY130-STEPCUT
2 08499 PLY130-STEPCUT-RETROFIT
3 08498 PLY130-STEPCUT-GUIDE-EXT
4 08500 PLY130-STEPCUT-TWRENCH
5 08497 PLY130-STEPCUT-BLADES (5)
5 4 3 2 1 0
13 12 11 10 9 8 7 6 5 4 3 2 1 0
1 2 3 4 5

www.flexco.com
—4—
Specifications
Description
With the Ply 130 Step Cutter you are in possession
of a quality Novitool® product from Flexco. e
carefully developed and built machine gives you
the option of the highest quality conveyor belting
fabrication. By adding the Step Cutter to the Ply 130
ply separator, you can now maximize productivity
with fast, repeatable creation of stepped edges in
preparation for endless or mechanical belt splicing.
e Ply 130 is able to separate belt edges. It is
normally used for preparing a stepped splice. By
means of the Step Cutter, the layer passing above the
separation blade can be cut o simultaneously with
the separation process. is operation is commonly
used for preparing stepped splices or recessed
mechanical belt fasteners.
Two Step Cutter models are available. One is a
retrot model (Item 08499) for Ply 130 separators
manufactured without a Step Cutter interface (T-slot
on inside of faceplate). For units manufactured with
this interface, the Step Cutter (Item 08501) is an
optional feature available for purchase.
Ply 130 Step Cutter Ordering Information
Item Number Description Shipping Weight
08499 PLY130-STEPCUT-RETROFIT 4.1 lbs. (1.9 kg)
08501 PLY130-STEPCUT 2.7 lbs. (1.2 kg)
Optional Items Ordering Information
08497 PLY130-STEPCUT-BLADES (5) 0.15 lbs. (0.07 kg)
08498 PLY130-STEPCUT-GUIDE-EXT 1.6 lbs. (0.7 kg)
08500 PLY130-STEPCUT-TWRENCH 0.2 lbs. (0.09 kg)
Tools Required for Installation
Item 08499 PLY130-STEPCUT-RETROFIT
• Plastic Hammer
• 5 mm Hex Wrench
• Torque Wrench

—5—
Signal words:
“DANGER” indicates an imminently
hazardous situation which, if not avoided, will
result in death or serious injury. is signal
word is limited to the most extreme situations.
“WARNING” indicates a potentially
hazardous situation which, if not avoided,
could result in death or serious injury.
“CAUTION” indicates a potentially hazardous
situation which, if not avoided, may result in
minor or moderate injury. It may also be used
to alert against unsafe practices.
Safety Symbol
!
is international safety symbol is used to
identify and call attention to specic
safety matters.
Safety Information
To Avoid Severe Personal Injury or Property
Damage, read carefully and understand the
following Safety Precautions.
General Safety Rules –Save These Instructions–
1. WORK AREA
!cAutIoN
Keep your work area clean and well lit.
Cluttered benches and dark areas
inviteaccidents.
!dANGeR
Do not operate power tools in explosive
atmospheres, such as in the presence of ammable
liquids, gases, or dust. Power tools create sparks
which may ignite the dust or fumes.
2. ELECTRICAL SAFETY
!dANGeR
e Ply Separator is a single insulated tool and
needs a multiple wire grounded power cord
and grounded power supply system. Contact
a qualied electrical installation company to
connect the right plug.
!WARNING
Do not use outdoors. is power tool is
designed for indoor use only.
3. PERSONAL SAFETY
!WARNING
Use safety equipment. Always wear eye
protection. Dust mask, non-skid safety shoes,
hard hat, or hearing protection must be used for
appropriate conditions.
Stay alert, watch what you are doing and use
common sense when operating a tool. Do not
use tool while tired or under the inuence of
drugs, alcohol, or medication. A moment of
inattention while operating tools may result in
serious personal injury.

www.flexco.com
—6—
Check for misalignment or binding of moving
parts, breakage of parts, and any other condition
that may aect the tool’s operation. If damaged,
have the tool serviced before using. Poorly
maintained tools cause many accidents.
e Ply Separator should not be used to split
other materials than thermoplastic belting
materials. e thickness of the belting material
should never exceed 10 mm.
5. SERVICE AND MAINTENANCE
!WARNING
Only qualied repair personnel must perform
tool service. Service or maintenance performed by
unqualied personnel could result in a risk of injury.
Always wear cut-proof safety gloves (according to
EN388, Coded X.5.X.X) and safety glasses.
!cAutIoN
Maintain tools with care. Keep blades sharp
and clean. Properly serviced tools and knives
with sharp edges are less likely to bind or clutter
material and are easier to control.
When servicing a tool, use only original
replacement parts. Use of unauthorized parts or
failure to follow Maintenance Instruction, may
create a risk of injury.
6. REPLACING THE BLADE
!WARNING
Always wear cut-proof safety gloves (according
to EN388, Coded X.5.X.X) and safety glasses
when replacing blade. Blade is razor sharp, treat
itaccordingly.
Safely store spare blades.
Do not attempt to re-sharpen blades. is will
aect splitting completely through belt.
General Safety Rules -Save These Instructions-
3. PERSONAL SAFETY (continued)
!WARNING
Dress properly. Do not wear loose clothing
or jewelry. Contain long hair. Keep your hair,
clothing, and gloves away from moving parts.
Loose clothes, jewelry, or long hair can be
caught in moving parts.
Never alter or remove safety devices.
4. USE AND CARE
!WARNING
Read and understand the Ply 130 Operations
Manual before using the Step Cutter with the
Ply130.
Keep your hands away from the Ply 130
traction rolls and splitting area. Always guide
the material in a way that your hands have
a minimum distance of 3.94” (10 cm) from
thisarea.
cAutIoN
Only operate the Ply 130 with it being fastened
to a level, rm surface. Splitting should be
performed operating the machine with two
hands on the material.
Disconnect the plug from the power source
before making any adjustments, changing
accessories, or storing or transporting the tool.
Such preventive safety measures reduce the risk
of starting the tool accidentally.
NEVER use a tool, which is defective or
operating abnormally. If the tool appears to be
operating unusually, making strange noises,
or otherwise appears defective, stop using it
immediately and arrange for repairs.
Do not use tool if switch does not turn it on or
o. Any tool that cannot be controlled with the
switch is dangerous and must be repaired.
!

—7—
www.flexco.com
Installation of New Faceplate - Retrofit Kit Only
A
Caution! Disconnect Ply 130 plug from the power source. Remove two
screws from existing top faceplate on Ply 130.
Lightly tap at back edge of top faceplate with a plastic hammer until a small
opening appears in between top cover plate and Ply 130 body. A small plastic
chisel may be required if the faceplate is a tight t.
A1
A2

www.flexco.com
—8—
B1
B1
Installation of New Faceplate - Retrofit Kit Only
A4
While tapping back edge of faceplate, alternate low pulling force on each side
of faceplate until removed. Discard removed faceplate. Ensure ngerguard
and dowels are installed in the Ply 130 body as shown before installing the
Step Cutter faceplate.
With traction roller and dowel pins properly aligned, mount Step Cutter
faceplate at to Ply 130 body, lightly tapping with plastic hammer if
required. Warning! Do NOT use screws to pull faceplate to Ply 130 body!
A3

—9—
Installation of New Faceplate - Retrofit Kit Only
Using a torque wrench, reinstall two screws at 2.9 -lbs (4 N-m) torque
maximum, xing retrot faceplate to Ply 130 body.
A5

www.flexco.com
—10—
Installation of Scale - Retrofit Kit Only
B
B2
Clean top surface of Ply 130 body nearest to infeed table.
Remove backing paper from scale decal and install on Ply 130 body. Align
to edge of Ply Separator body as indicated above.
B1

—11—
C
Installation of Step Cutting Blade
Loosen blade retention setscrews using 2.5 mm hex wrench. Do not loosen
the at head screw on opposite side.
Carefully insert step cutting blade into position, aligning edge of blade
even with step cutter face to ensure proper blade position. Tighten blade
retentionsetscrews.
C1
C2

www.flexco.com
—12—
Installation of the Step Cutter
D
D2
Ensure that Step Cutter blade position is adjusted ush to T-nut side of unit.
Loosen (do not remove) Step Cutter T-nut screw. Align Step Cutter T-nut with
T-groove in faceplate and insert until tab contacts faceplate. Caution! Step
Cutter should slide in T-slot with ease and not be forced.
D1

—13—
Installation of the Step Cutter
Using the T-handle hex wrench, tighten Step-Cutter T-nut screw. Reposition
Ply 130 adjustment handle if required for improved access.
If necessary, use the 2.5 mm hex wrench to loosen screw and adjust lateral
position of step-cutting blade near to, but not contacting ply separation
blade. Tighten screw to x blade position. If ply separation blade is replaced
(Refer to Ply 130 Safety and Operations Manual for instructions), correct
position of step-cutting blade should be conrmed.
D3
D4

www.flexco.com
—14—
Installation of the Step Cutter
D6
Install Guide Extension for step cutting less than 1.57” (40 mm). Loosen belt
guide xing screws.
Li belt guide and insert guide extension under guide. Position guide to
desired step cutting possition and tighten belt guide xing screws.
D5

—15—
E
Operation of the Step Cutter
Test Step Cutter using a two-ply, PVC belt. e belt material passing over the
ply separation blade should be cut from belt at step cutter blade position and
a small undercut will remain.
Near end of step cut, operator must assist nal few millimeters of belt
material through step cutting blade, taking care to guide belt straight.
E1
E2

www.flexco.com
—16—
Ply 130™Step Cutter Safety and Operation Manual
• If the material passing above the ply separation blade is not being cut at the step cutter
bladeposition:
– xation screw is loose and Step Cutter may require repositioning, or
– step cutter blade may require adjustment towards ply separation blade, or
– step cutter blade may not be seated correctly in the Step Cutter unit, or
– step cutter blade may be worn, requiring replacement.
• If the belt cover is very thin or has little stability (e.g. w/o fabric), step cut may become wavy.
is is subject to the material, machine settings, and can be dicult to avoid.
• If belt material becomes stuck in the ply separator, rotate the Ply 130 power switch to the
reverse position, to dislodge the material. Inspect step cutter blade position aer dislodging
material and making adjustments as needed.
Troubleshooting
Warranty provided is limited to defects in materials and workmanship.
e warranty has a maturity of one year from the date of delivery. In this period the necessary
parts will be made available free of charge. Any further warranty claims, damages, consequential
damages are excluded.
e above warranty shall apply exclusively and only under the following conditions:
• An expert according to the conditions and standards of the competent authorities must install
the appliance.
• Any warranty claims are forfeited when performing repairs, modications or adaptations
and or assembling unapproved components without the prior consent of Flexco. In addition,
any warranty claims are forfeited when installed by way of deviation from the national and
localregulations.
• Claims during the warranty period provide no extension of the warranty period.
Warranty
2525 Wisconsin Avenue • Downers Grove, IL 60515-4200 • USA
Tel: (630) 971-0150 • Fax: (630) 971-1180 • E-mail: info@exco.com
Visit www.flexco.com for other Flexco locations and products.
©2013 Flexible Steel Lacing Company. 09-13. For reorder: X3407
Other manuals for Ply 130
1
Table of contents
Other Novitool Cutter manuals
