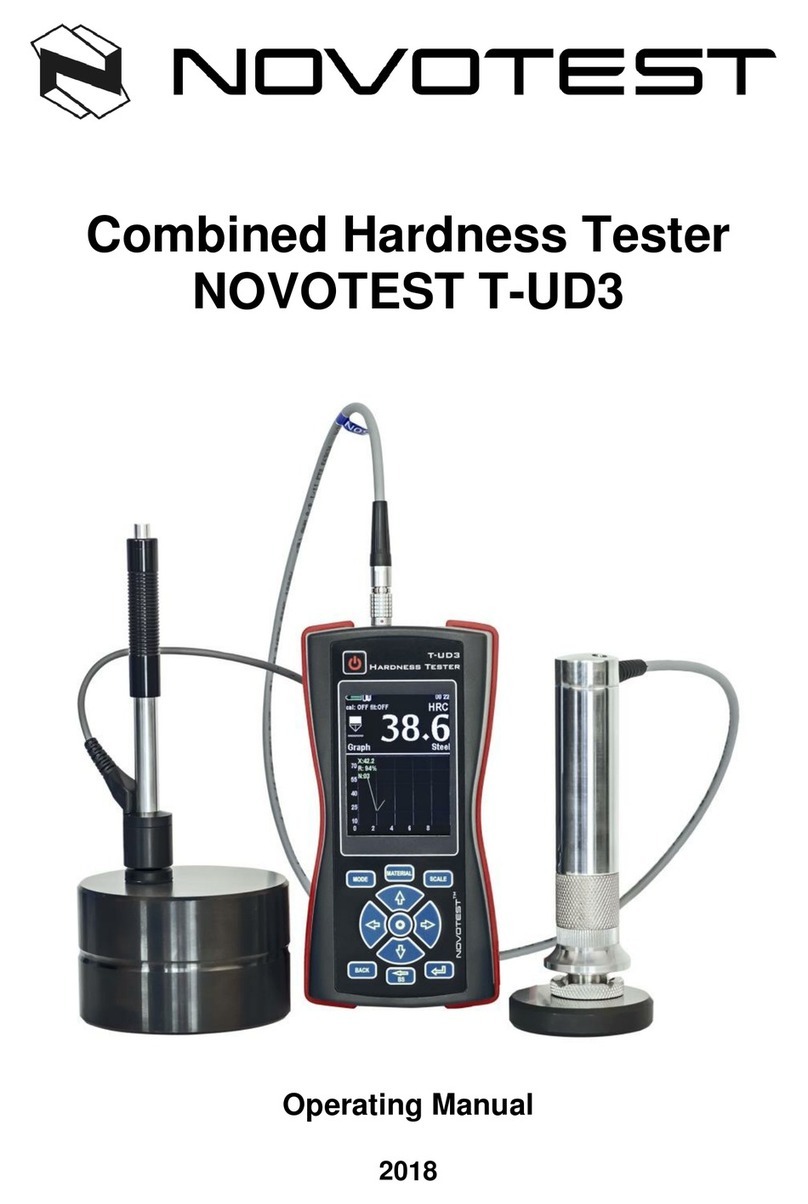
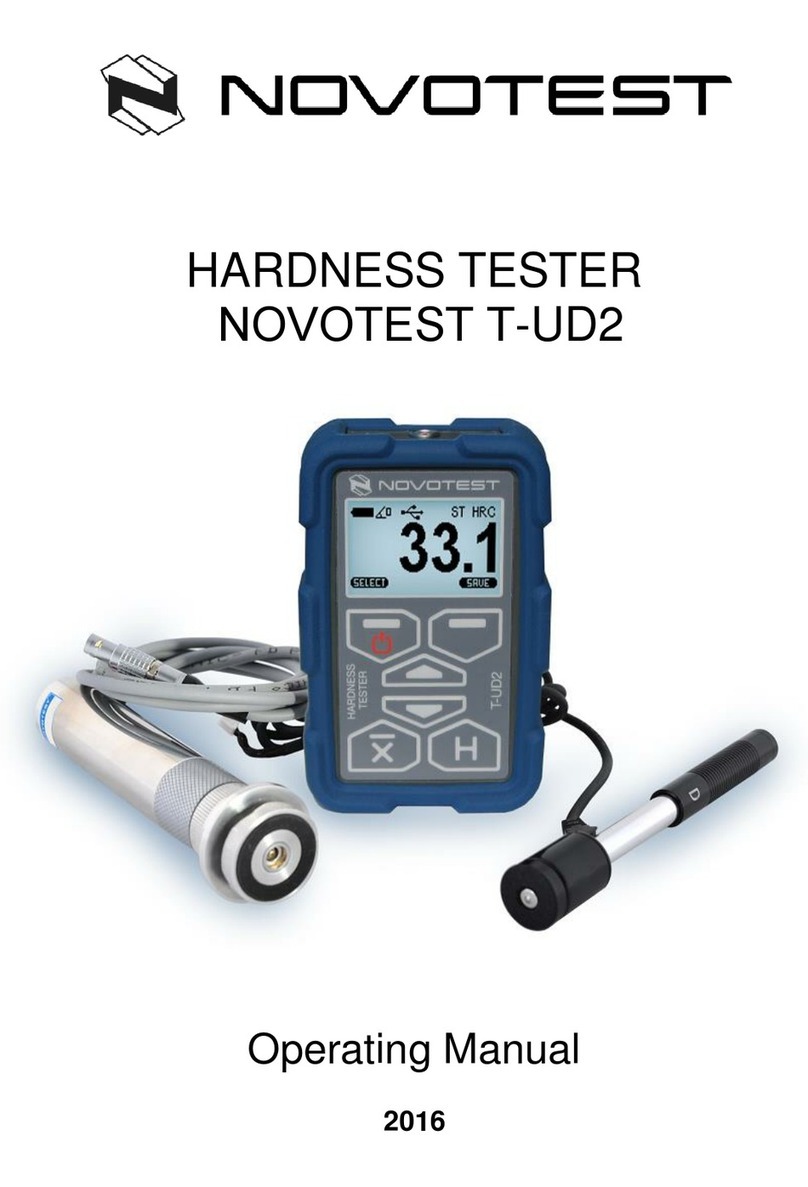
NOVOTEST T-UD3 User manual

Combined Hardness Tester
NOVOTEST T-UD3
Operating Manual
2019

Operation Manual
Hardness Tester NOVOTEST T-UD3
Page. 2
CONTENT
1 DESCRIPTION AND OPERATION OF THE DEVICE AND ITS COMPONENTS.........................5
1.1 The purpose of the device...............................................................................................................5
1.2 Technical characteristics of the device ...........................................................................................5
1.3 Standard delivery set.......................................................................................................................7
1.4 Purpose of the probes......................................................................................................................7
1.5 Parts.................................................................................................................................................8
1.5.1 Ultrasonic Contact Impedance Probe U1 probe.....................................................................10
1.5.2 Leeb probe..............................................................................................................................10
1.6 Design and functioning.................................................................................................................11
1.6.1 Modes.....................................................................................................................................11
1.6.2 Leeb measurement principle (Leeb) ......................................................................................12
1.6.3 Ultrasonic Contact Impedance method..................................................................................12
1.7 Means of measurement, tools and accessories..............................................................................13
1.8 Marking and sealing......................................................................................................................13
1.9 Packing..........................................................................................................................................13
2 INTENDED USE.................................................................................................................................14
2.1 Operational limitations..................................................................................................................14
2.2 Preparing the device for use..........................................................................................................14
2.2.1 Visual inspection....................................................................................................................14
2.2.2 Installing the batteries............................................................................................................14
2.2.3 Connecting the Probe.............................................................................................................15
2.3 Using the device............................................................................................................................15
2.3.1 Preparing the object of testing ...............................................................................................15
2.3.2 Turning on..............................................................................................................................16
2.3.3 Charging the battery...............................................................................................................17
2.3.4 Measurements using Ultrasonic Contact Impedance Probe U1.............................................18
2.3.5 Measurements with the Leeb Probe (dynamic)......................................................................21
2.3.6 Measurement modes ..............................................................................................................24
2.3.7 Calibration..............................................................................................................................28
2.3.8 Settings...................................................................................................................................34
2.3.9 Archive...................................................................................................................................34
2.3.10 Memory card........................................................................................................................35
2.3.11 Information...........................................................................................................................36
2.3.12 Photo fixation of the measurements.....................................................................................36
2.3.13 Connecting to PC.................................................................................................................38
3 TECHNICAL MAINTENANCE OF THE PRODUCT AND ITS COMPONENTS .........................43
3.1 Security measures .........................................................................................................................43

Operation Manual
Hardness Tester NOVOTEST T-UD3
Page. 3
3.2 Verification ...................................................................................................................................43
3.2.1 Operations and verification means.........................................................................................43
3.2.2 Visual inspection....................................................................................................................44
3.2.3 Testing....................................................................................................................................44
3.2.4 Determination of the basic error of the instrument according to the HRC scale...................44
3.2.5 Determination of the basic error of the instrument on the scale HB......................................44
3.2.6 Determination of the basic error of the instrument on the scale НV .....................................45
3.3 Warranty........................................................................................................................................45
3.3.1 Basic warranty........................................................................................................................46
3.3.2 Extended warranty .................................................................................................................46
3.3.3 Warranty for repaired or replaced parts.................................................................................46
3.3.4 Wear parts ..............................................................................................................................46
3.3.5 Duties of the owner................................................................................................................47
3.3.6 Warranty limitations ..............................................................................................................47
3.3.7 Other cases not covered by the warranty...............................................................................48
3.3.8 Guarantees and consumer legislation.....................................................................................48
3.4 Maintenance of the device ............................................................................................................48
4 MAINTENANCE ................................................................................................................................50
5 STORAGE ...........................................................................................................................................50
6 TRANSPORTATION..........................................................................................................................50
7 RESYCLING .......................................................................................................................................50

Operation Manual
Hardness Tester NOVOTEST T-UD3
Page. 4
Caution!
Please read this manual carefully before using the NOVOTEST T-UD3 hardness tester.
This operating manual (hereinafter O.M.) includes general information in order to give the
operating personnel understanding of functioning and operating rules of the NOVOTEST T-UD3
hardness tester (hereinafter referred to as the device or hardness tester). The document contains
technical characteristics, description of the design and principle of operation, as well as information
necessary for the correct use of the device. Before starting work, it is necessary to read this manual, as
the device operation must be carried out by persons who are familiar with the operation principle and
the device design.
Correct and effective use of the hardness tester requires obligatory availability:
−Testing methods;
−Conditions for testing, according to testing methods;
−Trained, and familiar with this O.M. user.
The enterprise-manufacturer reserves the right to make non-critical changes, without making
worse technical characteristics of the device. These changes may not be mentioned in the text of
current document.
The standard delivery kit of the device includes the operational documentation as a part of this
O.M. and the SERVICE AND MAINTENANCE RECORDS.
The present O.M. applies to all modifications of the device: T-UD3, T-U3, T-D3.
Terms used in this manual:
Hardness testers for metals – are used for material hardness testing, without destroying its
structure.
Hardness – property of a material to resist the elastic and plastic deformation, or destruction when
another material that is more solid is incorporated into the surface layer and takes no deformation of its
body - an indenter.
Indenter – an element of the device pressed into the testing material for measuring its hardness.
Diamonds, hard alloys, hardened steel are used for manufacturing indenters.
Young's modulus (modulus of longitudinal elasticity) – physical value characterizes the
properties of the material to resist tension, compression under elastic deformation.
Leeb method – to measure the hardness of the material, the rebound method is used (the ratio of
the speed of the impact body before and after the impact).
Ultrasonic Contact Impedance (UCI) – measuring the degree of change (damping) of the
vibration frequency of the rod with the indenter at the end when penetrating into the surface of the
testing sample. The softer is metal the dipper indenter penetrates into it, and the bigger is square of the
contact and higher degree of damping of the vibration frequency (in the ultrasonic range).
Kalman filter – an effective recursive filter that estimates the vector of a dynamic system state
using a series of incomplete and noisy measurements.
Median filter – one of the digital filter types, widely used in digital signal processing to reduce
noise. The median filter is non-linear FIR filter. Median filtering is an efficient procedure for
processing signals influenced by impulse noise.

Operation Manual
Hardness Tester NOVOTEST T-UD3
Page. 5
1 DESCRIPTION AND OPERATION OF THE DEVICE AND ITS COMPONENTS
1.1 The purpose of the device
The device is designed to measure hardness of:
−metals and alloys on the Rockwell (HRC), Brinell (HB), Vickers (HV), Leeb (HL), Shore
(HS) hardness scales and others;
−surface layer of metal subjected to fusing, spraying, mechanical, thermal and other types of
metal surface treatment;
−cast iron, stainless steels and non-ferrous alloys, using the calibration mode on non-
standard hardness test blocks;
−measuring of the tensile strength (σv) for stretching products from carbonaceous steels of
the pearlite class by automatic recalculation from the Brinell hardness scale (HB).
The Hardness Tester allows instant analysis of the hardness of the product directly at the site of
operation or production of the product in workshop, laboratory and field conditions, for example, in
machine building, metallurgy, power engineering, shipbuilding and railway transport, aerospace and
oil and gas industry, repair and installation and service organizations etc.
The objects of measurement can be: pressure vessels for various purposes (reactors, steam
generators, collectors, boiler drums, gas holders, etc.), rotors of turbines and generators, pipelines,
rolls, crankshafts, gears, parts of various vehicles, industrial semi-finished products (castings, forgings,
sheets), etc. Also, the hardness tester can be used for:
−assessing the stability of technological processes (product processing, welding, etc.);
−diagnostics of equipment, in order to evaluate its residual safe resource (control of
hardness of pipelines, boilers, etc.);
−assessing the quality of performed repairs;
−heat treatment quality evaluation.
1.2 Technical characteristics of the device
The NOVOTEST T-UD3 hardness tester is a portable device made in an impact-resistant housing
(with a special protective silicone bumper-case for complicated operating conditions) inside which a
board with electronic components and accumulators are placed. The main characteristics of the device
are presented in Table 1.1, Table 1.2 shows the ranges of measurements, and characteristics of probes
are in Table 1.3.
Table 1.1 - The main characteristics of the device
Overall dimensions, mm
180х80х35
Powered by three NiMH batteries or AA batteries
each 1,2 V
Power supply current, not more than, mA
100
Time of continuous operation, not less than, h
10
Weight of electronic unit with batteries, not more than, g
250
Operating temperature range, ° С
from -20 to +40
Humidity, not more, %
from 30 to 80

Operation Manual
Hardness Tester NOVOTEST T-UD3
Page. 6
Table 1.2 - Measurement range and limits of the basic permissible error
Hardness scale Measurement range
Measurement error
U1
Leeb
Rockwell, HRC
From 20 to 70
±2
±2
Brinell, HB from 90 to 150 ±10 ±10
Brinell, HB
from 150 to 650
±15
Vickers, HV
from 240 to 500
±15
±15
Vickers, HV
from 500 to 940
±20
Leeb, HL
from 300 to 800
–
±4
Shore, HS
from 30 to 100
Is determined when markup
Strength limit σv (reference), МPa
from 370 to 1500
Is determined when markup
Table 1.3 - Characteristics of probes
Probe Type
U1 (98 N)
U1 (50 N)
U1 (10 N)
Leeb
Overall dimensions, mm
Ø30х140
Ø30х140
Ø30х140
Ø20х145
Weight, g, not more than
250
250
250
130
Roughness of the measured surface, Ra
3,2
2,5
1,5
3,2
Radius of curvature of the measured
surface, mm
5 5 5 10
Weight of the controlled product, not less
than, kg
0,1 0,1 0,1 5
Thickness of the controlled product, not
less than, mm
1,5 1 0,8 12
Load, kgf
10
5
1
-
The device corresponds to: ASTM A956 “Standard Test Method for Leeb Hardness Testing of
Steel Products”; ASTM A1038 “Standard Test Method for Portable Hardness Testing by the
Ultrasonic Contact Impedance Method”.
Device body protection.
Level of the device body protection from penetration of solids and water is according to required
standard.
MTBF
Mean time between failures (MTBF) of the device without taking into account the reliability
factor of the probes is not less than 6000 h.
Service time
The total average service life of the device is not less than 10 years.
The criteria of decommissioning of the device - economic inexpediency of restoring the operable state
of the components of the instrument by repairing.

Operation Manual
Hardness Tester NOVOTEST T-UD3
Page. 7
1.3 Standard delivery set
−Electronic Unit ........................................................................................................................1 pc.
−Rebound Leeb Probe.............................................................Availability - according to the order
−Ultrasonic Contact Impedance Probe U1 (98 N) ..................Availability - according to the order
−Ultrasonic Contact Impedance Probe U1 (50 N) ..................Availability - according to the order
−Ultrasonic Contact Impedance Probe U1 (10 N) ..................Availability - according to the order
−Rechargeable battery...............................................................................................................3 pc.
−Charger....................................................................................................................................1 pc.
−USB cable for PC....................................................................................................................1 pc.
−Case.........................................................................................................................................1 pc.
−Operating manual NOVOTEST.T-UD3 .................................................................................1 pc.
Additional equipment:
−Hardness test blocks (HRC, HB, HV, HLD, etc.) .................................................. If ordered
−Cordless grinder...................................................................................................... If ordered
* At the request of the customer, the delivery set can be expanded with additional equipment or
parts. The exact information about the delivery set is indicated on the separate document.
1.4 Purpose of the probes
The Rebound Leeb Probe (Figure 1.1, Rebound Leeb Probe) – purposed for hardness
measurement by dynamic method. It is intended for measuring hardness of large-sized objects, and
also coarse-grained materials.
The UCI Probe U1 (Figure 1.1, Contact Impedance (UCI) Probe U1) - Measurement of hardness
by Ultrasonic Contact Impedance method. The use of a diamond indenter allows the probe to be
mounted precisely at any tiny point, and leaves a small-size imprint, making the measurement of the
U1 the least destructive.
The probe is perfectly suited for the following tasks: measuring the hardness of complex shapes,
fine-grained materials, heat-treated materials, thin layers and coatings, surface hardened parts, thin-
walled pipes, small parts, etc.
Table 1.4 shows the characteristics of the UCI U1 type probes.
Rebound Leeb Probe UCI Probe U1
Figure 1.1 - Types of probes

Operation Manual
Hardness Tester NOVOTEST T-UD3
Page. 8
Table 1.4 - Features and applications of UCI U1 probe type
Model
Load
Features
Main applications
UCI U1
(98 N) 98 N
(10 kgf)
The main type of probe for
solving most problems of
hardness measurement. 10 kg
load is to be applied for
measurement (set automatically
by the probe). Low requirements
for surface cleanliness.
−Heat-treated and cemented details.
−Measuring in grooves, on teeth, on
radius surfaces.
−Measurement on the blades, on the
internal surface of the pipes,
openings.
UCI U1
(50 N) 50 N
(5 kgf)
The main probe type for the most
tasks of hardness measurement. 5
kg load is to be applied for
measurement (automatically
controled by the probe). Average
surface cleannes requirements.
−Heat-treated and cemented parts, for
example, shafts, turbines, gears,
teeth, welds, heat affected zones.
−Measuring in grooves, on teeth, in
grooves, on radius surfaces.
−Measurement on the blades, on the
internal surface of the pipes,
openings.
UCI U1
(10 N) 10 N
(1 kgf)
The reduced load probe is
designed to measure the hardness
of material with increased
requirements to the imprint size
(polished surfaces), to measure
the hardness of surface hardened
layers. 1 kg load is to be applied
for measurement (automatically
controled by the probe).
More sensible to the surface
cleanliness, in comparison with
U1 (50 N).
−Nitrided and cemented surface
layers of molds, stamps, stamps,
thin-walled parts.
−Bearings, lateral surfaces of saws
teeth.
−Measurement of hardness of
hardening coatings.
−Measurement on the blades, on the
inner surface of the pipes, inside the
holes.
1.5 Parts
The device consists of an electronic unit made of impact-resistant ABS plastic and placed into a
protective silicone bumper, and connected probes. The detachable connection is located on the upper
end surface of the housing; there is also a mini USB connector, which is used to connect the device to
PC or to charge the batteries. The control keyboard is located on the front panel, which also houses a
contrasting color LCD / TFT display. In the lower rear part of the device under the cover, fixed with
the threaded connection with the help of two screws, there is a battery compartment in which the
batteries are installed (Figure 1.2). In Figure 1.3, it shows the control keyboard of the device.

Operation Manual
Hardness Tester NOVOTEST T-UD3
Page. 9
1– bumper; 2 –LCD/TFT color contrast display; 3 – NiMH battery; 4 – control keyboard; 5 – battery
compartment; 6 – electronic unit; 7 – probe socket; 8 – flash light; 9 – photo camera; 10 – mini USB
socket; 11 – cover; 12 – threaded connections for cover.
Figure 1.2 - Hardness tester NOVOTEST T-UD3
Figure 1.3 - Control buttons and their functional purpose
On/Off button
Material selection
Mode selection
Navigation keys
Back
Scale mode selection
Enter
Backspace (back/delete one
position)

Operation Manual
Hardness Tester NOVOTEST T-UD3
Page. 10
1.5.1 Ultrasonic Contact Impedance Probe U1 probe
The construction of the probe is shown in Figure 1.4 The probe has a special removable
collapsible head with a double-sided thrust washer. The thrust washer provides the convenience of
positioning the probe onto the testing product and pressing during the measurement.
1 – housing; 2 – removable collapsible nozzle; 1 – housing; 2 – removable collapsible nozzle;
3 – removable double sided thrust washer; 3 – removable double sided thrust washer;
4 – support platform. 4 – centering pipe; 5 – diamond tip.
Figure 1.4 - Appearance of the Ultrasonic Contact Impedance Probe U1
One side of the washer is flat; the other has prismatic grooves designed for the convenience of
measuring hardness on cylindrical products of different diameters. The probe with the removed washer
is used for carrying out of measurement of hardness in narrow and hardly accessible places.
To measure hardness on flat surfaces, the washer on the probe head should be installed flat to the
surface of the product, and to measure the hardness on the cylindrical surfaces, the washer on the
probe head should be installed with a side with prismatic grooves to the product.
Caution!
To ensure a better smoothness of the collapsible detachable nozzles, they are individually grounded to
each probe. Replacement of probe tips is not allowed.
1.5.2 Leeb probe
The Leeb probe has a built-in mechanism for charging the spring, which is the most ergonomic
and convenient to work with (Figure 1.5). Spring charging is provided by moving the upper part of the
probe housing downwards, after which the probe can be installed on the controlled object and
measurement can be done.
Caution!
It is forbidden to discharge the trigger of the Leeb probe “in the air”.

Operation Manual
Hardness Tester NOVOTEST T-UD3
Page. 11
Figure 1.5 - The appearance of the Leeb probe
1.6 Design and functioning
The principle of operation of the hardness tester depends on the type of the connected probe.
When using the Leeb probe, the hardness is measured by the dynamic method of Leeb, and when
using the UCI probe - by the ultrasonic contact impedance method.
The dynamic method of measuring hardness is used to control:
−hardness of objects weighing more than 5 kg and wall thickness of more than 10 mm;
−hardness on solid products, products with coarse-grained structure, forged and cast
products;
−hardness, if minimal surface preparation is required.
Ultrasonic contact impedance method for measuring hardness is used to measure:
−hardness of objects with low mass (from 0,1 kg) and wall thickness (over 1 mm);
−hardness of products with a glossy surface (if the minimum imprint size is required);
−hardness of the surface hardened layer at the inspection site.
1.6.1 Modes
The hardness tester works in the following modes:
1. <MEASUREMENTS>:
−Main scales mode (HRC, HRB, HB, HV, HS, HL, MPA);
−User scales mode (U1, U2, U3);
−A mode of measurement of hardness of basic materials (steel, alloy steel, stainless
steel, gray cast iron, high-strength cast iron, aluminum, brass, bronze, copper);
−A hardness measurement mode of user materials (<USER 1>, <USER 2>);
−<GRAPH> mode;
−<HISTOGRAM> mode;
−<STATISTIC> mode;
−<SMART> mode;
−<SIGNAL> mode.
2. <CALIBRATION>:
−One or two points;
−Three points.
3. <ARCHIVE>:
−Saved measurements view.
4. <SETTINGS>:
−<DATE>;
−<TIME>;
−<LANGUAGE>;
Impact body
Inductive coil
Housing Trigger
Plug
Charger

Operation Manual
Hardness Tester NOVOTEST T-UD3
Page. 12
−<PHOTO>;
−<BRIGHTNES>;
−<PALETTE>;
−<SOUND>;
−<RESULT>;
−<VOLUME>;
−<AUTO OFF>;
−<RETRO>;
−<FLASH>;
−<TOLERANCE>;
−<FILTER>;
−<FILTER MODE>.
5. <MEMORY CARD>:
−<SAVE>;
−<LOAD>;
−<CLEAR>.
6. <INFORMATION>:
−About dealers;
−About the device.
7. Two-way communication with PC:
−Data transfer;
−Transfer of calibration settings;
−Interface change.
1.6.2 Leeb measurement principle (Leeb)
The dynamic principle probe (rebound method) is a separately executed device connected to the
electronic unit by means of a cable.
The principle of measuring hardness is based on the determination of the velocity ratio of impact
and rebound of the striker (impact body) inside the probe. Carbide ball is located at the end of the
impact body, directly in contacting with the material at the moment of impact. Inside of the impact
body is a permanent magnet. The striker, after pressing the trigger button, is ejected onto the testing
surface by a pre-charged spring. While this, the striker moves inside the inductor coil and, with its
magnetic field, induces an electromotive force (EMF) in it. The signal from the output of the induction
coil is fed to the input of the electronic unit, where it is converted into a hardness value of the selected
scale and displayed.
This method is particularly suitable for hardness measurements on solid products, coarse-grained
products, forged and cast products.
The design of the dynamic probe allows user to make many measurements for a short time, and
working with it does not require special skills, such as with an UCI probe.
1.6.3 Ultrasonic Contact Impedance method
Ultrasonic probe (UCI - ultrasonic contact impedance method) is a separate device connected to
an electronic unit by means of the cable.
The probe basically uses a steel rod with a diamond pyramid at the end, which is an Acoustic
Resonator (Oscillating Rod) of the built-in self-oscillator of ultrasonic frequency. When the diamond
pyramid penetrating into the testing object under the fixed force of the calibrated spring, the resonant
frequency of the resonator changes in accordance with the material hardness. The relative change in
the frequency of the resonator is converted by the electronic unit into the hardness value on the
selected scale and displayed.

Operation Manual
Hardness Tester NOVOTEST T-UD3
Page. 13
This method is suitable for hardness measurements on products of various weight and thickness,
and especially on finished products with a glossy surface, as it leaves a minimally visible imprint after
measurements.
The design of the ultrasonic probe makes it possible to carry out measurements in hard-to-reach
places (for example, the surface of gear teeth, etc.), as well as on thin-walled structures (eg. pipelines,
etc.) that could not be measured by the Leeb probe.
It should be taken into account that the result of the measurement by the UCI method depends on
the Young's modulus of the test sample.
1.7 Means of measurement, tools and accessories
The correct work of the device is checked by the hardness measuring of the reference hardness test
blocks (2 category), reference hardness blocks should be grounded through a lubricant layer to the
grinding plate weighing not less than 5 kg. Mismatch readings must not exceed the permissible error
(Table 1.2). If the permissible error is exceeded, user should calibrate the instrument in accordance
with 2.3.7.
In case of device defect the manufacturer is obliged to make adjustment and installation of the
device.
1.8 Marking and sealing
There is a label with device type and trademark of the manufacturer on the front panel of the
device.
The serial number is printed on the back panel, under the battery compartment cover.
1.9 Packing
The electronic unit and the probe are delivered in a package (case), excluding their damage during
transportation.
To avoid mechanical damage to the cable and connectors of the device, it is necessary to
disconnect the probe from the device before packing it into the package.

Operation Manual
Hardness Tester NOVOTEST T-UD3
Page. 14
2 INTENDED USE
2.1 Operational limitations
Operation of the device should be carried out under the influence of factors and taking into
account the parameters of the monitored objects in accordance with the specified technical
characteristics. The device must be used within its technical characteristics.
Only qualified personal, familiar with the operation manual is allowed to use this device.
After transporting the device at temperature below zero to the place of operation and bring it into
the room with a positive temperature - it is necessary to keep the device in its package for at least 6
hours in order to avoid failure due to condensation of moisture.
2.2 Preparing the device for use
2.2.1 Visual inspection
Carry out visual external inspection of the device; make sure that there are no mechanical
damages to the electronic unit, the probe, the connector and the connecting cable.
2.2.2 Installing the batteries
Install the batteries into the battery compartment by unscrewing the two fixing screws and
removing the battery cover. Batteries are to be installed according to the polarity indicated on the
device (Figure 2.1). Close the battery compartment cover and screw in the screws.
Figure 2.1 - Installing the batteries

Operation Manual
Hardness Tester NOVOTEST T-UD3
Page. 15
2.2.3 Connecting the Probe
Using the connecting cable connect the required probe to the probe socket on the electronic unit.
Connect the connecting cable making sure that the red dot on the plug and socket are in line (Figure
2.2).
Figure 2.2 - Connecting the probe
2.3 Using the device
2.3.1 Preparing the object of testing
Prepare the tested surface area of the material, removing moisture, contamination (oil, dust, etc.),
grease, scale, oxide film, and rust from it. Grind it with a grinder or sandpaper and wipe the testing
surface.
The roughness and curve radius of the tested surface, as well as the weight and dimensional
characteristics of the product, should correspond to the parameters specified in the technical
characteristics of the hardness tester (Table 1.3), and consider the type of probe (UCI or dynamic) used
for the measurement.
The results of measurements by the UCI method are affected not only by the properties of the
metal during plastic deformation, but also by the Young's modulus (modulus of elasticity). It entails
the need to adjust the device when working with products that have the Young's modulus different
from the Young's modulus of structural and carbon steels.
To determine the additional error presence, user should compare the results of measurements with
the measurements carried out according to the static measurement principle. If the difference in the
results does not exceed the error of the device, it means that it is possible to carry out measurements
according to the characteristic written in the memory of the device with delivery. If the measurement
error exceeds the allowed accuracy, a two-point or one-point calibration of the device on the product
or sample (see 2.3.7) is necessary.
If the product or hardness value does not respond to the requirements of Table 1.3 (mass and / or
thickness), the device will make measurements with additional error. It will be as bigger, as bigger is

Operation Manual
Hardness Tester NOVOTEST T-UD3
Page. 16
deviation from these requirements. The additional error may be, either positive or negative, depending
on the specific conditions.
The reason for the additional error is the parasitic vibration at the indenter contact point with the
material at the moment of measurement. This is due to the vibration of the whole product, if its weight
is low, either because of product deflection if its thickness is small.
To determine the presence of additional error user should compare these measurement results with
the measurement results using a bench hardness tester.
There are three methods to delete the additional errors.
The first method – to make the one-point or two-point correction of the current user setting in
accordance with clause 2.3.7. It is used if an additional error is not more than 15%, and the results in a
series of measurements are constant.
The second method – deleting parasitic vibrations by gripping product in a vise (vise weight
should be over indicated in Table 1.3). To prevent damage of the product it is allowed to use the vise
with overhead jaws from a softer metal.
The third method (recommended) – deleting parasitic vibrations by grinding the object to a
massive polished plate. The plate should have roughness Ra not more than 0.4 microns, obviously
greater weight than indicated in Table 1.3, non-flatness not less than 0.005 mm, a Young's modulus of
the material from which the plate is made should be close to the Young's modulus of the product. The
underside of the product should be plane-polished with a roughness Ra not more than 0.4 microns and
flatness should be not more than 0,005 mm. For installation the product on the plate its support surface
(underside) should be covered with a thin layer of lubricant. Then the product is to be ground to the
plate surface in this way that between the surfaces and plates there are no even small air gaps.
Grinding must be tight enough so as the product and the plate are a single monolithic.
Also, imprints of different depths may be the reason of the additional error. Depths values may be
different, depending on the measured hardness (Table 2.1). It is recommended to measure the hardness
of the layer that is 20 times greater than the depth value. For the reasons mentioned above, the
measurement result is under the influence of the surface layer properties. The depth of indenter
penetration into the material is substantially smaller in comparison with the measurement by bench
machines: Brinell and Rockwell. This can cause the measurement result discrepancy in the case of
hardening, decarbonized layer, burn marks, and martensitic spots.
Table 2.1 - The depth of the imprints on the material surface in millimeters
Probe type
100НВ
187НВ
400НВ
60,7HRC
Leeb (D)
0,039
0,028
0,021
0,018
UCI (98 N)
0,098
0,081
0,052
0,036
UCI (50 N)
0,070
0,056
0,038
0,025
UCI (10 N)
0,031
0,025
0,017
0,011
Hardening can be formed in the surface layer after the turning, milling and rough polishing. The
softer is metal, the greater is difference between the hardness of the top layer and the inside layer.
Decarbonized layer with low hardness is formed by the high-temperature heat treatment. It may be
hardening, normalization, hot rolling, forging, etc. The thickness of this layer is typically less than 0.2
mm.
For heat treated steels with good hardenability when getting the average hardness due to surface
overheating martensitic spots with high hardness may occur.
2.3.2 Turning on
Turn on the device by long pressing the button < > on the control panel until the short-time
splash screen on the display (Figure 2.3).

Operation Manual
Hardness Tester NOVOTEST T-UD3
Page. 17
Figure 2.3 – Splash screen
After this, the device switches to the main menu (Figure 2.4), or in the <Measuring> mode (if the
probe is connected).
Figure 2.4 - Main Menu
From the Main Menu the user can enter:
1. <MEASURING>;
2. <CALIBRATION>;
3. <ARCHIVE>;
4. <SETTINGS>;
5. <MEMORY CARD>;
6. <INFORMATION>.
After entering the selected sections, except the <Information>, the display is divided into two
areas: the main area and information area (upper part of the display).
In the main area Workspace section is located, and the information area provides information
about the batteries charge, connecting the device to PC, SD card presence and current time.
Before using the device, make sure that the batteries have enough power. Fully stocked LED
(green) indicates that the battery is charged to 100%. If there is absence or lack of charge (red), charge
the battery by a charger or by connecting the device to PC or Power Bank.
Long press on the button < > makes the device to shut down.
2.3.3 Charging the battery
To charge the battery, plug the power supply (included into the hardness tester standard set) to the
power connector located on the upper end of the device housing. During charging the device can be
used.

Operation Manual
Hardness Tester NOVOTEST T-UD3
Page. 18
Full battery charging time - 14 hours. Always look after device when charging. Also, the device
can be charged by connecting to a PC or Power Bank.
If do not use the device, should charge the batteries at least once per two month to avoid batteries
from failure.
2.3.4 Measurements using Ultrasonic Contact Impedance Probe U1
LIMITATION: limited use for measuring products with a coarse-grained structure (e.g., cast iron)
or a weight of less than 100 grams, or a thick less than 1 mm! Typically, such
products must be ground to a massive polished plate.
1. Before measurements, it is necessary to prepare the surface according to p. 2.3.1.
2. Plug the UCI probe.
3. Turn on the device by long pressing < >.
4. As the probe is already connected, the device immediately goes to the <MEASUREMENTS>
section (Figure 2.5).
Figure 2.5 – <MEASURING> section
5. Select the required hardness scale, press < > to assess the selection menu (Figure 2.6),
than select the scale with < > and < > keys (the Rockwell C (HRC), Brinell
(HB), Vickers (HV), Rockwell B (HRB), Shore (HS), Leeb (HL), the measurement of tensile
strength (σv) for carbon pearlite steel (MPA), user scales (U1, U2, U3)).
Figure 2.6 - Selecting the hardness scales
User calibration presence
Diamond indenter state
(Ready for operation)
Mode
Scale
Material

Operation Manual
Hardness Tester NOVOTEST T-UD3
Page. 19
6. Select the material that is going to be tested. By pressing < > open the selection menu
(Figure 2.7), with the keys < > and < > select the required material (steel, alloy
steel, stainless steel, gray iron, ductile iron (<Nodular Iron>), aluminum, brass, bronze, copper,
user material (<USER. 1>, <USER. 2>).
Note: If the UCI probe delivering there is steel calibration only. Other materials are to be
calibrated by user.
Figure 2.7 – Material selection
7. Select a required measurement mode (see p. 2.3.6), using < > open mode selection menu
(Figure 2.8), using keys < > and < > select the mode (<GRAPH>,
<HISTOGRAM>, <STATISTICS>, <INTELLECTUAL>, <SIGNAL>).
Figure 2.8 – Measurement mode selecting
8. Place the probe thrust washer on the sample surface, holding for support platform as shown in
Figure 2.9 A. By pushing on the support platform with two hands move diamond intender of
the probe vertically to the sample until it touch the surface (Figure 2.9, B) and then non-stop,
gently (approximately while 0.5 seconds), with a pressing force (5 kg if probe UCI (50N)
press the diamond intender into the metal surface without any displacement (Figure 2.9 C).
Caution!
Do not press abruptly, because it can cause exceeding of the permissible error value and damage of the
diamond indenter.

Operation Manual
Hardness Tester NOVOTEST T-UD3
Page. 20
A B C
Figure 2.5 – Measuring with UCI U1 probe
Note: The pressing force is set by the probe built-in spring with fixed force.
9. The display shows the value of hardness (Figure 2.10). The measurement result is displayed on
the display until the next measurement.
Figure 2.10 – The display after measurement
10. After the measurements the user can save measurement (series of measurements) into archive
by pressing < > key (ENTER).
11. A keyboard will appear on the display to enter the measurement (series of measurements)
name (Figure 2.11).
This symbol shows that the
diamond indenter is in touch
with the tested object or the
device is not ready for the next
measurement
Other manuals for T-UD3
2
Table of contents
Other NOVOTEST Test Equipment manuals
Popular Test Equipment manuals by other brands
AFL
AFL FOCIS Lightning 2 Quick reference guide

Kingfisher
Kingfisher KI 2300 Series Quick reference guide
Elenco Electronics
Elenco Electronics XK-700TK Assembly & instruction manual

ion science
ion science GAS-CHECK SF6 instruction manual

Raytech
Raytech TR-1 instruction manual
BACtrack
BACtrack SingleShot instructions
Valhalla Scientific
Valhalla Scientific 4314KV Operation manual
Intellisystem
Intellisystem IT-900-IPC Series user manual
Shimpo Instruments
Shimpo Instruments ST-320BL Operation manual
Kewtech
Kewtech KT63 operating instructions
NORAUTO
NORAUTO 10A/12V instruction manual

Viavi
Viavi ATC-5000NG Operation manual
