Novy 7931.400 User manual

NL Montage instructie recirculatiebox met monoblock lter
FR Instructions d’installation le caisson recyclage avec ltre monoblock
DE Montageanleitung Umluftbox mit Monoblocklter
EN Installation Instructions recircualtionbox with monoblock lter
7931400_110513_MA2
7931400 - 7932400 - 7933400

2
NL
1 VOORSCHRIFTEN VOOR
VEILIGHEID EN MONTAGE
Meer informatie over de Novy producten, acces-
soires en diensten kunt u vinden op internet:
• België: www.novy.be
• Nederland: www.novynederland.nl
Dit is de montage instructie voor het toestel zoals
op de voorzijde is aangegeven.
In deze montage instructie wordt gewerkt met een
aantal symbolen. Hieronder vind u de betekenis van
deze symbolen.
Symbool Betekenis Actie
Indicatie Toelichting van een
indicatie op het toestel
Waarschuwing Dit symbool duidt op
een belangrijke tip of
een gevaarlijke situatie
Technische veiligheidsvoorschriften
• Dit toestel voldoet aan de geldende veiligheids-
voorschriften. Ondeskundige montage kan ech-
ter persoonlijk letsel en schade aan het toestel
veroorzaken.
• Het toestel is uitsluitend bedoeld voor huishou-
delijk gebruik (bereiding van voedingsmiddelen)
met uitsluiting van alle ander huishoudelijk,
commercieel of industrieel gebruik. Gebruik het
toestel niet buitenshuis.
• Bewaar deze handleiding zorgvuldig en geef
deze door aan de persoon die het toestel even-
tueel na u gebruikt.
• Verwijder etiketten en zelfklevers/ stickers wel-
ke op het toestel zijn geplaatst met gebruiks- of
montage tips. In het toestel achter het vetlter
bevindt zich het type sticker, deze niet verwij-
deren.
Waarschuwing voorafgaand montage
• Controleer de staat van het toestel en het
montagemateriaal zodra u ze uit de verpakking
haalt. Neem het toestel met zorg uit de ver-
pakking. Gebruik geen scherpe messen om de
verpakking te openen.
• Installeer het toestel niet indien het beschadigd
is en richt u in dat geval tot Novy.
• Controleer aan de hand van tekening of alle
montagematerialen meegeleverd zijn. De lters
bevinden zich in het toestel.
• Novy is niet aansprakelijk voor schade als ge-
volg van onjuiste montage, onjuiste aansluiting,
onjuist gebruik of onjuiste bediening.
• De veiligheid is alleen gewaarborgd bij een
deskundige montage volgens de montagehand-
leiding. De installateur is verantwoordelijk voor
een goede werking op de plaats van opstelling.
• Metalen onderdelen kunnen scherpe kantjes
hebben en u kunt zich eraan verwonden. Draag
daarom bij het monteren handschoenen die u
daartegen beschermen.
2 HET MONOBLOCK
RECIRCULATIEFILTER
Hedendaagse keukenventilatie en energie-eciën-
tie: de eerste kan niet zonder de laatste. Recircula-
tie biedt hierin de oplossing. Recirculatieafzuigkap-
pen voeren de kookdampen niet af, maar lteren de
geur en het vet uit de lucht en blazen de gelterde
lucht vervolgens terug de woning in.
Het Novy monoblocklter absorbeert onaangena-
me geuren en maakt afvoer van warme lucht naar
buiten toe overbodig. De basis van het monoblock-
lter is een vooruitstrevende vorm van geactiveerde
koolstofdeeltjes in de vorm van minuscule bolletjes
die op een dragende labyrintstructuur zijn gekleefd.
Door de labyrintstructuur heeft het monoblocklter
een beperkt verlies aan druk en een maximaal be-
houd aan rendement. Dit resulteert in een eciënte
afzuiging, uitstekende geurabsorptie en een beperkt
geluidsniveau.
3 GEBRUIK VAN DE
RECIRCULATIEBOX
De recirculatiebox wordt toegepast in combinatie
met een dampkap/ afzuigkap of werkbladafzuiging.
Na een vast ingestelde tijd geeft een indicatie op de
afzuigkap of werkbladafzuiging aan dat het mono-
block recirculatielter vervangen dient te worden.
Lees de gebruiksaanwijzing van uw toestel
voor de programmering en het gebruik van
de recirculatie modus.
Voor een optimale werking van het mono-
block recirculatielter is het van belang de
afzuiging van het toestel voor het koken aan
te zetten en de nalooptijd te respecteren.
Lees hiervoor de instructies in de gebruiks-
aanwijizing van uw toestel.
Zorg voor voldoende ventilatie in de keuken
voor een optimale eciëntie van het recircu-
latie systeem.
Een nieuw monoblock lter kunt u verkrijgen
via de vakhandel of via de website van Novy.
Artikelnummer monoblock lter:
7900055 (2x)
3
FR
1 PRESCRIPTIONS DE SÉCURITÉ
ET D'INSTALLATION
Vous trouverez plus d'informations sur les produits,
accessoires et services Novy sur Internet :
www.novy.fr
Ceci est la notice de montage de l'appareil identié
en première page.
Cette notice de montage utilise un certain nombre
de symboles. Vous trouverez ci-dessous la signi-
cation de ces symboles.
Symbole Signication Action
Indication Explication d'une indica-
tion apparaissant sur
l'appareil
Avertissement Ce symbole signale un
conseil important ou une
situation dangereuse
Consignes de sécurité techniques
• Cet appareil est conforme aux règles de sécu-
rité en vigueur. Toutefois, une utilisation non
conforme peut entraîner des blessures corpo-
relles et endommager l'appareil.
• L'appareil est exclusivement destiné à un
usage domestique (préparation d'aliments), à
l'exclusion de tout autre usage domestique,
commercial ou industriel. N'utilisez pas l'appa-
reil en extérieur.
• Conservez soigneusement cette notice et
remettez-le à la personne qui pourrait utiliser
l'appareil après vous.
• Retirez les étiquettes et les autocollants qui ont
été apposés sur l'appareil et mentionnant des
conseils d'utilisation ou de montage. L'étiquette
d'identication se trouve à l'intérieur de l'appa-
reil, derrière le ltre à graisse ; ne la retirez pas
Avertissement préalables au montage
• Vériez l'état de l'appareil et du matériel de
montage dès que vous les sortez de l'embal-
lage. Retirez l'appareil de l'emballage avec
précaution. N'utilisez pas de couteaux pointus
pour ouvrir l'emballage.
• Si l'appareil est endommagé, ne l'installez pas
et contactez Novy.
• Vériez sur que tout le matériel de montage est
inclus. Les ltres se trouvent déjà dans l'appa-
reil.
• Novy n'est pas responsable des dommages ré-
sultant d'un montage, d'un raccordement, d'une
utilisation ou d'un maniement incorrects.
• La sécurité n'est garantie que si l'appareil est
correctement installé conformément à la notice
de montage. L'installateur est responsable du
bon fonctionnement sur le lieu d'installation.
• Les pièces métalliques peuvent présenter des
arêtes vives et peuvent occasionner des bles-
sures. Dès lors, portez des gants qui vous en
préservent lors de l'assemblage.
2 LE FILTRE DE RECIRCULATION
MONOBLOCK
Ventilation de la cuisine et ecacité énergétique : la
première ne peut pas se passer de l’autre. La recir-
culation ore la meilleure solution. Les hottes d’as-
piration à recirculation n’évacuent pas les vapeurs
de cuisson, elles ltrent les odeurs et la graisse de
l’air et ramènent l’air ltré dans l’appartement.
Le ltre Novy monoblock absorbe les odeurs dé-
sagréables et rend l’évacuation de l’air chaud vers
l’extérieur superue. La base du ltre monoblock
est une forme avancée de particules de carbone
activées sous forme de billes minuscules collées
sur une structure de support en forme de labyrinthe.
À cause de cette structure de labyrinthe, le ltre
monoblock a une perte de pression limitée et un
contenu maximum de rendement. Cela résulte en
une aspiration ecace, une excellente absorption
des odeurs et un niveau sonore limité.
3 UTILISATION DE LE CAISSON
RECYCLAGE
La boîte de recirculation est utilisée en combinaison
avec une hotte aspirante ou un extracteur de plan
de travail.
Après une durée déterminée, une indication sur la
hotte ou la plaque de cuisson indique que le ltre de
recirculation monoblock doit être remplacé.
Avant de programmer et d'utiliser le mode de
recirculation, lisez le manuel d'instructions
de votre appareil.
Pour un fonctionnement optimal du ltre
de recirculation monobloc, il est important
de mettre l'extracteur en marche avant la
cuisson et de respecter le temps de foncti-
onnement après la cuisson. Pour ce faire,
lisez les instructions gurant dans le mode
d'emploi de votre appareil.
Assurer une ventilation adéquate dans la
cuisine pour une ecacité optimale du sys-
tème de recyclage.
Un nouveau ltre monoblock peut être ob-
tenu via le ou via le site Internet de Novy.
Numéro d’article ltre monoblock :
7900055 (2x)

4
DE
1 SICHERHEITS- UND
MONTAGEVORSCHRIFTEN
Weitere Informationen zu den Produkten, dem
Zubehör und den Dienstleistungen von Novy nden
Sie im Internet unter:
www.novy-dunsthauben.de
Diese Broschüre enthält die Montageanleitung für
das Gerät, wie auf der Vorderseite angegeben. Die
Gebrauchsanweisung wurde dem Gerät in einer
gesonderten Broschüre beigefügt.
In dieser Montageanleitung werden einige Symbole
verwendet. Nachfolgend nden Sie eine Erklärung
dieser Symbole.
Symbol Bedeutung Aktion
Anzeige Erläuterung einer Anzeige auf
dem Gerät.
Warnhinweis Dieses Symbol weist auf
einen wichtigen Tipp oder eine
gefährliche Situation hin.
Technishe sicherheitsvorschriften
• Dieses Gerät erfüllt die geltenden Sicherheits-
vorschriften. Eine unsachgemäße Verwendung
kann jedoch zu Verletzungen und Schäden am
Gerät führen.
• Das Gerät ist nur für den Hausgebrauch (Zube-
reitung von Lebensmitteln) bestimmt, unter Aus-
schluss aller anderen haushaltlichen, gewerbli-
chen und industriellen Zwecke. Das Gerät darf
nicht im Freien verwendet werden.
• Bewahren Sie diese Anleitung sorgfältig auf
und geben Sie sie an die Person weiter, die das
Gerät möglicherweise nach Ihnen benutzt.
• Entfernen Sie Etiketten und Aufkleber von dem
Gerät, die mit Verwendungs- oder Montagetipps
versehen sind. Hinter dem Fettlter bendet
sich ein Aufkleber, der nicht entfernt werden
darf.
Warnhinweise vor der Montage
• Überprüfen Sie den Zustand des Geräts und
des Montagematerials, sobald Sie es aus der
Verpackung nehmen. Nehmen Sie das Gerät
sorgfältig aus der Verpackung. Verwenden Sie
zum Önen der Verpackung keine scharfen
Messer.
• Installieren Sie das Gerät nicht, wenn es be-
schädigt ist, und wenden Sie sich in diesem Fall
an Novy.
• Überprüfen Sie ob alle Montagematerialien
vorhanden sind. Die Filter benden sich in dem
Gerät.
• Novy haftet nicht für Schäden, die durch falsche
Montage, falschen Anschluss, unsachgemäße
Verwendung oder falsche Bedienung entste-
hen.
• Die Sicherheit ist nur bei fachgerechter Installa-
tion gemäß der Montageanleitung gewährleis-
tet. Derjenige, der das Gerät installiert, ist für
den ordnungsgemäßen Betrieb am Installati-
onsort verantwortlich.
• Metallteile können scharfe Kanten haben, an
denen Sie sich verletzen können. Tragen Sie
bei der Montage Handschuhe, die Sie vor Ver-
letzungen schützen.
2 DER MONOBLOCK
UMLUFTFILTER
Zeitgemäße Küchenentlüftung und Energieezienz
stehen in unmittelbarem Zusammenhang miteinan-
der: Die Küchenentlüftung sollte heute möglichst
energieezient sein. Hier bietet der Umluftbetrieb
eine Lösung. Dunstabzugshauben, die im Umluft-
betrieb arbeiten, führen die Kochdämpfe nicht ab,
sondern ltern den Geruch und das Fett aus der
Luft heraus und blasen die gelterte Luft zurück in
den Raum.
Der Novy Monoblocklter absorbiert unangenehme
Gerüche und macht die Ableitung von warmer Luft
ins Freie überüssig. Grundlage des Monoblock-
lters ist eine fortschrittliche Form von Aktivkohle-
partikeln in Form von winzigen Kugeln, die auf eine
tragende Labyrinthstruktur geklebt sind. Aufgrund
der Labyrinthstruktur zeichnet sich der Monoblockl-
ter durch einen begrenzten Druckverlust und einen
maximalen Wirkungsgrad aus. Das Ergebnis ist
eine eziente Absaugung, eine hervorragende Ge-
ruchsabsorption und ein niedriger Geräuschpegel.
3 VERWENDUNG DIE EINBAU-
UMLUFTBOX
Der Umluftbox wird in Kombination mit einer
Dunsthaube oder eine Muldenlüfter verwendet.
Nach einer fest eingestellten Zeit zeigt eine Anzeige
auf der Dunstabzugshaube oder dem Kochfeld
an, dass der Monoblock-Umluftlter ausgetauscht
werden muss.
Lesen Sie vor der Programmierung und der
Verwendung des Rezirkulationsmodus die
Bedienungsanleitung Ihres Geräts.
Für den optimalen Betrieb des Monoblock-
Rezirkulationslters ist es wichtig, den
Extraktor vor dem Kochen einzuschalten und
die Nachlaufzeit einzuhalten. Lesen Sie dazu
die Hinweise in der Bedienungsanleitung
Ihres Gerätes.
Sorgen Sie für eine ausreichende Belüftung
in der Küche für eine optimale Ezienz des
Umluftsystems.
Einen neuen Monoblocklter erhalten Sie im
Fachhandel oder über die Novy-Website.
Artikelnummer Monoblocklter:
7900055 (2x)

5
EN
1 INSTRUCTIONS FOR SAFETY
AND USE
Further information on Novy products, accessories
and services may be found on the internet:
www.novy.co.uk
These are the directions for use for the appliance as
shown on the front. The installation instructions are
in a separate booklet supplied with the appliance.
These directions for use make use of a number of
symbols. The meanings of the symbols are shown
below.
Symbol Meaning Action
Indication Explanation of an indi-
cation on the device.
Warning This symbol indicates
an important tip or a
dangerous situation
Technical safety instructions
• This appliance complies with the applicable
safety instructions. However, improper use may
cause personal injury or damage to the appli-
ance.
• The appliance is intended exclusively for
household use (preparation of food) and ex-
cludes all other domestic, commercial or indus-
trial use. Do not use the appliance outside.
• Keep good care of this manual and pass it on
to any person who may use the appliance after
you.
• Remove labels and stickers on the appliance
with tips for use or installation. The type sticker
is to be found behind the grease lter in the ap-
pliance. Do not remove it.
Warning before installation
• Check the condition of the appliance and the
installation ttings as soon as you remove them
from the packaging. Remove the appliance from
the packaging with care. Do not use sharp knives
to open the packaging.
• Do not install the appliance if it is damaged, and in
that case inform Novy.
• Check that all the materials for installation have
been supplied. The filters are in the appliance.
• Novy is not liable for damage resulting from incor-
rect assembly, incorrect connection, incorrect use
or incorrect operation.
• Safety is guaranteed only with expert installa-
tion in accordance with the installation manual.
The installing technician is responsible for proper
operation at the installation location.
• Metal parts may have sharp edges, and you may
injure yourself on them. For that reason, wear
protective gloves during installation.
2 THE MONOBLOCK
RECIRCULATION FILTER
Contemporary, energy-ecient kitchen ventilation:
you can’t have the rst without the latter. Recircula-
tion oers the solution for this. Recirculation extrac-
tion hoods do not remove the cooking fumes, but
lter the odour and fat out of the air and then blow
the ltered air back into the home.
The Novy monoblock lter absorbs unpleasant
odours and makes the removal of hot air to the out-
side unnecessary. The basis of the monoblock lter
is an advanced form of activated carbon particles
in the shape of minuscule spheres that are bonded
to a load-bearing labyrinth structure. Due to the
labyrinth structure, the monoblock lter has a limited
loss of pressure and maintains a maximum e-
ciency. This results in ecient extraction, excellent
odour absorption and a limited noise level.
3 USE OF THE RECIRCULATION
BOX
The recirculation box must be used with an ex-
tractor hood or worktop extractor.
After a xed set time, an indication on the cooker
hood or hob indicates that the monoblock recircu-
lation lter needs to be replaced.
Before programming and using the recir-
culation mode, read the operating instructi-
ons for your device.
For optimal operation of the monoblock
recirculation lter, it is important to switch on
the extractor before cooking and to respect
the after-running time. To do this, read the
instructions in the operating instructions for
your appliance.
Provide adequate ventilation in the kitchen
for optimal eciency of the recirculation
system.
You can obtain a new monoblock lter
from specialist retailers or via the Novy
website.
Article number monoblock lter:
7900055 (2x)

6
1 2
1x
A3
B C
1x 8x
9x 1x 1x
1x
7
4 FR - INSTALLATION
Vériez sur que tout le matériel de montage est
inclus.
Positionnement bouche de souage:
Avant l’installation il faut déterminer la position de la
sortie de souage; en haut/en bas ou à l’arrière ou
sur le côté, en fonction de l’endroit d’encastrement
(plafond, cloison ou plinthe)
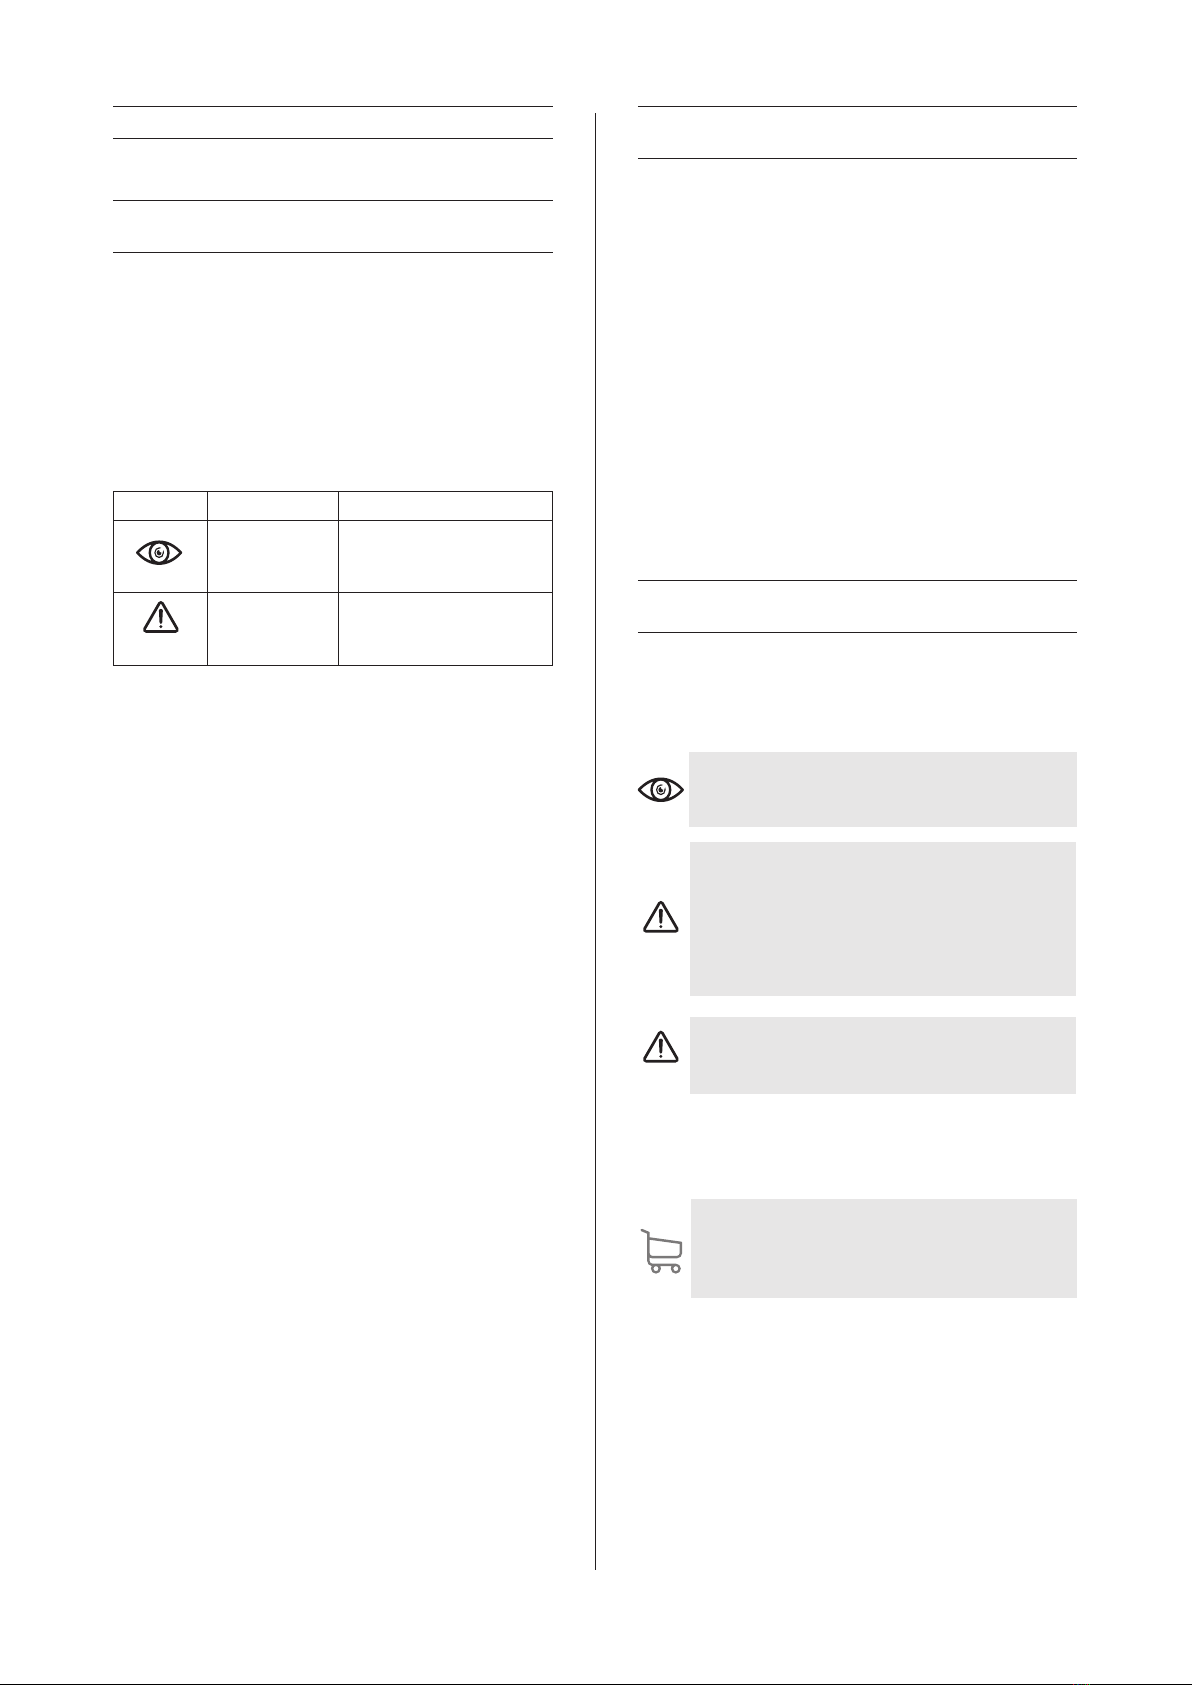
A. An de pouvoir souer vers le haut ou le bas, il
faut fermer la sortie rectangulaire sur le côté ou à
l’arrière:
• Dévisser la sortie de souage
• Coller le bord de mousse sur les bords de la
plaque de recouvrement (fournie)
• Poser la plaque de recouvrement devant la sortie
de souage
• Revisser la sortie de souage
B. Enlever le passage perforé ainsi que l’isolation
en-dessous.
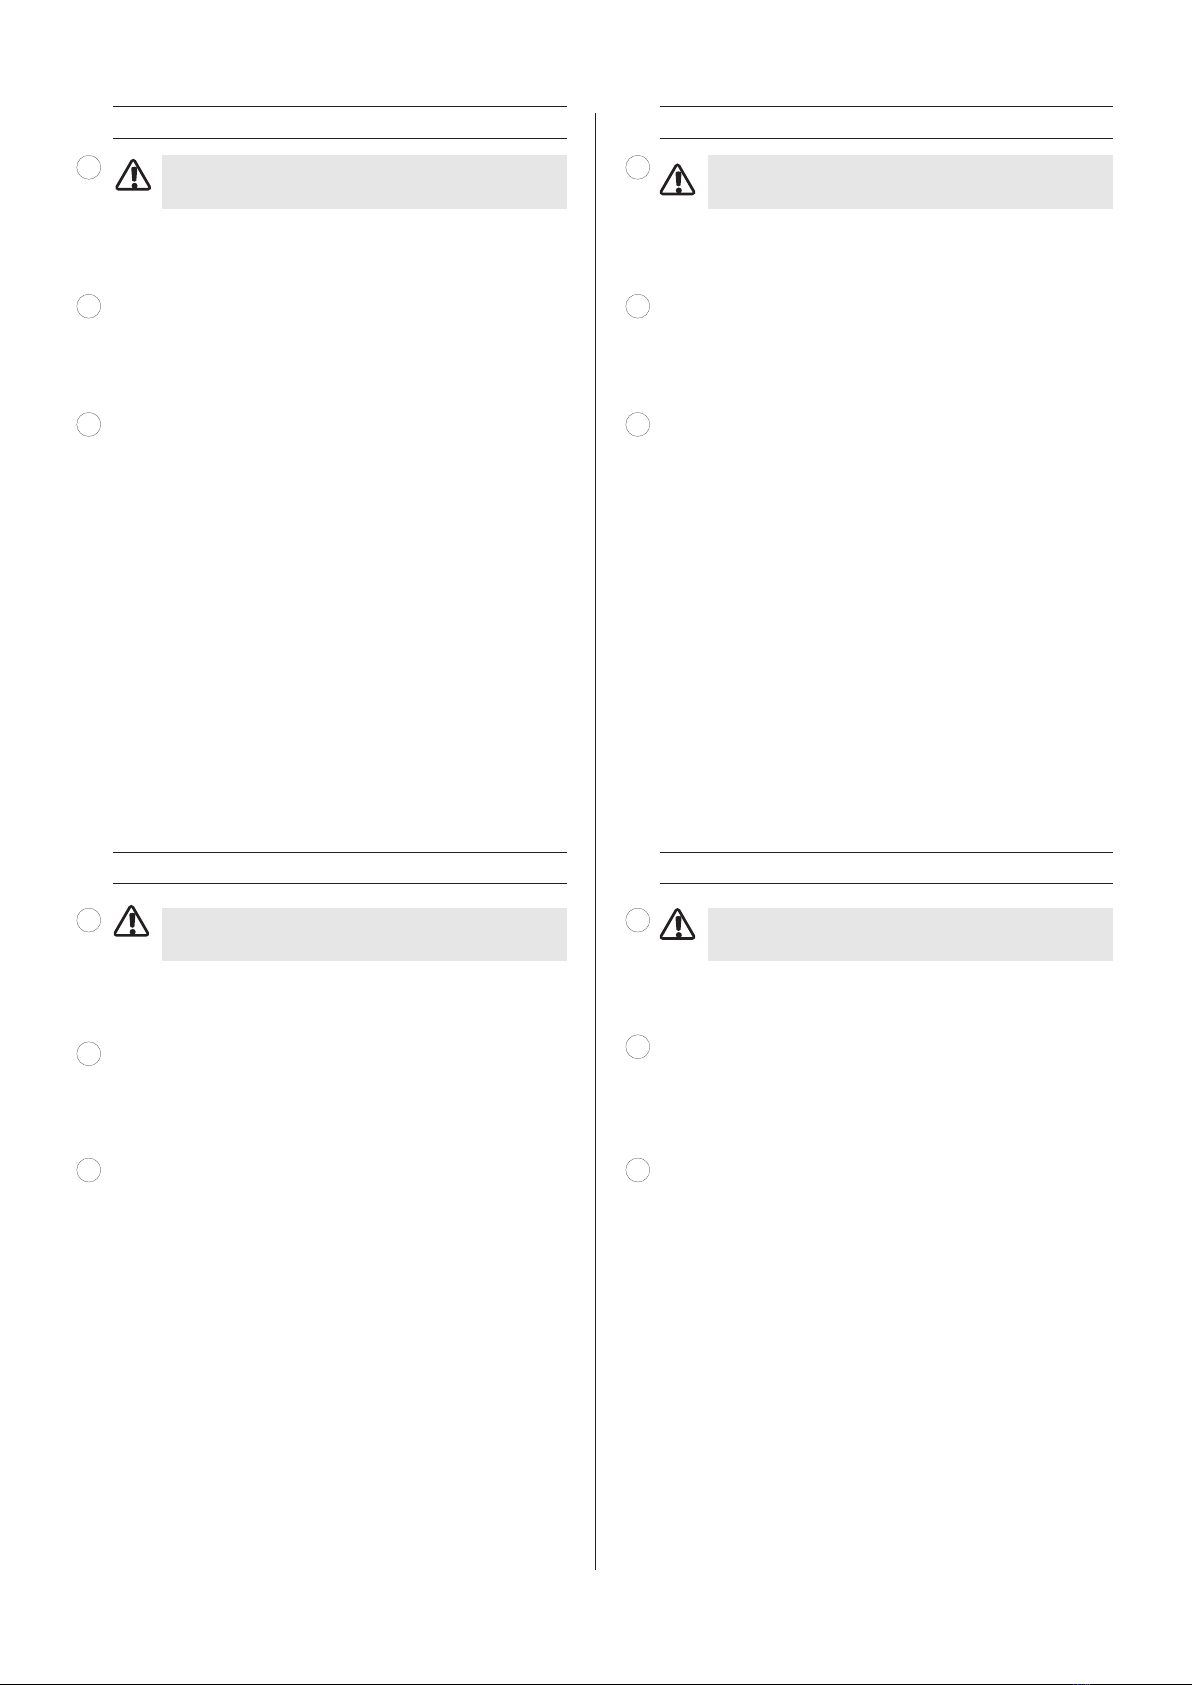
C. Si vous voulez installer la sortie de souage à
l’arrière:
• Dévisser la sortie de souage
• Tourner la sortie de souage
• Revisser la sortie de souage en positionnant la
sortie à l’arrière
1
4 NL - INSTALLATIE
Controleer aan de hand van tekening of alle mon-
tagematerialen meegeleverd zijn.
Positionering uitblaasopening:
Voor installatie moet u bepalen waar de uitblaasopen-
ing moet komen; bovenaan/onderaan of achteraan/
zijkant, dit afhankelijk van de inbouwlocatie (plafond,
wand of plint)
A. Om uit te blazen naar boven of onder, dient u de
rechthoekige uitgang aan de zijkant of achterkant af
te sluiten:
• Schroef de uitblaasopening los
• Kleef de mousse boord op de randen van de
afdekplaat (meegeleverd)
• Plaats de afdekplaat voor de uitblaasopening
• Schroef de uitblaasopening terug vast
B. Verwijder de voorgeperforeerde doorlaat en de
onderliggende isolatie.
C. Als u de uitblaasopening achteraan wil plaatsen:
• Schroef de uitblaasopening los
• Draai de uitblaasopening
• Schroef de uitblaasopening terug vast met de
uitblaasopening achteraan
Belangrijk: lees voorafgaand de voorschriften
voor veiligheid en montage.
2
3
Important: Veuillez lire les instructions de sé-
curité et d’installation avant de commencer.
4 DE - INSTALLATION
Überprüfen Sie ob alle Montagematerialien vorhan-
den sind.
Positionierung der Ausblasönung:
Legen Sie vor dem Einbau fest, wo die Ausblasö-
nung positioniert werden soll: vorne/unten oder
hinten/seitlich. Die Position hängt von dem Ein-
bauort ab (Decke, Wand oder Sockelleiste).
A. Um die Luft nach oben oder unten auszublasen,
muss der rechtwinkelige Ausgang auf der Seiten-
äche oder der Rückseite geschlossen werden:
• Schrauben Sie die Ausblasönung los.
• Kleben Sie die Schaumstoplatte auf die
Ränder der Abdeckplatte (mitgeliefert).
• Positionieren Sie die Abdeckplatte vor der
Ausblasönung.
• Schrauben Sie die Ausblasönung wieder fest.
B. Entfernen Sie den vorperforierten Durchlass und
die darunter liegende Isolierung.
C. Wenn Sie die Ausblasönung hinten anordnen
möchten:
• Schrauben Sie die Ausblasönung los.
• Drehen Sie die Ausblasönung.
• Schrauben Sie die Ausblasönung wieder mit
der Önung nach hinten fest.
4 EN - INSTALLATION
Check that all the materials for installation have been
supplied.
Positioning the discharge opening:
Before installation, you must determine where the
outlet opening should be; top / bottom or back / side,
this depending on the installation location (ceiling,
wall or plinth).
A. For outlet top or bottom, close the rectangular exit
on the side or back:
• Unscrew the discharge opening
• Stick the mousse board on the edges of the cov-
er plate (supplied)
• Place the cover plate in front of the outlet open-
ing
• Mount the the discharge opening with the screws.
B. Remove the pre-perforated passage and the un-
derlying isolation.
C. If you want to place the discharge opening at the
back:
• Unscrew the discharge opening
• Turn the discharge opening
• Screw the discharge opening back with the open-
ing at the back.
Wichtig: Bitte lesen Sie die Sicherheits- und
Installationshinweise, bevor Sie beginnen.
1
2
3
Important: Please read the safety and instal-
lation instructions before you start.
1
22
3 3
1

8
6
7
45

9
NL
Voorzie een inbouwopening in de plint/wand of pla-
fond met volgende afmetingen:
123x805 mm (tolerantie -0/+1 mm)
Voorzie voldoende inbouwruimte: de minimale inbou-
wdiepte = 295mm
Minimum hoogte van de plint: 150mm
Afhankelijk van de plaats dient u daarmee rekening te
houden bij het uitsnijden van de openingen in de plint
of plafond.
Voorzie een opening in de kast om met een afvoer-
kanaal toegang te hebben tot de aansluitpijp. Duid de
positionering van de opening voor de ronde aanslu-
itpijp/afvoerkanaal aan en maak hier een gepaste
opening. Hou rekening met het type buis (rond ø150
mm of plat 89x222x1000 mm).
Open de recirculatiebox door op de zijkant te druk-
ken (sticker “hier drukken”) tot je een click hoort. Het
rooster is nu volledig los. Haal de monoblocklters uit
de recirculatiebox.
Plaats de recirculatiebox in de gemaakte plint opeing.
Regel de hoogte van de box met de instelschroef aan
de binnenzijde van de recirculatiebox of gebruik een
andere ondersteuning om de box recht in de opening
te plaatsen voor een optimaal resultaat.
FR
Prévoir une ouverture d’encastrement dans la plinthe/
le cloison ou le plafond aux dimensions suivantes:
123x805 mm (tolérance -0/+1 mm)
Prévoir susamment d’espace d’encastrement: la
profondeur d’encastrement minimum est de 295 mm.
Hauteur minimum de la plinthe: 150mm
En fonction de l’endroit, il faut tenir compte de ces
données lors de la découpe des trous dans la plinthe
ou le plafond.
Prévoir une ouverture dans le boîtier an de permet-
tre l’accès au conduit de raccordement par un conduit
de vidange. Marquer le positionnement de l’ouverture
pour le conduit rond de raccordement ou le conduit
de vidange et créer une ouverture adéquate. Tenir
compte du type de conduit (rond ø150 mm ou plat
89x222x1000 mm).
Ouvrir la boîte d’encastrement en appuyant sur le
côté (étiquette: “appuyer ici”) jusqu’à entendre un clic.
Maintenant la grille est complètement détachée. En-
lever les ltres monobloc de la boîte de recirculation.
Poser la boîte de recirculation dans l’ouverture de
plinthe créée.
Régler la hauteur de la boîte au moyen de la vis de
réglage à l’intérieur de la boîte de recirculation ou uti-
liser un autre support an de poser la boîte de façon
bien droite dans l’ouverture an d’obtenir un résultat
optimum.
DE
Schaen Sie in dem Sockel/der Wand oder Decke
einen Ausschnitt mit den folgenden Abmessungen:
123x805 mm (Toleranz -0/+1 mm)
Sehen Sie genügend Platz für den Einbau vor: mini-
male Einbautiefe = 295 mm
Minimale Höhe der Holzleie: 150 mm
Je nach Ort i dies beim Herellen des Ausschnitts
in dem Sockel oder der Decke zu berücksichtigen
Stellen Sie eine Önung im Schrank her, um mit
einem Ableitungskanal Zugang zum Anschlussrohr
zu bekommen. Markieren Sie die Positionierung der
Önung für das runde Anschlussrohr/den Ableitungs-
kanal und schaen Sie hier einen passenden Aus-
schnitt. Berücksichtigen Sie den Rohrtyp (rund ø150
mm oder ach 89x222x1000 mm).
Önen Sie die Einbaubox, indem Sie auf die Seiten-
äche drücken (Aufkleber “hier drücken”), bis ein
Klickgeräusch zu hören i. Das Gitter i jetzt voll-
ändig lose. Nehmen Sie die Monoblocklter aus der
Umluftbox heraus.
Platzieren Sie die Umluftbox in dem hergeellten
Sockelausschnitt.
Juieren Sie die Höhe der Box mit der Einells-
chraube auf der Innenseite der Umluftbox oder
benutzen Sie eine andere Halterung, um die Box
gerade in dem Ausschnitt anzuordnen und dadurch
ein optimales Ergebnis zu erreichen.
EN
Provide an opening in the plinth / wall or ceiling with
the following dimensions:
123x805 mm (tolerance -0 / + 1 mm)
Provide sucient installation space: the minimum
installation depth = 295mm
Minimum height of the plinth: 150mm
Depending on the location, be aware of the cutting
out openings in the plinth or ceiling.
Make an opening in the kitchen cabinet to have ac-
cess to the connection. Mark the positioning from the
opening for the round connection pipe / outlet and
make a suitable opening here. Keep in mind the type
of tube (round ø150 mm or at 89x222x1000 mm).
Open the built-in box by pressing on the side (sticker
“press here”) until you hear a click. The grid is now
completely loose. Remove the monoblock lters from
the recirculation box.
Place the recirculation box in the created opening.
Adjust the height of the box with the adjusting screw
on the inside of the recirculation box or use another
one support to place the box straight in the opening
for optimal results.
4
5
6
7
4
5
6
7
4
5
6
7
4
5
6
7
10
8
9

11
NL
Schroef de recirculatiebox met de hand (niet te strak!)
aan met de bijgeleverde schroeven (meegeleverd).
Enkel bij gebruik van de uitblaasopening bovenaan of
onderaan:
Kleef de mousse boord aan de onderkant van het
ronde koppelstuk (meegeleverd) en schroef deze vast
op de geïnstalleerde recirculatiebox.
Plaats de koolstolters terug in de opening en sluit
het rooster.
Bij het aansluiten van afvoerkanalen dienen
deze aangesloten te worden op de voorziene
uitblaasopeningen. Tape de verbindingen tussen de
uitblaasopening en het afvoerkanaal goed af met
aluminiumtape (meegeleverd 906.292)
FR
Visser la boîte de recirculation par la main (pas trop
serrée) au moyen des vis fournies.
Uniquement lors du positionnement de la sortie de
souage vers le haut ou vers le bas:
Coller le bord de mousse sur le côté inférieur de la
pièce ronde d’accouplement (fournie) et visser celle-
ci sur la boîte de recirculation installée.
Remettre en position les ltres à charbon dans
l’ouverture et fermer la grille.
Dans le cas de conduits de vidange, raccorder ceux-
ci sur les bouches de souage prévues. Bien xer du
ruban adhésif
DE
Schrauben Sie die Umluftbox von Hand mit den mit-
gelieferten Schrauben fest (Schrauben nicht zu fest
andrehen!).
Nur bei Positionierung der Ausblasönung oben oder
unten:
Kleben Sie die Schaumstoplatte auf die Unterseite
des runden Koppelstücks (mitgeliefert) und schrau-
ben Sie dieses an der eingesetzten Umluftbox fest.
Setzen Sie die Kohlenstolter wieder in die Önung
ein und schließen Sie das Gitter.
Wenn Ableitungskanäle angeschlossen werden,
müssen sie mit den vorgesehenen Ausblasönungen
verbunden werden. Wickeln Sie Aluminiumband (mit-
geliefert 906.292) um die Verbindungsstellen zwis-
chen der Ausblasönung und dem Ableitungskanal.
EN
Screw the recirculation box by hand (not too tight!)
With the supplied screws.
Only when using the discharge opening at the top or
bottom:
Stick the mousse board to the bottom of the round
connector (supplied) and screw it onto the
installed recirculation box.
Put the monoblock lters back in the opening and
close the grid.
The duct must be connected to the openings on the
recirculation box. Mount carefully with aluminum tape
(supplied 906.292).
8
9
8
8 8
9
9
9

NOVY nv behoudt zich het recht voor te allen tijde en zonder voorbehoud de constructie en de prijzen van haar producten te wijzigen.
NOVY SA se réserve le droit de modier en tout temps et sans préavis la construction et les prix de ses produits.
NOVY nv behält sich das Recht vor, jederzeit und ohne Vorbehalt die Konstruktion und die Preise seiner Produkte zu ändern.
Novy nv reserves the right at any time and without reservation to change the structure and the prices of its products.
NOVY nv se reserva el derecho a modicar en cualquier momento y sin condiciones la construcción y los precios de sus productos.
NOVY nv si riserva il diritto di modicare in qualsiasi momento senza preavviso la struttura e i prezzi dei suoi prodotti.
NOVY nv
Noordlaan 6
B - 8520 KUURNE
Tel. 056/36.51.00 - Fax 056/35.32.51
http://www.novy.be
France: www.novy.fr +33 (0)3.20.94.06.62
Deutschland und Österreich: www.novy-dunsthauben.de +49 (0)511.54.20.771
Nederland: www.novynederland.nl +31 (0)88-0119110
United Kingdom: www.noy.co.uk +44 (0) 207 866 2493
España: www.novy.es +34 938 700 895
Italia: www.novy.it +39 (0)39.20.57.501
Other manuals for 7931.400
2
This manual suits for next models
2
Table of contents
Languages:
Other Novy Ventilation Hood manuals


Novy
Novy Panorama 1821 User manual

Novy
Novy 1801 User manual

Novy
Novy 661 User manual

Novy
Novy 230 CLOUD User manual

Novy
Novy Pure'line Compact 6810 User manual

Novy
Novy ONE POWER User manual

Novy
Novy 828 User manual

Novy
Novy Flat'line 7600 User manual

Novy
Novy Mood 7550 User manual

Novy
Novy Mood 7550 User manual


Popular Ventilation Hood manuals by other brands


Siemens
Siemens LC 89950 GB Operating and installation instructions

Electrolux
Electrolux AEG DH1690-M Instructions for use

Vent-Axia
Vent-Axia Milano Instruction on mounting and use

Belling
Belling DIH900 Installation & user's instructions

Beko
Beko HNU 61422 B user manual

Venmar
Venmar Jazz VJ70524SS installation instructions