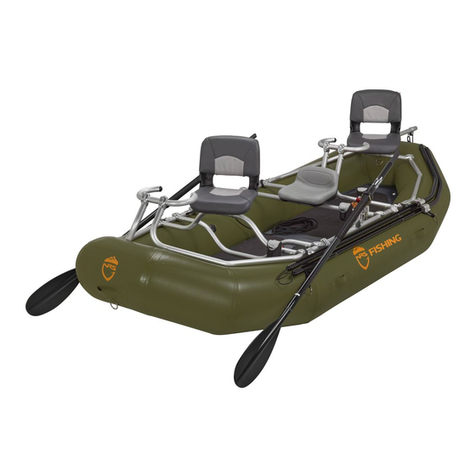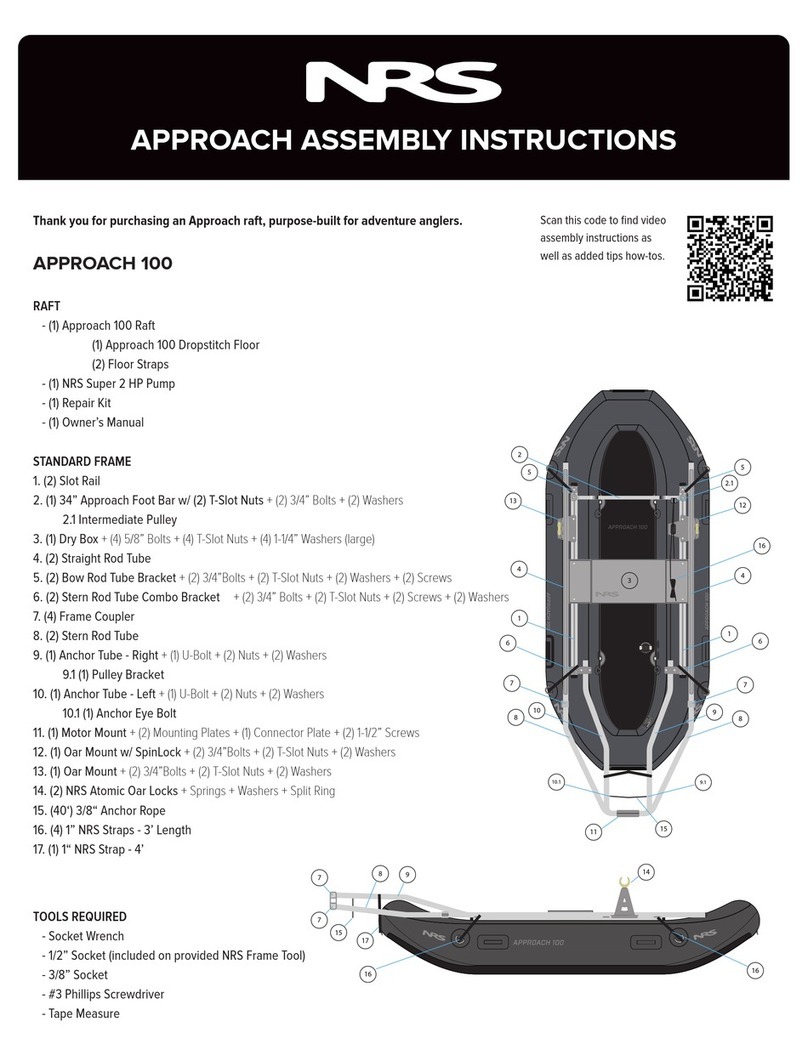
8. We’ll start with the front Platform. Attach the Platform to the wider Thwarts with U-bolts. Each U-bolt will use two washers and
two nuts. Don’t tighten completely at this time.
9. Attach the Front Thigh Hook Support (the bent one) with a U-bolt, making sure to attach the end with two bolts securing the
LoPro. Start with the Support laid out flat. Tighten the inboard nut (the one toward the platform at this point) until the threads
just pass through the nut’s nylock insert. Rotate the Support vertical and tighten the other nut.
10. Now set the assembly inside the boat and secure the lower ClampITs to the Thwart. Leave the upper ClampITs loose until
you install the Side Rails.
11. Attach the Front Seat Support (the U-shaped one) to the Thwart with U-bolts. Attach a Universal Seat Mount to the Seat
Support (instructions come with the USM). Make sure the Seat Support is vertical and the USM is level. Add Swivel Seat
using the four bolts, washers and nylock nuts included with the seat. You’ll need the 7/16" socket and 7/16" end wrench here.
Add the curved Thigh Hook to the Thigh Hook Support. Adjust the Thigh Hook to a comfortable position and tighten all the
U-bolts.
12. Now assemble the rear Casting Platform, again outside the boat, following Steps 8-11 above. The rear Seat Bar is also
U-shaped, but with a “dog-leg bend”. Follow the same directions for attaching the Seat Bar LoPros to the Platform as you did
the front Platform Thigh Hook Support: Tighten the inboard legs of the U-bolts only until the threads come through the nut’s
nylock insert. Then raise the Support and fully tighten the other nut.
13. Attach the end of the rear Thigh Hook Support, the end that has two bolts securing the LoPro, to the rear Thwart.
14. Now attach the Side Rails. Orient the ends of the rails with double bends toward the stern. Slide U-bolts between the batten
tops and pipe on the bow and stern Thwarts. Slide Side Rail LoPro ends over the U-bolts, making sure the Rail fits in the
center thwart ClampIT, then add washers and nuts. Leave the nuts loose until the Cross Bar and Foot Bar are attached.
15. Attach the Cross Bar and Foot Bar, leaving the U-bolts loose enough for adjusting them fore and aft. On the right end of the
Cross Bar, use the oversized U-bolt, and before adding washers and nuts place the Anchor System Intermediate Pulley on
the LoPro.. Allow the Cross Bar and Foot Bar to determine the Side Rail height. Now tighten U-bolts on the ends of the Side
Rails and tighten the center ClampIT.
16. Attach the Flip Seat Mount to the center of the center Thwart.
17. Insert the Dry Box between the center Thwart and Cross Bar. Complete tightening of the Cross Bar U-bolts.
18. Install High-Back Seat to the Flip Seat Mount. We’ve found it works best to bolt to the first and third set of holes from the front
of the Mount.
19. Attach Foot Pegs to the Foot Bar. Place Oar Mounts on the Side Rails, approximately 12"-14" in front of the center thwart. Add
U-bolts and tighten. Add Cobra Oarlocks.
20. Move Foot Bar where needed for good support for the rower and tighten the U-bolts.
21. Now install the rest of the Anchor System. Install the Remote Bracket with Jam Cleat and Pulley on the Foot Bar. Remove 2"
LoPro bolt on right side of Foot Bar. Replace that bolt with the 2-1/2" bolt, flat washer on both ends, and nylock nut. Tighten
bolt.
22. Install the Anchor Mast. Use two 1-3/4" bolts, with large fender washers on inside of transom, and with flat washers and nylock
nuts on the outside. Tighten bolts.
23. Make sure all the U-bolts are now tight.
24. Attach Stripping Baskets to Thigh Hooks.
25. Finish inflating sidewalls to operating pressure (8-9 psi).
26. If you have any questions, give us a call at 800.635.5202.
48123 Ver. 3
nrs.com


