Caution
Ensure the handpiece is attached tightly and properly to the
coupling. DO not pull the connector ring during air pressure
supply. If the Connector Ring pulled during air pressure supply,
handpiece may fly away.(NL-10LED/PTL-CL-LED III)
Fig. 3
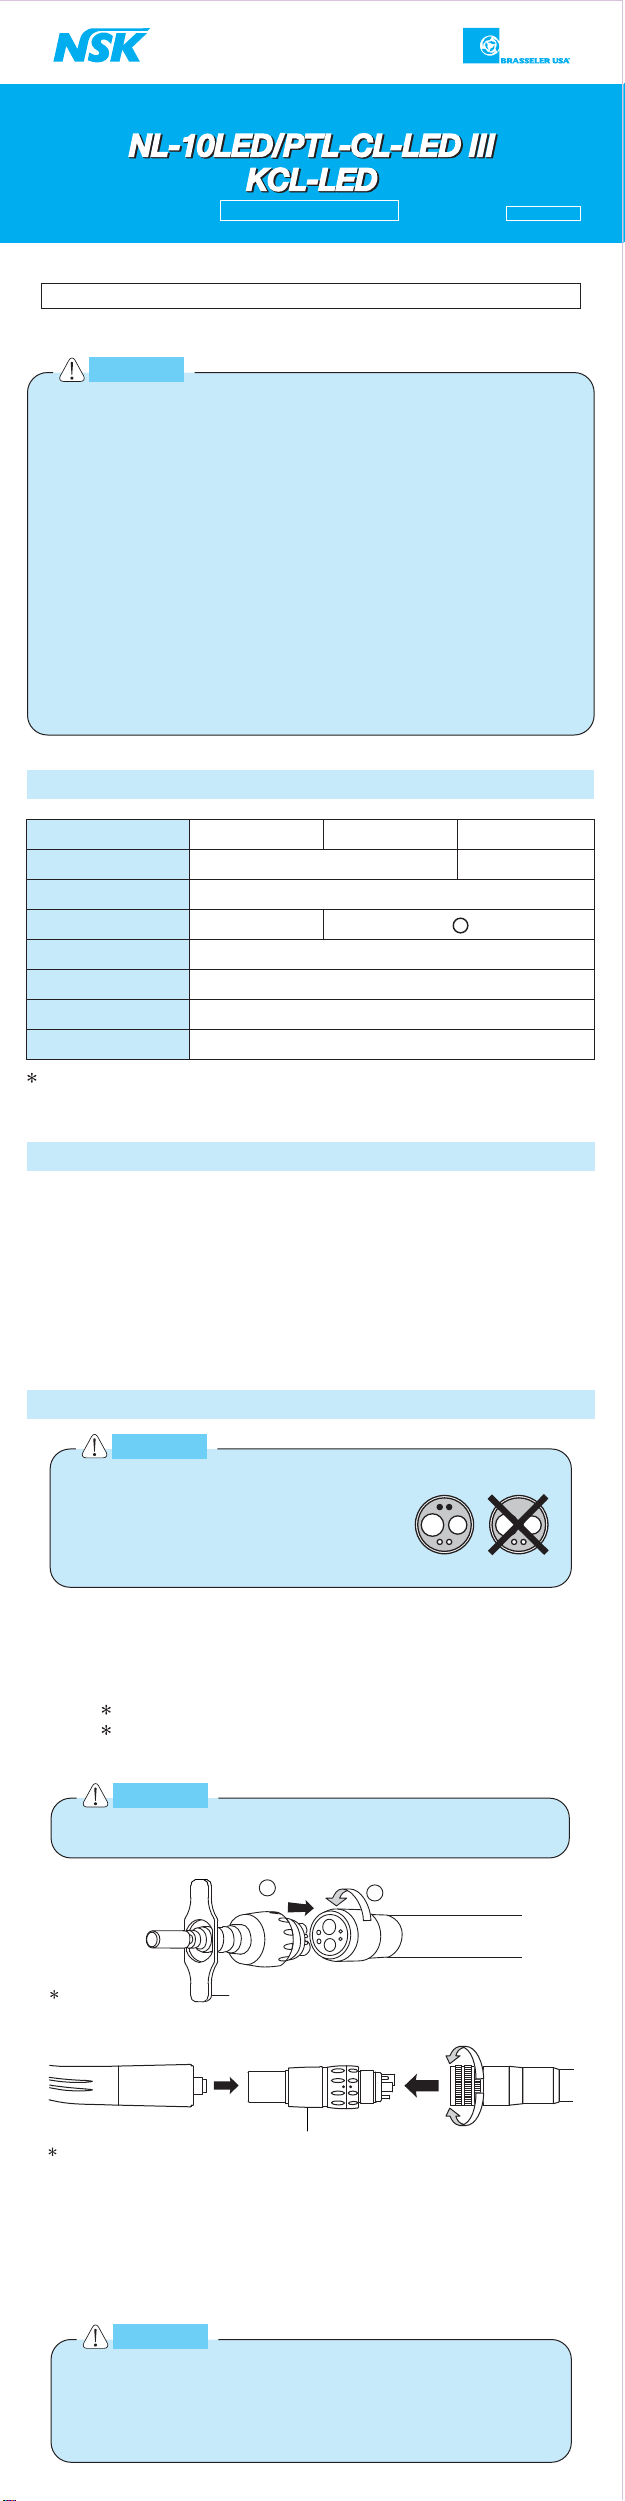
Caution
Do not connect the coupling to ISO Standard
4 hole tubing. If it connects to a hose without
the light function, the light terminal can be
damaged.
Please read this operation manual carefully and file for future reference.
LED Coupling
OPERATION MANUAL OM-TR355E
· When operating the product always consider the safety of the patient.
· The product is designed only for clinical dental use by qualified
personnel.
· Do not attempt to disassemble the product or tamper with the mechanism.
· Do not wipe with, clean or immerse in high acid water or sterilizing
solutions.
· Do not allow any impact on to the product. Do not drop the product.
· Do not connect or disconnect the hose or handpiece until the drive
motor has completely stopped.
· Do not wipe with, or clean or immerse in, high acid water or sterilizing
solutions.
· Refer to the operation manual of the hose and handpiece for connection
instructions.
· Do not attempt hydrothermal cleaning or rinse the device in water. It may
cause malfunction or electric shock.
· Follow the instrument manufacturer’s instructions.
· Ensure clean, dry air supply. Moisture and debris in air supply may
cause the motor to malfunction.
Caution
-
KaVo®MULTIflex®
NSK Phatelus Coupling
KCL-LEDPTL-CL-LED III
ISO9168 Type C
Model
Handpiece Type
Hose Type
Water Adjustment
Optic Type
Voltage
Activate Voltage
Consumption current
NL-10LED
White LED
AC/DC 3.3V±0.05V
2.5~4.0V
Less than 0.25A (3.3 V)
For lighting power, follow the EN60601-1,Voltage has to match SELV
(Safety Extra Low Voltage)
KaVo®MULTIflex®is copyright for Kaltenbach & Voigt GmbH & Co.(Germany).
1. Specification
1. Specification
(2)Disconnecting
1) Pull back the connector ring and gently remove the handpiece
from the coupling. (NL-10LED/PTL-CL-LED III)
2)Losen the hose nut and gently pull out the hose.
(1)Connecting
1)To connect, align and insert carefully and firmly the pin of the
coupling into the pin holes of the hose, and fasten the hose
nut securely.(Fig.2)
Coupling cap as attached. (NL-10LED/PTL-CL-LED III)
Wrench (KCL-LED)
2)Insert handpiece straight into coupling until it clicks.
2. Features
· There is no generation of heat in the light source, increasing
power savings and extending the life of the LED.
· Contains a Water Adjusting Ring to adjust the water flow.
(PTL-CL-LED-III,KCL-LED).
· Power supply for illumination is regardless of polarity. You can use
variety of unit.
· Utilizes a Non-Retraction Valve to prevent the water flow back into
the delivery unit.
3. Setting
Fig. 1
Fig. 2
Coupling
Connector Ring
Tighten
Loosen
Caution
Ensure the handpiece is attached tightly to the coupling.
NL-10LED
2
1
Fixing Wrench
KCL-LED


