27. MODE –
MANUAL/AUTOLOOP: Press this to switch between Manual Mode and Autoloop Mode, which changes the
functions of the four buttons on its right.
Note: When the track is currently looping, the IN/1 and OUT/2 buttons will blink and the RELOOP/4 button will be
lit white to indicate a loop is active (regardless of the actual length of the loop).
In Manual Mode (the MODE button will be lit white), the four buttons on its right will function as LOOP IN,
LOOP OUT, LOOP STORE, and RELOOP (explained above).
In Autoloop Mode (the MODE button will be lit red), the four buttons on its right will set 1-, 2-, 4-, and 8-beat
loops, respectively.
28. 1/2 X –Press this to halve the length of the selected loop.
29. 2 X –Press this to double the length of the selected loop.
30. LOOP SHIFT LEFT –Press this to move the loop in position 1-beat left.
31. LOOP SHIFT RIGHT –Press this to move the loop in position 1-beat right.
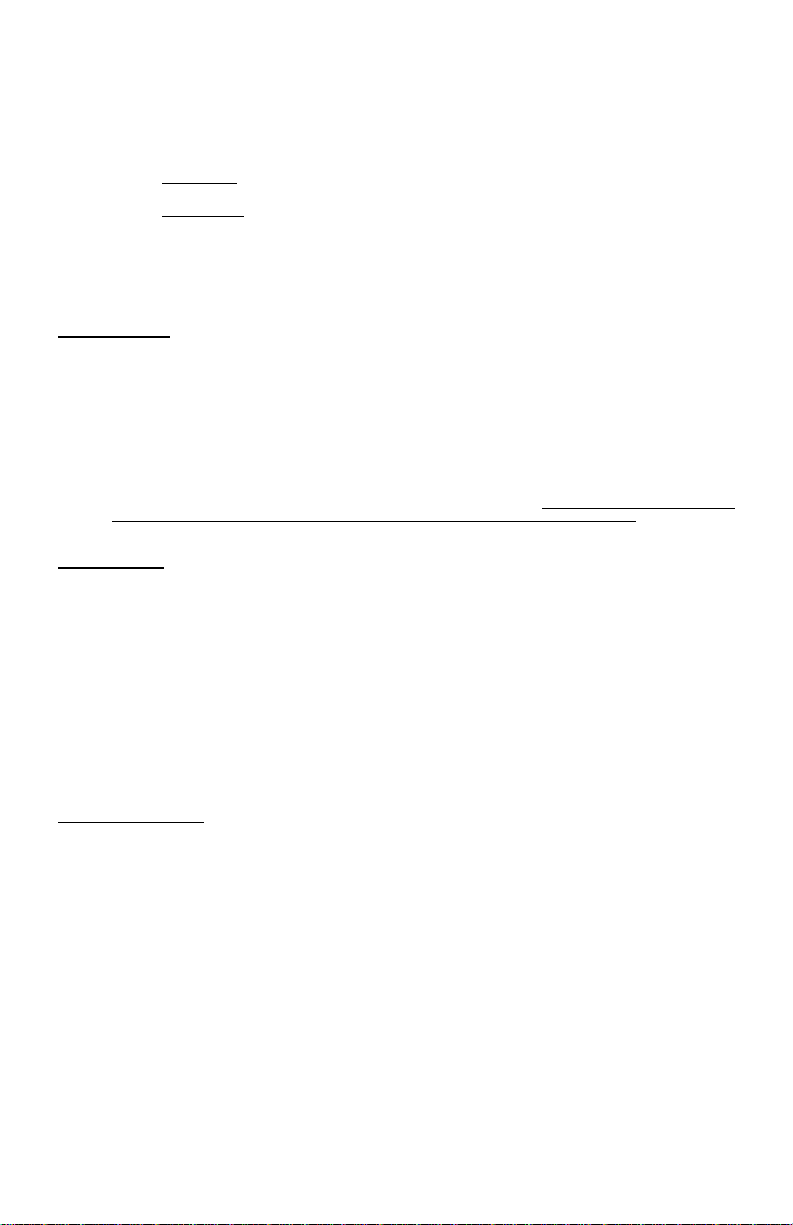
TRACK CONTROLS
32. STRIP SEARCH –moving your finger across the STRIP SEARCH allows for quick navigation through the track.
33. CLEAR / SET –
LEFT DECK –Assign the Video Output of Deck 1 to the Left Crossfader position
RIGHT DECK –Assign the Video Output of Deck 2 to the Right Crossfader position
MASTER DECK ASSIGN (4 Decks Only): Press SHIFT+ this button to make the currently selected Deck's BPM the
Master BPM (all other Decks will sync to this Deck).
34. ADJUST / SLIP –
LEFT DECK (4 Decks Only) –Assign the Video Output of Deck 3 to the Left Crossfader position
RIGHT DECK (4 Decks Only) –Assign the Video Output of Deck 4 to the Right Crossfader position
ADJUST CBG: Press Shift+ this button put the deck in CBG Move mode. Use the deck’s platter to adjust the CBG
for the track. Press Shift+ this button again to return to normal platter control. If track is playing and CBG Move is
activated, the platter’s LED pattern will change to Pattern #1 to signify you are in CBG Move mode.
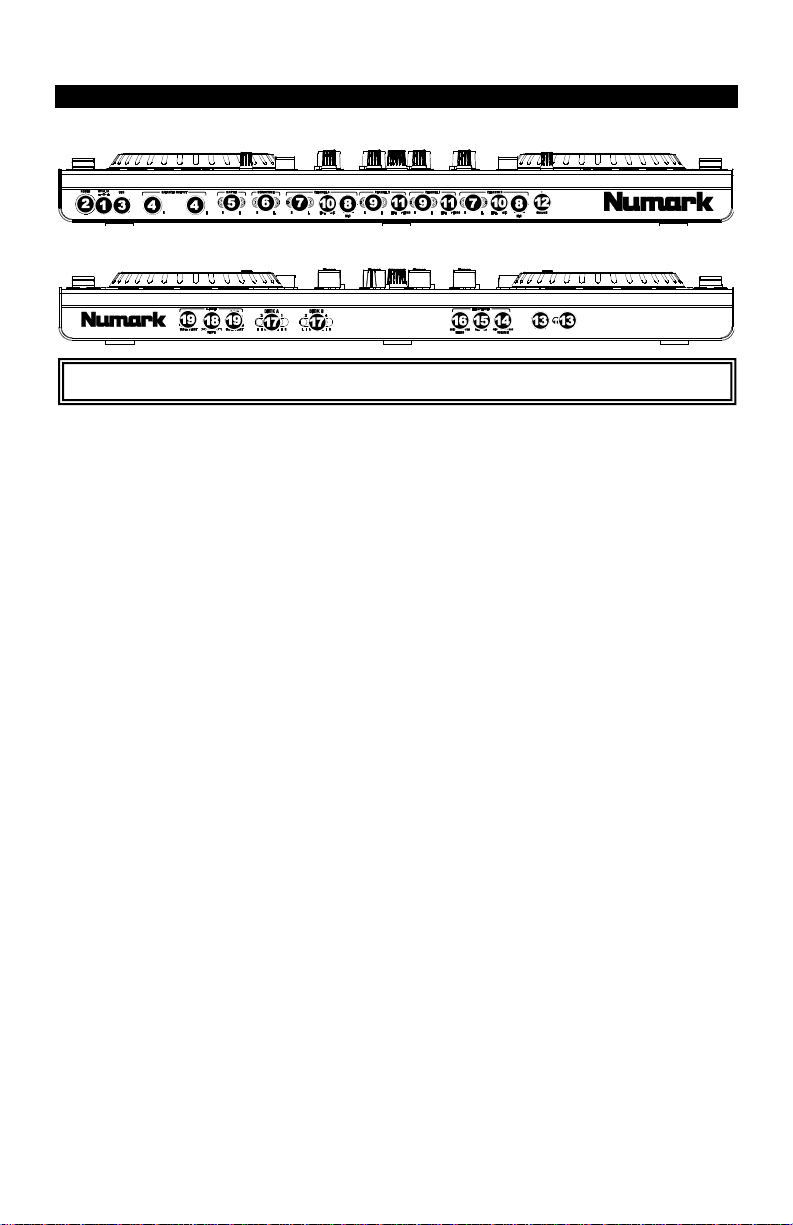
PITCH CONTROLS
35. TAP –Tap this button at the same tempo as the track to help the software detect a more accurate BPM reading.
36. KEY LOCK –
KEY LOCK: Toggle the Key Lock feature of the software on or off.
PITCH RESET: Press and hold for 3 secs and upon release the track’s pitch setting will slowly return to the Zero (0)
position.
37. PITCH RANGE –Press this to adjust the range of the PITCH FADER. Range values are 6,12,18,25,50, and 100%.
38. PITCH FADER –Controls the track’s playback speed. An LED next to the fader will light up when set at 0%.
39. PITCH BEND ( + / –) –Press or hold down either of these buttons to temporarily adjust the track’s playback speed.
When released, the track playback will return to the speed designated by the PITCH FADER.
40. CROSSFADER METER –Visual representation of the crossfader’s position. When viewing the Video Panel the meter
represents the position of the Video Crossfader.
41. TAKEOVER LEDs –Disabled in this software version.
NAVIGATION CONTROLS
42. SCROLL KNOB –Use this knob to scroll through lists of tracks, folders, etc. in the browser. Press it to expand/collapse
the browser ZOOM view mode.
43. FWD / BACK –These buttons move the selector between panels in the browser.
DEFAULT SORT –Press and hold the View button then press BACK to sort the track list by the software’s default
sort setting.
ALBUM SORT –Press and hold the View button then press FWD to sort the track list by the Album field.
44. CRATES (FOLDERS) –Press this to move the selector to the software folders brower.
SONG SORT –Press and hold the View button then press CRATES to sort the track list by the Title field
45. PREPARE (SIDELIST) –Press this to move the selector to the SideList browser.
ARTIST SORT –Press and hold the View button then press PREPARE to sort the track list by the Artist field
46. FILES (TRACKS) –Press this to move the selector to the Tracks browser.
BPM SORT –Press and hold the View button then press FILES to sort the track list by the BPM field
47. LOAD A / LOAD B –Press one of these buttons while a track is selected to assign it to the left or right Deck,
respectively.
AUTO VIDEO TRANSITION –Press and hold the View button then press the LOAD A / B buttons to have the video
crossfader auto transition to the respective side of deck button pushed.