NVIDIA 3D VISION USER GUIDE
System Requirements
Before you begin, please review the following minimum system
requirements to ensure your PC meets the hardware requirements
necessary to enjoy the 3D Vision experience.
For a full list of System Requirements including supported NVIDIA
GPUs, 3D Vision-Ready LCDs, 3D Vision notebooks and other required
components, please visit www.nvidia.com/get3D and select System
Requirements.
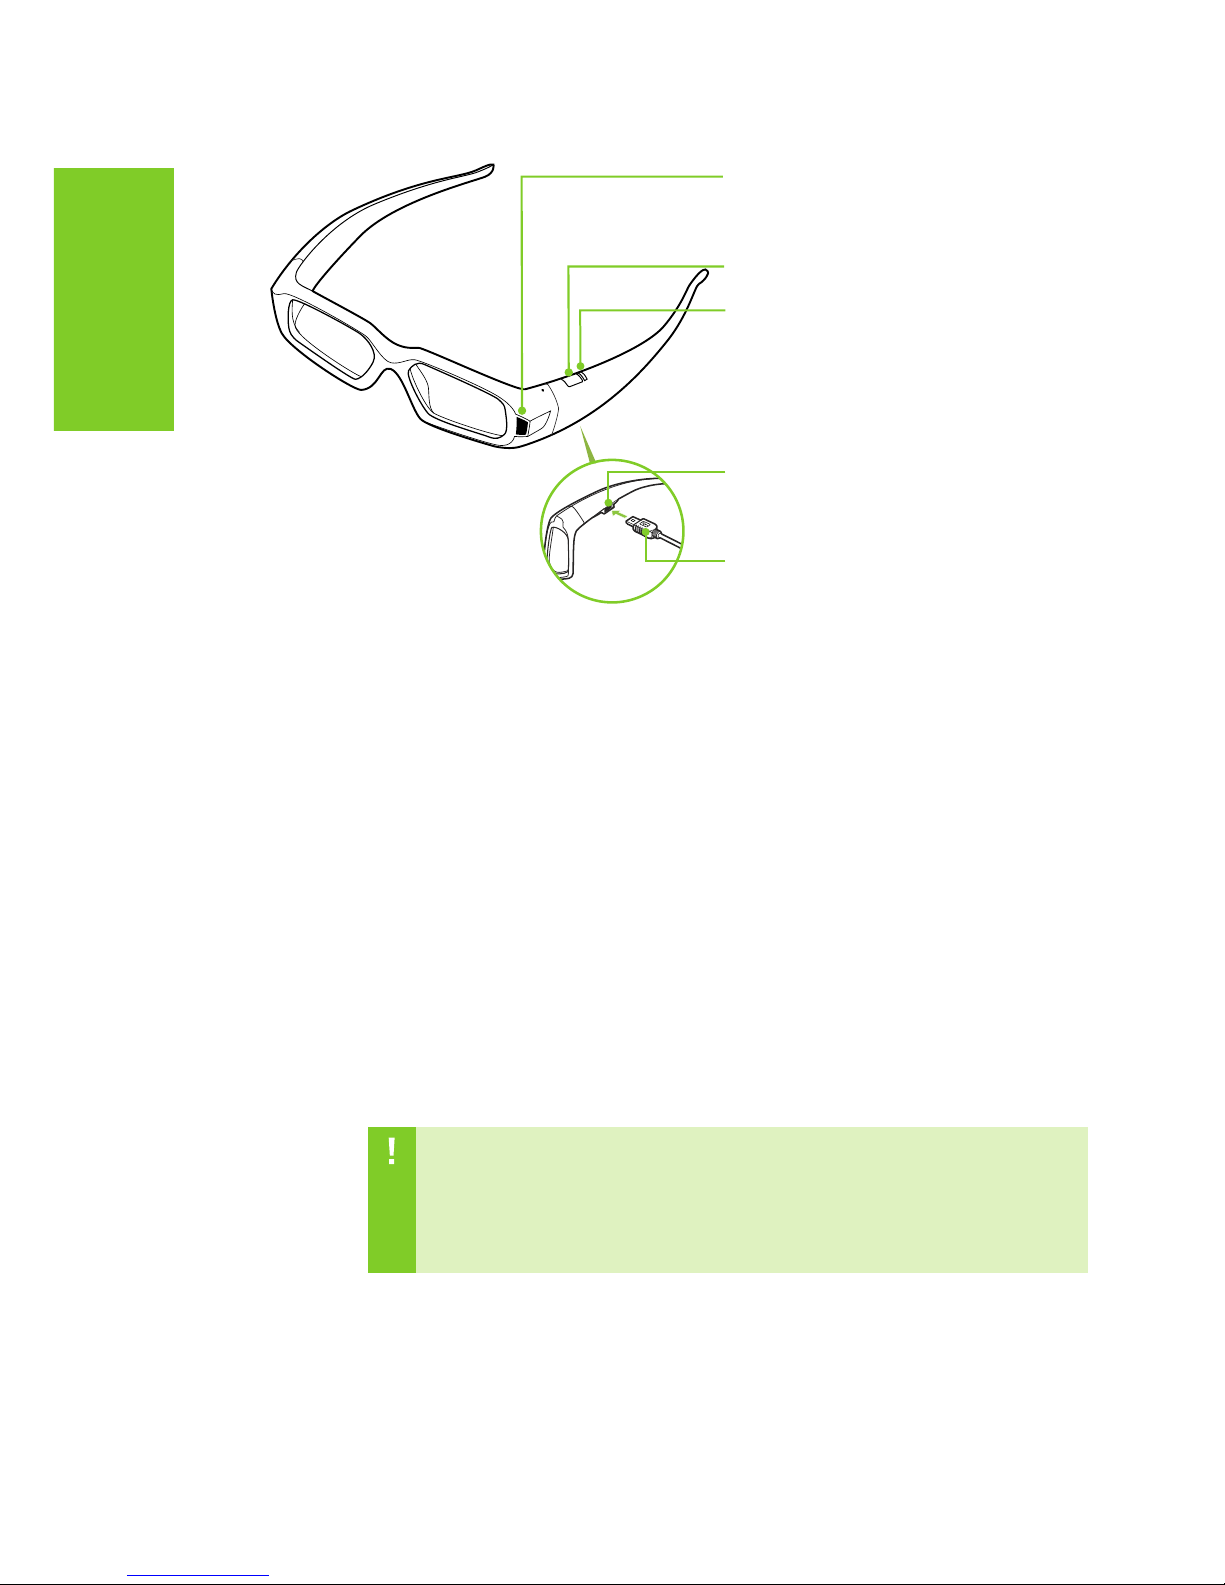
Safety Requirements
Do not wear the wireless glasses in any situations that require
unimpaired visual perception. Do not use the glasses as sunglasses.
Under normal conditions, stereoscopic 3D viewing is safe for any
duration that you would normally view your display. However, some
people may experience discomfort. To minimise the potential for
experiencing visual problems or any adverse symptoms:
> Take the stereoscopic 3D medical test to verify your ability so see
stereoscopic 3D images.
> Maintain a distance no closer than 2 to 2.5 feet away from the
display. Viewing from too close a distance can strain your eyes.
> Take regular breaks, at least 5 minutes after every hour of
stereoscopic 3D viewing.
> Start with the depth at the default of 15%. As you get more
comfortable viewing stereoscopic 3D, you can increase the
depth amount.
> If you experience any of the following symptoms:
• nausea, dizziness, or queasiness,
• headache, or eyestrain,
• blurry vision,
• double vision that lasts longer than a few seconds,
Do not engage in any potentially hazardous activity (for example,
driving a vehicle) until your symptoms have completely gone away.
If symptoms persist, discontinue use and do not resume stereoscopic
3D viewing without discussing your symptoms
with a doctor.