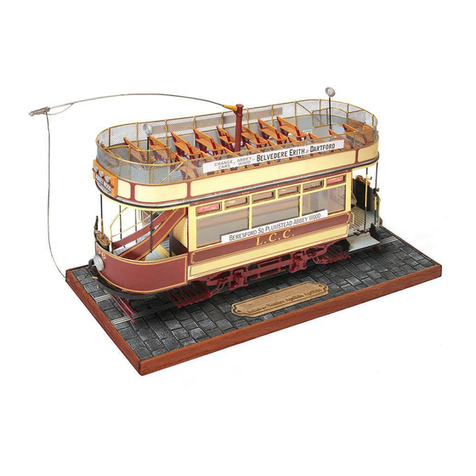
INSTRUCCIONES DE MONTAJE NEW ORLEANS
A. Extraiga la pieza A1 del retal. Para ello, corte los nervios de unión con un cúter. Sitúe la pieza A1 en posición plana con los cuatro orificios destacados, orientados como le muestra la
imagen. Utilice una regla para hallar el centro del suelo A1 y trace una línea que lo divida en dos mitades. Pegue un listón A2, centrado sobre la línea. Para esta operación utilice cola
blanca, (Ref.19200). Complete la longitud del listón con un trozo del mismo tipo. Pegue 5 listones A2 más a cada lado del primero. Después, lije con esponja-lija de grano fino. Aplique
imprimación, (Ref.19142). Después, pinte el suelo de color negro, (Ref.19301). Cuando la pintura seque, destaque los relieves de los listones con pintura blanca, (Ref.19300). Para ello,
utilice la técnica del pincel seco.
B. Lije los listones B1 y tíñalos con tinte sapeli, (Ref.19210). Corte las piezas B1 a la medida indicada en la lista de piezas. Recorte los respaldos de los asientos de la plantilla PL-01. Forre
una cara de los respaldos con las piezas B1. Después, corte los sobrantes a ras de la figura. Forre la otra cara del mismo respaldo y vuelva a cortar los sobrantes. Pegue las piezas B2 en
una sola cara de los respaldos. Observe las imágenes siguientes antes de continuar, debe construir 9 respaldos de un lado y 9 del otro. Después, barnice las piezas obtenidas con barniz,
(Ref.19209). Extraiga las piezas B3 de la plancha que las agrupa. Después, dóblelas a 90º y péguelas en el perfil de los respaldos como le indica la imagen.
C. Extraiga las piezas C1 y C2 de la plancha que las agrupa y líjelas. Después, tiña todas las piezas con tinte sapeli, (Ref.19210). Forre una de las caras de las bases de los asientos C1
con las piezas C3. Observe que las bases tienen un orificio ajustado hacia un lado. Debe forrar 9 piezas de un lado y 9 del otro. Barnice las piezas obtenidas con barniz, (Ref.19209). Pegue
los respaldos sobre los asientos de manera que queden inclinados. Debe obtener 9 asientos de cada lado. Corte a medida y pegue las piezas C4 sobre las piezas C2. Después, pegue las
piezas C2 en los laterales de los asientos.
D. Elimine los restos de los nervios de unión de las piezas D1. Trace una línea a todo lo largo de las piezas D1, a 17mm desde el plano indicado en la imagen. Pegue la pieza D2 ajustada
por debajo de la línea trazada. Pegue las piezas D3 y D4 enrasadas con los orificios de las ventanas. Corte a medida y pegue las piezas D5 centradas contra la pieza D1. Estas piezas
harán de tope para los marcos de las ventanas. Estas operaciones deberá realizarlas con las dos piezas D1.
E. Utilice un punzón para marcar un punto en el centro de cada pieza D5 a la medida indicada en la imagen. Realice orificios ciegos e inserte y pegue un cáncamo B en cada uno de ellos.
Aplique imprimación, (Ref.19142), a las piezas D1 y E1. Después, pinte la cara interior de las piezas de color rojo oscuro, (Ref.19383). Ensamble y pegue las piezas A1, D1 y E1 para formar
el habitáculo del tranvía. Aplique masilla, (Ref.19143), para disimular las uniones de las piezas. Después, lije con esponja-lija de grano fino para unificar las superficies. Pegue las piezas E2
y E3 a ambos lados del conjunto.
F. Utilice una herramienta de corte para cortar y extraer los montantes de las piezas E1. Después, lime para dejar la superficie uniforme. Aplique imprimación, (Ref.19142), a todo el exterior
del conjunto. Después, lije para dejar finas las superficies. Pinte el exterior con pintura de color verde oliva, (Ref.19388). Construya y decore las piezas que le indican las imágenes. Utilice la
plantilla PL-01 para elaborar las piezas de hilo de latón. Pinte todo el fondo del tranvía de color negro, (Ref.19301). Inserte una tuerca F9 en cada orificio hexagonal del suelo y péguela con
pegamento rápido, (Cianocrilato). Pegue encima las piezas F10 para fijar las tuercas.
G. Pegue las piezas G1 a G6 para construir la parte superior de las cabinas. Tape las uniones de las piezas con masilla tapa grietas, (Ref.19143). Después, lije los conjuntos para unificar
las superficies. Aplique imprimación, (Ref.19142) y vuelva a lijar. Inserte y pegue las piezas G7 a G13 para construir la parte inferior de las cabinas. Forre el suelo de las cabinas con las
piezas G15. Forre los frontales con las piezas G16.
H. Aplique masilla tapa grietas a los conjuntos y cuando se seque, lije hasta unificar las superficies. Inserte y pegue la parte superior de las cabinas con la parte inferior. Pegue las piezas H1
para tapar los huecos. Inserte y pegue las piezas H2. De forma a las piezas H3 y péguelas en la parte inferior de los frontales. Imprima y lije hasta que consiga unas superficies finas y
unificadas. Después, pinte las cabinas de color verde oliva, (Ref.19388), rojo oscuro, (Ref.19383), y negro, (Ref.19301). Compruebe el ajuste de las cabinas en los extremos del habitáculo
del tranvía. Utilice una superficie plana para alinear los conjuntos. Después, péguelos de forma definitiva. Construya los bancos con las piezas H4 a H11. Inserte y pegue los bancos y
asientos en el habitáculo.
I-J-K. Construya y decore todos los conjuntos que le indican las imágenes. Deberá utilizar la plantilla PL-01 para elaborar algunas piezas de latón. Extraiga los cristales y ajústelos dentro
del grueso de las ventanas. Pegue las piezas que le indican las imágenes en el tranvía. Las puertas puede pegarlas, o redondear sus ejes para que se puedan abrir y cerrar. Los escalones
los puede dejar abiertos o dejarlos también móviles pegando solamente las bisagras que lo unen a la estructura del tranvía. Añada las barras y los conjuntos en el interior del tranvía. Pegue
las ventanas laterales con sus cristales ya colocados. Coloque las decoraciones que son autoadhesivas.
Construya los conjuntos de la parte inferior del tranvía. Estos conjuntos se fijarán bajo el tranvía mediante unos tornillos. Utilice una varilla o similar para elaborar los muelles. Después, pinte
los conjuntos obtenidos de negro y destaque los relieves con pintura de color plata.
L-M-N. Construya el techo del tranvía siguiendo las indicaciones de las imágenes. Construya los troles y péguelos centrados sobre el techo.
ASSEMBLY INSTRUCTIONS NEW ORLEANS
A. Remove the A1 piece from the stamped piece. To do so, cut the joins with a cutter. Lay piece A1 flat with the four holes highlighted, as shown in the illustration. Use a ruler to find the
centre of the A1 floor and draw a line that divides it into two halves. Glue an A2 slat, centred on the line. Use white glue for this, (Ref.19200). Complete the length of the slat with a piece of
the same type. Glue 5 more A2 slats to each side of the first one. Then, sand with a fine-grained sanding sponge. Apply primer, (Ref.19142). Then paint the floor black, (Ref.19301). When
the paint dries, highlight the relief of the slats with white paint, (Ref.19300). To do this, use the dry brush technique.
B. Sand the B1 slats and dye them with sapele dye, (Ref.19210). Cut parts B1 to the size indicated in the parts list. Cut out the seat backrests of the PL-01 template. Line one side of the
backs using with B1 parts. Next, cut the excess material flush with the figure. Line the other side of the same backrest and re-cut the excess. Glue the B2 parts to a single face of the
backrests. Note the following images before continuing, you must build 9 backs on one side and 9 on the other. Then, varnish the pieces obtained with varnish, (Ref.19209). Remove the B3
pieces from their strip. Then, bend them at 90° and glue them into the profile of the backrests as shown in the illustration.
C. Remove pieces C1 and C2 from their strip and sand them. Then, dye all the pieces with sapele dye, (Ref.19210). Line one of the faces of the C1 seats bases with the C3 parts. Note that
the bases have a hole at one side. You must line 9 pieces on one side and 9 on the other. Varnish the pieces obtained with varnish, (Ref.19209). Glue the backrests onto the seats so that
they are tilted. You must have 9 seats on each side. Cut to size and glue the C4 pieces onto the C2 pieces. Then glue the C2 pieces to the sides of the seats.
D. Remove the remains of the joins from the D1 parts. Draw a line along the length of the D1 parts, 17mm from the plane shown in the image. Glue the D2 piece adjusted below the line you
have drawn. Glue pieces D3 and D4 flush with the window holes. Cut to size and glue the D5 pieces centred against the D1 piece. These pieces will make a stop for the window frames.
These operations must be carried out using the two D1 pieces.
E. Use a punch to mark a point in the centre of each D5 piece of the size shown in the image. Make blind holes and insert and glue one B eyebolt into each one. Apply primer, (Ref.19142), to
parts D1 and E1. Then, paint the inner face of the pieces dark red, (Ref.19383). Assemble and glue parts A1, D1 and E1 to form the tram compartment. Apply putty, (Ref.19143), to disguise
the joints. Then, sand with fine-grained sanding sponge to even out the surfaces. Glue the E2 and E3 pieces to both sides of the assembly.
F. Use a cutter to cut and remove the uprights of the E1 parts. Then, sand to an even surface. Apply primer, (Ref.19142), to the entire exterior of the assembly. Then, sand to smooth out the
surfaces. Paint the outside with olive green paint, (Ref.19388). Build and decorate the pieces as illustrated. Use template PL-01 to make the brass wire parts. Paint the entire bottom of the
tram black, (Ref.19301). Insert an F9 nut into each hexagonal hole in the floor and glue it with super glue, (Cyanoacrylate). Glue the F10 pieces on top to fix the nuts.
G. Glue pieces G1 to G6 to build the top of the compartments. Cover the joints of the pieces with filler, (Ref.19143). Then, sand the assemblies to smooth out the surfaces. Apply primer,
(Ref.19142) and sand again. Insert and glue parts G7 to G13 to build the bottom of the compartments. Line the floor of the cabins with the G15 pieces. Line the fronts with the G16 pieces.
H. Apply filler to the assemblies and when it dries, sand until the surfaces are smooth. Insert and paste the top of the compartments to the bottom. Glue the H1 pieces to cover the gaps.
Insert and glue pieces H2. Shape the H3 pieces and stick them on the bottom of the front. Print and sand until you get thin, even surfaces. Then paint the cabins olive green, (Ref.19388),
dark red, (Ref.19383), and black, (Ref.19301). Check the adjustment of the compartments at the ends of the tram carriage. Use a flat surface to align the sets. Then, glue them in place. Build
the benches with pieces H4 to H11. Insert and glue the benches and seats in the compartment.
I-J-K. Build and decorate all the sets shown in the illustrations. You will need to use template PL-01 to make some of the brass parts. Remove the glass and fit them in the thickness of the
windows. Glue the pieces onto the tram as illustrated. The doors can be glued together, or their hinges can be rounded so that they can be opened and closed. The steps can be left open or
moveable, gluing only the hinges that connect them to the structure of the tram. Add the bars and assemblies inside the tram. Glue the side windows with the glass already in place. Apply
the self-adhesive decoration.
Construct the assemblies of the lower part of the tram. These assemblies will be fixed under the tram by screws. Use a rod or the like to make the springs. Then, paint them black and
highlight the relief with silver paint.
L-M-N. Build the roof of the tram following the directions in the illustrations. Build the trolleys and glue them centred on the roof.
