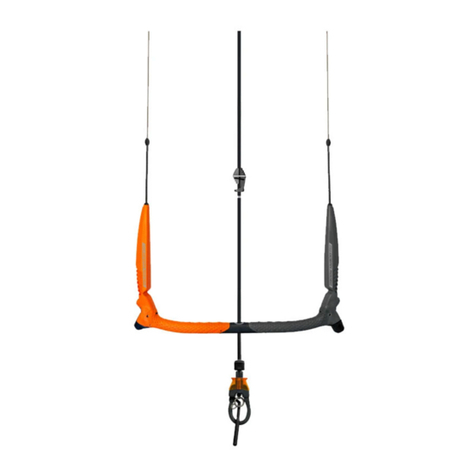
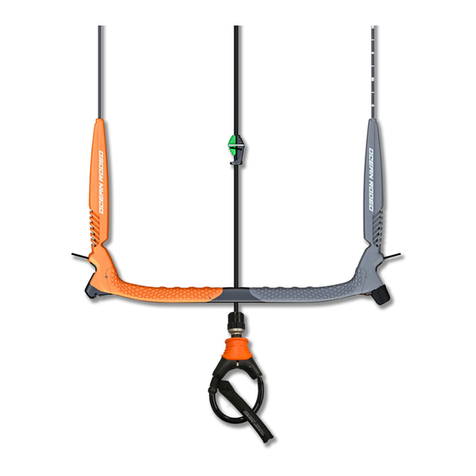
Ocean Rodeo Control User manual

1

2 3
Take a lesson!
THIS MANUAL IS NOT A KITE LESSON! BEFORE YOU LAUNCH YOUR
KITE, TAKE LESSONS FROM A PROPERLY CERTIFIED SCHOOL!
IMPORTANT NOTE
Read this manual thoroughly before using your
new kite control bar. This is not a kiteboarding
instruction manual, nor does it eliminate the
need for professional instruction in the sport
of traction kiting.
The user is therefore advised to obtain such
instruction as well as familiarizing him or
herself with the information in this manual,
prior to the use of the accompanying kite
control bar and line set.
For more information and a listing of certied
schools in your area, visit oceanrodeo.com.
TABLE OF CONTENTS
Caution
Tuning the lines
Back line length adjustment
Using a lock in tube
Trim loop release cuff activation
Trim loop reset after activation
Trim line adjustment
Connecting leash / harness attachment
Kite leash attachment
Kite leash safety release
6
7
9
10
11
12
14
16
17
19
20
21
22
23
23
below bar swivel
Single front line re-ride
Line storage bungees
Storing and caring
Warranty

4 5
C
A
A
B
BG
G
LP
S
S
R
R
I
J
K
N
O
M
H
H
F
QE D
A Back ying lines
B Back line leader
C Front ying lines
D Front line ag out safety
EAbove bar trim cleat
FAbove bar trim handle
GBack line length adjuster
H Bar oats
IBelow bar swivel
J Push away release
KTrim loop
LLock in tube
MLeash attachment ring
NKite leash
O Kite leash release cu
PSafety line
Q Trim line
R Bar
S Bungee line storage

6 7
Caution Safety Warning: kite powered sports can be very dangerous and physically demanding. The
user of this product should understand that participating in kite powered sports may involve serious
injury or death and agree to observe the following safety precautions:
� Get instruction specic to your kite and its
safety systems
� Be rst aid certied and carry rst aid and
rescue devices
� Consult your doctor prior to taking kite
lessons
� Always wear a nationally approved personal
oatation device when on the water
� Dress appropriately for the weather and water
temperatures
� Check your equipment’s condition before
every session looking for signs of use and
potential failure
� Never kite alone
� Do not kite in overpowered or gusty
conditions
� Do not kite in oshore wind conditions
� Before launching your kite at an unfamiliar
location, scout for safety hazards and consult
other kiters in the area for possible concerns
(rocks, reefs, currents, changeable weather,
local ‘best practices’, etc).
� Never launch with obstacles or people closer
than two full line lengths downwind
� Never kite near power lines!
� Never ask a non-kiter to launch or land your
kite!
� Always wear a kite leash! Never wear a boar
leash!
� Always weigh your kites with rocks or sand
when on the beach to prevent inadverten
launch
� Always announce your launch so people around
you can be prepared to move or assist in the
event of a problem
� Do not exceed your ability. Be honest with
yourself
� Never use alcohol or other mind altering drugs
prior to kiteboarding
� Never modify or otherwise alter any safety or
release system
� Never kite if your release system is not fully
functional
TUNING THE LINES
Your kite’s performance relies on properly
tuned lines! Make a habit of checking your
line lengths regularly. Attach all four lines to an
immovable object (nail or screwdriver pushed
into the ground etc.) Pick up the kite bar and
make sure the trim strap is fully extended
[un-cleat the rope and let it pull through the
cleat so the stopper knot is touching the
cleat.] (1)
1 2
Now pull on the bar to check your rear outside
lines. If the bar is not square (perpendicular)
to the center lines then adjust the length using
the knots on the leader line. (2)

8 9
All Lines Equal Length!
With your trim strap fully extended (stopper
knot touching the cleat) your back lines and
front lines must be equal in length. If at any
time your rear lines are shorter than your front
lines your kite will not y properly. Lines stretch
so please check them regularly! (3)
3
back line length adjustment
Your back ying lines can be adjusted longer or
shorter by sliding the neoprene covers up and
adjusting the larks head knots. (1)
Move the larks head connection up or down to
correct uneven back line lengths. (2)
When your line lengths are equal, slide the
neoprene covers down covering the loose
ends of the back leader lines. (3)
1 2 3

10 11
using a lock in tube
The lock in tube helps keep your trim loop
hooked in if you have slack or minimal tension
on your lines while riding.
1 2 3
TRIM LOOP RELEASE CUFF ACTIVATION
To separate yourself from the trim loop in an emergency situation, push the orange release cu
(located on the chicken loop hub) away from you with force.
To use the lock in tube simply ex the tubing
into the head of the harness, under the trim
loop.
So long as your kite leash is attached to the center line leash attachment, the control bar will ride up
the center safety line and depower the kite.

12 13
Trim loop reset after activation
To reset your trim loop, push the metal retain-
ing pin down (1)
Slide the metal box ring over the retaining pin
and push into place (2)
Push metal retaining ring up towards release cu
(3)
Holding pin in place, slide release cu up (4)
Slide retaining pin under release cu and let
cu snap back into place (5)

14 15
Trim line adjustment
Trim line set to maximum power (1)
Pull down on trim line to depower your kite (2)
1 2 3 4
Pull down and out on the trim line to release
from cleat (3)
Allow trim line to travel back to a longer length
to add power (4)

16 17
1 2 3
connecting Leash / harness attachment KITE LEASH ATTACHMENT
1 2
If your harness does not have a leash attach-
ment point use the provided leash tether.
Slide leash tether under your harness
spreader bar (1)
Wrap tether around the spreader bar and
through the tether’s opening (2)
Pull tight and secure the velcro to hold the
tether in place (3)
NOTE! It is incredibly important you attach your
leash to the kite with the leash release cuff closest
to your harness!
Slide the “Riders End” loop through the leash
tether D ring (1)

18 19
3 4
PUSH
Kite leash Safety release
1 2
Slide the release cu up (3)
Slip the retaining pin under the cu and let it
snap back in place (4)
NOTE: Always test your safety systems!
To eject your leash, simply push the cu away
from you (1)(2)

20 21
Single front line re-ride
When activated, this control bar’s safety
release system depowers your kite by releas-
ing tension on 3 of the 4 ying lines, allowing
the kite to depower and remain safely tethered
to you by one front ying line connected to
your leash.
Below bar swivel
twisted front lines can eect the operation of your front line
re-ride. In order to correct twisted front lines simply grasp the
below the bar swivel head (located at the top of the trim loop) and
turn it in the dirdectin opposite the twist in the lines.

22 23
Storing and caring
To avoid tangles we suggest you wind your
lines in a gure 8 pattern around your bar
ends. This ‘end over end’ approach will
prevent coils in your lines which will lead to
tangles and allow you to smoothly run them
out again for your next session.
Warning!
Knots can easily form in your ying lines! Espe-
cially close to the kite end of your lines. Always
inspect for and remove knots when found. Knots
weaken your ying lines! Lines with immovable
knots should be replaced!
warranty
All kite control bars are covered by a
one year warranty oered to the original
purchaser on workmanship and materials.
Warranty is limited to the repair or replace-
ment at Ocean Rodeo’s sole discretion. This
warranty does not cover damage caused by
normal wear and tear, misuse or negligence
and does not extend to any other equipment
possibly damaged in the event of a product
failure.
This warranty is invalid and void if unau-
thorized repairs or modications have been
made to the equipment. Bars used for
professional or commercial use (rentals,
instruction, etc) are covered under a 30 day
warranty only. Repairs or alterations not
covered by warranty will be billed to the
customer.
Line storage bungees
Use bar end line bungees to secure your kite
lines for tanglr free storage.

Table of contents
Other Ocean Rodeo Aircraft manuals

Ocean Rodeo
Ocean Rodeo SHIFT GEN 3 User manual

Ocean Rodeo
Ocean Rodeo ALUULA G Series Setup guide

Ocean Rodeo
Ocean Rodeo Stick-Shift User manual

Ocean Rodeo
Ocean Rodeo ALUULA User manual

Ocean Rodeo
Ocean Rodeo FLITE User manual

Ocean Rodeo
Ocean Rodeo Stick-Shift Gen 2 User manual

Ocean Rodeo
Ocean Rodeo SLE Series User manual

Ocean Rodeo
Ocean Rodeo Go Joe User manual