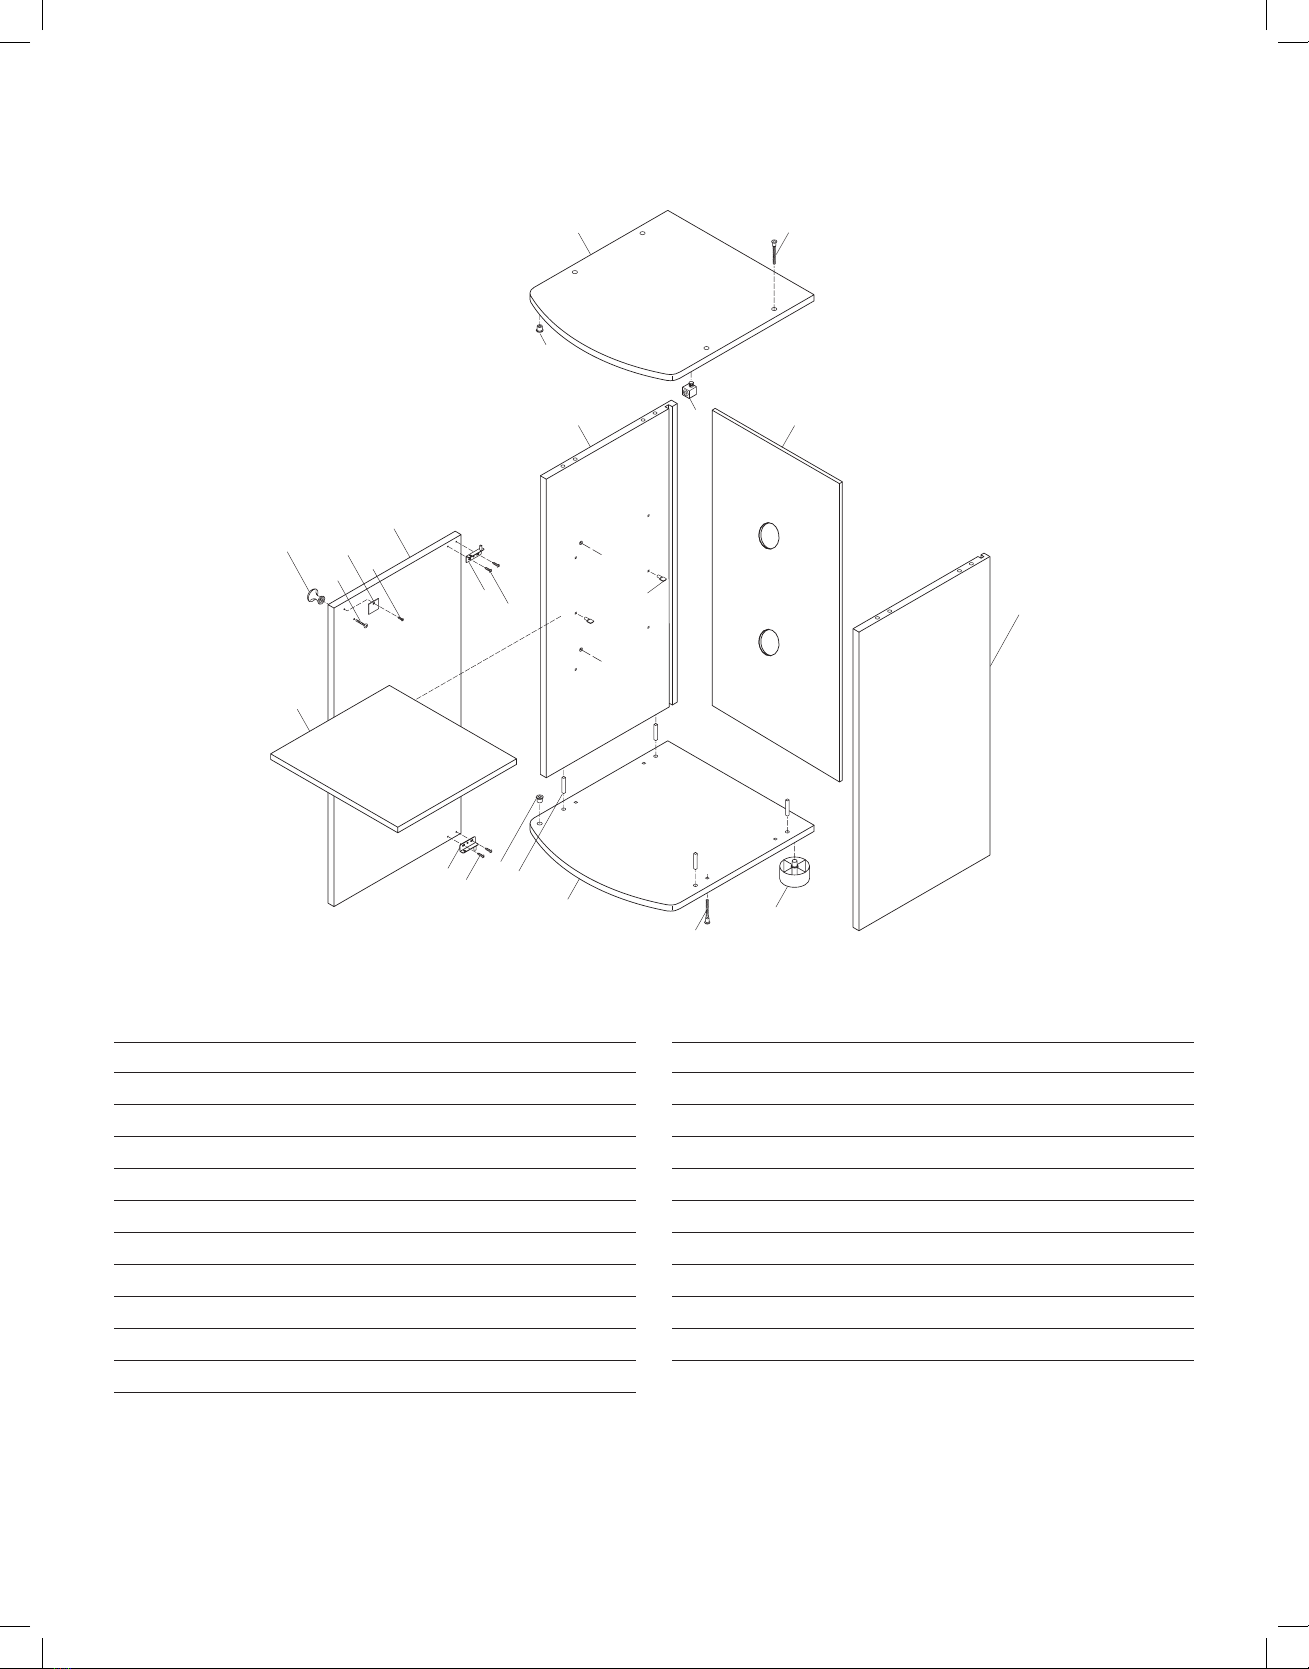
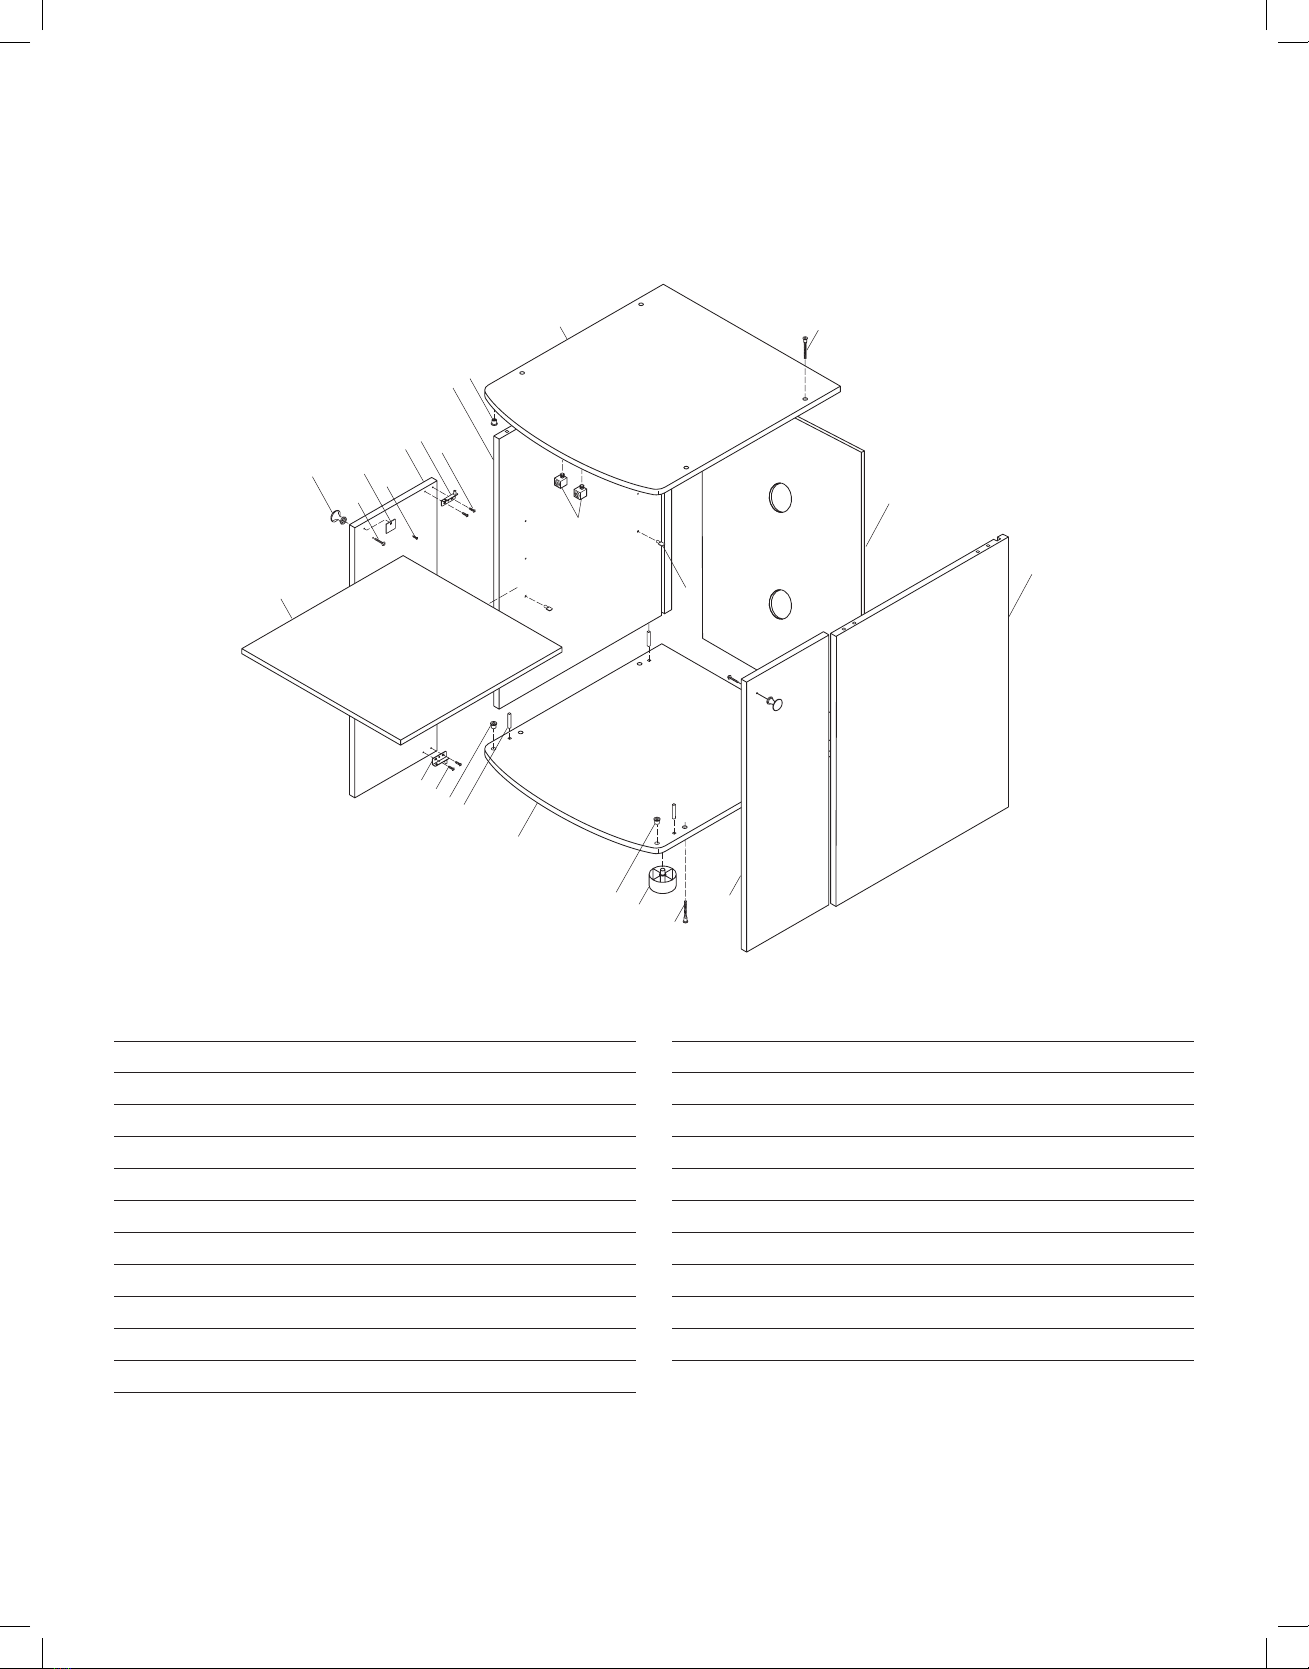
Foot
Hex
Wrench
Hex
Socket-Head
Screws
Strike Plate
Doorknob Hinge
Hinge
Wooden Pegs
Grommets
Wooden Pegs
Assembly Instructions –
Size 29
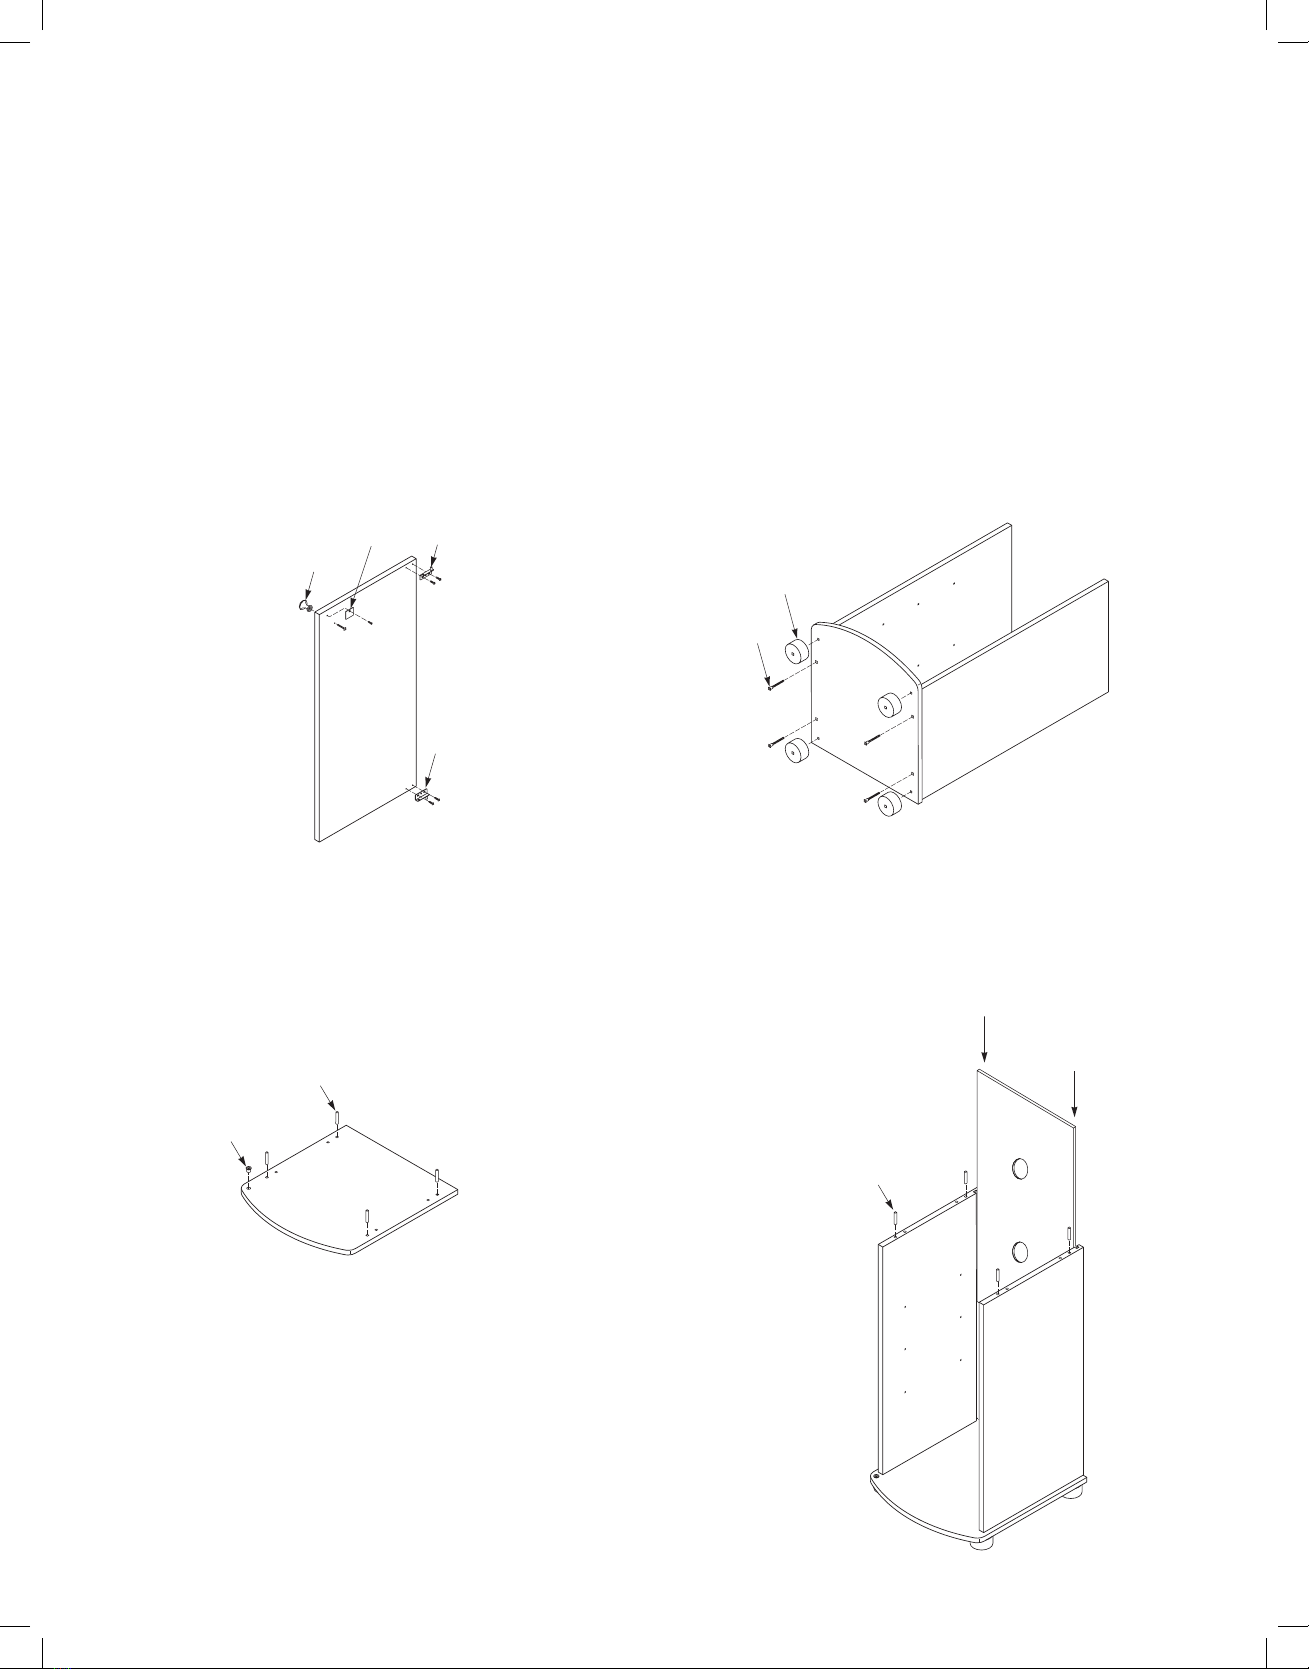
Step 1
1. Attach two hinges to inside of each door panel
by screwing two short wood screws (1/2 inch)
through each hinge into predrilled holes.
2. Attach strike plate to inside of each door panel
by screwing one short wood screw (3/8 inch)
into predrilled hole.
3. Insert medium screw (1 inch) through predrilled
hole in each door and attach knob.
Step 4
1. Stand upright.
2. Slide back into grooves on both
the side panels.
3. Insert four wooden pegs into
predrilled holes in side panels.
Step 2
1. Insert four wooden pegs into predrilled holes
on bottom panel.
2. Insert two grommets into hinge holes on
bottom panel.
Step 3
1. Attach side panels to bottom panel by aligning
wooden
pegs with predrilled holes and sliding into place.
2. Screw four hex socket-head screws into predrilled
holes in bottom panel using provided hex wrench.
(Do not overtighten.)
3. Attach stand feet into holes on the underside of
the bottom panel by pushing into predrilled holes.
6