manuals.online logo
Brands
  1. Home
  2. •
  3. Brands
  4. •
  5. OEM
  6. •
  7. Speakers
  8. •
  9. OEM Architech PS-525 User manual

OEM Architech PS-525 User manual

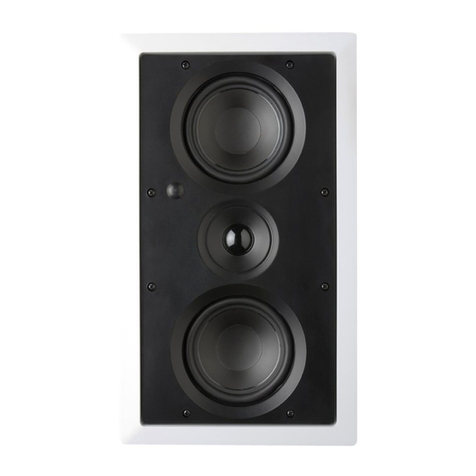
RECTANGULAR 5 1/4" 2-WAY MTM SPEAKER PS-525 LCRS
5 1/4" LCRS
Congratulations! You have
purchased a high quality stereo
loudspeaker. When matched to
comparable electronic equipment,
expect years of quality high fidelity
sound. We are constantly striving
to provide the very best technology
has to offer.
The following manual is designed
to give you, the installer or owner,
basic information as to the
speaker’s installation and operation.
It is beyond the scope of this
manual to go into all the details that
must be taken into consideration in
a sophisticated high fidelity system.
If you have any further questions
regarding this speaker which are
not answered by this manual,
please feel free to contact your
local dealer.
GENERAL DESCRIPTION
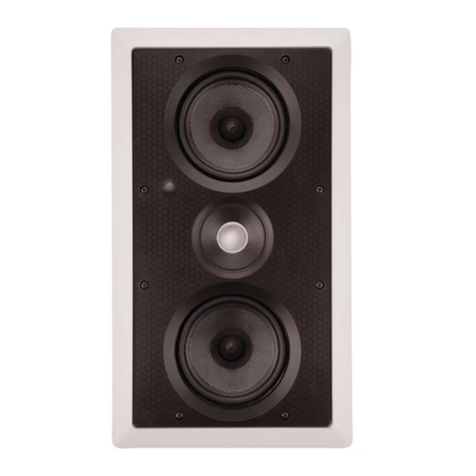
The 5 1/4" two-way LCRS
speaker has two magnetically
shielded 5 1/4" Woven Kevlar
woofers with linear long throw butyl
rubber edge surrounds. Pivoting 1"
lens-free aluminized ferro-fluid
cooled dome tweeters are utilized
for excellent high frequency
dispersion throughout the entire
listening environment.
SHIPPING DAMAGE
Each speaker is thoroughly tested
before it leaves the factory.
However, in shipment, accidents
may occur. Please inspect your
speakers carefully when you
receive them to make sure there is
no damage. If there is, please
notify your dealer, or supplier
immediately for assistance. If you
received your speakers by public
transportation, report the damage at
once.
AMPLIFIER OPERATION
The 5 1/4" two-way LCR speaker
is equipped with a special
automatic polyswitch circuit which,
when overdriven, will automatically
restrict electrical current to the
tweeter to prevent damage. The
circuit will automatically re-engage
once the volume is turned down or
the problem is removed. This
normally takes about thirty (30)
seconds to occur.
The speaker will perform well with
amplifiers from 15 to 150 Watts
RMS. However, any speaker can
be damaged or its protective
circuitry engaged by any size
amplifier that is being overdriven
into clipping. “Amplifier clipping” is
a phrase used to describe a
condition when, because of the
volume demand, an amplifier is
being asked for more power than it
can give. If you should find that
your protective circuits on the
tweeter are activated often, please
consider reducing the volume at
which you normally play the
speaker or purchasing a larger
amplifier with more reserve power.
DAMAGE DONE TO A SPEAKER
BY CLIPPING IS NOT COVERED
UNDER THE WARRANTY.
SPEAKER PLACEMENT
Placement of the Wall Mounted
Speakers in your room should be
carefully considered. They should
be located where they will provide
you with the best possible sound
and the greatest ease of
installation.
It is beyond the scope of this
publication to discuss all of the
various aspects of speaker
placement. Please feel free to
contact your dealer.
WIRING
To achieve maximum performance
from your new speakers, we
strongly suggest the use of special
low inductance stereo cable. There
are many good brands presently on
the market. The cable should be 16
gauge or larger. Speaker wire
smaller than 16 gauge, which is
sometimes clear coated, will
decrease your speaker’s
performance. The larger the wire
is, the better. For a proper and safe
installation it is important when
installing your speakers and/or
running wire through your house
that you adhere to all local codes
and regulations. We suggest that a
professional be consulted in order
to maximize your system’s
performance. The following,
however, are just a few
suggestions:
1. Try to keep the wire length to a
minimum. Runs of over 50 feet
should have 16 gauge or heavier
wire.
2. Avoid routing speaker cables
immediately parallel to electrical
cables. This will help reduce
hum and RF interference.———
15 3/4"
3 1/2" 9"
Width 7 7/8"
Height 14 7/16"
Depth 3 1/2"
Cut-out Dimensions
3. In securing your wire, do not
staple or nail through the
insulation. By doing so, a short
could occur in your wire and not
only significantly reduce your
system’s performance but
damage your electronics, i.e.
amplifier, as well.
4. Allow about 2 ½ feet of free wire
at the cut-out to aid in the ease
of installation of your speakers.
This is also helpful if you should
have to remove the speaker
from the wall again for any
reason.
5. In checking your speakers, make
sure proper phasing is
maintained. Simply put, this
means being sure the same wire
which is hooked to the positive
terminal of the amplifier is
hooked to the positive terminal
of the speaker. It is important to
check this on all speakers. If
one speaker is hooked up
incorrectly, or out of phase, the
quality of your bass will be
seriously impaired.
INSTALLATION
As the diagrams show, the
speaker utilizes a metal mounting
ring which, after tightening with the
screws provided, acts as a clamp to
hold the speaker in place.
To aid in speaker performance, a
fibrous material, such as fiberglass
or polyester fiber, may be placed
behind the speaker to help
eliminate unwanted sound from
being transmitted into adjoining
rooms.
Professional installers use quality
equipment. The better the
equipment, the better the installation.
Once you determine where you wish
the speakers to be placed, do the
following:
Using the paper template provided
and the proper equipment, cut the
appropriate sized hole in the wall
making sure that where you wish the
speakers to be placed will not be
obstructed by a stud or other material
hidden in the wall. On drywall, cuts
are best made with a keyhole saw.
If it was done correctly, you should
be able to reach the speaker wire
through the hole. Pull the wire out of
the wall and hook it up to the
terminals on the back of the speaker
assembly, observing polarity (+ & -).
Install the frame and mounting
ring assembly by passing the black
mounting ring through the cut-out as
illustrated above (see figures 1 & 2).
Next, verify that the speaker frame
fits into the cut-out. The white
frame should fit snugly and
smoothly in the cut-out hole.
However, if the hole should have
been cut a little too large, there is
an overlapping frame on the
speaker that will cover this.
Once the frame is in place, begin
alternately tightening the screws
until the mounting ring is up against
the back side of the wall board
being careful not to over tighten
(see fig. 3). Insert speaker into
frame and install the remaining
screws (see fig. 4). Start with the
inner pair of screws followed by the
top pair and then the bottom pair.
Be careful not to over-tighten.
12
4
3
OEM Systems Company, Inc.
www.oemsystems.com
WIRING (continued)
Do not over tighten
these screws

Other OEM Speakers manuals

OEM Sound Terrain ST-6 User manual

OEM

OEM Sound Terrain ST-6 User manual

OEM Sound Terrain SS-84G User manual

OEM

OEM Sound Terrain SS-84G User manual

OEM PE-W620-LCRSf User manual

OEM

OEM PE-W620-LCRSf User manual

OEM Preference K-6LCRS User manual

OEM

OEM Preference K-6LCRS User manual

OEM Presence A-505 User manual

OEM

OEM Presence A-505 User manual

OEM A-LCRS User manual

OEM

OEM A-LCRS User manual

OEM Architech AP-525 LCRS User manual

OEM

OEM Architech AP-525 LCRS User manual

OEM Presence A-650 User manual

OEM

OEM Presence A-650 User manual

OEM Rs-62 User manual

OEM

OEM Rs-62 User manual

OEM Architech AP-601 User manual

OEM

OEM Architech AP-601 User manual

OEM Sound Terrain RS-68 User manual

OEM

OEM Sound Terrain RS-68 User manual

OEM Preference Loudspeaker User manual

OEM

OEM Preference Loudspeaker User manual

OEM Architech PS-615 User manual

OEM

OEM Architech PS-615 User manual

OEM SE-694KE User manual

OEM

OEM SE-694KE User manual

OEM PS-601 User manual

OEM

OEM PS-601 User manual

OEM Presence Elite PE-620f User manual

OEM

OEM Presence Elite PE-620f User manual

OEM AP-802 User manual

OEM

OEM AP-802 User manual

OEM Endeavor IO-510 User manual

OEM

OEM Endeavor IO-510 User manual

OEM SC-602E User manual

OEM

OEM SC-602E User manual

OEM A-525 User manual

OEM

OEM A-525 User manual

OEM Presence Elite PE-620LCRSf User manual

OEM

OEM Presence Elite PE-620LCRSf User manual

OEM RS-6B User manual

OEM

OEM RS-6B User manual

OEM Endeavor IO-505 User manual

OEM

OEM Endeavor IO-505 User manual

OEM Architech PS-601 User manual

OEM

OEM Architech PS-601 User manual

Popular Speakers manuals by other brands

Logitech Z-5 quick start guide

Logitech

Logitech Z-5 quick start guide

Majestic ORION instruction manual

Majestic

Majestic ORION instruction manual

Power Dynamics 952.590 instruction manual

Power Dynamics

Power Dynamics 952.590 instruction manual

Martin Audio DD6 - SCHEMA manual

Martin Audio

Martin Audio DD6 - SCHEMA manual

Tivoli Audio Model Two quick start guide

Tivoli Audio

Tivoli Audio Model Two quick start guide

NHT SB3 user manual

NHT

NHT SB3 user manual

iLive IBR2807DP instruction manual

iLive

iLive IBR2807DP instruction manual

Toa GS-302 instruction manual

Toa

Toa GS-302 instruction manual

DaytonAudio B652-AIR user manual

DaytonAudio

DaytonAudio B652-AIR user manual

Monitor Audio Airstream s150 instruction manual

Monitor Audio

Monitor Audio Airstream s150 instruction manual

Alcons LR28 manual

Alcons

Alcons LR28 manual

Dell AC411 user manual

Dell

Dell AC411 user manual

HYPE ES-14002BT Operation manual

HYPE

HYPE ES-14002BT Operation manual

FINE AUDIO NV-03345 instruction manual

FINE AUDIO

FINE AUDIO NV-03345 instruction manual

Conceptronic HOYT 03 Series quick guide

Conceptronic

Conceptronic HOYT 03 Series quick guide

Viking Electronics 22TB-IP quick start guide

Viking Electronics

Viking Electronics 22TB-IP quick start guide

DAD Event series user manual

DAD

DAD Event series user manual

Ozaki C-MOUTH EM98725 Brochure & specs

Ozaki

Ozaki C-MOUTH EM98725 Brochure & specs

manuals.online logo
manuals.online logoBrands
  • About & Mission
  • Contact us
  • Privacy Policy
  • Terms and Conditions

Copyright 2025 Manuals.Online. All Rights Reserved.