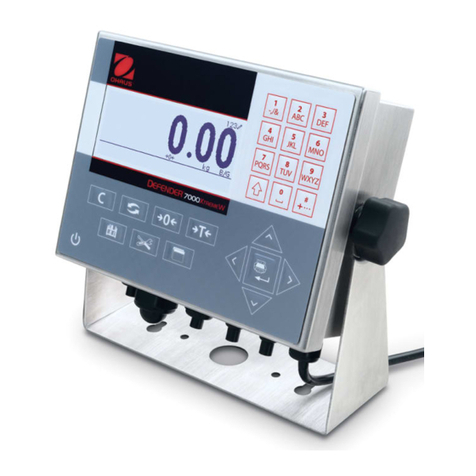
OHAUS CKW-55 User manual

CKW-55 Indicator
and
CKW Series Scale
Instruction Manual
T


Ted Xia
President
Ohaus Corporation
Pine Brook, NJ USA
Urs Muller
General Manager
Ohaus Europe
Greifensee, Switzerland
Ohaus Corporation, 19A Chapin Road, P.O. Box 2033, Pine Brook, NJ, 07058-2033, USA
Declaration of Conformity We, Ohaus Corporation, declare under our sole responsibility that the instruments listed below are in conformity with the directives
and standards mentioned.
Model/Type CKW-55, CKW3R55, CKW6R55, CKW15L55, CKW30L55
EC Marking: EC Directive Applicable Standards
EU 73/23/EEC
Low Voltage
89/336/EEC
Electromagnetic compatibility
EN45501:1992 1)
For non-automatic weighing instruments used in an Article 1, 2.(a) application, additional metrological marking according to Annex IV of Council
directive 90/384/EEC must be attached to the instrument
90/384/EEC
Non-Automatic Weighing Instruments
Date: October 1, 2004
1) Valid only for CKW-55 terminals in connection with approved load cells
EN60950-1: 2003
EN61326-1:1997 +A1:1998 +A2: 2001
04
0103
i

ii
Marking
R
CUS
Compliance to the following standards is indicated by the corresponding marking on the product.
UL60950-1 : 2003
AS/NZS4251.1, AS/NZS4252.1
NSF CRITERIA C-2-1983
NSF/ANSI /3-A 14159-1 - 2002
FCC Note
This equipment has been tested and found to comply with the limits for a Class B digital device, pursuant to Part 15 of the FCC Rules. These limits are
designed to provide reasonable protection against harmful interference in a residential installation. This equipment generates, uses and can radiate radio
frequency energy and, if not installed and used in accordance with the instructions, may cause harmful interference to radio communications. However,
there is no guarantee that interference will not occur in a particular installation. If this equipment does cause harmful interference to radio or television
reception, which can be determined by turning the equipment off and on, the user is encouraged to try to correct the interference by one or more of the
following measures:
• Reorient or relocate the receiving antenna.
• Increase the separation between the equipment and receiver.
• Connect the equipment into an outlet on a circuit different from that to which the receiver is connected.
• Consult the dealer or an experienced radio/TV technician for help.
Industry Canada Note
This Class B digital apparatus complies with the Canadian ICES-003.
Cet appareil numérique de la classe B est conforme à la norme NMB-003 du Canada.
ISO 9001 Registration
In 1994, Ohaus Corporation, USA, was awarded a certificate of registration to ISO 9001 by Bureau Veritus Quality International (BVQI), confirming that the
Ohaus quality management system is compliant with the ISO 9001 standard’s requirements. On May 15, 2003, Ohaus Corporation, USA, was re-registered
to the ISO 9001:2000 standard.
Standard

CKW-55 CHECKWEIGHER EN-1
1. INTRODUCTION ........................................................................................................................ EN-5
1.1 Description ............................................................................................................................. EN-5
1.2 Features .............................................................................................................................. EN-5
1.3 Safety Precautions................................................................................................................... EN-6
1.3.1 Relay Option Safety Precautions..................................................................................... EN-6
2. INSTALLATION ......................................................................................................................... EN-7
2.1 Unpacking and Checking ........................................................................................................ EN-7
2.2 Selecting the Location ............................................................................................................. EN-7
2.3 Connecting Power ................................................................................................................... EN-7
2.3.1 AC Power...................................................................................................................... EN-7
2.3.2 Battery Power (Optional Equipment) .............................................................................. EN-7
2.4 Initial Calibration ..................................................................................................................... EN-8
3. OPERATION .............................................................................................................................. EN-8
3.1 Overview of Parts and Controls................................................................................................. EN-8
3.2 Control Functions .................................................................................................................. EN-10
3.3 Menu ............................................................................................................................ EN-11
3.3.1 Menu Structure ........................................................................................................... EN-11
3.3.2 Menu Navigation ........................................................................................................ EN-12
3.4 Turning Indicator On/Off ......................................................................................................... EN-12
3.4.1 Turning On ................................................................................................................. EN-12
3.4.2 Turning Off.................................................................................................................. EN-12
3.4.3 Stabilization................................................................................................................ EN-12
3.5 Application Modes ................................................................................................................ EN-13
3.5.1 Weighing.................................................................................................................... EN-13
Zero Operation ......................................................................................................... EN-13
Basic Weighing ........................................................................................................ EN-13
Manual Tare ............................................................................................................ EN-13
Preset Tare............................................................................................................... EN-13
Auto-Tare................................................................................................................. EN-14
Auto-Tare Accept ...................................................................................................... EN-14
Displaying Gross, Net, Tare ...................................................................................... EN-14
Changing Units of Measure ....................................................................................... EN-14
Printing Data ............................................................................................................ EN-14
Accumulation Operation ........................................................................................... EN-15
3.5.2 Checkweighing ........................................................................................................... EN-16
Bar Graph, Beeper and Weight Display Indication ...................................................... EN-16
Summary of Checkweigh Key Functions .................................................................... EN-16
Programming Accept Range by Numeric Key Entry .................................................... EN-17
Programming Target, Minimum and Maximum Variance Values ................................ EN-18
Programming Target and Minimum and Maximum % Variance ................................. EN-19
TABLE OF CONTENTS FOR CKW-55 INDICATOR Page

EN-2 CKW-55 CHECKWEIGHER
Normal Checkweighing Operation ............................................................................. EN-20
Negative Checkweighing Operation ........................................................................... EN-20
Zero Checkweighing Operation.................................................................................. EN-21
3.5.3 Library Operation ........................................................................................................ EN-22
Summary of Library Key Functions............................................................................ EN-22
Entering and Editing Library Data .............................................................................. EN-22
Loading an Existing Library to the Active Checkweigh Mode ....................................... EN-24
Reviewing Library Data ............................................................................................. EN-25
3.6 Scale Settings ....................................................................................................................... EN-25
3.6.1 Setup Menu ................................................................................................................ EN-25
3.6.2 Readout Menu ............................................................................................................ EN-27
3.6.3 Mode Menu ................................................................................................................ EN-28
3.6.4 Print Menu .................................................................................................................. EN-31
3.6.5 Communication Menu................................................................................................. EN-33
3.6.6 I/O Menu .................................................................................................................... EN-35
3.6.7 GMP Data Menu ......................................................................................................... EN-36
3.6.8 Lockout Menu ............................................................................................................ EN-37
3.6.9 Hardware Lockswitch .................................................................................................. EN-38
4. CARE AND MAINTENANCE .......................................................................................................... EN-39
4.1 Calibration ............................................................................................................................ EN-39
4.1.1 Span Calibration ......................................................................................................... EN-39
4.1.2 Linearity Calibration..................................................................................................... EN-40
4.1.3 Calibration Test ........................................................................................................... EN-41
4.1.4 Geographical Adjustment Factor .................................................................................. EN-42
4.1.5 GMP Calibration Printout .............................................................................................. EN-44
4.2 Cleaning ............................................................................................................................ EN-45
4.3 Troubleshooting.................................................................................................................... EN-45
4.4 Service information................................................................................................................ EN-45
4.5 Battery Replacement .............................................................................................................. EN-46
4.5.1 Lithium Battery Replacement ........................................................................................ EN-47
4.5.2 Rechargeable NIMH Battery Replacement ..................................................................... EN-47
5. TECHNICAL DATA ....................................................................................................................... EN-48
5.1 Drawings and Dimensions .................................................................................................... EN-48
5.2 Technical Data ...................................................................................................................... EN-50
5.3 Specifications ....................................................................................................................... EN-50
TABLE OF CONTENTS FOR CKW-55 INDICATOR (Cont.) Page

CKW-55 CHECKWEIGHER EN-3
TABLE OF CONTENTS FOR CKW-55 INDICATOR (Cont.) Page
6. ACCESSORIES AND OPTIONS ..................................................................................................... EN-51
6.1 Available Options .................................................................................................................. EN-51
6.1.1 Relay Option................................................................................................................... EN-51
6.1.2 RS485/422 Option .......................................................................................................... EN-51
6.1.3 Rechargeable Battery option ............................................................................................ EN-51
APPENDIX A MAKING CONNECTIONS TO THE INDICATOR................................................................... EN-53
A.1 Load Cell Connections........................................................................................................... EN-53
A.2 Jumper Positions .................................................................................................................. EN-54
A.3 Interface Connections ............................................................................................................ EN-54
A.3.1 Connecting RS232 Interface Cable ................................................................................... EN-54
A.3.2 Connecting External Input Device (Not supplied) .............................................................. EN-54
APPENDIX B LEGAL FOR TRADE ...................................................................................................... EN-55
B.1 Setup Procedure ................................................................................................................... EN-55
B.2 Locking Metrological Parameters ........................................................................................... EN-55
B.3 Verification ............................................................................................................................ EN-56
B.4 Sealing ............................................................................................................................ EN-56
APPENDIX C CKW INDICATOR MOUNTING ......................................................................................... EN-59
APPENDIX D SERIAL COMMUNICATION ........................................................................................... EN-61
D.1 Interface Commands ............................................................................................................. EN-61
APPENDIX E CAPACITY AND GRADUATION TABLE ............................................................................ EN-62
Limited Warranty ........................................................................................................................... EN-63

EN-4 CKW-55 CHECKWEIGHER
List of Tables
Table Number Title Page
3-1 Parts and Controls EN-8
3-2 Control Functions EN-10
4-1 Geographical Adjustment Values EN-43
4-2 Troubleshooting EN-45
5-1 Dimensions EN-48
6-1 Accessories and Options EN-51
6-2 ASCII Number to Character Conversion EN-52
D-1 Serial Interface Command Table EN-61
Figure Number Title Page
3-1 Indicator EN-8
3-2 Scale EN-8
3-3 Control Panel EN-9
4-1 RTC Battery Removal/Installation EN-46
5-1 CKW Series Scale EN-48
5-2 CKW-55 Indicator Table Mount Position EN-49
5-3 CKW-55 Indicator Wall Mount Position EN-49
A-1 Cable Entry Identification EN-53
A-2 Printed Circuit Board Connections EN-53
A-3 Open and Shorted Jumpers EN-54
B-1 Inside the Indicator Cover EN-55
B-2 Internal Wire Seal EN-57
B-3 Internal Sealing Label EN-57
B-4 External Wire Seal EN-58
B-5 External Sealing Label EN-58
C-1 Mounting Bracket Dimensions EN-60

CKW-55 CHECKWEIGHER EN-5
1. INTRODUCTION
This manual contains installation, operation and maintenance instructions for the CKW-55 Indicator and CKW Series Scales.
Please read this manual completely before installation and operation.
1.1 Description
The CKW Series is a dedicated static checkweighing product line with enhanced software and simplified user functionality.
Its easy-to-clean, hygienic design and stainless steel construction make it specifically ideal for food processing and other
wet-environment applications.
Behind this instrument stands Ohaus, a leading manufacturer of precision Indicators, Scales and Balances. An Aftermarket
Department with trained instrument technicians is dedicated to providing the fastest service possible in the event this
instrument requires servicing. Ohaus also has a Customer Service Department to answer any inquiries regarding
applications and accessories.
1.2 Features
Major features include:
• Up to 20,000 maximum displayed resolution
• Stainless steel enclosure with NEMA 4X / IP66 protection
• Stainless steel 2-way table/wall mount bracket included, (Indicator only configuration)
• Supports up to four 350 ohm analog load cells
• High-contrast 0.8"/20 mm high, 6-digit, 7-segment LED weight display with adjustable brightness
• Configurable 3-color, 24-segment LED over-accept-under checkweigh indication with audible signal
• Numeric keypad and 7-function membrane switch operation with optional function lockouts
• One-button checkweigh target set point entries by weight range, variance, or % offset from target
• Flexible unit switching: kg, g, lb, oz, lb:oz, %
• Fast < 2-second display update speed
• 20-part library storage for: Product ID no., Minimum, Maximum, Target and Tare values
• GMP, Time/Date, Auto-Tare, Accumulation, Average and Standard Deviation
• Geographical adjustment function for remote calibration and certification in applicable areas
• Bi-directional RS232 interface
• User-configurable external input connection for remote tare, zero, print and other operations
• Universal switching power supply: nominal 100-240 V ac, 50-60 Hz
• Scale models include a tubular column: 304 stainless steel, 11.8" / 300 mm fixed height with indicator and base
mounting brackets
Optional features include:
• RS485/422 Serial Communication
• AC/DC Relay output
• Internal rechargeable nickel metal hydride (NiMH) battery

EN-6 CKW-55 CHECKWEIGHER
1.3.1 Relay Option Safety Precautions
This equipment may have an optional AC or DC Relay Option board installed. This option allows external device control to
be coordinated to the Indicator’s bar graph settings.
• Verify that the input voltage range printed on the data label matches the local AC power to be used.
• Make sure that the power cord does not pose a potential obstacle or tripping hazard.
• Use only approved accessories and peripherals.
• Operate the equipment only under ambient conditions specified in these instructions.
• Disconnect the equipment from the power supply when cleaning equipment .
• Do not operate the equipment in hazardous or unstable environments.
• Do not immerse the equipment in water or other liquids.
• Do not drop heavy loads on the platform.
• Service should only be performed by authorized personnel.
• This equipment is supplied with a grounded power cable. Use only with a compatible grounded power outlet.
1.3 Safety Precautions
For safe and dependable operation of this equipment, please comply with the following safety precautions:
Before making connections to the Relay terminals, remove power from the system. If the system contains an optional
rechargeable battery system, be sure that the ON/ZERO
Off
button is used to fully turn off the system after removing the AC
power plug.
More detailed installation instructions are included with the Relay Option Kit when purchased.
CAUTION: ELECTRICAL SHOCK HAZARD. REMOVE ALL POWER CONNECTIONS TO THE
INDICATOR BEFORE SERVICING OR MAKING INTERNAL CONNECTIONS. THE HOUSING
SHOULD ONLY BE OPENED BY AUTHORIZED AND QUALIFIED PERSONNEL, SUCH AS AN
ELECTRICAL TECHNICIAN.

CKW-55 CHECKWEIGHER EN-7
2. INSTALLATION
2.1 Unpacking and Checking
Unpack and verify that the following components have been included:
• CKW-55 Indicator • Complete Scale models also include:
• Instruction Manual o Column
• 2-way Mounting Bracket (with stand-alone indicator) o Base Assembly
• Weights and Measures Kit o CKW Base Instruction Manual
• Warranty Card
Retain all of the original packaging materials in the event the unit has to be transported or stored.
2.2 Selecting the Location
This equipment should be used in an environment free from vibration, temperature extremes or highly corrosive conditions.
These factors may affect normal operation of the unit.
Scale bases used with the CKW-55 Indicator must be located on a stable level surface and kept away from vibrating sources
such as large machinery or appliances.
Adjust the leveling feet so that the bubble is centered in the
circle of the level indicator located in the rear of the scale.
Note: Ensure that the scale is level each time its location is changed.
2.3 Connecting Power
2.3.1 AC Power
Plug the AC power cord into a properly grounded power outlet. The CKW Indicator utilizes a universal switching power
supply that operates from 100 to 240 VAC / 50 to 60 Hz.
2.3.2 Battery Power (Optional equipment)
The scale can be operated on the internal rechargeable battery when AC power is not available. The scale will automatically
switch to battery operation if there is a power failure or the power cord is removed. A fully charged battery can operate the
scale for up to 10 hours independent of the AC power line. When the battery requires charging, Lo Bat is displayed during
operation. The scale will automatically turn off when the battery is fully discharged.
With AC power applied to the scale, the bar graph will start flashing on the first yellow bar segment indicating charging is in
progress. As the battery is charged, the segments on the bar graph continue to advance until the first green segment is
reached. A flashing green segment indicates that the battery is fully charged.
Before using the scale for the first time, the internal rechargeable battery may require charging for up to 12
hours. The scale can be operated during the charging process. The battery is protected against over
charging and the scale can remain connected to the AC power line.

EN-8 CKW-55 CHECKWEIGHER
2.4 Initial Calibration
Scales are factory calibrated prior to shipping. If calibration is required, refer to section 4.1.
3 OPERATION
3.1 Overview of Parts and Controls
CAUTION
BATTERY IS TO BE REPLACED ONLY BY AUTHORIZED SERVICE PERSONNEL.
RISK OF EXPLOSION CAN OCCUR IF REPLACED WITH THE WRONG TYPE OR CONNECTED
IMPROPERLY.
Dispose of the battery according to local laws and regulations.
T
Figure 3-1. Indicator.
Figure 3-2. Scale.
1
2
34
5
4
1
6
7
8
9
10
Item Description
1 Adjusting Knob
2 I/O Ports
3 Control Panel
4 Indicator Case
5 AC Power Input
6 Table/Wall Bracket
7 Column
8 Level Indicator
9 Weighing Platform
10 Adjusting Feet
TABLE 3-1. PARTS AND CONTROLS.

CKW-55 CHECKWEIGHER EN-9
3.1 Overview of Parts and Controls (Cont.)
11
12 13
25
24
23
14
15
22 21 20 19 18 17 16
Figure 3-3. Control Panel.
TABLE 3-1. PARTS AND CONTROLS (Cont.).
Item Description
11 Weight Display
12 Checkweigh Bar Graph
13 Capacity Label Window
14 Numeric Keypad
15 C clear button
16-22 Control Buttons See Table 3-2
23 Weighing Units, Brutto/Gross, Net, Tare, Preset Tare Indicators
24 Stable Indicator
25 Center of Zero Indicator

EN-10 CKW-55 CHECKWEIGHER
3.2 Control Functions
Primary Function
(Short Press)
Secondary Function
(Long Press)
Navigation Function
(Menu Mode)
• Turns the
indicator on.
• If indicator is on,
sets zero.
• Turns indicator
off.
Off
ON/ZERO
Yes
• Enters the current
menu shown on
the display.
• Accepts the
current setting on
the display.
PRINT
• Sends current
display value to
the serial
interface.
Units
• Changes the
weighing unit.
No
• Advances to the
next menu.
• Rejects the
current setting on
the display and
advances to the
next available
setting.
G/N/T
• Displays gross,
net and tare
values.
Menu
• Enters menu
mode.
Back
• Moves backwards
through upper
and medium
level menus.
• Backs out of
lower level
menus and
settings.
TARE
• Performs tare
operation.
• Saves pre-set
tare after
numeric entry.
• Exits the present
mode and returns
directly to the
weighing mode.
LIBRARY
• With Library
mode on,
initiates library
view/entry/edit
sequence.
Save
• With Library
mode on, saves
library data and
loads to active
weighing mode.
NEXT+/-
• Adds displayed
weight into
accumulation
memory.
• Toggles numeric
data entry
between + and -.
• Displays
statistical
information of
accumulated
weighing
memory.
TARGET
• With checkweigh
mode on,
initiates target
view/entry/edit
sequence.
• Saves and steps
through target
data.
Exit
Primary Function
Secondary Function
Navigation Function
TABLE 3-2. CONTROL FUNCTIONS.

CKW-55 CHECKWEIGHER EN-11
3.3.1 Menu Structure
CALIBRATION (Sec. 4.1)
Span Perform
Linearity Perform
Calibration Test Perform
Geo Factor: 0…16...19…31
End
SETUP (Sec. 3.6.1)
Reset: No, Yes
Legal-For-Trade: Off,On
Calibration Unit: kgkg
kgkg
kg, lb
FS Capacity: Numeric Entry
Graduation: Numeric Entry
Zero Range: 2%,18%, 100%
Retain Zero Data: Off, On
Auto-Tare: Off, On, On Acc
Beep Volume: Off, Lo, Hi
Key Beep: Off, On
End
READOUT (Sec. 3.6.2)
Reset: No, Yes
Unit: kg, lb, g, oz, lb:oz, %
Stable Range: .5d, 1d, 2d, 5d
Averaging Level: Lo, Med, Hi
Auto-0 Tracking: Off, .5d, 1d, 3d
LED Brightness: Off, Lo, Med, Hi
Bar Brightness: Off, Lo, Med, Hi
Power Saver: Sleep, Auto-off
End
COM (Sec. 3.6.5)
Reset: NoNo
NoNo
No, Yes
Baud Rate: 300, 600, 1200, 2400,
4800, 96009600
96009600
9600,19200
Parity: NoneNone
NoneNone
None, Even, Odd
Data Length: 77
77
7, 8
Stop Bit: 1, 22
22
2
Handshake: None, XON/XOFFXON/XOFF
XON/XOFFXON/XOFF
XON/XOFF
Address*: Off, On
(00, 01…99)
Alt Command: Print, Tare, Zero
End
PRINT (Sec. 3.6.4)
Reset: No, Yes
Stable Only: Off, On
Auto Print Mode: Off, Stable, Interval,
Continuous
Print Content: Display, Numeric,
Header, Setpoint,
Gross, Net, Tare, GMP,
Accumulation
Layout: Format, Feed
List: Menu, Library
End
MODE (Sec. 3.6.3)
Reset: No, Yes
Checkweigh: Off, On
Library: Off, On
Set Point Input: Range, Variance, %
Beeper Signal: Off, Accept, Under,
Over, Under-Over
Display Signal: Off, Accept, Under,
Over, Under-Over
Graph Increment: Scaled, Auto, User
Graph Display: Segment, Bar, Block
End
I/O (Sec. 3.6.6)
Reset: No, Yes
External Input: Off, Tare, Zero, Print,
Units, GNT, Accumula-
tion, Start-Stop,Tare-
Start-Stop
Input Beep: Off, On
Relay Output*: Type, Sequence, Contact
End
GMP (Sec. 3.6.7)
Reset: No, Yes
User ID: Enter 6 characters
Project ID: Enter 6 characters
Scale ID: Enter 6 characters
Date: Format, Set
Time: Format, Set
End
LOCK (Sec. 3.6.8)
Menu: Reset, Cal, Setup, Read,
Mode, Print, Com, I/O,
GMP Data
Key Function: Reset, Num, Clr, Target,
Lib, Lib Save, Next, Zero,
Print, Units, GNT, Tare,
Menu
End
NOTES:1. Bolded items indicate factory default settings.
2. The unit selected for “Calibration Unit” will become the default “On” unit in the event that all other units are set to “Off”.
3. When the Legal for Trade setting is changed to “On”, the following items are affected:
i. Span and Linearity calibration are unavailable, Geo factor is viewable but not alterable, Cal Test will operate.
ii. Underlined menu items become forced as default.
4. *Some menu items will only become available when certain optional accessories are installed.
5. Using the Reset function in the “SETUP” menu will not change the values entered for FS Capacity or Graduation.
3.3 Menu

EN-12 CKW-55 CHECKWEIGHER
3.3.2 Menu Navigation
TO ENTER THE MENU MODE
Press and hold the Menu button until MENU appears on the display. The first upper level menu CAL appears on the display.
Summary of button navigation functions in menu mode:
--Yes - Allows entry into the displayed menu.
- Accepts the displayed setting and advances to the next menu item.
--No - Skips by the displayed menu.
- Rejects the displayed setting or menu item and advances to the next available item.
--Back - Moves backwards through the upper and middle level menus.
- Backs out of a list of selectable items to the previous middle level menu.
--Exit - Exits from menu directly to the active weighing mode.
3.4 Turning Indicator On/Off
3.4.1 Turning On
With the scale off, press the ON/ZERO
Off
button. The Indicator performs a display-test, momentarily indicating model, option
and status information, and then goes into the active weighing mode.
3.4.2 Turning Off
To turn the Indicator off, press and hold the ON/ZERO
Off
button until OFF is displayed.
3.4.3 Stabilization
Before initially using the indicator, allow time for it to adjust to its new environment. The recommended warm-up period is
five (5) minutes after the scale has stabilized to room temperature.

CKW-55 CHECKWEIGHER EN-13
3.5 Application Modes
Before using the CKW-55 Indicator, make sure it has been properly set up and calibrated (refer to Sections 3.3.2 Menu
Navigation and Section 3.6.1 Setup Menu).
If the unit is received as a scale, it has been factory calibrated and can be operated at this point using the factory default
settings. To ensure optimal accuracy, Ohaus recommends that the Scale be re-calibrated before use (refer to Section 4.1 for
Calibration and Appendix B Legal for Trade Sealing if required).
3.5.1 Weighing
Zero Operation
Press the ON/ZERO
Off
button to zero the weight display. The scale must be stable to accept
zero operation.
Basic Weighing
Place the item to be weighed on the Scale platform. The illustration indicates a sample of
1.5 kg, Gross weight.
Manual Tare
When weighing an item that must be held in a container, taring stores the container weight
into the Indicator’s memory. Place the empty container to be tared on the scale platform
(example 0.5 kg).
Press the TARE button. The container weight is tared. The display will show 0 kg, Net
weight.
% kg lb g oz B/G Net Tare PT
To clear the Tare value, empty the scale platform (the display will show the tare weight as a
negative value). Press the TARE button. Display will show 0 kg, Gross weight.
Pre-Set Tare
A Pre-set Tare (PT) is a known tare value entered through the numeric keypad. The PT value
will supersede any other Tare or PT value in memory. (When using Pre-Set Tare, make sure
that Auto-Tare function is set off in the Setup menu.)
To initiate a Pre-set Tare, enter a numeric value using the keypad (example 1.000 kg), then
press the TARE button.
Display will show the Pre-set Tare as a negative value, with the PT indicator on.
Notes: 1.If the TARE button is not pressed 5 seconds from the last numeric entry, the
display returns to the previous mode without a tare being stored.
2.To clear a Pre-set Tare value, empty the pan then press the TARE button.
The display will return to 0 kg, Gross weight.
% kg lb g oz B/G Net Tare PT

EN-14 CKW-55 CHECKWEIGHER
Auto-Tare
Auto-Tare automatically tares the initial weight (such as a container) placed on the empty platform, without having to press
the TARE button. The tare value is cleared automatically when the weight on the pan is fully removed.
In Auto-Tare mode, the Tare indicator blinks when waiting for a Tare item to be placed on the empty scale platform (with
LFT On, there is no flashing Tare indicator).
When the On Accept setting is selected, weight values that are within the accept range will be tared automatically.
Note: Auto-Tare supersedes any pre-set (PT) value in memory.
Displaying Gross, Net, Tare
When a tare has been entered, pressing the G/N/T
Menu
button successively displays the Tare, the Gross, and the Net
weights. After a few seconds the scale automatically reverts to displaying the NET weight.
Changing Units of Measure
Press and hold the PRINT
Units
button until the desired measuring unit appears. Only measuring units enabled in the
Readout-Unit Menu will be displayed (refer to Section 3.6.2).
Printing Data
Printing the displayed data to a printer or sending the data to a computer requires that the communication parameters in the
Print and Communication Menu are set (refer to Sections 3.6.4 and 3.6.5).
Press the PRINT
Units
button to send the displayed data to the RS232 port (the Auto-Print Mode in Section 3.6.4 function
must be Off).
Note: If the PRINT
Units
button is pressed too long, the display advances to another measuring unit without sending the
print data.

CKW-55 CHECKWEIGHER EN-15
% kg lb g oz B/G Net Tare PT
To add a weight value to the Accumulation memory, place the item on the platform, then short
press the NEXT +/-
button. M-ADD is momentarily flashed on the display to indicate that the
value is added into memory. Repeat this step for each additional item.
To view the Accumulation data, long press the NEXT +/--
--
- button. Accumulation data is displayed
momentarily in the following sequence:
Display parameter COUNT, then the total number of weighed samples (example 150).
Display parameter TOTAL, then the total accumulated weight value (example 1504.05 kg).
Display parameter AVG, then the calculated average of the accumulated values (example
10.03 kg).
Display parameter S-DEV (standard deviation), then the calculated standard deviation
(example 4.502 kg).
Display END, then the display returns to the active weighing mode.
To clear the Accumulation memory, press the C button during the display sequence. At the end
of the display sequence, CLEAR is displayed and returns to active weighing mode.
Notes: 1. If a value exceeds the size of the 6 digit display, the number will first be displayed in
reduced decimal places, after this, the g and lb:oz units may be changed to kg and lb
units. If the value still exceeds the display digits, Err will be displayed. The correct
value with the original weighing unit will always be printed when the Accumulation
data is printed.
2. I/O- External Input setting should NOT be set to: S-S or T-S-S (refer to Section 3.6.6),
since this menu setting also controls the functionality of the NEXT +/- button. The
accumulate function is not available if either of these I/O selections are made.
Accumulation Operation
The Accumulation function is always on and allows basic statistical information to be collected from multiple weighings.
Accumulated data collected includes total count (or number of samples), total sample weight, average sample weight, and a
standard deviation of sample weight. The information continues to accumulate and is retained until cleared or the scale is
turned off.
% kg lb g oz B/G Net Tare PT

EN-16 CKW-55 CHECKWEIGHER
3.5.2 Checkweighing
The CKW Series features multiple user-configurable checkweighing functions that permit weighing items against preset
minimum-maximum and target parameters.
Notes: 1. Checkweighing and target entry operations are enabled only when Checkweigh is turned on in the Mode Menu
(refer to Section 3.6.3, Mode Menu). When enabled from the menu, Checkweigh mode is automatically active
upon exiting from the Mode Menu.
2.The weight of the item being checked is net of any Tare or Pre-set Tare value.
Bar Graph, Beeper and Weight Display Indication
The CKW-55 Indicator features a 24-segment, 3-color Bar Graph, complemented by an audible Beeper and Weight Display
visual alert (refer to Sections 3.6.1 Setup Menu and 3.6.3 Mode Menu). These checkweigh indication features are easily
configurable and can be turned on or off to suit most user preferences.
Bar Graph segments illuminate according to the following conditions:
Under (yellow) = weight is below preset minimum value.
Accept (green) = weight is equal or within preset target range.
Over (red) = weight exceeds preset maximum value.
NOTE: The checkweigh TARGET button and menu settings can be locked to resist tampering of checkweigh parameters (refer
to Sections 3.6.3 Mode Menu and 3.6.8 Lock Menu).
Summary of Checkweigh Key Functions
Use the following buttons to establish checkweigh set point values (Checkweigh Mode is on).
TARGET Checkweigh Start, Accept and Advance button.
1. Initiates the Target setting sequence and
2. Accepts the displayed values and advances to the next sequence.
CIn numeric entry sequence, short press clears one digit at a time, long press erases the display
(shows - - - - - - ). Re-enter a new value.
NEXT +/- Toggles the displayed value being entered between negative and positive.
Other manuals for CKW-55
2
This manual suits for next models
9
Table of contents
Other OHAUS Accessories manuals

OHAUS
OHAUS T72XW AM User manual

OHAUS
OHAUS Defender T24PE User manual

OHAUS
OHAUS T31P Installation and operating instructions

OHAUS
OHAUS 5000 User manual

OHAUS
OHAUS Ranger 3000 Series User manual

OHAUS
OHAUS Defender 5000 Series User manual

OHAUS
OHAUS Defender 3000 User manual

OHAUS
OHAUS 5000 User manual

OHAUS
OHAUS DEFENDER SERIES User manual

OHAUS
OHAUS Defender 5000 TD52P User manual