Ohio Medical Corporation MiniOX 3000 User manual

P/N 814358 [Rev.2] 01/2015
MiniOX®3000
Oxygen Monitor
Operation Manual
WARNING
THIS MANUAL MUST BE READ CAREFULLY PRIOR TO THE OPERATION OF
THIS DEVICE. THIS DEVICE WILL PERFORM AS DESIGNED ONLY IF USED IN
ACCORDANCE WITH THE MANUFACTURER’S INSTRUCTIONS. IMPROPER USE
MAY CAUSE THE DEVICE TO FAIL TO PERFORM AS DESIGNED AND MAY CAUSE
INJURY TO THE PATIENT AND/OR HEALTHCARE PROFESSIONAL.
The warranties made by Ohio Medical Corporation®with respect to these products are voided if the products are
not installed, used and serviced in accordance with the instructions in this manual. Please protect yourself and
your patients by following them. We encourage our customers to write or call regarding this equipment prior to
use or for any additional information relative to use or repairs.
This product is not intended as a life-sustaining or life-supporting device.
FEDERAL (USA) LAW RESTRICTS THIS DEVICE TO SELL BY OR ON THE ORDER OF A PHYSICIAN
Ohio Medical Corporation®| 1111 Lakeside Drive | Gurnee, IL 60031 USA
1-866-549-6446 | fax: 1-847-855-6218 | www.ohiomedical.com

P/N 814358 [Rev.2] 01/2015

P/N 814358 [Rev.2] 01/2015
Ohio Medical Corporation®
Medical Instrument Warranty
This product is sold by Ohio MedicalTM under the warranties set forth in the following paragraphs. Such warranties
are extended only with respect to the purchase of this product directly from Ohio Medical or Ohio Medical’s
Authorized Dealers as new merchandise and are extended to the first Buyer thereof, other than for purpose of
resale.
For a period of twelve (12) months from the date of original delivery to Buyer, to Buyer’s order, or to an Ohio
Medical Authorized Dealer, this product, other than its expendable parts, is warranted to be free from functional
defects in materials and workmanship and to conform to the description of the product contained in the operation
manual and accompanying labels and/or inserts, provided that the same is properly operated under conditions of
normal use, that regular periodic maintenance and service is performed and that replacements and repairs are
made in accordance with the instructions provided. This same warranty is made for a period of sixty (60) days
with respect to the expendable parts. The foregoing warranties shall not apply if the product has been repaired
other than by Ohio Medical or in accordance with written instructions provided by Ohio Medical, or altered by
anyone other than Ohio Medical, or if the product has been subject to abuse, misuse, negligence, or accident.
Ohio Medical’s sole and exclusive obligation and Buyer’s sole and exclusive remedy under the above warranties
is limited to repairing or replacing, free of charge, at Ohio Medical’s option, a product, which is telephonically
reported to the nearest Ohio Medical Regional Service Office and which, if so advised by Ohio Medical, is
thereafter returned with a statement of the observed deficiency, not later than seven (7) days after the expiration
date of the applicable warranty,to the designated Ohio Medical Service Office during normal business hours,
transportation charges prepaid, and which, upon Ohio Medical’s examination, is found not to conform with
the above warranties. Ohio Medical shall not be otherwise liable for any damages including, but not limited to
incidental damages, consequential damages, or special damages.
There are no express or implied warranties which extend beyond the warranties herein above set forth. Ohio
Medical makes no warranty of merchantability or fitness for a particular purpose with respect to the product or
parts thereof.

P/N 814358 [Rev.2] 01/2015
General Warnings and Cautions
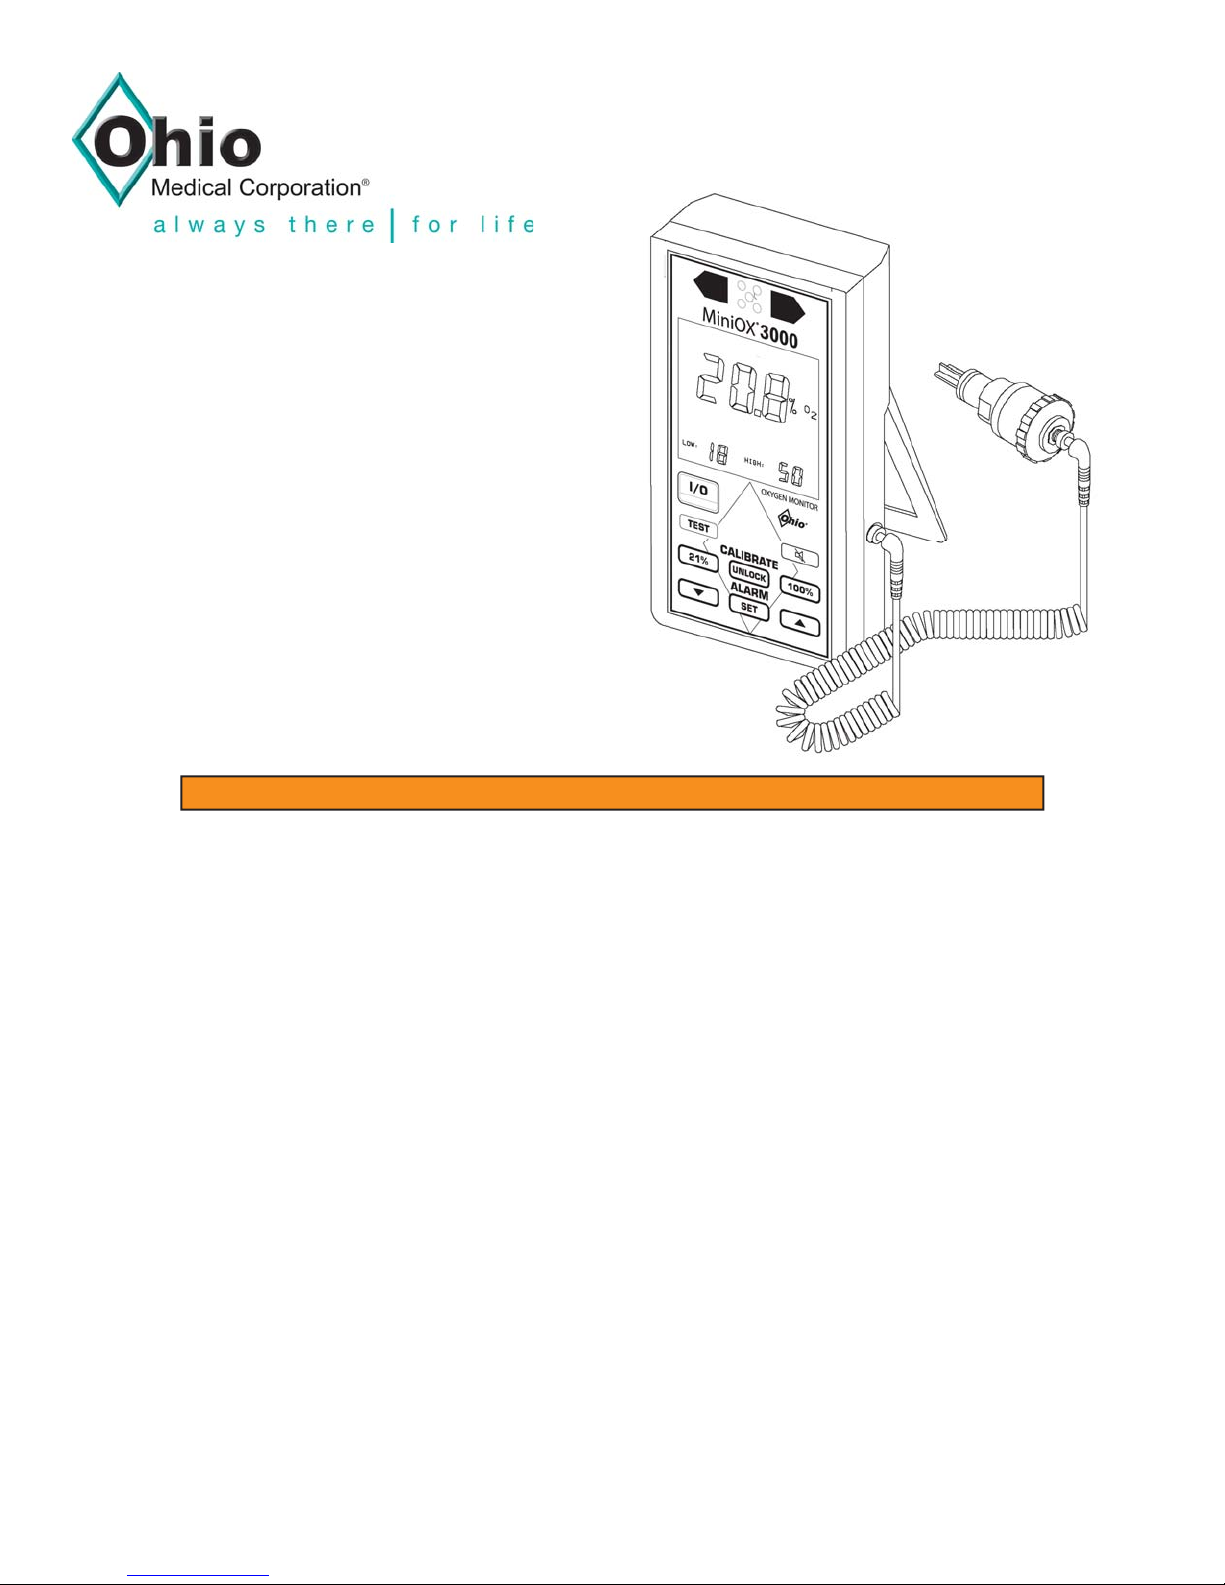
1. The MiniOX®3000 Oxygen Monitor will perform
to specifications only if it is used and serviced in
accordance with the manufacturer’s instructions.
This instrument is to be used only by qualified,
trained personnel who have carefully read the
operating manual and labels and who have observed
the information set forth. If this instrument does not
perform as described in this manual, the instrument
must not be used until the condition is rectified.
2. The MiniOX®3000 Oxygen Monitor must be calibrated
prior to each use. A two point calibration check must
be performed weekly. See Section 3, Operation. If
the instrument cannot be calibrated, the sensor must
be replaced. If the instrument is still unable to be
calibrated, the instrument must be serviced.
3. The oxygen sensor has a minimal response to
certain gases other than oxygen. Be aware of these
gases and their interference levels. SeeAppendix C,
Interferent Gases and Vapors.
4. The oxygen sensor is affected by changes in
barometric pressure. See Appendix B, Effects of
Pressure, Humidity and Temperature.
5. The sensor is a sealed unit containing a potassium
hydroxide electrolyte, which is caustic. If the sensor
should develop a leak and the contents come
in contact with skin or clothing, rinse area with
large quantities of water. In case of eye contact,
immediately flush eyes for at least 15 minutes,
holding eyes open. Call a physician. Dispose of a
leaking sensor immediately; it must be disposed of
in accordance with all applicable federal, state, and
local regulations.
6. Ensure a tight fit exists between the sensor and the tee
adapter. Ohio Medical tee adapters are engineered
to fit securely with Ohio Medical sensors. However,
the sensor retaining strap must be used to prevent
accidental separation of sensor and tee adapter.
7. Never operate the MiniOX®3000 Oxygen Monitor if it
is suspected that water or other liquids have entered
into the case. If this occurs, immediately turn the unit
OFF and contact your nearest Ohio Medical Service
Center for additional information.
8. Use of devices generating or emitting electromagnetic
radiation near the MiniOX®3000 Oxygen Monitor may
interfere with the proper operation of the product,
causing it to fail to perform as designed. Particularly,
the electromagnetic radiation from the interfering
device may cause the product to display incorrect/
erratic values or to stop operating. Special attention
should be paid to the patient if this occurs.
9. Never use the MiniOX®3000 Oxygen Monitor in
combustible atmosphere, such as occurs with
flammable anesthetics. Such use could result in
ignition of atmosphere.
10. Never allow an excess length of cable near the
patient’s head or neck, as such could result in
strangulation. Secure excess cable to the bed rail or
other suitable object.
FAILURE TO COMPLY WITH THESE WARNINGS
COULD JEOPARDIZE THE WELL-BEING OF THE
PATIENT AND/OR HEALTH CARE PROFESSIONAL.
1. Remove internal battery if unit is to be non-operational
for extended periods of time.
2. Observe polarity when inserting a new battery.
Incorrect connection may cause damage to the
instrument.
3. The MiniOX®3000 Oxygen Monitor must never be
immersed in any cleaning solution, autoclaved, or
exposed to temperatures greater than 70oC.
4. Use only genuine Ohio Medical Corporation
accessories and replacement parts. Failure to do
so may seriously impair the monitor’s performance.
Repair or alteration of the MiniOX®3000 Oxygen
Monitor beyond the scope of the maintenance
instructions or by anyone other than an authorized
Ohio Medical Corporation service person could
cause the product to fail to perform as designed.
5. Improper mounting of the sensor in a breathing circuit
may result in inaccurate readings. The sensor MUST
be mounted with the deflector pointing downward to
prevent moisture collection on the sensor membrane
(see Figures 3-3 and 3-4 in Section 3, Operation).
Install the sensor upstream from the humidifier to
minimize its exposure to moisture.
6. Never use a MiniOX®3000 Oxygen Monitor with a
cable that appears worn, cracked, or has damaged
insulation.
FAILURE TO COMPLY WITH THESE CAUTIONS
COULD RESULT IN INSTRUMENT DAMAGE AND/OR
FAILUREOFUNITTOPERFORMTOSPECIFICATIONS.
WARNING
CAUTION
MiniOX®3000 Oxygen Monitor General WARNINGS and CAUTIONS
WC-1

P/N 814358 [Rev.2] 01/2015
MiniOX®3000 Oxygen Monitor General WARNINGS and CAUTIONS
Statement citing a potential safety hazard and
possible injury to yourself or others.
Statement citing a possibility of damage to the
instrument or other property.
Advisory on instrument function.
CAUTION
WARNING
Definition of Warnings and Cautions
NOTE:
WC-2

P/N 814358 [Rev.2] 01/2015
MiniOX®3000 Oxygen Monitor Table of Contents
Section 1
Introduction..........................................................................................1-1
General Description.................................................................................................................. 1-1
Operating Principles................................................................................................................. 1-2
MiniOX®3000 Oxygen Sensor ............................................................................................ 1-2
MiniOX®3000 Instrument .................................................................................................... 1-2
Operator Interface .............................................................................................................. 1-2
Internal Functions .............................................................................................................. 1-2
Data and System Status ..................................................................................................... 1-2
Performance Features ............................................................................................................ 1-2
Calibration............................................................................................................................ 1-2
Low/High Oxygen Concentration Alarms ............................................................................. 1-3
Low Battery Alarms ............................................................................................................. 1-3
Sensor Indicator .................................................................................................................. 1-3
Calibration Needed Indicator .............................................................................................. 1-3
Error Handling ..................................................................................................................... 1-4
Test Functions...................................................................................................................... 1-4
Radio FrequencylElectromagnetic Insensitivity.................................................................... 1-4
Section 2
Setting Up the MiniOX®3000 Oxygen Monitor ................................ 2-1
Figure 2-1 MiniOX®3000 Oxygen Monitor ..................................................................... .2-1
CAUTION................................................................................................................ 2-2
Figure 2-2 Assembled MiniOX®3000 Oxygen Monitor ................................................... 2-2
Section 3
Operation..............................................................................................3-1
Calibration ................................................................................................................................ 3-1
CAUTION..................................................................................................................... 3-1
To Calibrate In Room Air, Figure 3-1 ................................................................................... 3-1
Figure 3-1 Calibrating the MiniOX®3000 Oxygen Monitor in Room Air......................... . 3-1
To Calibrate at 100% O2, Figure 3-2 .................................................................................. 3-2
Figure 3-2 Calibrating the MiniOX®3000 Oxygen Monitor at 100% O2........................... 3-2
Two-Point Linearity Check....................................................................................................... 3-3
Setting the Alarms. .................................................................................................................. 3-3
To Set the Low Alarm ........................................................................................................... 3-3
To Set the High Alarm ......................................................................................................... .3-4
Alarm Conditions..................................................................................................................... 3-4
High and Low Oxygen Concentration Alarms ..................................................................... 3-4
Silencing an Alarm ............................................................................................................... 3-4
Low Battery Alarms. ............................................................................................................ 3-4
Sensor Indicator................................................................................................................... 3-4
Error Handling......................................................................................................................3-5
Table 3-1 Alarms and Status Messages .......................................................................... 3-5
Test Functions..................................................................................................................... 3-6
Battery Test .......................................................................................................................... 3-6
High and Low Alarms Test. .................................................................................................. 3-6
Installing the Sensor in a Breathing Circuit. ............................................................................. 3-6
TOC-1

P/N 814358 [Rev.2] 01/2015
MiniOX®3000 Oxygen Monitor Table of Contents
Mounting the Instrument with a Pole Bracket........................................................................... 3-6
Figure 3-3 Installing Sensor into Tee Adapter ..................................................................... 3-7
Figure 3-4 Sensor in Breathing Circuit................................................................................. 3-8
Figure 3-5 MiniOX®3000 Oxygen Monitor with Pole Mounting Bracket .............................. 3-8
Section 4
Maintenance and Care ........................................................................4-1
CAUTION .................................................................................................................... 4-1
Battery & Battery Cover Replacement. .................................................................................... 4-1
Figure 4-1. Battery Cover Removal ................................................................................ 4-1
Sensor Replacement................................................................................................................ 4-2
Deflector Replacement............................................................................................................. 4-2
Cable Replacement.................................................................................................................. 4-2
Cleaning, Disinfection and Sterilization.................................................................................... 4-2
CAUTION..................................................................................................................... 4-2
Instrument ........................................................................................................................... 4-2
Sensor and Cable ............................................................................................................... 4-3
Sensor Deflector, Retaining Strap and Tee Adapter ............................................................ 4-3
Appendix A
Specifications............................................................................................. A-1
Table A-1. Specifications. .................................................................................................A-1
Appendix B
Effects of Pressure, Humidity and Temperature ............................B-1
CAUTION ....................................................................................................................B-1
Effects of Pressure ..................................................................................................................B-1
CAUTION ....................................................................................................................B-1
Effects of Humidity ...................................................................................................................B-1
Effects of Temperature ............................................................................................................B-1
CAUTION ....................................................................................................................B-1
Appendix C
Interferent Gases and Vapors............................................................C-1
Table C-1 Interferent Gases and Vapors ....................................................................... C-1
Appendix D
Troubleshooting ................................................................................ D-1
Table D-1 Troubleshooting ............................................................................................ D-1
Appendix E
Error Codes......................................................................................... E-1
Table E-1 Error Codes ....................................................................................................E-1
Appendix F
Accessories and Replacement Parts ................................................F-1
Table F-1 Accessories and Replacement Parts .............................................................F-1
TOC-2

P/N 814358 [Rev.2] 01/2015
MiniOX®3000 Oxygen Monitor Section 1, Introduction
Section 1
Introduction
The MiniOX®3000 Oxygen Monitor provides
continuous, direct monitoring of oxygen mixtures in a
variety of applications, including:
• Respiratory Therapy (e.g., respirators, ventilators,
pediatric incubators)
• Anesthesiology (e.g., anesthesia machines)
• Oxygen Therapy (e.g., oxygen tents)
The monitor is for use by trained health care
professionals:
• under the supervision, or on the order, of a
physician
• in a hospital or clinical setting
• during emergency transport
General Description
Battery-operated and microprocessor-controlled,
the MiniOX®3000 Oxygen Monitor measures
oxygen concentrations in the 0% to 100% range.
The monitor’s performance features ensure reliable
and accurate oxygen measurement. These features
include:
• calibration function
• high and low oxygen concentration alarms
• low and depleted battery alarms
• oxygen sensor indicator
• automatic error detection
• battery test
• oxygen alarm test
The calibration function allows calibration of
the device against room air (defined as oxygen
concentration of 20.8%) or 100% O2. Audible and
visual alarms alert the operator when monitor
calibration is required.
High and low oxygen concentration alarms may be
set in the ranges of:
• 16% to 100% (high alarm) and
• 15% to 99% (low alarm)
or the default high/low settings may be used (50%
and 18%, respectively). Audible and visual alarms
activate when oxygen concentrations:
• fall below the preset (or default) low alarm setting
• rise above the preset (or default) high alarm
setting
The MiniOX®3000 Oxygen Monitor:
• detects low and depleted battery conditions
• activates audible and visual alarms
• alarms for:
• sensor disconnection or malfunction
• various internal operating errors
The MiniOX®3000 Oxygen Monitor conducts self-
checks:
• at power-up (battery installation)
• at turn on
• during operation
Additionally, the monitor has two operator-initiated
test functions:
• The Alarm Test verifies the operation of the high
and low oxygen level alarms
• The Battery Test assesses the relative remaining
battery life
The MiniOX®3000 Oxygen Monitor consists of two
components: the instrument and the oxygen sensor.
The front of the hand-held instrument features:
• a touch-sensitive keypad
• a liquid crystal display (LCD) that shows:
• monitor status
• continuous oxygen concentrations
• preset alarm levels
• two red light-emitting diodes (LEDs) which serve
as visual alarms
The back of the instrument case features:
• a bail bar to allow the instrument to “stand” on a
horizontal surface during monitoring operations
• a plastic wedge that slides into an optional
bracket for mounting the instrument on a
horizontal or vertical pole
The galvanic oxygen sensor consists of a deflector
assembly and a plastic housing containing two
electrodes. A coiled cable connects the sensor to the
1-1

P/N 814358 [Rev.2] 01/2015
MiniOX®3000 Oxygen Monitor Section 1, Introduction
instrument. Plugs at each end of the cable snap into
jacks (one located in the sensor housing and one
located in the instrument) and are held securely in
place by twist collars.
The oxygen sensor is introduced into a breathing
circuit through an Ohio Medical Corporation tee
adapter connecting two lengths of tubing. The
sensor/tee adapter assembly is positioned with the
sensor deflector pointing downward to ensure that
moisture does not collect on the sensor membrane.
The retaining strap ensures that the sensor remains
securely in place in the tee adapter.
See the following appendices:
• Appendix A, Specifications
• Appendix F, Accessories/Replacement Parts
Operating Principles
MiniOX®3000 Oxygen Sensor
The oxygen sensor includes two electrodes:
• a gold cathode exposed to the atmosphere
through a fluoropolymer membrane
• a lead anode submersed in a potassium
hydroxide solution
When oxygen diffuses through the membrane, the
electrochemical reduction of oxygen on the cathode
and the corresponding oxidation on the anode
generate an electrical current proportional to the
partial pressure of oxygen in the sample atmosphere.
The instrument temperature compensates, amplifies,
and converts the electrical current, displaying O2
values.
The Ohio Medical Corporation oxygen sensor is self-
zeroing; when no oxygen is present:
• no current is produced
• 0% oxygen is displayed
The sensor has a minimal response to gases other
than oxygen (see Appendix C, Interferent Gases and
Vapors).
MiniOX®3000 Instrument
The MiniOX®3000 Oxygen Monitor is battery-
powered and microprocessor-controlled. The
microprocessor:
• provides the operator interface
• controls internal functions
• monitors data and system status
Operator Interface
When the operator enters commands using the
keypad, the microprocessor interprets these
commands and responds by:
• displaying text in the LCD
• activating the LEDs
• emitting audible tones
Internal Functions
During operation, the microprocessor coordinates all
internal functions including:
• self-testing
• response to keypad commands
• data collection
• display update
• confirmation that a programmed sequence is
properly followed
Data and System Status
The signal from the oxygen sensor is amplified
and converted to a digital value through electronic
circuitry. Following software compensation, the
microprocessor:
• compares current data to preselected values
• displays the updated O2concentration
• if appropriate, activates audible and visual alarms
The microprocessor also monitors internal systems,
indicating such operating conditions as:
• calibration required
• low battery voltage
• sensor disconnect
• system error
Performance Features
Calibration
The MiniOX®3000 Oxygen Monitor must be
calibrated:
1-2

P/N 814358 [Rev.2] 01/2015
MiniOX®3000 Oxygen Monitor Section 1, Introduction
• daily, while in operation
• each time the monitor is turned ON
• following sensor disconnection/reconnection
• when environmental conditions (pressure,
humidity and temperature) change
When a MiniOX®3000 Oxygen Monitor with a sensor
connected is turned ON, the monitor performs a self-
test and a calibration requirement occurs:
• “CAL” flashes on the display, telling the operator
to carry out the calibration procedure
The calibration procedure is initiated by exposing the
sensor to a calibration gas [either room air (defined
as oxygen concentration of 20.8%) or 100% oxygen]
and pressing the corresponding key on the keypad.
The following appears on the display:
• “CAL LOCKED”
• the selected calibration gas concentration.
When the unlock key is pressed the monitor
displays:
• “CAL”
• a 10-segment bar graph which “counts down” two
seconds per bar for 20 seconds
The monitor automatically calibrates to the selected
concentration. At the end of the 20 seconds, the
monitor:
• emits a beep indicating that calibration is
complete
• enters the operating mode
See Section 3, Calibration
Low/High Oxygen Concentration Alarms
The MiniOX®3000 Oxygen Monitor has audible
and visual alarms that activate when oxygen
concentrations exceed preset low or high alarm
settings. Default settings are 18% and 50%,
respectively; however, the operator may select alarm
levels between 15% and 100%. See Section 3,
Setting the Alarms
When the MiniOX®3000 Oxygen Monitor detects an
oxygen concentration that exceeds the preset alarm
limit:
• the red LED for that alarm flashes
• an audible alarm activates
• the measured concentration appears in the
display
The operator can silence the audible alarm for
three 30-second intervals for a total of 90 seconds;
however, the visual alarm continues to flash. At
the end of the silence period, the audible alarm
reactivates if the alarm condition is not corrected. See
Section 3, Silencing an Alarm
Low Battery Alarms
The MiniOX®3000 Oxygen Monitor features a two-
stage battery alarm that warns of depleted and
expired battery voltage:
• The first alarm alerts the operator that the monitor
has approximately six hours of operating time
remaining:
• a warning message appears in the display
• an audible alarm sounds at 30-second
intervals
• If the operator does not replace the battery after
this alarm, a second low battery alarm activates
when the battery is no longer able to support
monitoring. The monitor:
• displays a warning message
• activates an audible and visual alarm (See
Section 3, Low Battery Alarms)
Sensor Indicator
During monitoring, the MiniOX®3000 Oxygen Monitor
displays a warning message; audible and visual
alarms activate if:
• the oxygen sensor becomes disconnected
• the cable fails or disconnects from the sensor or
instrument
• the sensor membrane is perforated
• the thermistor circuit opens
Calibration Needed Indicator
The MiniOX®3000 Oxygen Monitor flashes “CAL”:
• when the monitor is turned ON
• following sensor disconnection/reconnection
1-3

P/N 814358 [Rev.2] 01/2015
MiniOX®3000 Oxygen Monitor Section 1, Introduction
If a calibration is performed using a calibration
gas other than room air or 100% oxygen, or if the
microprocessor detects a calibration error during
normal operation:
• the display flashes a warning message: “CAL”
and “ERR” five times; then, “CAL” flashes
• audible and visual alarms activate, alerting
the operator that recalibration is required. See
Section 3, Calibration
Error Handling
The MiniOX®3000 Oxygen Monitor performs a self-
test
• when it is turned ON
• after a battery is installed (power-up)
• during routine monitoring
If the microprocessor detects an error during these
routine self-tests or during monitoring,
• the display flashes:
• “ERR”
• an error code
• audible and visual alarms activate
• the monitor ceases to operate until the
appropriate service is performed. See Appendix
E, Error Codes
To reset the monitor, press SET or turn the monitor
OFF, then ON (press I/0 twice). For further details,
see Appendix E, Error Codes
Test Functions
In addition to alarms that alert the operator to low and
expired battery voltage, the MiniOX®3000 Oxygen
Monitor features:
• a keypad function that allows the operator to
check the relative battery life at any time. See
Section 3, Test Functions
• a test function that allows the operator to ensure
that the high and low alarms activate at the preset
alarm levels. See Section 3, Test Functions
Radio Frequency/Electromagnetic Insensitivity
The MiniOX®3000 Oxygen Monitor is designed to be
insensitive to radio frequency interference (RFI) and
electromagnetic interference (EMI). However, if the
monitor comes in close contact with an RF transmitter
or local electrical disturbance, an erratic reading may
occur.
1-4

P/N 814358 [Rev.2] 01/2015
Section 2
Setting Up the MiniOX®3000 Oxygen
Monitor
The MiniOX®3000 Oxygen Monitor is packaged in
a shipping carton suitable for instrument storage. If
there is obvious damage to the shipping carton or its
contents, contact Ohio Medical Corporation Repair at:
866-549-6446, Option #1
To set up the monitor:
1. Verify that you have the following (see Figure
2-1):
• MiniOX®3000 Oxygen Monitor
• Oxygen sensor and deflector in sealed
package
MiniOX®3000 Oxygen Monitor Section 2, Setting Up the Monitor
• 10-foot coiled cable with twist collar
• Tee adapter
• Sensor retaining strap
• 9-volt alkaline battery
• MiniOX®3000 Operation Manual CD
2. Check the sensor’s manufacturing date on the
sensor package. If the sensor is put into service
within six months after this date, the sensor will
meet performance specifications.
3. Remove the sensor from the sealed package and
attach it to the coiled cable.
a. Firmly press the connector until it snaps into
place; tighten the twist collar.
b. Insert the opposite end of the coiled cable into
the jack on the side panel of the instrument;
tighten the twist collar.
4. Remove the deflector from the package.
2-1
SENSOR
RETAINING STRAP
TEE
ADAPTER
OXYGEN SENSOR AND DEFLECTOR
IN SEALED CONTAINER
9-VOLT
ALKALINE
BATTERY
10 FT
COILED
CABLE
Figure 2-1
MiniOX®3000 Oxygen Monitor
MINIOX®3000
OXYGEN MONITOR
TWIST
COLLAR

P/N 814358 [Rev.2] 01/2015
MiniOX®3000 Oxygen Monitor Section 2, Setting Up the Monitor
a. Insert the gasket into the open end of the
deflector, ensuring that the gasket is properly
seated within the deflector
b. Gently screw the deflector onto the sensor
(For monitoring in a breathing circuit, see
Section 3, Installing the Sensor in a Breathing
Circuit)
5. Unscrew the two battery cover screws on the back
of the instrument.
a. Remove the cover
b. Install the battery (See Section 4, Battery
Replacement for full battery installation
instructions)
After battery installation:
• the display flashes
• the instrument performs a self-test
• then turns OFF
6. Proceed to Section 3, Operation
Do not handle the sensor unnecessarily
during calibration or use. Body heat can
cause the sensor’s thermistor to change
disproportionately to the change in
gas sample temperature at the sensing
electrode. This can produce some error
until thermal equilibrium is restored.
See Appendix F, Accessories/Replacement Parts
for ordering MiniOX®3000 Monitor accessories and
replacement parts (Figure 2-2).
2-2
CAUTION
Figure 2-2
Assembled MiniOX®3000 Oxygen Monitor
INCREASE ALARM SET POINT KEY
AUDIBLE ALARMS
LED ALARMS
DISPLAYED OXYGEN READING
HIGH ALARM POINT SETTING
LOW ALARM POINT SETTING
ON/OFF KEY
BATTERY TEST AND ALARM
TEST KEY
21% CALIBRATION KEY
DEFLECTOR
SENSOR
CABLE ASSEMBLY
SILENT KEY
MONITOR
STAND
UNLOCK KEY
(ENABLES CALIBRATION SEQUENCE)
DECREASE ALARM SET POINT KEY
SET KEY
(ENABLES ADJUSTMENTS OF
ALARM SET POINTS)
100% CALIBRATION KEY

P/N 814358 [Rev.2] 01/2015
MiniOX®3000 Oxygen Monitor Section 3, Operation
Section 3
Operation
This section describes the following operational
procedures and functions of the MiniOX®3000
Oxygen Monitor:
• Calibration
• Two-Point Linearity Check
• Setting the Alarms
• Alarm Conditions
• Silencing an Alarm
• Test Functions
• Installing the Sensor in a Breathing Circuit
• Mounting the Instrument with a Bracket
Calibration
The MiniOX®3000 Oxygen Monitor requires
calibration:
• daily, while in operation
• when the operating environment changes
• after the monitor is turned ON
• if the sensor is disconnected and reconnected to
the instrument
Recommended practice of calibration is against
room air (defined as oxygen concentration of 20.8%).
When a more precise measurement is desired,
repeat calibration using 100% oxygen concentration.
Changes in pressure, humidity or temperature may
affect calibration accuracy (see Appendix B, Effects
of Pressure, Humidity, and Temperature).
Do not handle the sensor unnecessarily
during calibration or use. Body heat can
cause the sensor’s thermistor to change
disproportionately to the change in
gas sample temperature at the sensing
electrode. This can produce some error
until thermal equilibrium is restored.
To Calibrate In Room Air (Figure 3-1):
1. Expose sensor to room air.
3-1
1
2
3
4
5
PRESS I/O
PRESS 21%
CALIBRATE
EXPOSE SENSOR
TO ROOM AIR
PRESS UNLOCK
AFTER 20 SECOND
CALIBRATION COMPLETE
AND
20.8% +2% DISPLAYED
Figure 3-1
Calibrating the MiniOX®3000 Oxygen Monitor in Room Air
CAUTION

P/N 814358 [Rev.2] 01/2015
MiniOX®3000 Oxygen Monitor Section 3, Operation
2. Press I/0 to turn ON the instrument.
• “CAL” flashes in the display
3. Press 21%. The following appears on the display:
• “CAL”
• “LOCKED”
• “21% CAL”
4. Press UNLOCK. The following appears:
• “CAL”
• “21% CAL”
• a 10-segment bar graph that “counts down”
two seconds per bar for 20 seconds
5. After 20 seconds, the calibration process is
complete the device:
• displays 20.8% ± 2% O2(18.8% to 22.8%)
• proceeds to the monitoring mode
• displays the current oxygen concentration as
%O2
To Calibrate at 100% O2(Figure 3-2)
Note: Prior to calibrating at 100% O2, the MiniOX®
3000 Oxygen Monitor must first be calibrated
in room air.
3-2
2
3PRESS 100%
CALIBRATE
EXPOSE SENSOR
TO 100% OXYGEN
4
5
PRESS UNLOCK
AFTER 20 SECOND
CALIBRATION COMPLETE
AND
100% +0/-2% DISPLAYED
1CALIBRATE IN
ROOM AIR
1. Calibrate in room air (see Section 3, To Calibrate
in Room Air)
2. Expose the sensor to 100% oxygen and allow
the readings to stabilize prior to initiating the
calibration.
• “CAL” flashes in the display.
3. Press 100%. The following appears on the
display:
• “CAL”
• “LOCKED”
• “100% CAL”
4. Press UNLOCK. The following appears on the
display:
• “CAL”
• “100% CAL”
• a 10-segment bar graph that “counts down”
two seconds per bar for 20 seconds.
5. After 20 seconds, the calibration process is
complete; the device:
• displays 100.0% +0/-2% (98% to 100%)
• proceeds to the monitoring mode
• displays the current oxygen concentration as
%O2
Figure 3-2
Calibrating the MiniOX®3000 Oxygen Monitor at 100% O2

P/N 814358 [Rev.2] 01/2015
NOTE: The MiniOX®3000 Oxygen Monitor has a
five second “time out” following keypad
functions. If you do not press UNLOCK
within five seconds, the instrument
returns to the flashing “CAL” mode.
NOTE: During operation if “CAL ERR”
flashes in the display, visual, audible
alarms activate, and then “CAL”
flashes, turn OFF the instrument
and repeat calibration procedure.
When recalibrating, be sure to select
the calibration value and use the
corresponding calibration gas. If “CAL
ERR” reoccurs, it may be necessary
to replace the sensor. (See Section 4,
“Sensor Replacement”)
NOTE: During operation if “CAL” displays, you
must recalibrate the monitor. If “CAL”
displays following proper recalibration, it
may be necessary to replace the sensor.
(See Section 4, Sensor Replacement)
Two-Point Linearity Check
To evaluate sensor performance, conduct a two-point
linearity check on the monitor every week or any time
you suspect that the sensor is not accurately reading
oxygen concentrations. Acceptable range for room air
measurement during a linearity check is:
• 20.8% ±2% (18.8% to 22.8%). This variation
allows for differences in:
• sampling methods
• accuracy of gas concentration
• precision of initial setting
If linearity deviates more than ±2%, the sensor is
nearing end-of-life and should be replaced.
To perform a two-point linearity check:
1. Calibrate in room air.
2. Place the sensor in a stream of oxygen with a
known concentration of 100% until the reading
stabilizes.
3. Recalibrate the monitor.
4. After calibration, measure room air. This reading
should be 20.8% ±2% (18.8% or 22.8%) within
five minutes.
• If the variation is greater than ±2%, repeat the
two-point linearity check
• If the variation is still greater than ±2%,
replace the sensor. (See Section 4, Sensor
Replacement)
Setting the Alarms
The default Alarm Set points are:
• 18% for Low Alarm (appears in the lower left
corner of the display)
• 50% for High Alarm (appears in the lower right
corner of the display)
These alarm points can be reset between 15%
and100%.
NOTE: The MiniOX®3000 Oxygen Monitor
retains current alarm settings when
turned OFF, if the alarm settings are not
below 18%. However, if the alarm settings
are lower than 18% when the MiniOX®
3000 Oxygen Monitor is turned OFF or
following battery replacement, alarm set
points return to the default settings of
18% and 50%.
To Set the Low Alarm
1. Press SET once. The following appears on the
display:
• “AL”
• up/down arrows
2. Using the arrow keys, scroll up or down to the
desired Low Alarm set point (15% to 99%).
3. The MiniOX®3000 Oxygen Monitor “locks” this
value. After five seconds, the monitor:
• beeps once
• automatically proceeds to the Monitoring
Mode
NOTE: The Low Alarm CANNOT be disabled or
set:
• below 15%
• above 99%
• higher than or equal to the High Alarm setting
To Set the High Alarm
1. Press SET twice. The following appears on the
display:
MiniOX®3000 Oxygen Monitor Section 3, Operation
3-3

P/N 814358 [Rev.2] 01/2015
• “AL”
• up/down arrows
2. Using the arrow keys, scroll up or down to the
desired High Alarm set point (16% to 100%).
3. The MiniOX®3000 Oxygen Monitor “locks” this
value. After five seconds, the monitor:
• beeps once
• automatically proceeds to Monitoring Mode
(Press SET once after Step 2 to manually
proceed to Monitoring Mode)
NOTE: The HIGH Alarm value:
• CANNOT be set equal to, or less than, the
Low Alarm value
• CAN be disabled by increasing the alarm set
point beyond 100% until “--” displays
Alarm Conditions
High and Low Oxygen Concentration Alarms
When the MiniOX®3000 Oxygen Monitor detects an
oxygen concentration that exceeds the preset alarm
limit:
• the red LED flashes for that alarm (High or Low)
• an audible alarm activates
• the measured concentration displays
Silencing an Alarm
The MiniOX®3000 Oxygen Monitor features a silence
function that allows the operator to temporarily mute
the O2concentration audible alarm.
1. When an audible alarm activates, press the silent
key (labeled with a horn icon) to mute the alarm
for up to three 30-second intervals, press:
• once for a 30-second interval
• twice (within two seconds) for a 60-second
interval
• three times (within four seconds) for a
90-second interval
The following appears on the display:
• a horn icon
• a three-bar graph showing a “countdown”
of 10 seconds per bar for each 30 second
interval
NOTE: When the audible alarm is silenced, the
appropriate visual alarm continues to
flash.
MiniOX®3000 Oxygen Monitor Section 3, Operation
If the alarm condition is not corrected within the
preset silence interval (30,60, or 90 seconds):
• the audible alarm reactivates
If the alarm condition is corrected and then reoccurs
within this interval:
• both audible and visual alarms activate
2. To manually terminate the silence mode, press
the down arrow (labeled with a ▼icon).
Low Battery Alarms
The MiniOX®3000 Oxygen Monitor features a two-
stage battery alarm that warns of depleted and
expired battery voltage:
• The first alarm alerts the operator that the monitor
has approximately six hours of operating time
remaining:
• “LOW BAT” appears on the display
• an audible alarm sounds at 30-second
intervals
• If the operator does not replace the battery after
this alarm, a second low battery alarm activates
when the battery is no longer able to support
monitoring.
• the monitor displays “LOW BAT” and “---”
• audible and visual alarms are activated
For periodic checks on battery status, see Section 3,
Test Functions”
Sensor Indicator
During monitoring, the MiniOX®3000 Oxygen Monitor
displays “SENSOR” and “OFF”; audible and visual
alarms activate if:
• the oxygen sensor becomes disconnected
• the cable fails or disconnects from the sensor or
instrument
• the sensor membrane is perforated
• the thermistor circuit opens
3-4

P/N 814358 [Rev.2] 01/2015
Error Handling
The MiniOX®3000 Oxygen Monitor performs a self-
test
• when it is turned ON
• after a battery is installed
If the microprocessor detects an error during these
routine self-tests or during monitoring:
• the display flashes “ERR” and an error code
• audible and visual alarms activate
• the monitor ceases to operate until the
appropriate service is performed; to reset the
monitor, press SET or turn the monitor OFF,
then ON (press I/0 twice). For further details see
Appendix E, Error Codes
NOTE: During normal operation, if a key is pressed
and held longer than nine seconds, audible
and visual alarms activate.
1. To reset the monitor, press SET or turn the
monitor OFF, then ON (Press I/0 twice). For
further details see Appendix E, Error Codes
Table 3-1 is a summary of MiniOX®3000 Oxygen
Monitor alarms and status messages.
MiniOX®3000 Oxygen Monitor Section 3, Operation
3-5
Table 3-1 Alarms and Status Messages
ALARM CAUSE CORRECTIVE ACTION
Low O2alarm:
O2concentration appears,
visual alarm flashes, and
audible alarm activates
Oxygen concentration is below the
preset Low Alarm setting
Check patient and delivered oxygen concentration
Verify that low alarm setting is appropriate
High O2Alarm:
O2concentration appears,
visual alarm flashes, and
audible alarm activates
Oxygen concentration is above the
present High Alarm setting
Check patient and delivered oxygen concentration
Verify that high alarm setting is appropriate
“SENSOR OFF” displays;
visual and audible alarms
activate
Cable is disconnected or malfunc-
tioning Check cable and sensor connections
Sensor is disconnected Visually check cable for damage. If necessary, replace cable
Sensor membrane is perforated If the alert persists, replace sensor
Thermistor circuit is open on the
sensor circuit board
If alert persists following sensor replacement, call Ohio Medical
Corporation service
During calibration, “CAL ERR”
flashes, visual and audible
alarms activate; then “CAL”
flashes
Calibration performed using a
gas other than room air or 100%
oxygen or wrong calibration key
pressed (100%/21%)
Recalibrate the monitor, ensure proper calibration key pressed
for calibration gas of room air or 100% oxygen
If the alert persists, replace sensor
If alert persists following sensor replacement, call Ohio Medical
Corporation service
During calibration, “CAL”
flashes
Sensor signal is out of monitoring
range
Recalibrate the monitor, ensure proper calibration key pressed
for calibration gas of room air or 100% oxygen
If the alert persists, replace the sensor
If alert persists following sensor replacement, call Ohio Medical
Corporation service
“LOW BAT” displays and mon-
itor beeps every 30 seconds
Monitor has approximately six
hours of operating time remaining
Replace the battery as soon as possible; then, recalibrate the
monitor and reset the high and low alarm values
“LOW BAT” displays “---”
flashes, both visual alarms
activate, and monitor emits a
three-tone beep for four min-
utes; monitor shuts OFF
Battery is expired and monitor is
not operating
Replace the battery as soon as possible; then recalibrate the
monitor and reset the high and low alarm values
“ERR” and error code (01 to
08) display, visual and audible
alarms activate and monitor
locks
Microprocessor detects internal
error
Note error code and see Appendix E, Error Codes
Disconnect Battery
Call Ohio Medical Corporation Service

P/N 814358 [Rev.2] 01/2015
MiniOX®3000 Oxygen Monitor Section 3, Operation
3-6
Test Functions
Battery Test
In addition to alarms alerting the operator to low and
expired battery voltage, the MiniOX®3000 Oxygen
Monitor features a keypad function allowing the
operator to check the relative battery life at any time.
To test battery status:
1. Press TEST once. The following appears on the
display:
• “BATTERY TEST”
• a 10-bar graph showing relative battery life.
Ten bars indicate a fully charged battery; one
bar indicates a battery near depletion
2. After five seconds, the MiniOX®3000 Oxygen
Monitor proceeds to the Monitoring mode,
displaying oxygen concentrations as %O2.
High and Low Alarms Test
The MiniOX®3000 Oxygen Monitor features a test
function to ensure that the high and low alarms
activate at the preset alarm levels. To test the alarms:
Press TEST twice.
• “ALARM TEST” displays
• the instrument automatically scrolls up to the high
alarm value and flashes this value on the display
• the audible alarm and visual high alarm activate
(If the high alarm value is disabled, the instrument
scrolls down from 100% to the low alarm value)
• the instrument then automatically scrolls down to
the low alarm value and flashes this value on the
display
• the audible alarm and visual low alarm activate
• the MiniOX®3000 Oxygen Monitor proceeds
to the Monitoring Mode, displaying oxygen
concentrations as %O2
NOTE: The MiniOX®3000 Oxygen Monitor is not
monitoring during the Alarm Test which
may take up to 30 seconds to complete.
NOTE: The Alarm Test will not function if the
MiniOX®3000 Oxygen Monitor is in an
alarm condition.
Installing the Sensor in a Breathing Circuit
To use the sensor in a breathing circuit, you will need
the following:
• Sensor (with deflector)
• Tee adapter
• Retaining Strap
To install the sensor in a breathing circuit:
1. Install the tee adapter into the breathing circuit
upstream from the humidifier. Make sure that side
port of the tee adapter is facing upward.
2. Remove the coiled cable from the sensor.
3. Firmly insert the sensor (with deflector) into the
tee adapter with the deflector pointing downward
(Figure 3-3) to prevent moisture from condensing
onto the sensor membrane (See Appendix B,
Effects of Pressure, Humidity, and Temperature).
Make sure that the sensor fits tightly into the tee
adapter.
4. Install one end of the retaining strap over a post
on the side of the tee adapter.
5. Loop the strap over the sensor, inserting the strap
center hole over the sensor cable jack.
6. Install the other end of the strap over the other tee
adapter post.
7. Re-attach the coiled cable to the sensor. Tighten
the twist collar.
The sensor is securely placed for monitors (See
Figure 3-4).
Mounting the Instrument with a Pole Bracket
The MiniOX®3000 Oxygen Monitor (as shown in
Figure 3-5) can be attached to a vertical or horizontal
pole using the Ohio Medical Corporation Mounting
Bracket (See Appendix F, Accessories/Replacement
Parts). To mount the MiniOX®3000 Oxygen Monitor:
1. Configure the bracket for either horizontal or
vertical attachment by adjusting the dovetail
mounting plate on the bracket.
2. Slide the mounting bracket onto the pole; secure
by tightening the screw knob.
3. Slide the wedge on the back of the monitor into
the dovetail mounting plate.

P/N 814358 [Rev.2] 01/2015
MiniOX®3000 Oxygen Monitor Section 3, Operation
3-7
Figure 3-3
Installing Sensor into Tee Adapter
SENSOR CABLE
RETAINING STRAP
SENSOR
GASKET
DEFLECTOR
O-RING
15mm TEE
Table of contents
Popular Medical Equipment manuals by other brands

C-Pro Direct
C-Pro Direct DORSIRAMP Instructions for use

Novametrix Medical Systems
Novametrix Medical Systems 515 Service manual

Allard
Allard 35306 SELECTION OPEN WRIST CHILDREN Instructions for use

Nasco
Nasco Life/form LF00958U instruction manual

InfuTronix
InfuTronix Nimbus II Plus Clinician manual

Olympus
Olympus OEP-5 instructions