OKIDATA B410 Installation and maintenance instructions

OKIDATA®B410 •420 •430
IMAGE UNIT & TONER CARTRIDGE REMANUFACTURING INSTRUCTIONS
OKIDATA B410/420/430 IMAGE UNIT & TONER CARTRIDGE
© 2013 UniNet Imaging Inc. All trademark names and artwork are property of their respective owners. Product brand names mentioned are intended to show compatibility only.
UniNet Imaging does not warrant downloaded information. Unauthorized sale, reproduction or distribution of this article is prohibited. For additional support, please contact [email protected]
www.uninetimaging.com
OKIDATA B410 •420 •430 IMAGE UNIT & TONER CARTRIDGE REMANUFACTURING INSTRUCTIONS
The five models of the B400 series are particularly different from other printers on the market. The electro-photographic system
uses LEDs instead of laser diodes for the creation of the latent image in the OPC. They also come standard with automatic duplex
printing - a feature many other similar market printers would offer at extra cost.
Other features include USB and parallel-port connectivity, which do not exist in competing models. Ultimately, the DN models are
thus standard-equipped to allow connection to Okidata's own network called "Okilan." Print speeds in these models are rated up
to 30 ppm.
These models operate with a system of two consumable parts (i.e. toner cartridge and separate imaging unit), the resolution is
1200 x 1200 dpi. The LED heads are warranted for five years, and the rest of the printer is for 1 year.
The B410/420/430 models have suitable monthly cycles of up to 50,000 impressions using 250-sheet capacity paper tray + 1
bypass, and a 500-sheet optional tray.
The Okidata B400 series toner cartridges contain chips for both 3,500 and 7,000 pages.
IMAGE UNIT - DISASSEMBY, CLEANING & REMANUFACTURING
Required Tools & Lubricants:
1. Medium Phillips head screwdriver
2. Needle-nose pliers
3. Jeweler's screwdriver
4. Toner vacuum
5. Conductive grease
Required Supplies:
1. Replacement OPC drum
2. Smartchip fuse for image unit
REMANUFACTURING OKIDATA B410/B420/B430
IMAGE UNIT & TONER CARTRIDGE
By Enrique Stura, Daniel Reyes and the Technical Staff at UniNet
© 2013 UniNet Imaging Inc. All trademark names and artwork are property of their respective owners. Product brand names mentioned are intended to show compatibility only.
UniNet Imaging does not warrant downloaded information. Unauthorized sale, reproduction or distribution of this article is prohibited. For additional support, please contact [email protected]
www.uninetimaging.com
1. Remove the toner cartridge from the image unit.

2. Remove the Phillips screws.
3. Unlock the rear tabs from the image unit cover.
OKIDATA B410 •420 •430 IMAGE UNIT & TONER CARTRIDGE REMANUFACTURING INSTRUCTIONS
© 2013 UniNet Imaging Inc. All trademark names and artwork are property of their respective owners. Product brand names mentioned are intended to show compatibility only.
UniNet Imaging does not warrant downloaded information. Unauthorized sale, reproduction or distribution of this article is prohibited. For additional support, please contact [email protected]
www.uninetimaging.com

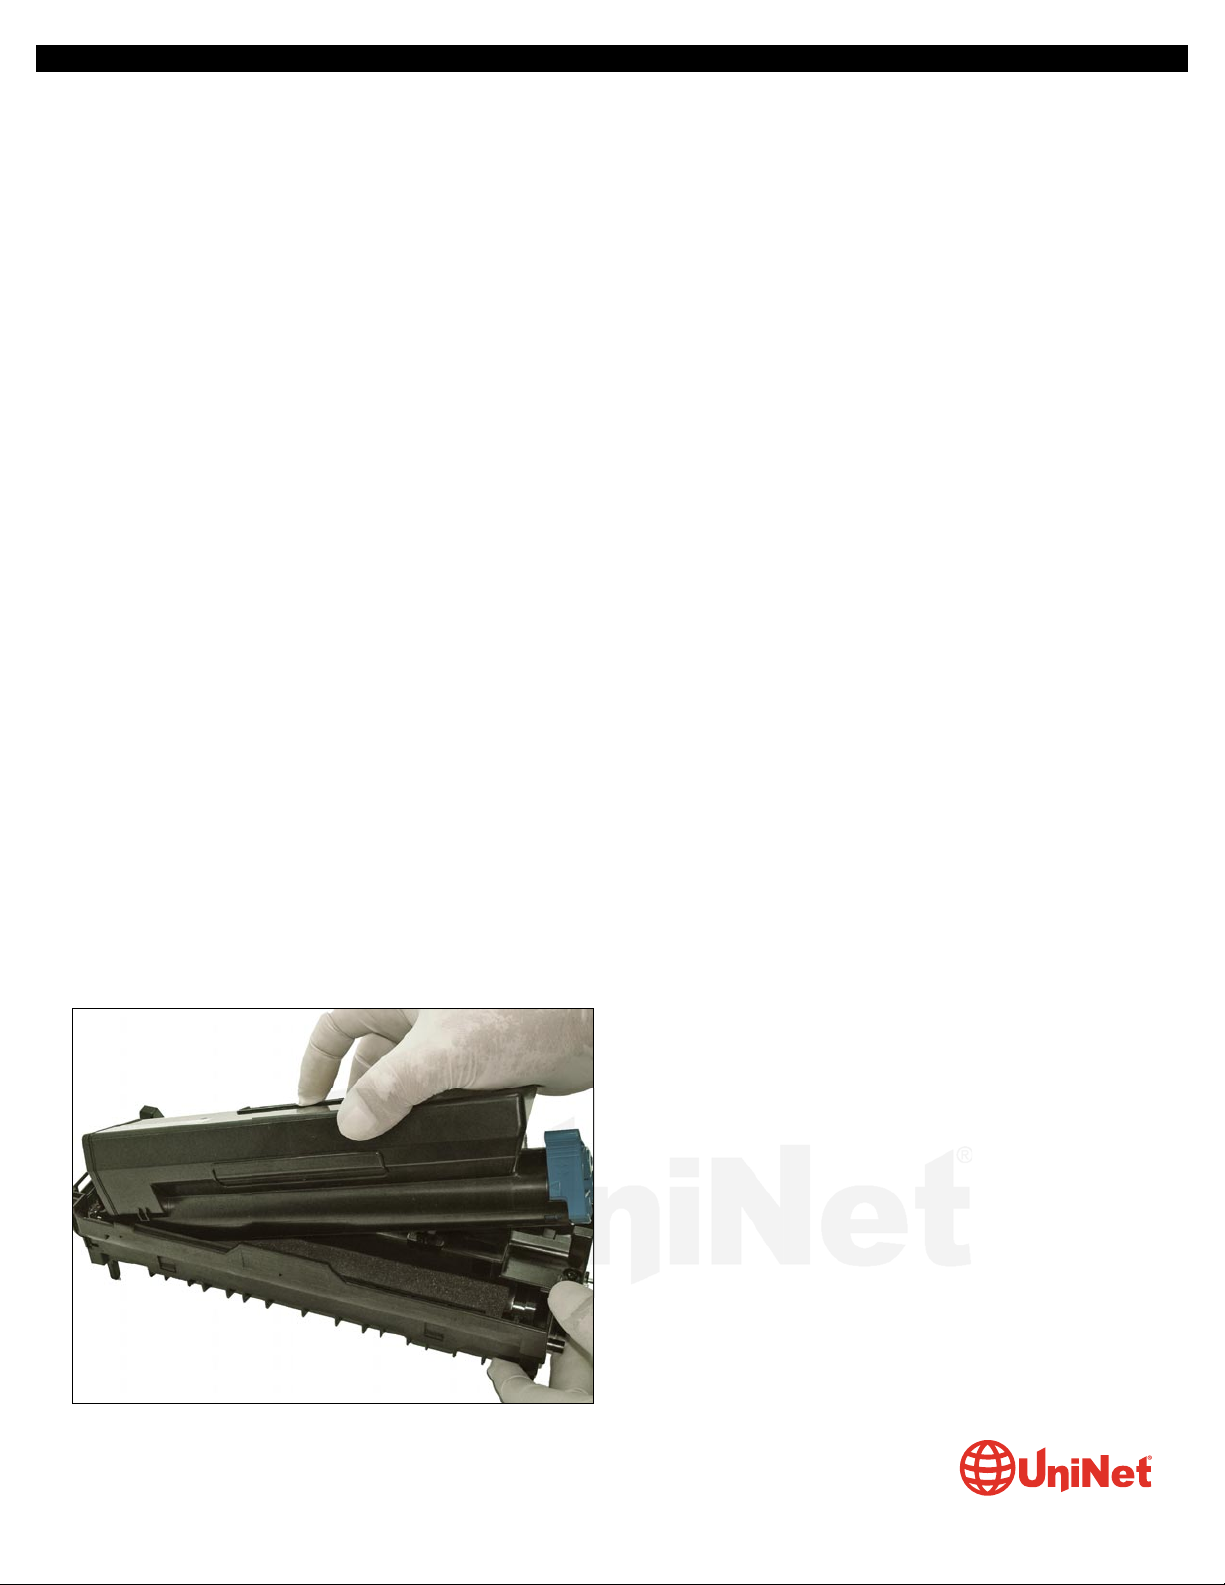
4. Lift the cover off completely. 5. Vacuum the lower toner hopper and roller
section thoroughly.
6. Remove the PCR by moving both posts toward you.
OKIDATA B410 •420 •430 IMAGE UNIT & TONER CARTRIDGE REMANUFACTURING INSTRUCTIONS
© 2013 UniNet Imaging Inc. All trademark names and artwork are property of their respective owners. Product brand names mentioned are intended to show compatibility only.
UniNet Imaging does not warrant downloaded information. Unauthorized sale, reproduction or distribution of this article is prohibited. For additional support, please contact [email protected]
www.uninetimaging.com

7. Remove the two screws on the gear (non-contact) side.
8. Remove the two screws on the contact side.
OKIDATA B410 •420 •430 IMAGE UNIT & TONER CARTRIDGE REMANUFACTURING INSTRUCTIONS
© 2013 UniNet Imaging Inc. All trademark names and artwork are property of their respective owners. Product brand names mentioned are intended to show compatibility only.
UniNet Imaging does not warrant downloaded information. Unauthorized sale, reproduction or distribution of this article is prohibited. For additional support, please contact [email protected]
www.uninetimaging.com

9. Remove the contact side end cap, moving it laterally.
OKIDATA B410 •420 •430 IMAGE UNIT & TONER CARTRIDGE REMANUFACTURING INSTRUCTIONS
10. Remove the chip housing from the contact side.
© 2013 UniNet Imaging Inc. All trademark names and artwork are property of their respective owners. Product brand names mentioned are intended to show compatibility only.
UniNet Imaging does not warrant downloaded information. Unauthorized sale, reproduction or distribution of this article is prohibited. For additional support, please contact [email protected]
www.uninetimaging.com

12. Remove the PCR contact.
OKIDATA B410 •420 •430 IMAGE UNIT & TONER CARTRIDGE REMANUFACTURING INSTRUCTIONS
© 2013 UniNet Imaging Inc. All trademark names and artwork are property of their respective owners. Product brand names mentioned are intended to show compatibility only.
UniNet Imaging does not warrant downloaded information. Unauthorized sale, reproduction or distribution of this article is prohibited. For additional support, please contact [email protected]
www.uninetimaging.com
11. On the gear side, remove the end cap.
It will come off together with the OPC drum shaft.
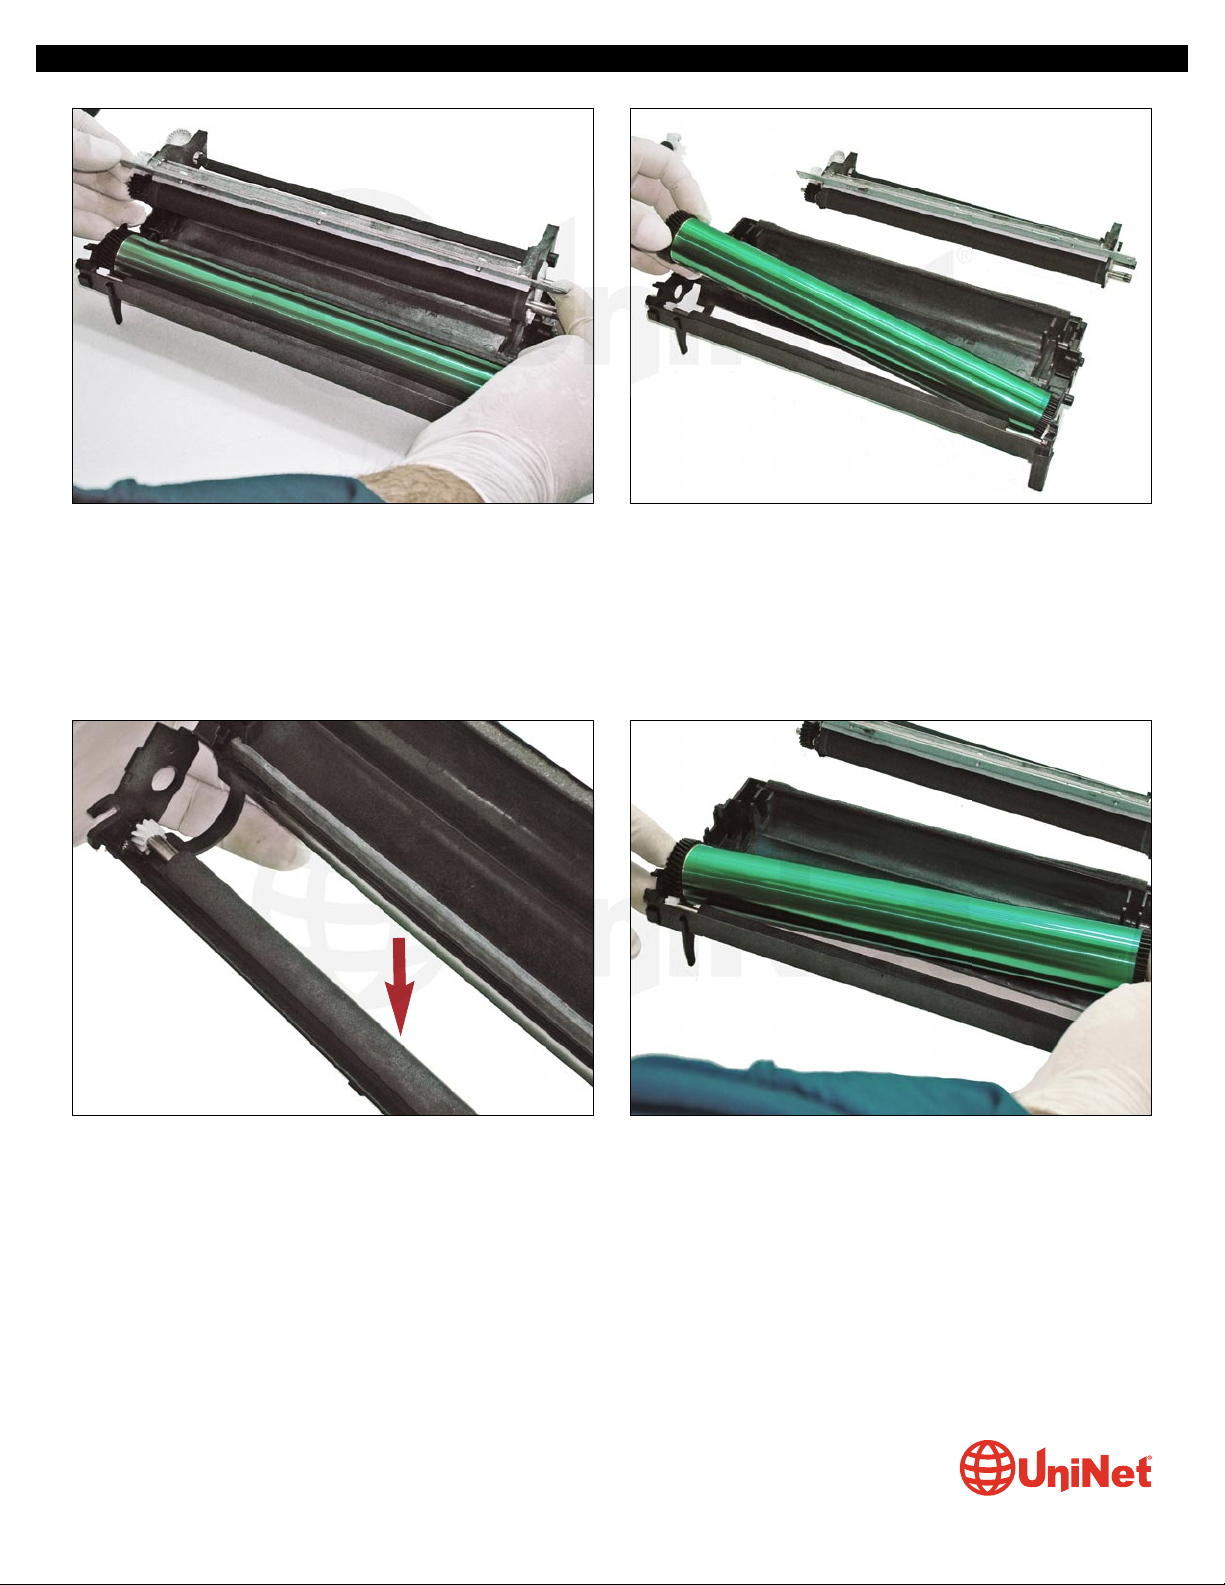
13. Remove the doctor blade assembly, taking off its position
and lifting forward.
14. Remove the OPC by lifting it up.
15. Use a vacuum to clean the roller shown without
removing it.
16. Assemble the components of the image unit, beginning
with the OPC.
OKIDATA B410 •420 •430 IMAGE UNIT & TONER CARTRIDGE REMANUFACTURING INSTRUCTIONS
© 2013 UniNet Imaging Inc. All trademark names and artwork are property of their respective owners. Product brand names mentioned are intended to show compatibility only.
UniNet Imaging does not warrant downloaded information. Unauthorized sale, reproduction or distribution of this article is prohibited. For additional support, please contact [email protected]
www.uninetimaging.com

17. Install the doctor blade assembly and snap it into place.
OKIDATA B410 •420 •430 IMAGE UNIT & TONER CARTRIDGE REMANUFACTURING INSTRUCTIONS
18. Install the PCR contact.
Lubricate the OPC drum shaft with conductive grease and insert almost completely as shown.
© 2013 UniNet Imaging Inc. All trademark names and artwork are property of their respective owners. Product brand names mentioned are intended to show compatibility only.
UniNet Imaging does not warrant downloaded information. Unauthorized sale, reproduction or distribution of this article is prohibited. For additional support, please contact [email protected]
www.uninetimaging.com
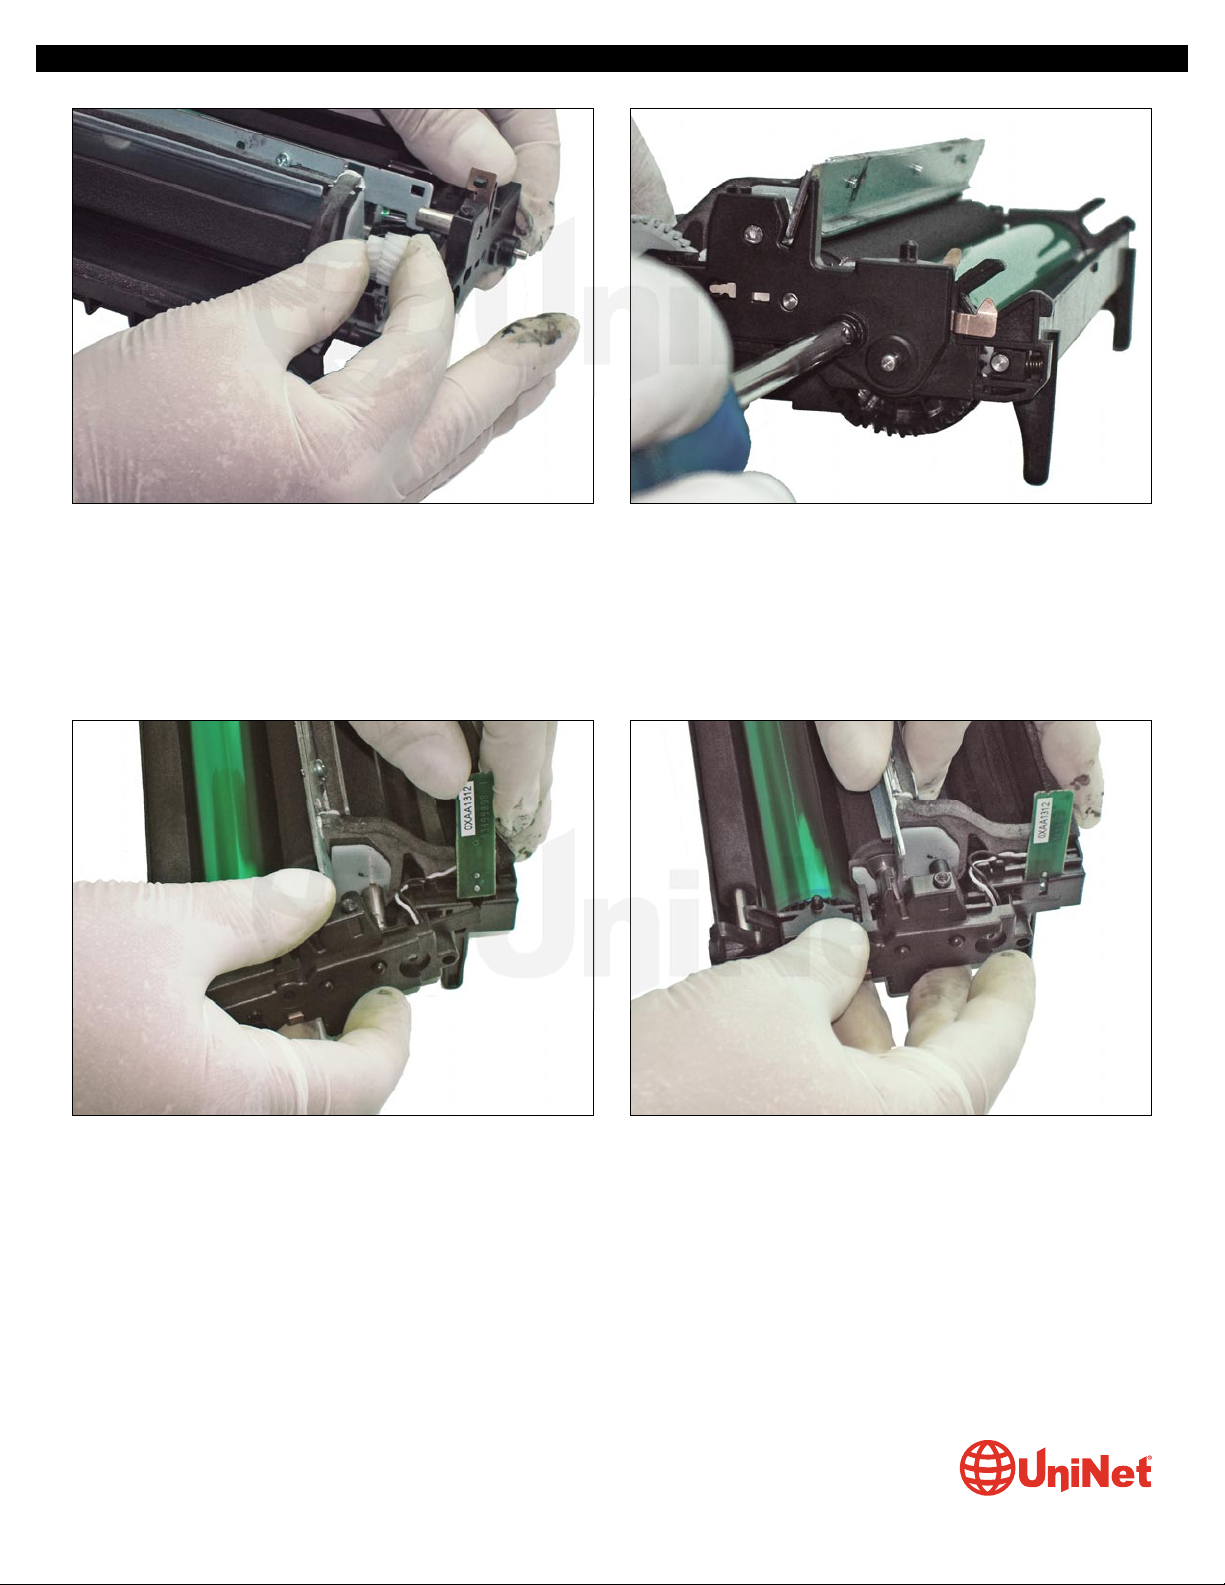
19. Install the small white gear to the short axis.
Install the end cap and screw.
20. On the opposite side of the unit, fit the contact chip assembly and install the end cap.
OKIDATA B410 •420 •430 IMAGE UNIT & TONER CARTRIDGE REMANUFACTURING INSTRUCTIONS
© 2013 UniNet Imaging Inc. All trademark names and artwork are property of their respective owners. Product brand names mentioned are intended to show compatibility only.
UniNet Imaging does not warrant downloaded information. Unauthorized sale, reproduction or distribution of this article is prohibited. For additional support, please contact [email protected]
www.uninetimaging.com
This manual suits for next models
2
Table of contents
Other OKIDATA Printer Accessories manuals


