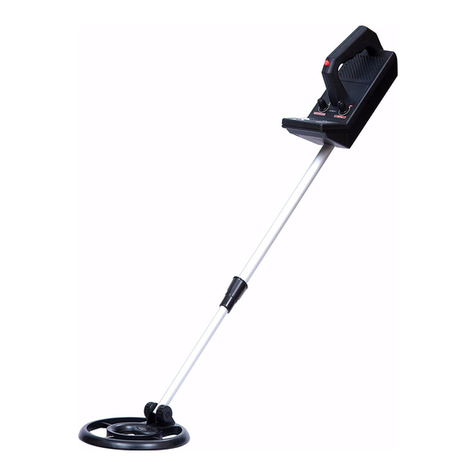
OKM PULSE NOVA User manual

INTRODUCTION
TECHNICAL SPECIFICATIONS
CONTROL ELEMENTS
ASSEMBLY
MEASUREMENT
TROUBLESHOOTING
OKM PULSE NOVA
MANUAL

Any information contained in these operating instructions may be changed without prior notice.
OKM does not make any warranty for this document. This also applies without limitation to implied assurances of merchantability and fitness for a specific purpose. OKM does not assume
any responsability for errors in this manual or for any incidental or consequential damage or loss associated with the delivery, exploitation or usage of this material.
This documentation is available "as presented" and without any kind of warranty. In no circumstances OKM takes responsibility for lost profits, usage or data losts, interruption of business
activities or all kind of other indirectly damages, which developed because of errors in this documentation. This instruction manual and all other stored media, which are delivered with this
package should only be used for this product. Program copies are allowed only for security- and savety purposes. The resale of these programs, in original or changed form, is absolutely
forbidden.
This manual may not be copied, duplicated or translated into another language, neither in part nor completely, over the copyright matters without the prior written consent of OKM.
Copyright ©2021 OKM GmbH. All rights reserved.

TABLE OF CONTENTS
1 INTRODUCTION...........................................................................4
1.1 PREFACE........................................................................................................ 4
1.2 IMPORTANT NOTES ...................................................................................... 5
1.2.1 General Notes ............................................................................................. 5
1.2.2 Possible Health Hazards ............................................................................ 5
1.2.3 Surrounding Area ....................................................................................... 5
1.2.4 Voltage......................................................................................................... 5
1.2.5 Data Correctness........................................................................................ 5
1.3 MAINTENANCE AND SERVICES.................................................................. 5
1.4 DANGER OF EXPLOSION DURING EXCAVATION........................................ 5
1.5 CARE AND USE ............................................................................................. 6
1.6 PROTECTING YOUR INVESTMENT .............................................................. 6
2 TECHNICAL SPECIFICATIONS.................................................7
2.1 CONTROL UNIT ............................................................................................. 7
2.2 TELESCOPIC ROD......................................................................................... 7
2.3 SEARCH COIL DELTA38 / OMEGA38............................................................ 7
2.4 SEARCH COIL DELTA18 / OMEGA18............................................................. 7
2.5 FRAME COIL XI104........................................................................................ 7
3 CONTROL ELEMENTS ...............................................................8
3.1 CONTROL UNIT ............................................................................................. 9
3.2 TELESCOPIC ROD........................................................................................11
3.3 SEARCH COILS ............................................................................................11
3.4 BLUETOOTH HEADPHONES .......................................................................12
3.4.1 Pairing new Bluetooth Headphones ..........................................................12
4 ASSEMBLY .................................................................................13
4.1 CHARGING THE CONTROL UNIT ................................................................13
4.2 MOUNTING THE CONTROL UNIT ...............................................................14
4.2.1 Attaching the Carrying Strap.....................................................................14
4.2.2 Mounting the Control Unit .........................................................................14
4.4 ADJUSTING THE TELESCOPIC ROD ..........................................................15
4.5 MOUNTING THE LED FLASHLIGHT ...........................................................16
4.6 ASSEMBLING THE FRAME COIL ................................................................17
5 MEASUREMENT........................................................................18
5.1 DETECTION DEPTH .....................................................................................19
5.2 GROUND BALANCING.................................................................................19
5.3 OPERATION ................................................................................................. 20
5.4 PINPOINTING.............................................................................................. 20
6 TROUBLESHOOTING................................................................21

4 / 22
1 INTRODUCTION
1.1 PREFACE
Dear customer,
our engineers, sales, training and support staff at OKM GmbH would like to thank you for your
purchase of the Pulse Nova metal detector.
The Pulse Nova pulse induction detector works on the principle of a time sensitive oscillator
which produces an alternating current that passes through a coil producing an alternating mag-
netic field. This alternating magnetic field creates an eddy current which can detect electrically
conductible metal. It uses the induction of a high voltage energy pulse to identify the presence
of metals.
The Pulse Nova is able to locate buried objects within various structures and vessels non-intru-
sively without having to excavate the area. The facile and flexible handling of the Pulse Nova can
easily and quickly give reproducible results.
Our team of specialists guarantees that our products are under recurrent control. Our special-
ists try to implement new developments in terms of further quality improvements for you.
By purchasing or using one of our products, we cannot guarantee that during the course of your
research you will be successful and have a find. The recognition of hidden and buried objects
depends on various factors. As you well may know there are different soil types all over the
world with different levels of natural attenuation. Variable soil properties can and will hamper
and alter ultimate scan measurements. Areas with an extreme amount of ground water, vary-
ing clays, sands and wet soils will make scanning more difficult and may reduce the maximum
depth capabilities of any and all detection equipment, regardless of brand or model.
For more information regarding where our equipment has been used and operated, please visit
our website. Our equipment is constantly being tested and when improvements or upgrades are
available, we will list them also on our website.
It is necessary for our company to protect our developments and all of the information learned
during the “Research and Development” phases in creating our technology. We strive to stay
within the given framework of legislation, patents and trademark registration.
Please take your time to read this User Manual and familiarize yourself with the operation,
functionality and how to use the Pulse Nova. We also offer training at our factory and on-site.
We strive to maintain a worldwide dealer network for assistance and support. Please visit our
website for more information.
INTRODUCTION

5 / 22
1.2 IMPORTANT NOTES
Prior to using the Pulse Nova and its accessories, please read the following instructions care-
fully. These instructions give information on how to use the detector and potential sources where
precautions should be taken.
1.2.1 General Notes
Being an electronic device, the Pulse Nova has to be treated with caution and care as with any
other electronic device. Any failure to observe the safety precautions given or any use for pur-
poses other than the ones it is designed for may result in damage or destruction of the process-
ing unit and/or its accessories or connected components.
The device has a built in anti-tampering module which will destroy the unit if it is improperly
opened. There are no end user serviceable parts on the inside of the unit.
1.2.2 Possible Health Hazards
If used properly this device normally does not pose any health hazards. According to current
scientific knowledge, the high-frequency signals are not harmful to the human body on account
of their low power.
1.2.3 Surrounding Area
When moving this unit from a cold place to a warmer place, watch out for condensation. Do not
operate the unit until possible condensation has evaporated. The unit is not weather or water
proof moisture within the electronics can destroy the unit.
Avoid strong magnetic fields, which may occur in places where there are large electric motors
or unshielded loudspeakers. Try to avoid using this equipment within 50 meters (150 ft) of this
type of equipment.
Metallic objects on the ground such as cans, tin, nails, screws or debris can influence your scan
data and present negative results regarding your scan data. Also it is a good habit to remove
any metallic objects off of your person like cellular telephones, keys, jewelry, etc... Do not wear
steel toe boots.
1.2.4 Voltage
The power supply can not be outside the indicated range of values. Use only approved chargers,
batteries and rechargeable batteries which are included within the scope of delivery.
1.2.5 Data Correctness
Data errors can occur if:
• the power supply of the device or the batteries are too low,
• the cables are too long,
• the unit is operating to close to devices which sends out disturbances or
• atmospheric conditions (electrical storms, lightning, etc.).
1.3 MAINTENANCE AND SERVICES
In this section you will learn how to maintain your measuring instrument with all included acces-
sories to keep it in good condition a long time and to get good measuring results.
The following list indicates what you absolutely should avoid:
• penetrating water
• strong dirt and dust deposits
• hard impacts
• strong magnetic fields
• high and long lasting heat effect
To clean your device please use a clean and dry soft rag or cloth. To avoid any damage you should
transport the device and accessories always in an appropriate way.
Prior to using your Pulse Nova please be sure that all batteries and accumulators are fully
charged. Also do not allow the batteries to completely discharge before recharging them. This
way your batteries will have a long and durable life. When the unit is not in use, recharge the
batteries every 3 months so that they retain their performance.
To charge the external batteries use only the approved chargers
which are part of the scope of delivery.
1.4 DANGER OF EXPLOSION DURING EXCAVATION
Unfortunately, the last two world wars also made the ground in many places of the world a po-
tentially explosive scrap heap. A host of those lethal relics are still buried in the ground. Do not
start digging and hacking for an object wildly when you receive a signal of a piece of metal from
your device. Firstly, you might indeed cause irreparable damage to a truly rare find, and second-
ly, there is a chance that the object reacts in an insulted way and strikes back.
Note the color of the ground close to the surface. A red or reddish color of the ground is an
Never use the 115/230 Volt main supply directly!

6 / 22
indicator of rust traces. As regards to the finds themselves, you should definitely pay attention
to their shape. Curved or round objects should be a sign of alarm, especially if buttons, rings or
little pegs can be identified. The same applies to recognizable ammunition or bullets and shells.
Leave ammonition where it is, do not touch it and, most importantly, do not take any of it home
with you. The devices of war made use of rocker fuses, acid fuses and ball fuses. Those compo-
nents have been rusting away in the course of time, and the slightest movement may cause parts
of them to break and be triggered. Even seemingly harmless objects such as cartridges or large
ammunition are anything but that.
Moving such an object may cause those crystals to produce friction, leading to an explosion. If
you come across such relics, mark the place and do not fail to report the find to the police. Such
objects always pose a danger to the life of hikers, walkers, farmers, children and animals.
1.5 CARE AND USE
The Pulse Nova is a sturdy instrument, but it is not designed to withstand abuse. In caring for
your Pulse Nova, there are several important DOs and DON‘Ts to remember.
• DO NOT use to get rid of bushes, flatten area by swinging wildly or pry rocks loose.
• DO NOT drop the machine into water or use it while it is raining or wet.
• DO NOT leave it exposed at night where dew could form on it.
• DO NOT store it in places that could get extremely hot.
• DO NOT leave it in the trunk of a car where high temperatures could build up.
• DO NOT spray lubricants, or any type of cleaners, solvents, sealants or other chemicals
into or onto the electronic parts, switches or controls.
• DO NOT attempt to modify or repair the detector‘s electronics as this will void your detec-
tor‘s warranty.
• DO clean your unit with a soft dry or slightly damp cloth to remove dust and residue from
the previous use.
• DO use the device within the proper operating guidelines.
• DO use the detector with the proper OKM Power Pack as to not cause damage to the unit.
The warranty does not cover damage resulting from an accident, neglect or abuse.
1.6 PROTECTING YOUR INVESTMENT
Often detector users become disappointed when their new detector becomes less and less re-
sponsive and seems to have lost some of its original peak performance. You can help prevent
this from happening to your detector by following these basic care and protection guidelines:
• Operate your detector exactly as recommended in this User Manual.
• Use only the OKM Power Pack or other approved power supplies.
• The search coil cable is hard-wired to the search coil and protected by a stress relief. Inspect
the stress relief frequently to make sure it is firmly attached and intact.
• Keep cables properly wound around the extension pole and protect them during use. Floppy,
pinched, or damaged cables may short, causing unnecessary replacement of the search coil.
• Sweep the search coil carefully, especially when using around rocks and building founda-
tions. Avoid hitting the search coil against hard, solid objects and surfaces.
• Keep your search coil slightly off of the ground during the sweep, especially when using in
gravel or hard, rocky dirt.
• The search coil is waterproof and can be submerged in either fresh or salt water. After the
search coil is used in salt water, rinse it and the lower stem assembly well with fresh water
to prevent corrosion of the metal parts.
• The search coil is waterproof but the electronics are not. Thus, always prevent any moisture
or water from entering the control housing and never allow the cable connectors to become
submerged in water.
• If working in or near water, or if there is a possibility of rain, use a protective weather resis-
tant pouch or plastic bag to cover the control housing. Make sure it can “breathe” in order to
ensure against condensation buildup inside.
• After each use, clean the detector with a soft cloth to remove dust, moisture or other con-
taminants.
• When transporting the detector in a car during hot weather, store it on the floor of the pass-
enger compartment if possible. Using a carry bag gives additional protection. In any case,
never allow the detector to roll around unprotected in the trunk or back of a pickup truck.
• Protect your detector from dust, moisture, and extreme temperatures during storage.
• When shipping, use the original factory carton or similar heavy-duty container and provide
sufficient padding around all parts.
• Treat your detector as you would any sensitive electronic instrument. Though it is designed to
withstand the demands of normal treasure hunting, proper care is essential.
7 / 22
2 TECHNICAL SPECIFICATIONS
The technical specifications are medial values. During operation slight variations are possible.
2.1 CONTROL UNIT
Dimensions (L x W x H) 180 x 115 x 70 mm
Weight 0.64 kg
Input (max) 4.8 - 20 V DC, 3.16 A, 20W
Safety Class IP40
Operating Time (fully charged, 25° C) approx. 8 hours
Charging Time @19V approx. 3 hours
Feedback acoustic
Operating Temperature 0° C to +40°C
Storage temperature -20°C to +70° C
Waterproof No
2.2 TELESCOPIC ROD
Dimensions (L x W x H) 630–1023 x 115 x 200mm
Weight 0.90kg
2.3 SEARCH COIL DELTA38 / OMEGA38
Diameter Ø 375mm
Height 45mm
Cable Length approx. 1.50 m
Weight approx. 0.80 kg
Technology
Bifilar Mono Coil, High Voltage Pulse Induction
Waterproof Yes
2.4 SEARCH COIL DELTA18 / OMEGA18
Diameter Ø 175 mm
Height 45mm
Cable Length approx. 1.50 m
Weight approx. 0.38 kg
Technology
Bifilar Mono Coil, High Voltage Pulse Induction
Waterproof Yes
2.5 FRAME COIL XI104
Dimensions, disassembled (D x L) Ø 130 x 1120 mm
Weight (with shipping tube) approx. 3.26 kg
Dimensions, assembled (L x W x H) 1040 x 1040 x 60 mm
Weight (without shipping tube) approx. 2.35 kg
Technology Mono Coil, High Voltage Pulse Induction
Waterproof No
TECHNICAL SPECIFICATIONS

8 / 22
CONTROL ELEMENTS
3 CONTROL ELEMENTS
In this section we explain more about the fundamental use of all control elements for
the Pulse Nova metal detector. All connectors, inputs and outputs are explained in
detail. Understanding the various ports and connectors makes it
much easier to prepare the unit for operation.
Assembled Metal Detector with Standard Search Coil Delta38
• The Search Coil is mounted at the bottom of the Telescopic Rod.
• The Control Unit needs to be attached beneath the armrest.
detail. Understanding the various ports and connectors makes it
much easier to prepare the unit for operation.
Assembled Metal Detector with Standard Search Coil
Delta38
The Search Coil is mounted at the bottom of the Telescopic Rod.
The Control Unit needs to be attached beneath the armrest.
Control
Unit
Attachable
LED Flashlight
Telescopic
Rod
Search Coil
Delta38

9 / 22
3.1 CONTROL UNIT
Sensitivity
Knob
Loop for
Carrying Strap
Search Coil
Socket
Charger
Socket
Charging LED
Charger Socket / Charging LED: When the internal battery is too low – which is signaled by a low
triple tone at increasingly shorter intervals – you have to recharge it by connecting the appropri-
ate Power Charger to the Charger Socket. As long as charging is in progress, the Charging LED
is orange. As soon as the Charging LED turns off, the battery is fully charged. Complete details
about charging the unit you will find in chapter "4.1 Charging the Control Unit" on page 13.
Search Coil Socket: Plug the Connector of the Search Coil into this socket before using the de-
tector. No matter if you are using the standard Search Coils or the Frame Coil, this is the place
where it gets connected.
Slider Plate: This part is used to mount the Control Unit to the Telescopic Rod. Thanks to the
embedded magnet, the Control Unit will keep in place when attached. Read chapter "4.2 Mount-
ing the Control Unit" on page 14 to learn more about assembling and disassembling the Con-
trol Unit to the Telescopic Rod.
Headphones Socket: If you don’t want to use Bluetooth Headphones you can also use wired
headphones by plugging them into the Headphones Socket. As soon as the headphones are
connected, the internal speaker will be disabled.
Loop for Carrying Strap: When using the Frame Coil it is recommended to detach the Control
Unit off the Telescopic Rod and attach the Carrying Strap instead. To do so, simply hook the
carabiner into both loops and carry the unit around your neck (see chapter "4.6 Assembling the
Frame Coil" on page 17).
Slider Plate
with Magnet
Headphones
Socket
Power Button
with Operating LED
Loop for
Carrying Strap
Volume
Knob

10 / 22
Sensitivity
Knob
Power Button
with Operating LED
Volume
Knob
Power Button with Operating LED: Push the Power Button to switch on the Control Unit. At first,
the Operating LED starts blinking for about 2 seconds before it remains green permanently. If
the LED blinks rapidly before turning off, the internal battery is too low and must be charged (see
chapter "4.1 Charging the Control Unit" on page 13).
If you are using Bluetooth Headphones, you see its pairing state by looking at the Operating LED.
If the LED is blue the headphones are properly connected and ready to use as output source for
any acoustic signals. More details about Bluetooth Headphones and the LED indications can be
found in chapter "3.4 Bluetooth Headphones" on page 12.
To switch off the Control Unit, push the Power Button for at least 3 seconds until the Operating
LED turns off.
Volume Knob (black cap): This knob regulates the volume
of the acoustic output. Turning the knob to the left low-
ers the volume, turning it to the right raises the volume.
If the value reaches its minimum or maximum, addition-
al turning in the same direction will have no decreasing
or increasing effect. In this case, you will hear a double
tone that indicates you reached the end of the adjustment
range.
In case you need to connect Bluetooth Headphones, the
Volume Knob can be utilized for pairing purposes. Please
read chapter "Pairing new Bluetooth Headphones" for
more information.
Sensitivity Knob (gray cap): This knob is used to regulate
the sensitivity of the Search Coil. The higher the sensitivity
the deeper you may find underground objects but the more
noise and disturbances you may receive alongside metal
signals.
Turning the knob to the left lowers the sensitivity, turning
it to the right raises the sensitivity. If the value reaches
its minimum or maximum, additional turning in the same
direction will have no decreasing or increasing effect. In
this case, you will hear a double tone that indicates you
reached the end of the adjustment range.
If the sound output gets to noisy, you may apply a ground
balance by pushing the Sensitivity Knob downwards. Read
chapter "Ground Balancing" for more details about bal-
ancing your metal detector.

11 / 22
3.2 TELESCOPIC ROD
The Telescopic Rod - also called Telescopic Shaft - is the link between Control Unit and Search
Coil. Only the Frame Coil is used without Telescopic Rod.
Search Coil Mount: Here you mount your preferred Search Coil to the Telescopic Rod. Read
chapter "Mounting the Search Coil" for details.
Slider Bracket: The Slider Bracket serves as a mount for the Control Unit. Read chapter "4.2
Mounting the Control Unit" on page 14 to learn more about mounting the Control Unit to the
Telescopic Rod.
Hand Grip / Armrest: While your hand is grabbing the Hand Grip, your arm should rest in the
Armrest. Tighten the Velcro for your own comfort.
Tab Locks: Use these locks to extend
or shrink the Telescopic Rod. Open the
tab to loose the connected shaft of the
rod and tighten it after adjusting the
length accordingly.
More details in chapter "4.4 Adjusting
the Telescopic Rod" on page 15.
3.3 SEARCH COILS
The Pulse Nova metal detector comes (depending on the purchased pack) with several Search
Coils in different sizes:
• 38cm Search Coil: for standard purposes
• 18cm Search Coil: to detect small objects near the ground surface
• Frame Coil: to detect large objects at greater depths
Connector: The connector of the designated Search Coil has to be plugged into the Search Coil
Socket of the Control Unit.
Slider
Bracket Armrest
Hand Grip
Tab Lock
(locked)
Tab Lock
(locked)
Search Coil
Mount
Connector
Shaft
Adapter
Tab Lock
(unlocked)
Tab Lock
(locked)

12 / 22
3.4 BLUETOOTH HEADPHONES
The Pulse Nova metal detector can be operated with any OKM Bluetooth Headphones that is
supporting A2DP (Advanced Audio Distribution Profile) with either SBC or aptX LL (Low Latency)
Codec. Your Pulse Nova metal detector comes with preconfigured OKM Bluetooth Headphones.
The original OKM Bluetooth Headphones, which belong to the scope of delivery of your Pulse
Nova, are already paired. To successfully connect your headphones with the Control Unit place
the headphones close to the detector and follow these steps:
1. Power on the Control Unit and wait until the Operating LED is permanently green.
2. Switch on your OKM Bluetooth Headphones.
3. After a short time the Operating LED changes from green to blue, to indicate a successful
Bluetooth connection.
As soon as the Bluetooth connection between Control Unit and headphones has been estab-
lished, the internal speaker will be disabled. The Headphones Socket will not be disabled, so any
wired headphones that are connected to the Control Unit are still working independently.
3.4.1 Pairing new Bluetooth Headphones
To operate the Pulse Nova metal detector with any other wireless OKM Bluetooth Headphones,
you have to pair your new headphones with the Control Unit first. Place the headphones close to
the detector and follow these steps:
1. Power on the Control Unit and wait until the Operating LED is permanently green.
2. Switch on your Bluetooth Headphones.
3. Activate the pairing mode of your new Bluetooth headphones (see headphones manual).
4. Push and hold the Volume Knob of the Control Unit until the Operating LED flashes blue.
5. As soon as the Operating LED is permanently blue it indicates a successful Bluetooth
connection.

13 / 22
4 ASSEMBLY
After unpacking your Pulse Nova metal detector for the first time, you assemble and prepare it
for the first use. Here are the steps to follow to get it ready for operation.
4.1 CHARGING THE CONTROL UNIT
The Control Unit contains an internal battery that must be recharged regularly to guarantee a
proper function of the detector. The metal detector has two ways to indicate a low battery:
• After powering on a fully charged Control Unit, the Operating LED will be permanently
green. In case the internal battery is too low, the Operating LED flashes green and then
switches off again. You will not be able to power on the detector at all.
• When the internal battery gets low while working with the detector, a low triple tone at
increasingly shorter intervals will sound on your acoustic output. This very unique tone will
repeat to inform you about the low battery condition until the Control Unit switches off.
Recharge the battery by connecting the Power Charger or an OKM Power Pack.
The Charging LED indicates the status of the charge process:
• Charging LED is orange while charging is in progress.
• Charging LED switches off as soon as the charging process has finished.
When the metal detector is powered with an OKM Power Pack, the internal battery will automa-
tically be recharged while working with the metal detector. It may happen that the Charging LED
is orange most of the time, since the charging process takes place continuously.
Power Charger Power Pack
ASSEMBLY

14 / 22
4.2 MOUNTING THE CONTROL UNIT
There are two ways to carry the Control Unit while metal detecting:
• attached to the Carrying Strap
• mounted to the Telescopic Rod
Both methods will be explained in the following sections.
4.2.1 Attaching the Carrying Strap
The Carrying Strap is attached to the Control Unit when using the Frame Coil, since there is
no need of the Telescopic Rod at all.
Hook the carabiners of the Carrying Strap into the Loops of the Control Unit.
4.2.2 Mounting the Control Unit
When using the 18cm or 38cm Search Coil, the Control Unit may be mounted to the Telescopic
Rod.
1 2
Place the Slider Plate of the Control Unit
directly into the Slider Bracket of the
Telescopic Rod.
Push it completely into the bracket until it
snaps into place.
After the Control Unit has been attached to the Telescopic Rod, you can continue to mount the
Search Coil.
To dismount the Control Unit, first pull the Control Unit downwards and then pull it out of the
Slider Bracket:
1 2
Pull the Control Unit downwards. Pull the Control Unit out of the Slider Bracket.

15 / 22
4.3 MOUNTING THE SEARCH COIL
Assembling the Search Coil to the Telescopic Rod is very simple.
12
Unscrew the bolt from the Search Coil Mount
of the Telescopic Rod. Make sure the rubber
washers are seated next to the shaft before
attaching the Search Coil.
Insert the Search Coil Mount of the Telescopic
Rod into the Shaft Adapter of the Search Coil.
Fix it with the bolt and tighten it so that the coil
does not move.
Plug the Connector of the Search Coil into the
designated Socket of the Control Unit.
4.4 ADJUSTING THE TELESCOPIC ROD
The length of the Telescopic Rod can be adjusted according to your own body height. Adjust the
length according to your own comfort.
Use the Tab Locks to loosen and
tighten the single segments of the
Telescopic Rod.
To adjust the rod length, the Tab
Locks needs to be opened.
2
Extend the shaft to your desired length. To fix the length, lock the lever down.
Adjusting the Telescopic Rod is important:
To avoid straining any muscles and to allow
for more comfort while working with the de-
tector, a properly adjusted Telescopic Rod is
essential.
The Search Coil should be close to the ground
surface without touching it.
1

16 / 22
4.5 MOUNTING THE LED FLASHLIGHT
1 2 3 4
Place the LED Flashlight in the Holder ... ... and fix it with the rubber band. Place the LED Flashlight holder onto the
Mounting Plate on top of the Telescopic Rod ... ... and push it gently to fix it.
You can remove the flashlight via the rubber
band (see steps 1 and 2), e.g. for charging.
The Pulse Nova metal detector includes an LED Flashlight that can be attached on the Tele-
scopic Rod. This is very helpful for night searches or investigations in dark rooms or chambers.

17 / 22
4.6 ASSEMBLING THE FRAME COIL
1 2 3 4
Remove the disassembled Frame Coil from
the shipping tube. Unpack all components and
place them on the ground.
Unfold the Frame Coil segments carefully
and place the segments on the floor to form a
square with the belt clips pointing up.
Assemble the coil by putting each end into the
adjacent corner piece.
Each segment is equipped with a belt clip to
mount the carrying straps. You may change
the position of the belt clips to adjust it to your
individual needs.
The carrying straps must be attached to the
Frame Coil in order to carry it.
The coil can be carried by 2 people, whereas each person carries one single strap, or by 1 person by criss-crossing the straps and carrying them over the shoulders.

18 / 22
5 MEASUREMENT
This chapter gives practical instructions about the general procedure of scanning an area. The
different scanning methods and procedures will be explained in detail.
In this section you will learn more about the different operating modes of the Pulse Nova. Every
function is explained in the following subsections.
The Pulse Nova metal detector is a pulse induction metal detector. The Pulse Nova is fully auto-
matic in terms of knowing which search coil is attached. No matter if the small coil or the large
coil is attached, the unit knows where to set many of the automated processes.
The process of detection is done by using an eddy current. An eddy current uses an electromag-
netic induction to create a reaction within metals. This reaction within the metal object creates
electrical conductivity or an anomaly which actually disturbs the flow of the current. When this
disturbance is realized, the detector reports the anomaly.
The surface of the material being detected must be accessible to the current. Various finishes
and coverings may cause bad or weak readings.
An alternating current in the coil generates a changing magnetic field. The larger the coil, the
larger is the field. In fact, with a large field only larger items can be found. When using a small-
er coil the field is also smaller allowing the detection of smaller items. All of this is done by
reporting the variations within the magnetic field which is created by the coils. After an item is
detected, allow for a recovery time or enough time for the creation of another magnetic field.
MEASUREMENT

19 / 22
5.1 DETECTION DEPTH
In theory, the larger the item is and the longer it has been in the ground, the deeper it can be
detected. With a pulse induction detector, there is a high voltage surge sent into the ground cre-
ating a large magnetic field. Items with an electrical conductance will distort the magnetic field
causing the detector to react. This in combination with the size of the coil will affect the ultimate
possible depth.
Varying soils and layers within the soil will also affect the ultimate depth of the detector. Using
a pulse induction metal detector enables you to search in soils with a higher magnetic permea-
bility (highly mineralized) or susceptibility than other soils.
Air tests typically will be able to detect a metallic object twice the distance as the size of the coil.
Here are some object depths according to measuring in air:
Search Coil Delta18
and Omega18
Search Coil Delta38
and Omega38
Frame Coil
Xi104
Gold nugget ø 5mm 18 cm 17 cm -
Gold coin ø 20mm 23cm 25 cm -
Gold ring ø 22 mm 17 cm 34 cm -
Silver coin ø 24 mm 22 cm 35 cm -
Silver coin ø 40mm 31 cm 45 cm -
1EUR coin 28cm 43 cm -
Beverage can 0,5l 65 cm 110 cm 155 cm
Gas can 20 l 115 cm 180 cm 255 cm
Steel barrel DIN EN 210 115 cm 180 cm 310 cm
5.2 GROUND BALANCING
The ground balance of the Pulse Nova detector is mandatory for the proper operation of the unit.
Most of the balancing is done automatically, the rest by simply pushing a button.
When the sound signals of the metal detector are getting noisy and start to flutter, even if there
is no metal underneath the Search Coil, then you should apply a ground balance. A new ground
balance is also necessary when the ground conditions change rapidly.
Push and hold the Sensitivity Knob of the
Control Unit to start a new ground balance.
Keep the knob pushed down until the detec-
tor gets silent again without any noisy sounds.
You may repeat this procedure from time to
time to get the best detection results.

20 / 22
5.3 OPERATION
The unit needs to swing slowly over the ground or area to be scanned. It is important not to
change the height of the coil during the scanning procedure. If the unit is too close to the ground
it is possible that the coil will receive feedback from the ground itself. If this happens, simply
swing the coil a little higher above the ground.
1 second = approximate time required to sweep from one side to the other.
Practice a smooth sweep of the search coil from side-to-side keeping the coil close to the ground
throughout the swing. Each pass of the coil should take approximately 1 second from right to
left, 1 second to return from left to right. Walk forward slowly. Take small steps no greater than
half of a normal stride. Make sure each pass of the coil overlaps the last one by at least half the
length of the loop. Do not lift the coil at the end of each swing. Keep it close to the ground and at
the same height at all times.
To become comfortable sweeping the loop does take some practice. Relax, loosen up and find
a comfortable grip on the handle. Premature fatigue may result from gripping the handle too
tightly, an improperly adjusted rod or elbow support, and limited body movement. Hold the
handle loosely. Adjust the rod and elbow support for comfort and keep the elbow strap loose.
Use your arm, shoulder and even your back a little to allow for a smooth even sweep of the coil.
5.4 PINPOINTING
Once an object has been detected, move the coil off to one side of the target area and slowly
swing the coil over the area until it beeps directly over the target. Make notes of the area where
it begins to give an audio signal and where the signal begins to fade. Where the signal becomes
stronger that is the point of where the edge of the anomaly is and where the signal begins to fade
is the other side.
Sweep the detector from Position 1 over the anomaly, then go to Position 2 and repeat the pro-
cess. If necessary, repeat swinging from a third position. When this is done from different
sides, you will know exactly how long and wide the detected object is.
The different positions are necessary to properly pinpoint an anomaly.
1 second
Position 1
Position 2
Other manuals for PULSE NOVA
2
Table of contents
Other OKM Metal Detector manuals

OKM
OKM Fusion User manual

OKM
OKM FS Future Series User manual

OKM
OKM FS Future Series User manual

OKM
OKM Fusion User manual

OKM
OKM FS Future Series User manual

OKM
OKM eXp 4000 User manual

OKM
OKM FS Future Series User manual

OKM
OKM PULSE NOVA User manual

OKM
OKM eXp 6000 User manual

OKM
OKM FS Future GeoSeeker Mini User manual