OKM ROVER C4 User manual

INTRODUCTION
TECHNICAL SPECIFICATIONS
CONTROL ELEMENTS
ASSEMBLY & PREPARATION
OPERATING MODES
DATA TRANSFER
OKM ROVER C4
MANUAL

OKM GmbH
Julius-Zinkeisen-Str. 7
04600 Altenburg
Germany
Phone: +49 3447 4993000
Internet: www.okmdetectors.com
Facebook: www.facebook.com/okmmetaldetectors
Instagram: www.instagram.com/okmdetectors
YouTube: www.youtube.com/user/OKMDetectors
Any information contained in these operating instructions may be changed without prior notice.
OKM does not make any warranty for this document. This also applies without limitation to implied assurances of merchantability and fitness for a specific purpose. OKM does not assume any responsability
for errors in this manual or for any incidental or consequential damage or loss associated with the delivery, exploitation or usage of this material.
This documentation is available "as presented" and without any kind of warranty. In no circumstances OKM takes responsibility for lost profits, usage or data losts, interruption of business activities or all kind
of other indirectly damages, which developed because of errors in this documentation. This instruction manual and all other stored media, which are delivered with this package should only be used for this
product. Program copies are allowed only for security- and savety purposes. The resale of these programs, in original or changed form, is absolutely forbidden.
This manual may not be copied, duplicated or translated into another language, neither in part nor completely, over the copyright matters without the prior written consent of OKM.
Copyright ©2021 OKM GmbH. All rights reserved.

TABLE OF CONTENTS
1 INTRODUCTION...........................................................................4
1.1 PREFACE........................................................................................................ 4
1.2 IMPORTANT NOTES ...................................................................................... 5
1.2.1 General Notes ............................................................................................. 5
1.2.2 Possible Health Hazards ............................................................................ 5
1.2.3 Surrounding Area ....................................................................................... 5
1.2.4 Voltage......................................................................................................... 5
1.2.5 Data Safety .................................................................................................. 5
1.3 MAINTENANCE AND SERVICES.................................................................. 5
1.4 DANGER OF EXPLOSION DURING EXCAVATION........................................ 6
1.5 CARE AND USE ............................................................................................. 6
1.6 PROTECTING YOUR INVESTMENT .............................................................. 6
2 TECHNICAL SPECIFICATIONS.................................................7
2.1 CONTROL UNIT ............................................................................................. 7
2.2 WIRELESS DATA TRANSFER....................................................................... 7
2.3 STANDARD PROBE....................................................................................... 7
2.4 SUPER SENSOR............................................................................................ 7
3 CONTROL ELEMENTS ...............................................................8
3.1 CONTROL UNIT ............................................................................................. 9
3.2 STANDARD PROBE / SUPER SENSOR .......................................................11
3.3 BLUETOOTH HEADPHONES .......................................................................11
4 ASSEMBLY AND PREPARATION...........................................12
4.1 PAIRING BLUETOOTH..................................................................................12
4.2 ASSEMBLING THE DETECTOR ...................................................................14
5 OPERATING MODES.................................................................16
5.1 3D GROUND SCAN .......................................................................................16
5.1.1 Preparing a 3D Ground Scan......................................................................16
5.1.1.1 Saving into Memory .................................................................................18
5.1.1.2 Transferring to Computer........................................................................19
5.1.2 Conducting a 3D Ground Scan .................................................................. 20
5.2 PINPOINTER.................................................................................................21
5.2.1 Preparing a Pinpointer Scan......................................................................21
5.2.2 Conducting a Pinpointer Scan .................................................................. 22
5.2.3 Analyzing a Pinpointer Scan..................................................................... 23
5.3 MAGNETOMETER ....................................................................................... 24
5.3.1 Preparing a Magnetometer Scan.............................................................. 24
5.3.2 Conducting a Magnetometer Scan ........................................................... 25
5.4 MINERAL SCAN ...........................................................................................26
5.4.1 Preparing a Mineral Scan..........................................................................26
5.4.2 Conducting a Mineral Scan ...................................................................... 28
5.4.3 Analyzing a Mineral Scan ......................................................................... 28
5.5 MEMORY TO PC........................................................................................... 29
5.6 SETTINGS.................................................................................................... 32
5.6.1 Volume....................................................................................................... 32
5.6.2 Headphones .............................................................................................. 32
5.6.3 Language .................................................................................................. 32
5.6.4 Lighting ..................................................................................................... 32
5.6.5 Brightness................................................................................................. 33
5.6.6 Factory Reset............................................................................................ 33
5.7 INFORMATION............................................................................................. 33
6 PREPARING DATA TRANSFER ..............................................34

4 / 36
1 INTRODUCTION
1.1 PREFACE
Dear customer,
our engineers, sales, training and support staff at OKM GmbH would like to thank you for your
purchase of the Rover C4.
The Rover C4 detector works on the principle of Electro-Magnetic Signature Reading (EMSR).
Besides the detection of metallic objects this device is also capable of detecting natural features
of the earth like formations of strata, cavities, voids, faults, ground water and other non-metallic
objects. Then, of course, this equipment is best suited to the detection of sepulchers, treasures,
buried utilities, tanks etc.
The Rover C4 is able to locate, document and analyze buried objects within various structures
and vessels non-intrusively without having to excavate the area. Using EMSR is particularly
useful in areas where detection is a must and excavation is not possible. The facile and flexible
handling of the Rover C4 can easily and quickly give reproducible results.
With our team of specialists we guarantee that our products are under recurrent control. Our
specialists try to implement new developments in terms of further quality improvements for you.
By purchasing or using our products, we cannot guarantee that you will be successful and have
a find during the course of your research. The recognition of hidden and buried objects depends
on a huge number of factors. As you well may know there are different soil types all over the
world with different levels of natural attenuation. Variable soil properties can and will hamper
and alter ultimate scan measurements. Areas with an extreme amount of ground water, varying
clays, sands and wet soils make scanning more difficult and may reduce the maximum depth
capabilities of the detection equipment, regardless of make or model.
For more information regarding where this equipment has been used and operated, please visit
our website. Our equipment is constantly being tested. Improvements and upgrades are listed
on our website.
It is necessary for our company to protect our developments and all of the information learned
during the “Research and Development” phases in creating our technology. We strive to stay
within the given framework of legislation, patents and trademark registration.
Please take your time to read this User Manual and familiarize yourself with the operation, func-
tionality and how to utilize the Rover C4. We also offer training for OKM equipment in our fac-
tory and on-site. We strive to maintain a worldwide dealer network for assistance and support.
Please visit our website www.okmdetectors.com for more information.
INTRODUCTION

5 / 36
1.2 IMPORTANT NOTES
Prior to using the Rover C4 and its accessories, please read these operating instructions care-
fully. These instructions give information on how to use the detector and potential sources where
precautions should be taken.
The Rover C4 and its accessories serve for the analysis, documentation and detection of
sub-surface anomalies and ground disturbances. The recorded data of the ground structure
will be transmitted to a PC to give a visual representation using our proprietary software pro-
gram. Any additional notes to the software should be observed. Please refer to the Visualizer 3D
Studio Documentation!
1.2.1 General Notes
Being an electronic device, the Rover C4 has to be treated with caution and treated with care
as with any electronic device. Any failure to observe the safety precautions given or any use for
purposes other than the ones it is designed for may result in damage or destruction of the pro-
cessing unit and/or its accessories or connected components.
The device has a built in anti-tampering module which will destroy the unit if it is improperly
opened. There are no end user serviceable parts inside the unit.
1.2.2 Possible Health Hazards
If used properly this device usually does not pose any health hazards. According to current sci-
entific knowledge, the high-frequency signals are not harmful to the human body on account of
their low power.
1.2.3 Surrounding Area
When moving this unit from a cold place to a warmer place, watch out for condensation. Do not
immediately operate the unit until any possible condensation could have evaporated. The unit is
not weather proof and water or condensation can destroy the unit.
Avoid strong magnetic fields, which may occur in places where there are large electric motors
or unshielded loudspeakers. Try to avoid using this equipment within 50 meters (150ft) of this
type of equipment.
Metallic objects on the ground such as cans, tin, nails, screws or debris can influence your scan
data and present negative results regarding your scan data. Also it is a good habit to remove
any metallic objects off of your person like cellular telephones, keys, jewelry, etc. Do not wear
steel toe boots.
1.2.4 Voltage
The power supply can not be outside the indicated range of values. Use only approved chargers,
batteries and rechargeable batteries which are included within the scope of delivery.
Never use the 115/230 Volt mains supply.
1.2.5 Data Safety
Data errors can occur if:
• the range of the sender module has been exceeded,
• the power supply of the device or the batteries are too low,
• the cables are too long,
• the unit is operating to close to devices which sends out disturbances or
• atmospheric conditions (electrical storms, lightning, etc.).
1.3 MAINTENANCE AND SERVICES
In this section you will learn how to maintain your measuring instrument with all included acces-
sories to keep it in good condition a long time and to get good measuring results.
The following list indicates what you absolutely should avoid:
• penetrating water
• strong dirt and dust deposits
• hard impacts
• strong magnetic fields
• high and long lasting heat effect
To clean your device please use a clean and dry soft rag or cloth. To avoid any damage you should
transport the device and accessories always in an appropriate way.
Prior to using your Rover C4 please be sure that all batteries and accumulators are fully charged.
To charge the external batteries use only the approved chargers
which are part of the scope of delivery.

6 / 36
1.4 DANGER OF EXPLOSION DURING EXCAVATION
Unfortunately, the last two world wars also made the ground in many places of the world a po-
tentially explosive scrap heap. A host of those lethal relics are still buried in the ground. Do not
start digging and hacking for an object wildly when you receive a signal of a piece of metal from
your device. Firstly, you might indeed cause irreparable damage to a truly rare find, and second-
ly, there is a chance that the object reacts in an insulted way and strikes back.
Note the color of the ground close to the surface. A red or reddish color of the ground is an
indicator of rust traces. As regards to the finds themselves, you should definitely pay attention
to their shape. Curved or round objects should be a sign of alarm, especially if buttons, rings or
little pegs can be identified. The same applies to recognizable ammunition or bullets and shells.
Leave ammonition where it is, do not touch it and, most importantly, do not take any of it home
with you. The devices of war made use of rocker fuses, acid fuses and ball fuses. Those compo-
nents have been rusting away in the course of time, and the slightest movement may cause parts
of them to break and be triggered. Even seemingly harmless objects such as cartridges or large
ammunition are anything but that.
Moving such an object may cause those crystals to produce friction, leading to an explosion. If
you come across such relics, mark the place and do not fail to report the find to the police. Such
objects always pose a danger to the life of hikers, walkers, farmers, children and animals.
1.5 CARE AND USE
The Rover C4 is a sturdy instrument, but it is not designed to withstand abuse. In caring for your
ground scanner, there are several important DOs and DON‘Ts to remember:
• DO NOT use to get rid of bushes, flatten area by swinging wildly or pry rocks loose.
• DO NOT drop the machine into water or use it while it is raining or wet.
• DO NOT leave it exposed at night where dew could form on it.
• DO NOT store it in places that could get extremely hot.
• DO NOT leave it in the trunk of a car where high temperatures could build up.
• DO NOT spray lubricants, or any type of cleaners, solvents, sealants or other chemicals
into or onto the electronic parts, switches or controls.
• DO NOT attempt to modify or repair the detector‘s electronics as this will void your detec-
tor‘s warranty.
• DO clean your unit with a soft dry or slightly damp cloth to remove dust and residue from
the previous use.
• DO use the device within the proper operating guidelines.
• DO use the detector with the proper OKM Power Pack as to not cause damage to the unit.
The warranty does not cover damage resulting from an accident, neglect or abuse.
1.6 PROTECTING YOUR INVESTMENT
Often detector users become disappointed when their new detector becomes less and less re-
sponsive and seems to have lost some of its original peak performance. You can help prevent
this from happening to your detector by following these basic care and protection guidelines:
• Operate your detector exactly as recommended in this User Manual.
• Use only approved OKM Power Packs.
• Avoid hitting the probe against hard, solid objects and surfaces.
• Keep your probe slightly off of the ground, especially when using in gravel or hard, rocky dirt.
• If working in or near water, or if there is a possibility of rain, use a protective weather resis-
tant pouch or plastic bag to cover the control housing. Make sure it can “breathe” in order to
ensure against condensation buildup inside.
• After each use, clean the detector with a soft cloth to remove dust, moisture or other con-
taminants.
• When transporting the detector in a car during hot weather, store it on the floor of the pass-
enger compartment if possible. Using the Peli case gives additional protection. In any case,
never allow the detector to roll around unprotected in the trunk or back of a pickup truck.
• Protect your detector from dust, moisture, and extreme temperatures during storage.
• When shipping, use the original factory carton or similar heavy-duty container and provide
sufficient padding around all parts.
• Treat your detector as you would treat any sensitive electronic instrument. Though it is de-
signed to withstand the demands of normal treasure hunting, proper care is essential.
7 / 36
2 TECHNICAL SPECIFICATIONS
The technical specifications are medial values. During operation slight variations are possible.
2.1 CONTROL UNIT
Dimensions (L x W x H) 360 x 320 x 140 mm
Weight 1.6kg
Input (max) 19 V DC, 3.16 A, 60W
Processor / Main CPU Cortex M3, 32 MHz
Processor / Slave CPU Cortex M0, 24MHz
Display 3.5” Resistive touch, 480 x 320 Pixel
Display CPU Cortex M3, 32 MHz, 128KB RAM
Data memory 4GB
Sample rate 1024 values / second
Measurement resolution 16 bit
Operating temperature -10– 60 °C
Storage temperature -20 –70 °C
Audio Internal speaker / Bluetooth
Air humidity 5% – 75%
Waterproof No
2.2 WIRELESS DATA TRANSFER
Technology Bluetooth 5.1
Frequency range 2.402 –2.480 GHz
Maximum transfer rate 1Mbps
Maximum Transmitting Power: +8 dBm
Maximum Range: approx. 10m
2.3 STANDARD PROBE
Length 445 mm
Diameter, Shaft / LED Orbit 35 mm/ 65 mm
Weight 0.4kg
Sensor technology SCMI-15-D
2.4 SUPER SENSOR
Length 960mm
Diameter, Shaft / LED Orbit 50mm/ 65mm
Weight 0.9 kg
Sensor technology SCMI-15-D
TECHNICAL SPECIFICATIONS

8 / 36
CONTROL ELEMENTS
3 CONTROL ELEMENTS
In this section you learn more about the fundamental use of all control elements for
this measuring instrument. All connections, inputs and outputs are explained in detail.
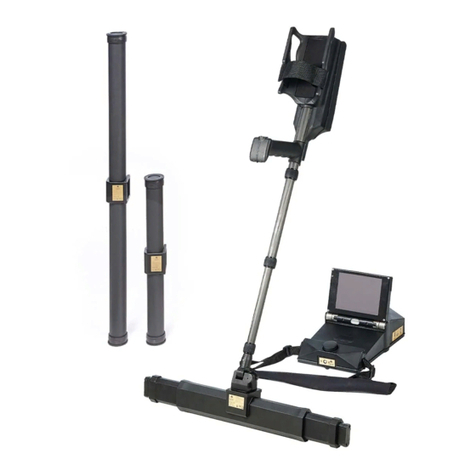
Assembled Metal Detector with Standard Probe
Control
Unit
Standard Probe
with LED Orbit
Control Panel
with Touchscreen

9 / 36
3.1 CONTROL UNIT
Charger
Socket
LED Lighting
Sensor
Socket
Charger Socket / Charging LED: When the internal battery is too low, you have to recharge it by
connecting the appropriate charger to the Charger Socket. As long as charging is in progress,
the Charging LED is orange. As soon as the Charging LED turns off, the battery is fully charged.
Sensor Socket: At this socket you have to connect the probe. Without any probe there is no mea-
surement possible. You may either attach the Standard Probe or the Super Sensor.
LED Lighting: The LED lights can be turned on to illuminate the scan area (see section „5.6.4
Lighting“ on page 32).
Touchscreen / Buttons: The display of the device shows all operating modes, messages and
measuring states. The display is a modern touchscreen that allows to touch the function area
to change your options and settings (see section „5.6 SETTINGS“ on page 32 for additional
information). Below that display there are 4 control buttons to operate the device even without
touchscreen. The button functions are described in the following table and in the chapter of the
relating operating mode.
Button Description
This button has 2 different meanings:
1) Power your detector on and off.
When the device is powered off and you press this button, the device will be
switched on and the Operating LED turns green. To power the device off, press
the button at least 3 seconds until the LED turns off.
2) Start a measurement and release single impulses when using the manual
impulse mode.
Select the next option or jump to the next setting.
Confirm a selection or change a specific settings value.
Go back to the previous screen or cancel a specific operation.
Speakers
Buttons
Handle
Charging
LED
Touchscreen

10 / 36
Speakers: By default the internal speakers are used for sound output. After pairing Bluetooth
headphones with the detector, those speakers are disabled. The volume can be adjusted in the
settings menu as described in section „5.6.1 Volume“ on page 32.
After powering on the Rover C4 metal detector by pushing the button, a start screen is shown
while the system is booting up. When finished, the main menu allows to choose the desired op-
erating mode with the button or by clicking the arrows on the touchscreen itself. If the desired
option is visible, confirm it by pushing or by touching the display button directly.
Lighting Headphones Language
Back Bluetooth Battery Information
Previous Confirm Next
Previous: Touch this area to go to the previous option. If you reach the first of all available op-
tions it will automatically jump to the last option.
Confirm / OK: Touch this area with your finger to confirm the current option. The same effect can
be achieved by using the button.
Next: Touch this area with your finger to show the next possible option. If you reach the end of
all available options it will automatically jump back to the first option. The same effect can be
achieved by using the button.
Back: The back icon is used to cancel an active operating mode like Magnetometer, Pinpointer,
3D Ground Scan or Mineral Scan. Furthermore, it is used to return to the previous screen, e.g.
to leave a submenu. The same effect can be achieved by using the button.
Lighting: Toggle the LED lights on the back of the display to light the search area. By touching
this icon you may either switch on or off your LED lighting. Also read section „5.6.1 Volume“ on
page 32 for detailed information.
Bluetooth: The wireless data connection icon indicates if a Bluetooth connection with your PC
has been established successfully.
Headphones: By default the internal speakers are used for any sound output. The headphones
icon indicates if Bluetooth headphones have been successfully connected with the Rover C4.
More information on how to connect Bluetooth headphones is available in section „5.6.2 Head-
phones“ on page 32!
Battery: The battery icon indicates the current charge state of the internal battery. If the battery
is too low ( ), you have to recharge it by using the appropriate charger.
Language: The language icon indicates the chosen language for the user interface by showing
its 2-letter-code according to ISO-639-1. Touching the language icon opens the language screen
where you are able to select any of the available languages. Read section „5.6.3 Language“ on
page 32 to learn more about setting your preferred language.
Information: The information icon is only visible in the main menu and represents a shortcut to
the information screen as described in section „5.7 INFORMATION“ on page 33.

11 / 36
3.2 STANDARD PROBE / SUPER SENSOR
Both measuring probes are equipped with a light sphere called LED Orbit, that can indicate the
measured values by color changes during the scanning process.
The plug is used to connect the probe with the sensor socket of the control unit.
3.3 BLUETOOTH HEADPHONES
The Rover C4 can be operated with any Bluetooth headphones available on the market. Your
Rover C4 already includes Bluetooth headphones.
To use the headphones with your metal detector, please follow these simple steps:
1. Select “Settings” from your main menu.
2. Now select “Headphones”.
3. Power on your Bluetooth headphones and push the pairing button.
The Rover C4 tries connecting for 60 seconds. If the Bluetooth connection between headphones
and device can be established successfully, the headphones icon changes from to .
Otherwise try again.
See also section „5.6.2 Headphones“ on page 32 for more detailed information regarding con-
necting the Bluetooth headphones.
Plug
Standard Probe
Super Sensor
LED Orbit

12 / 36
4 ASSEMBLY AND PREPARATION
4.1 PAIRING BLUETOOTH
Prior to transferring scan data to the Visualizer 3D Studio software, the Bluetooth of your com-
puter must be paired with your OKM detector.
1 2
3
ASSEMBLY & PREPARATION

13 / 36
In the "Add a device" dialog select Bluetooth. Make sure your device is turned on and discoverable.
Click on OKM Rover C4.
Confirm your selection with click on Done.
4 5 6

14 / 36
4.2 ASSEMBLING THE DETECTOR
Please follow the following instruction to assemble your detector and get ready for your first
measurement.
1
Make sure to recharge the internal bat-
tery of the detector before going into the
field.
Alternatively, you can use the Power Pack
to recharge the detector.
The Power Pack is optionally available
(not included in the standard delivery
scope).
2
Either connect the Standard Probe or the Super Sensor to the Sensor Socket.
The probe is used to measure the underground values and needs to be connected to
the socket on the bottom of the unit.
Push the plug into the Sensor Socket until the notch snaps in. There is only one cor-
rect direction possible to connect the probe properly.
Avoid hard impact or other damages!

15 / 36
OPERATING MODES

16 / 36
5 OPERATING MODES
After powering on the Rover C4 metal detector by pushing the button, a splash screen ap-
pears on screen while the system is booting up:
When finished, the main menu appears where you can select the desired operating mode.
The main menu offers the following operating modes and functions:
• 3D Ground Scan: A graphical 3D measurement for detailed analysis on a computer.
• Pinpointer: Transfer live data to Visualizer 3D Studio software to pinpoint potential targets.
• Magnetometer: Process an acoustic magnetic field measurement to detect ferrous metals.
• Mineral Scan: Conduct a graphical measurement for minerals and natural gold detection.
• Memory To PC: Transfer stored measurements to Visualizer 3D Studio software.
• Settings: Adjust general settings like display brightness, volume, language etc.
• Information: View information like serial number and firmware version.
The choice of the operating mode depends on your planned project. Usually, you should use sev-
eral operating modes one after another to explore an area. In that way you can obtain as much
information as possible from the underground of the scanned area.
5.1 3D GROUND SCAN
The operating mode "3D Ground Scan" provides a graphical measurement of any area for anal-
ysis on a computer. For the measurement you can either use the Standard Probe or the Super
Sensor. Get general information on conducting a geophysical measurement in the "3D Ground
Scan Guide".
5.1.1 Preparing a 3D Ground Scan
Before starting the actual measurement, you have to adjust 4 essential parameters:
• Impulses
• Impulse Mode
• Scan Mode
• Transfer Mode
These settings are necessary to define the field size and how to step out the area to record mea-
suring values. The next subsections will explain these parameters in more detail.
1 2
Power on the device and select the operating
mode "3D Ground Scan" from the main menu.
If there is no probe connected, the button is
disabled and shows the icon.
As soon as the Super Sensor or Standard
Probe is connected, confirm the operating
mode "3D Ground Scan" by pushing the
button.

17 / 36
3
First, set the number of measure points (Im-
pulses), which will be recorded for each sin-
gle scan line.
Auto: The number of measure points of one
scan line will only be defined during the mea-
surement. If you reach the end of the first scan
line in automatic impulse mode, press the
button to save the required number of mea-
sure points. In manual impulse mode, press
the button (the button is used to re-
lease the impulses). This number of measure
points will then be used for all following scan
lines. Beginning from the second scan line,
the device will stop by itself, when the defined
number of measure points has been sent.
In "Auto" mode you can not transfer data di-
rectly to a computer. You can only store the
measured values in the internal memory, be-
cause the exact length of field is not yet se-
lected.
10, 20, ..., 200: Each scan line consists of the
selected number of measure points. At the
end of each scan line the device stops by it-
self, as soon as the number of measure points
has been recorded.
4
The impulse mode sets the way of how the sin-
gle impulses (measure values) will be released
by the metal detector. There are two impulse
modes available:
Automatic: Each measure value will be recor-
ded automatically and continuously without any
break.
Manual: One measure value will only be recor-
ded after you have pressed the button.
5
Selecting the scan mode tells the Rover C4
how you will step out the scan field. There
are different ways to walk over the field while
recording the underground information. The
following scan modes are available:
Parallel: This scan mode is used to scan
all scan lines into the same direction.
So you will scan the first path to its end and
then come back to the starting point without
further scanning. Now you step to the left
and scan the next path. This repeats until you
reached the last scan line.
Zigzag: This scan mode is used to
scan all scan lines in zigzag style.
Here you will scan the first path to its end,
then you step to the left and you scan the sec-
ond path in reverse. Now step to the left again
to scan the next path. This repeats until you
reached the last scan line.
6
Define the type of data transfer. The transfer
mode configures where to send and store your
data.
Memory: The measured data will be stored
in the internal memory of the device. After fi-
nishing the measurement you should transfer
the data to a PC by using the operating mode
"Memory To PC". You can store up to 4 mea-
surements at a time in the internal memory of
the Rover C4.
Continue reading section „5.1.1.1 Saving into
Memory“ on page 18!
Computer: The measured data will be trans-
ferred right away to a connected computer.
Therefore, a Bluetooth connection will be esta-
blished before starting the measurement. The
option "Computer" is not available if the num-
ber of impulses has been set to "Auto".
Continue reading section „5.1.1.2 Transferring
to Computer“ on page 19!

18 / 36
5.1.1.1 Saving into Memory
If you have selected "Memory" as transfer mode, you need to select one of the four mem-
ory areas.
7 8
Select one of the four memory areas in which
the new scan data should be stored.
Use the button to highlight a specific slot
and confirm it with the button.
In case you selected a memory area that al-
ready contains data from a previous scan, the
shown message appears.
Use the button to either highlight the "Yes"
or "No" button and confirm it with the
button.
9
Now you can get ready and start your first
scan line by pushing the button.
Read section „5.1.2 Conducting a 3D Ground
Scan“ on page 20 to learn more about con-
ducting a complete ground scan.
If you are going to cancel this operating mode
simply push the button.

19 / 36
5.1.1.2 Transferring to Computer
If you selected "Computer" as transfer mode, you need to establish a wireless data con-
nection to the Visualizer 3D Studio software on your PC.
7 8
Rover C4 is now waiting for an incoming Blue-
tooth connection from your computer with Vi-
sualizer 3D Studio.
Set up your Visualizer 3D Studio software with
all the corresponding settings as explained in
chapter „6 PREPARING DATA TRANSFER“ on
page 34.
910
After the Bluetooth connection is established
you can start your first scan line by pushing
the button.
Read section „5.1.2 Conducting a 3D Ground
Scan“ on page 20 to learn more about con-
ducting a complete ground scan.
If you are going to cancel this operating mode
simply push the button.
After canceling the 3D Ground Scan screen,
the device also exits the wireless data con-
nection before returning back to the main
menu.

20 / 36
5.1.2 Conducting a 3D Ground Scan
After all parameters have been adjusted, the device is ready to start the first scan line. Begin-
ning from this moment, the display will indicate the current number of scan lines and the current
number of measured impulses per scan line.
The display indicates that the first scan line has started and no impulse has been measured up
to now. In total, there will be 20 measure points per scan line. The device is waiting for the user
to press the button to begin the measurement recording.
After setting all parameters you can start recording measure values. So go to your start position
of the first scan line and press the button.
1 2
a) If you have selected the impulse mode "Automatic" just keep going slowly until you have
reached the end of the first scan line. When you already have defined the number of im-
pulses then the device will stop automatically at the end of the line, otherwise – if selected
“Auto” - you should press the button when you have reached the end of the first scan
line. Now please go to the start position of the next scan line and press the button again.
The device will stop automatically by itself at the end of the scan line.
b) If you have selected the impulse mode "Manual" you should press the button to start
your measurement. Now you are using the manual scan mode, which means you should re-
lease each single measure impulse manually one by one with the button. The impulses
will not be sent out automatically. Now you should do a little step forward and press the
button, to measure the second measure point. The device stops and you should again walk
a little step forward and press the button once more. Now continue in this way until you
have reached the end of the first scan line. If you already have defined the number of im-
pulses per line, the device will automatically signalize the end of the scan line, otherwise
you should press the button when you like to finish the first line. Now go to the start
position of your next scan line and push the button again. Go another step forward and
repeat the measurement in the same way like you recorded the first scan line. The device
will now signalize automatically the end of the next scan line.
Continue to measure all further scan lines until you have recorded the complete measure area.
To finish the operating mode "3D Ground Scan" and return back to the main menu you simply
push the button.
Read about the general scanning procedure in the "3D Ground Scan Guide".
Selected Scan Mode
(Zigzag or Parallel) Number of recorded
measure points
Number of measure
points per scan line
Number of scan line
currently executed
Table of contents
Other OKM Metal Detector manuals

OKM
OKM PULSE NOVA User manual

OKM
OKM FS Future Series User manual

OKM
OKM eXp 4000 User manual

OKM
OKM EVOLUTION NTX User manual

OKM
OKM Future Series User manual

OKM
OKM Fusion User manual

OKM
OKM FS Future Series User manual

OKM
OKM PULSE NOVA User manual

OKM
OKM eXp 6000 User manual

OKM
OKM PULSE NOVA User manual