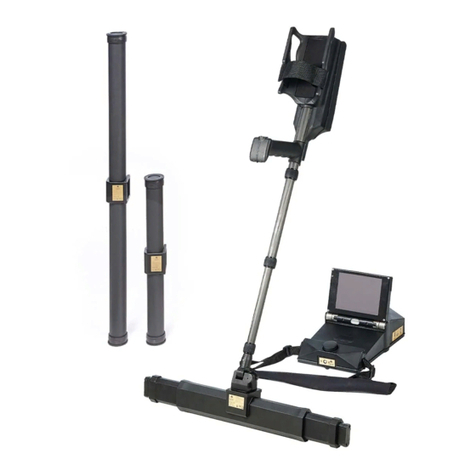
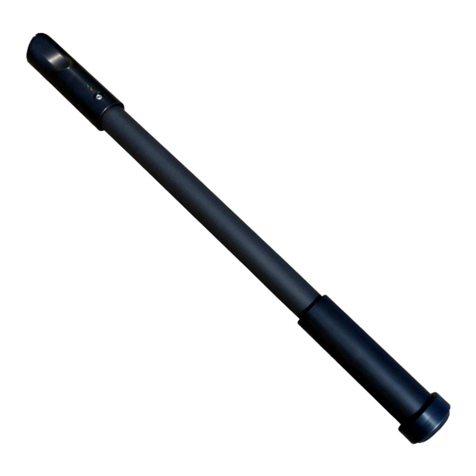
OKM Fusion User manual

Fusion Light
User's Manual

Any information contained in these operating instructions may be changed without prior notice.
OKM does not make any warranty for this document. This also applies without limitation to implied assurances of merchantability and
fitness for a specific purpose. OKM does not assume any responsability for errors in this manual or for any incidental or consequential
damage or loss associated with the delivery, e ploitation or usage of this material.
This documentation is available "as presented" and without any kind of warranty. In no circumstances OKM takes responsibility for lost
profits, usage or data losts, interruption of business activities or all kind of other indirectly damages, which developed because of errors
in this documentation. This instruction manual and all other stored media, which are delivered with this package should only be used for
this product. Program copies are allowed only for security- and savety purposes. The resale of these programs, in original or changed
form, is absolutely forbitten.
This manual may not be copied, duplicated or translated into another language, neither in part nor completely, over the copyright
matters without the prior written consent of OKM.
Copyright ©2019 OKM GmbH. All rights reserved.

3
Table of contents
1 Introduction ....................................................................................................................................................... 7
1.1 Preface ....................................................................................................................................................... 8
1.2 Important Notes ........................................................................................................................................ 9
1.2.1 General Notes ................................................................................................................................... 9
1.2.2 Possible Health Hazards ................................................................................................................... 9
1.2.3 Surrounding Area .............................................................................................................................. 9
1.2.4 Voltage ............................................................................................................................................... 9
1.2.5 Data safety ....................................................................................................................................... 10
1.3 Maintenance and Services ....................................................................................................................... 10
1.4 Danger of E plosion during E cavation .................................................................................................. 10
2 Technical specifications ................................................................................................................................... 13
2.1 Control unit .............................................................................................................................................. 14
2.2 Wireless data transfer ............................................................................................................................. 14
2.3 Computer, minimum requirements ........................................................................................................ 14
3 Scope of delivery .............................................................................................................................................. 15
4 Control elements ............................................................................................................................................. 17
4.1 Control unit .............................................................................................................................................. 18
5 Assembly .......................................................................................................................................................... 19
6 Download, install and activate application ...................................................................................................... 21
6.1 Download and Installation ....................................................................................................................... 22
6.2 Activation ................................................................................................................................................. 22
6.2.1 Activation with QR code ................................................................................................................... 23
6.2.2 Manual activation ............................................................................................................................ 24
7 Operating modes ............................................................................................................................................. 25
7.1 Establishing a Bluetooth connection ...................................................................................................... 27
7.2 Magnetometer ......................................................................................................................................... 28
7.3 3D Ground Scan ....................................................................................................................................... 30
7.3.1 Ground Scan Preparation ................................................................................................................ 30
7.3.1.1 Default ..................................................................................................................................... 30
7.3.1.2 Customized .............................................................................................................................. 30
7.3.2 Measurement Procedure ................................................................................................................ 32
7.3.3 Saving a Scan .................................................................................................................................. 34
7.3.4 Scan Analysis ................................................................................................................................... 35
7.3.5 Data Transfer to PC (optional) ......................................................................................................... 36
7.4 Open Scan ................................................................................................................................................ 37
7.5 Settings .................................................................................................................................................... 38
OKM GmbH
www.okmdetectors.com

4
7.6 Information .............................................................................................................................................. 38
8 Field procedure ................................................................................................................................................ 39
8.1 General scanning procedure .................................................................................................................. 40
8.1.1 Scan Mode ....................................................................................................................................... 40
8.1.2 Regulation of the number of impulses per scanning path ............................................................. 41
8.2 Special advices for field procedure ......................................................................................................... 43
8.2.1 Orientation of probe ........................................................................................................................ 44
8.2.2 Parallel or Zig-Zag? ........................................................................................................................ 45
8.2.3 Tips from the trainers themselves .................................................................................................. 45
OKM GmbH
www.okmdetectors.com
5
Table of figures
Figure 4.1: Overview of control elements .......................................................................................................... 18
Figure 5.1: Charging the control unit before usage ........................................................................................... 20
Figure 6.1: Download and installation of the application .................................................................................. 22
Figure 6.2: Start activation ................................................................................................................................. 23
Figure 6.3: Scan QR code to activate the application ......................................................................................... 23
Figure 6.4: Enter serial number and activation code manually ......................................................................... 24
Figure 7.1: Starting the application and viewing the main menu ...................................................................... 26
Figure 7.2: Graphical depiction of a Bluetooth connection ................................................................................ 27
Figure 7.3: Activating the operating mode "Magnetometer" ............................................................................. 28
Figure 7.4: Activating operating mode "3D Ground Scan" ................................................................................. 30
Figure 7.5: Adjusting scan parameters individually ........................................................................................... 31
Figure 7.6: Establishing a Bluetooth connection in operating mode "3D Ground Scan" .................................. 32
Figure 7.7: "Zig-Zag" scan in operating mode "3D Ground Scan" ..................................................................... 33
Figure 7.8: Saving the current scan ................................................................................................................... 34
Figure 7.9: Adding field dimensions to the current scan ................................................................................... 34
Figure 7.10: Analysis controls in operating mode "3D Ground Scan" ............................................................... 35
Figure 7.11: Locating the folder with scan images ............................................................................................ 36
Figure 7.12: Browse scans in memory ............................................................................................................... 37
Figure 7.13: Settings .......................................................................................................................................... 38
Figure 8.1: Starting position of a scan area ....................................................................................................... 40
Figure 8.2: Scan modes to measure an area ..................................................................................................... 41
Figure 8.3: Effects of changing the number of impulses and their distance .................................................... 42
Figure 8.4: Comparison of low and high number of impulses .......................................................................... 42
Figure 8.5: Different walking speeds during scanning ...................................................................................... 43
OKM GmbH
www.okmdetectors.com

1 Introduction
CHAPTER 1
Introduction

8 Introduction
1.1 Preface
Dear customer,
all of the engineers, sales, training and support staff at OKM GmbH would like to thank you for your purchase
of the Fusion Light.
The Fusion Light detector works on the principle of Electro-Magnetic Signature Reading (EMSR). Besides the
detection of metallic objects this device is also capable of detecting natural features of the earth like
formations of strata, cavities, voids, faults, ground water and other non-metallic objects. Then of course this
equipment is best suited at detecting sepulchers, treasure, buried utilities, tanks and the like.
The Fusion Light is able to locate, document and analyze buried objects within various structures and vessels
non-intrusively without having to e cavate the area. Using EMSR is particularly useful in areas where
detection is a must and e cavation is not possible. The facile and fle ible handling of the Fusion Light can
easily and quickly give reproducible results.
With our team of specialists we guarantee that our products are under recurrent control. Our specialists try
to implement new developments in terms of further quality improvements for you.
By purchasing or using one of our products, we cannot guarantee that during the course of your research
that you will be successful and have a find. The recognition of hidden and buried objects depends on a huge
number of factors. As you well may know there are different soil types all over the world with different levels
of natural attenuation. Variable soil properties can and will hamper and alter ultimate scan measurements.
Areas where there is an e treme amount of ground water, varying clays, sands and wet soils making
scanning more difficult and may reduce the ma imum depth capabilities of any and all detection equipment,
regardless of make or model.
For more information regarding where this equipment has been used and operated, please visit our web site.
Our equipment is constantly being tested and when improvements or upgrades are available, we will list
them also on our web site.
It is necessary for our company to protect our developments and all of the information learned during the
“Research and Development” phases in creating our technology. We strive to stay within the given framework
of legislation, patents and trademark registration.
Please take your time to read this User Manual and familiarize yourself with the operation, functionality and
how to utilize the Fusion Light. We also offer training for your equipment in our factory and on-site. We strive
to maintain worldwide dealer network for assistance and support. Please visit our web site for more
information.
OKM GmbH
www.okmdetectors.com

Introduction 9
1.2 Important Notes
Prior to using the Fusion Light and its accessories, please read these operating instructions carefully. These
instructions give information on how to use the detector and potential sources where precautions should be
taken.
The Fusion Light and its accessories serve for the analysis, documentation and detection of sub-surface
anomalies and ground disturbances. The recorded data of the ground structure will be transmitted to a PC to
give a visual representation using our proprietary software program. Any additional notes to the software
should be observed. Please read the user manual of the software!
1.2.1 eneral Notes
Being an electronic device, the Fusion Light has to be treated with caution and treated with care as with any
electronic device. Any failure to observe the safety precautions given or any use for purposes other than the
ones it is designed for may result in damage or destruction of the processing unit and/or its accessories or
connected components.
The device has a built in anti-tampering module which will destroy the unit if it is improperly opened. There
are no end user serviceable parts on the inside of the unit.
1.2.2 Possible Health Hazards
If used properly this device normally does not pose any health hazards. According to current scientific
knowledge, the high-frequency signals are not harmful to the human body on account of their low power.
1.2.3 Surrounding Area
When moving this unit from a cold place to a warmer place, watch out for condensation. Do not immediately
operate the unit until any possible condensation could have evaporated. The unit is not weather proof and
water or condensation can destroy the unit.
Avoid strong magnetic fields, which may occur in places where there are large electric motors or unshielded
loudspeakers. Try to avoid using this equipment within 50 meters (150 ft) of this type of equipment.
Metallic objects on the ground such as cans, tin, nails, screws or debris can influence your scan data and
present negative results regarding your scan data. Also it is a good habit to remove any metallic objects off of
your person like cellular telephones, keys, jewelry, etc... Do not wear steel toe boots.
1.2.4 Voltage
The power supply should not be outside the indicated range of values. Use only approved chargers which are
included in the scope of delivery.
OKM GmbH
www.okmdetectors.com

10 Introduction
1.2.5 Data safety
Data errors can occur if:
•the range of the sender module has been e ceeded,
•the power supply of the device or the batteries are too low,
•the unit is operating too close to devices which send out disturbances or
•atmospheric conditions (electrical storms, lightning, etc...).
1.3 Maintenance and Services
In this section you will learn how to maintain your measuring instrument with all included accessories to
keep it in good condition a long time and to get good measuring results.
The following list indicates what you absolutely should avoid:
•penetrating water
•strong dirt and dust deposits
•hard impacts
•strong magnetic fields
•high and long lasting heat effect
To clean your device please use a dry soft rag. To avoid any damage you should transport the device and
accessories always in the appropriate carrying cases.
Prior to using your Fusion Light please be sure that all batteries and accumulators are fully charged. Also
allow the batteries to completely discharge before recharging them, regardless if you are working with the
e ternal battery or with internal accumulators. This way your batteries will have a long and durable life.
To charge the internal battery, use only the approved chargers
which are part of our scope of delivery.
1.4 Danger of Explosion during Excavation
Unfortunately, the last two world wars also made the ground in many places of the world a potentially
e plosive scrap heap. A host of those lethal relics are still buried in the ground. Do not start digging and
hacking for an object wildly when you receive a signal of a piece of metal from your device. Firstly, you might
indeed cause irreparable damage to a truly rare find, and secondly, there is a chance that the object reacts in
an insulted way and strikes back.
Note the color of the ground close to the surface. A red or reddish color of the ground is an indicator of rust
traces. As regards the finds themselves, you should definitely pay attention to their shape. Curved or round
objects should be a sign of alarm, especially if buttons, rings or little pegs can be identified or felt. The same
OKM GmbH
www.okmdetectors.com

Introduction 11
applies to recognizable ammunition or bullets and shells. Leave that stuff where it is, do not touch anything
and, most importantly, do not take any of it home with you. The killing machines of war made use of
diabolical inventions such as rocker fuses, acid fuses and ball fuses. Those components have been rusting
away in the course of time, and the slightest movement may cause parts of them to break and be triggered.
Even seemingly harmless objects such as cartridges or large ammunition are anything but that. E plosives
may have become crystalline over time, that is, sugar-like crystals have formed.
Moving such an object may cause those crystals to produce friction, leading to an e plosion. If you come
across such relics, mark the place and do not fail to report the find to the police. Such objects always pose a
danger to the life of hikers, walkers, farmers, children and animals.
OKM GmbH
www.okmdetectors.com

2 Technical specifications
CHAPTER 2
Technical specifications

14 Technical specifications
The following technical indications are medial values. During operation small variations are quite possible.
Technical changes due to development are possible!
2.1 Control unit
Length ....................................................................................................................................................... 800 mm
Diameter ...................................................................................................................................................... 65 mm
Weight .................................................................................................................................................. about 700 g
Protection Class .............................................................................................................................................. IP40
Operating time (internal battery) ................................................................................................ appro . 12 hours
Charging time (internal battery) ................................................................................................... appro . 3 hours
Input (charger socket) .................................................................................................................. 19 V DC / 3.16 A
Processor / Main CPU .............................................................................................................. Corte M3, 32 MHz
Processor / Slave CPU ............................................................................................................. Corte M0, 24 MHz
Sensor technology ................................................................................................................................ SCMI-15-D
Sample rate .......................................................................................................................... 1024 values / second
Measurement resolution ............................................................................................................................... 16 bit
Operating temperature ........................................................................................................................ -10 – 60 °C
Storage temperature ............................................................................................................................ -20 – 70 °C
Air humidity ........................................................................................................................................... 5 % – 75 %
Waterproof ......................................................................................................................................................... No
2.2 Wireless data transfer
Technology .............................................................................................................................................. Bluetooth
Frequency range .......................................................................................................................... 2.4 – 2.4835 GHz
Ma imum transfer rate .............................................................................................................................. 1 Mbps
Receiving sensitivity ................................................................................................................................. -85 dBm
Ma imum range ................................................................................................................................... about 10 m
2.3 Computer, minimum requirements
The indicated technical parameters should help to choose a suitable computer to analyze your measured
scan data (for Visualizer 3D software only).
CD-ROM drive (internal or e ternal) .......................................................................................................... min. 4
Interface (data transmission) .......................................................................................................................... USB
Free disk space .................................................................................................................................... min. 50 MB
Working memory (RAM) ..................................................................................................................... min. 256 MB
Graphic card .................................................................................................... min. 128 MB, OpenGL-compatible
Operating system ................................................................ Windows Vista, Windows 7, Windows 8, Windows 10
OKM GmbH
www.okmdetectors.com

3 Scope of delivery
CHAPTER 3
Scope of delivery

16 Scope of delivery
In the following section you can find all standard equipment and optional parts of Fusion Light. The scope of
delivery can be different in some circumstances because of some optional accessories which are not
included in the basic equipment.
Description Quantity
Control Unit 1
Charger 1
Shipping Tube 1
Software “Visualizer 3D” optional
Android Smartphone with App optional
Windows Tablet PC (for “Visualizer 3D”) optional
Table 1: Scope of delivery
OKM GmbH
www.okmdetectors.com

4 Control elements
CHAPTER 4
Control elements
In this section you will learn more about the fundamental use of all control elements for this measuring
instrument. All connections, inputs and outputs are e plained in detail.

18 Control elements
4.1 Control unit
Figure 4.1 represents all control elements of the Fusion Light control unit. The control unit itself is the
scanning probe that can be used in vertical position only.
Battery LED: The battery LED indicates the current charge state of the internal battery during operation. As
long as this LED shines green you have enough power to run your device. When this LED starts blinking you
should recharge the battery.
Socket for Charger / Charge LED: When the green battery LED is blinking during operation you have to
recharge the internal battery by connecting the appropriate charger to the socket for charger. As long as
charging is in progress the charge LED is shining orange. When the charge LED turns off the battery is fully
charged.
Trigger with LED: Push the trigger to power on the detector. The trigger LED shines green now and is ready
to respond to incoming Bluetooth connection requests. As soon as the connection is established, the LED
turns blue. Now you can use the trigger to start scanning, initiate a new scan line (ground scan) or to do a
ground balance (magnetometer). To switch off the unit push the trigger for at least 3 seconds until the LED
turns off.
OKM GmbH
www.okmdetectors.com
Figure 4.1: Overview of control elements
Socket for Charger
Trigger with LED
Handle
Charge LED
Battery LED

5 Assembly
CHAPTER 5
Assembly
In this section is e plained how to assemble the device and how to prepare a measurement.

20 Assembly
The Fusion Light itself is ready to use without any additional preparations. You just have to make sure the
internal battery is charged properly. Therefor connect the charger to the socket for charger as shown in
figure 5.1.
As long as charging is in progress the charge LED is shining orange. When the charge LED turns off the
battery is fully charged.
OKM GmbH
www.okmdetectors.com
Figure 5.1: C arging t e control unit before usage
Other manuals for Fusion
1
Table of contents
Other OKM Metal Detector manuals

OKM
OKM eXp 4000 User manual

OKM
OKM PULSE NOVA User manual

OKM
OKM EVOLUTION NTX User manual

OKM
OKM FS Future Series User manual

OKM
OKM FS Future Series User manual

OKM
OKM ROVER C4 User manual

OKM
OKM Future Series User manual

OKM
OKM FS Future Series User manual

OKM
OKM PULSE NOVA User manual

OKM
OKM FS Future Series User manual
Popular Metal Detector manuals by other brands

Treasure Cove
Treasure Cove Fortune Finder JUNIORTC-1010 owner's manual

Skycruiser
Skycruiser TX-650 user manual

Turnstiles
Turnstiles HI-PE PLUS Installation, use and maintenance manual

Barska
Barska WINBEST Pro-400 manual

Minelab
Minelab E-Trac instruction manual

Fisher Research Labs
Fisher Research Labs F75 Special Edition Comprehensive operating manual & guide