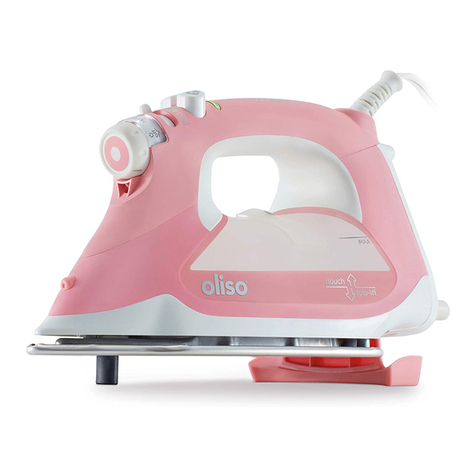
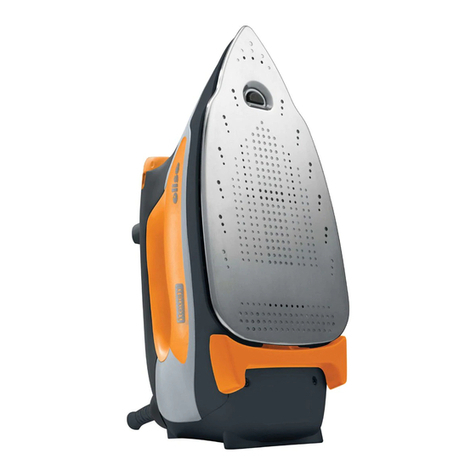
Oliso TG-800 User manual

User Manual for /
Manuel d’utilisation
Oliso®Steam Iron with Auto-Lift System™ /
Fer à vapeur Oliso®avec système Auto-liftMC
Models / Modèles
TG-800 with Non-Stick Soleplate /
TG-800 Semelle Antiadhésive
TG-1000 with Stainless Steel Soleplate /
TG-1000 Semelle en Acier Inoxydable
TG-1200 with Stainless Steel Soleplate /
TG-1200 Semelle en Acier Inoxydable

2
1 ) Use iron only for its intended use.
2 ) To protect against a risk of electric shock, do not immerse the iron in water or other liquids.
3 ) The iron should always be turned to “Off” before plugging or unplugging from the outlet. Never yank
cord to disconnect from the outlet; instead, grasp plug and pull to disconnect.
4 ) Do not allow cord to touch hot surfaces. Let iron cool completely before putting away. Loop cord
loosely around iron when storing.
5 ) Always disconnect iron from electrical outlet when filling with water or emptying and when not in use.
6 ) Do not operate iron with a damaged cord or if the iron has been dropped or damaged. To avoid the
risk of electric shock, do not disassemble the iron. Take it to a qualified serviceman for examination and
repair. Incorrect reassembly can cause a risk of electric shock when the iron is used.
7 ) Do not allow children to use iron. Close supervision is necessary for any appliance being used near
children. Do not leave iron unattended while connected or on an ironing board.
8 ) Burns can occur from touching hot metal parts, hot water, or steam. Use caution when you turn a
steam iron upside down – there may be hot water in the reservoir.
9 ) If the LED flashes orange (not red or green), the iron is not operating normally. Disconnect from the
power supply and have the iron serviced by qualified service personnel.
IMPORTANT SAFETY INSTRUCTIONS
When using your iron, basic safety precautions should always be followed, including the following:
Read all instructions before using this product.
SPECIAL INSTRUCTIONS
1 ) The iron must be used on a stable surface. When placing the iron on a stand or resting surface, make
sure the stand or surface is stable.
2 ) TG800 and TG1000 are 1440 watt appliances. TG1200 is a 1600 watt appliance. To avoid a circuit
overload, do not operate another high wattage appliance on the same circuit.
3 ) If an extension cord is absolutely necessary, a 12 A cord (TG800/1000) or a 14 A minimum cord
(TG1200) should be used. Cords rated for less amperage may overheat. Care should be taken to arrange
the cord so that it cannot be pulled or tripped over.
SAVE THESE INSTRUCTIONS

1
Welcome
Thank you for purchasing the Oliso®Iron, the only iron with the patented AUTO-LIFT
SYSTEM™. You’re just a few steps away from a new safer, easier way of ironing. Follow
the instructions in this manual to learn about your new iron’s features and care. We
hope you enjoy your Oliso®Iron.
Smart. Simple. Delightful.
EN

2
3 simple steps to start
FILL
Open the Flip Funnel™ and add
water to the tank with the fill cup
or directly from a faucet.
Plug in, then choose a fabric
setting.
When the green light stops blinking and is
constantly lit, the iron is ready for use. Touch
the handle and begin.
Enjoy your Oliso®iron
If you would like to learn more about your
iron’s unique features, please read on.
1
SET UP
2
iRON
3

3
getting to know your Oliso®iron
Status Light
Steam Button
Spray Button
Steam Selector
Electronic Fabric Selector
Spray Nozzle
Detailer
Lifters
Touch-activated handle
Auto-Lift™
on/off switch
Flip Funnel™
Water Tank
Soleplate
EN

4
Auto-Lift System™
To operate, place the iron right side
up on a flat surface. Plug the iron into
an outlet and make sure the Auto-Lift
switch is in the on ( ) position.
Touch the iron handle and the iron will
sense your hand and lower. Let go and
the iron’s Lifters will automatically raise
the iron above fabric.
OVERRIDING THE AUTO-LIFT SYSTEM™
If you wish to turn off the Auto-Lift system, move the switch on the back of the
iron to the off ( ) position. Your iron will now operate like a standard iron. If the
iron is left in the horizontal position without being touched for more than 30
seconds, the Auto-Lift system will automatically raise the iron. This will prevent
the iron from scorching or burning. Touch the iron handle, and the iron will lower.
You can restore Auto-Lift by returning the switch to the on ( ) position.

5
water tank
Open the Flip
Funnel™.
Leave the iron in a
horizontal position
and fill using the
included fill cup. Two
fill cups equal the
maximum capacity
of the water tank.
Alternatively, fill directly
from a faucet holding
the iron horizontally. Do
not fill the tank past the
MAX fill line on the
side of the iron. Close
the port when done.
If you need to add water during ironing, unplug
the iron and repeat the above steps. After filling,
make sure the iron is fully reheated before ironing.
This iron is designed to be used with regular tap
water. If your water is over 12 grams of hardness we
recommend using either inexpensive bottled spring
water or mixing half tap water with half distilled water.
Never use 100% distilled water as this can cause the
iron to spit and leak.
water recommendations
Before filling, slide
the steam selector
to off ( ). Make
sure the iron is
unplugged.
EN

6
fabric selector
fabric selector
status light
temperature is too low for steam steam ok
red flashing green green flashing red
off optimizing
temperature at set temp auto off
Turn the fabric selector to select a fabric setting. To use constant steam
or steam burst, the temperature must be set to the wool, cotton, or linen
range.
The Oliso iron uses a status light to display the iron’s status. To ensure correct
temperature, wait until the light displays steady green before ironing.

7
steam/spray system
Steam Selector: Slide the steam selector to set the amount of constant steam. The iron
can only produce steam when the fabric selector knob is set to the wool ( •• ), cotton, or
linen range (•••). Allow the iron to heat up (steady green status light) before activating
the steam control. Steam will be produced as soon as the iron is lowered.
Dry Ironing: To turn off the steam, slide the steam selector off ( ).
Auto Anti-Drip: Your Oliso®iron has an anti-drip feature which shuts off steam
production any time the iron’s Lifters are extended. This prevents unwanted
steam while the iron is standing. To prevent dripping entirely, keep the steam selector in
the off ( ) position.
Spray
• press the spray button for a strong mist spray
• the spray will help remove wrinkles
Burst of Steam
• firmly press the steam button for a strong burst of steam from the soleplate.
• the steam button can only be used when the iron is heated to the wool (••),
cotton, or linen range (•••).
• wait at least 3 seconds between each press of steam button.
Vertical Steam
• to steam vertically press the steam button while holding the iron upright.
• this is useful for getting creases and wrinkles out of hanging clothes or curtains.
• wait at least 3 seconds between each press of the steam button.
EN

8
If the Oliso®iron is not being used while it is plugged in, the status light will flash red and the iron will
turn itself off. The auto shut-off timing depends on whether the Auto-Lift System™ is turned on or off.
Touch the handle of the iron to restart it.
auto shut-off system
Auto-Lift on Auto-Lift off
iron position iron positionauto shut-off timing auto shut-off timing
8 minutes unused
8 minutes vertical
30 seconds knocked over 30 seconds knocked over
8 minutes vertical
30 seconds left untouched,
lifters will raise iron,
and iron will cool

9
after ironing
e.
b. Unplug the appliance (Do not hold iron while unplugging or the
Lifters will not stay extended. Iron should always be stored with Lifters
extended to prevent leaking).
c. Place iron on the Lifters and allow to cool.
d. Important: Empty water from the water tank after each use. To do this,
open the flip funnel™ and tilt the iron to the left until the tank is empty.
e. For easy storage, the power cord can be wound loosely around the
iron once it has cooled.
maintenance
The soleplate should be cleaned if starch or other residue build up. When the iron is cool, wipe the
soleplate with a soft, damp cloth. Do not use abrasive cleaners or scouring pads as this will damage
the iron’s soleplate.
Mineral deposits from tap water can occur in the soleplate vents. To clean, fill the water tank and heat
the iron to the linen fabric setting. Once the iron is fully heated, unplug the iron and hold over a sink.
Press the steam button repeatedly until water begins to drip out of the soleplate. Be careful, as this
creates large amounts of steam.
To ensure optimal steam production, the steam valve should be regularly cleared of accumulated
debris and minerals. This is done by moving the steam selector back and forth from the off ( )
to the max ( ) steam settings several times.
a. Turn the fabric selector to off. Slide the steam selector to off ( ).
EN

10
trouble shooting guide
iron does not heat
PROBLEM THINGS TO CHECK SOLUTION
Lifters do not
come out
iron does not steam
iron leaks
iron is emitting a brown
or white substance
fabric selector is set to off
iron not plugged in correctly
auto shut-off system is activated
Auto-Lift switch set to off
iron not plugged in correctly
handle activated
iron is not hot enough
steam selector set to off
steam valve is clogged
Auto-Lift is off and iron is
horizontal
iron is not hot enough
steam burst button is overused
water hardness may be too high
Turn the fabric selector knob to a fabric setting.
Check to make sure the plug is fully plugged into the socket.
touch the handle.
Set the switch on the back of the iron to the on ( ) position.
Check to make sure the plug is fully plugged into the socket.
Move your hand away from the iron, and the Auto-Lift
System will raise the sole-plate.
The fabric selector must be set to the wool, cotton or linen
settings to produce constant steam.
Steam selector must be turned to a setting.
Move the steam selector from off ( ) to the max ( )
settings a few times to unclog.
When the Auto-Lift switch is set to off ( ), always store
the iron in the vertical position. We recommend turning on
the Auto-Lift system to store the iron.
Make sure the fabric selector knob is set to the cotton or
linen range to ensure proper steam production.
Allow 3 seconds between uses of the steam burst function.
Switch to either spring water or half tap/half distilled water
mixture. See the “water tank” page for more information.

11
One (1) Year Limited Warranty
Oliso, Inc. warrants that for a period of one year from the date of the original purchase, this product will be free from defects
in material and workmanship, when utilized for normal household use. Oliso, Inc. will repair or replace this product or any
component of the product found to be defective during the warranty period without charge to the customer. If a replacement
product is sent, it will carry the remaining warranty of the original product. Replacement will be made with a new or
remanufactured product or component. If the product is no longer available, replacement may be made with a similar product of
equal or greater value. This is your exclusive warranty.
This warranty is valid for the original retail purchaser from the date of initial retail purchase and is not transferable. Keep the
original sales receipt. Proof of purchase is required to obtain warranty performance. Oliso, Inc. dealers or retail stores selling Oliso,
Inc. products do not have the right to alter, modify or in any way change the terms and conditions of this warranty.
The liability of Oliso, Inc. is limited solely to the cost of repair or replacement of the product at its option. This warranty does not
cover normal wear of parts and does not apply to any product that has been tampered with or used for commercial purposes.
This warranty does not cover damage caused by misuse, abuse, use on improper voltage or current, use contrary to the operating
instructions, negligent handling or damage due to faulty packaging or mishandling in transit. This warranty does not cover
damage or defects caused by or resulting from damages from shipping or repairs, service or alteration to the product or any of
its parts, which have been performed by a repair person not authorized by Oliso, Inc. Further, the warranty does not cover Acts of
God such as fire, flood, hurricanes, and tornados.
This warranty is extended to the original purchaser of the product and excludes all other legal and/or conventional warranties.
The responsibility of Oliso, Inc. is limited to the specific obligations expressly assumed by it under the terms of the limited
warranty. In no event shall Oliso, Inc. be liable for any incidental or consequential damages caused by breach of any express,
implied or statutory warranty or condition.
Except to the extent prohibited by law, any implied warranty or condition of merchantability or fitness for a particular purchase is
limited in duration to the duration of the above warranty. Oliso, Inc. disclaims all other warranties, conditions, or representations,
express, implied, statutory or otherwise. In no event shall Oliso, Inc. be liable for any indirect, special, incidental or consequential
losses or damages (including but not limited to interruption of business or loss of business or profit) resulting from the use of
or inability to use the product, any breach of contract, fundamental or otherwise, or for any claim brought against purchaser by
any other party. Some states or jurisdictions do not allow the exclusion or limitation of incidental or consequential damages or
limitations on how long an implied warranty lasts, so the above limitations or exclusion may not apply to you.
If you have any question regarding this warranty or would like to obtain warranty service, please email Oliso, Inc. at
customerservic[email protected]om, and a service center address will be provided to you. If you have further questions, you may call
1-800-899-5157.
© 2005-2007 Oliso, Inc. All rights reserved. Touch&Glide™, Auto-Lift System™, Auto-Lift™, Flow Glide™, Flip
Funnel™, and Smart Touch™ are trademarks of Oliso Inc. OlisoRis a registered trademark of Oliso Inc.
U.S. Patent No. #6,453,587 B1, #6,925,738 B2. Patent Pending
#40000014 <05/08> Printed in China.
www.oliso.com
EN

12
Lire toutes les consignes avant d’utiliser le produit.
1 ) Utiliser le fer uniquement aux fins auxquelles il est destiné.
2) Pour éviter tout choc électrique, ne jamais plonger le fer dans l’eau ni d’autres liquides.
3) Placer l’interrupteur à arrêt avant de brancher ou de débrancher le fer. Ne jamais tirer sur le cordon, saisir
plutôt la fiche pour la retirer de la prise de courant.
4) Ne pas laisser le cordon venir en contact avec des surfaces chaudes. Laisser le fer refroidir complètement
avant de le ranger. Pour le rangement, enrouler le cordon lâchement autour du fer.
5) Toujours débrancher le fer de la prise de courant quand il n’est pas utilisé et avant de remplir ou de vider
le réservoir.
6) Ne pas se servir du fer si le cordon est abîmé ou si on l’a échappé ou endommagé d’une manière
quelconque. Pour éviter tout risque de choc électrique, ne jamais démonter le fer; le faire examiner et
réparer par un réparateur qualifié. Le remontage incorrect du fer peut causer un choc électrique au moment
de son utilisation.
7) Ne pas laisser les enfants se servir du fer et exercer une étroite surveillance quand il est utilisé en leur
présence. Ne jamais laisser le fer sans surveillance quand il est branché ou qu’il se trouve sur une planche à
repasser.
8) Le contact avec les pièces métalliques, l’eau chaude ou la vapeur peut occasionner des brûlures.
Renverser le fer avec précaution, car le réservoir peut contenir de l’eau chaude.
9) Quand le témoin DEL clignote orange (pas rouge ni vert), c’est que le fer ne fonctionne pas correctement.
Débrancher l’appareil de la source d’alimentation et le faire vérifier par une personne qualifiée.
CONSIGNES DE SÉCURITÉ IMPORTANTES
Quand on utilise un fer à repasser, il faut toujours respecter certaines règles de sécurité
fondamentales, notamment les suivantes:
CONSIGNES PARTICULIÈRES
1) Ce fer a une puissance de 1440 W. Pour éviter toute surcharge électrique, ne pas utiliser un autre
appareil de haute puissance sur le même circuit.
2) S’il est absolument indispensable de se servir d’une rallonge électrique, utiliser un cordon de
12 A (TG800/1000) ou un cordon de 14 minimum A (TG1200) . Les cordons d’intensité nominale
inférieure risquent de surchauffer. Prendre soin de placer la rallonge de manière à éviter tout risque de
trébuchement ou de débranchement accidentel.
CCONSERVER LES PRÉSENTES CONSIGNES

1
merci
Nous vous remercions d’avoir acheté le fer Oliso®, le seul appareil doté du système
à autolevage breveté AutoliftMC, qui vous permettra de repasser de façon plus
sécuritaire et plus facile. Lisez le mode d’emploi figurant dans le présent manuel pour
en apprendre davantage sur les caractéristiques et l’entretien de votre nouveau fer.
Nous espérons que vous apprécierez votre fer Oliso®.
Génial. Simple. Plaisant.
FR

2
prêt en trois étapes faciles
REMPLIR RÉGLER
REPASSER
Ouvrir l’entonnoir rabattable Flip
FunnelMC et verser de l’eau dans le
réservoir à l’aide du gobelet ou remplir
le fer directement sous le robinet.
Brancher, puis sélectionner
le tissu approprié..
Quand le témoin vert cesse de clignoter et
demeure allumé en continu, le fer est prêt à
l’emploi. Toucher la poignée et commencer.
Profitez au maximum de votre fer Oliso®
Pour en apprendre davantage sur les
caractéristiques uniques de votre fer,
continuez votre lecture.
12
3

3
description du fer Oliso®
Témoin de fonctionnement
Bouton de jet de vapeur
Bouton de vaporisation
Sélecteur de débit de vapeur
Sélecteur de tissu électronique
Vaporisateur
Pointe avant
Leviers
Poignée d’activation
au toucher
Interrupteur Auto-
LiftMC (marche-arrêt)
Entonnoir
rabattable Flip
FunnelMC
Réservoir
Semelle
FR

4
Auto-Lift SystemMC
Placer le fer à l’horizontale sur une
surface plate. Brancher l’appareil et
vérifier que l’interrupteur Auto-Lift est à
la position marche ( ).
Il suffit de toucher la poignée pour que
le fer s’abaisse et de la relâcher pour
que les leviers sortent et le relèvent
automatiquement au-dessus du tissu.
DÉSACTIVATION DE LA FONCTION AUTO-LIFTMC
Pour désactiver la fonction Auto-Lift, mettre l’interrupteur à la position arrêt
( ). Le fer fonctionnera alors comme un fer ordinaire. Quand on laisse le fer en
position horizontale pendant plus de 30 secondes sans y toucher, le fer se lève
automatiquement pour prévenir tout risque de roussissement ou de brûlure du
tissu. Il suffit de toucher la poignée pour que le fer s’abaisse. Pour réactiver la
fonction Auto-Lift, remettre l’interrupteur à la position marche ( ).

5
réservoir
Ouvrir
l’entonnoir
rabattable Flip
FunnelMC.
Laisser le fer en
position horizontale
et remplir le réservoir
à l’aide du gobelet
fourni. Le réservoir
peut contenir jusqu’à
deux gobelets.
On peut aussi remplir le
réservoir directement
sous le robinet. Pour
ce faire, tenir le fer à
l’horizontale. Ne pas
dépasser le repère de
remplissage MAX qui se
trouve sur le côté du fer.
Fermer l’entonnoir une
fois le réservoir rempli.
Pour ajouter de l’eau pendant le repassage, débrancher le
fer et répéter les étapes ci-dessus. S’assurer ensuite que le
fer a atteint la température voulue avant de recommencer à
repasser.
Le fer est conçu pour une utilisation avec de l’eau du
robinet. Si la dureté de l’eau est supérieure à douze
grammes, nous conseillons l’utilisation d’eau de source
embouteillée économique ou d’un mélange à 50 %
d’eau du robinet et d’eau distillée. Ne jamais utiliser
d’eau distillée pure, car le fer pourrait cracher ou fuir.
Qualité de l’eau
Avant de remplir le
réservoir, déplacer
le sélecteur de
débit de vapeur à la
position arrêt ( ).
S’assurer que le fer
est débranché.
FR

6
sélecteur de tissu
sélecteur de tissu
témoin de
fonctionnement
température trop basse
pour la vapeur
température adéquate
pour la vapeur
rouge vert clignotant vert rouge clignotant
arrêt optimisation de
la température
température
sélectionnée
atteinte
arrêt
automatique
Sélectionner le tissu approprié. Pour un repassage à la vapeur (débit con-
tinu ou par jet), le sélecteur doit être placé dans la plage laine, coton ou lin.
Le fer Oliso®est doté d’un témoin de fonctionnement qui indique l’état de
l’appareil. Pour s’assurer que la température sélectionnée est atteinte, attendre
que le témoin vert s’allume en continu avant de commencer à repasser.
arrêt nylon soie mélange polyester laine coton lin
This manual suits for next models
2
Table of contents
Languages:
Other Oliso Iron manuals

Oliso
Oliso project iron M3PRO User manual

Oliso
Oliso Touch & Glide User manual

Oliso
Oliso Mini Project Iron M2Pro User manual

Oliso
Oliso Smartiron User manual

Oliso
Oliso smartiron TG1600Pro+ User manual

Oliso
Oliso smartiron TG1050 User manual

Oliso
Oliso smart iron TG1600Pro+ User manual

Oliso
Oliso Smart Iron TG1250 User manual

Oliso
Oliso project iron M3PRO User manual