Olitech EASY MATE+ OLT2914 User manual

User Manual
Model number: OLT2914
EASY MATE +

2

3
Olitech Easy Mate+
User Manual
Table of contents
Key descriptions……………………...4
Display icon descriptions……...……6
Specifications...................................8
Setting up the phone........................9
Calls……………………………………18
Messages…………………..…………20
Phonebook/Contacts…………...…..24
Emergency/SOS button…………….27
Additional features………………….32
Settings………………………...……..36
USB Data Cable ..............................43
Troubleshooting .............................44
Safety information..........................50
Warranty..........................................54

4
Key descriptions
Keys
Explanation
Green Button:
Used to answer or confirm call
Allows user to select options/
proceed through Menu
Red Button:
Used to end call
Selects “Back” when in Menu
Arrows:
Used to navigate Menu
When on home screen:
1. Down arrow provides
shortcut to Contacts
2. Up arrow provides
shortcut to Alarm
Emergency/SOS Button:
Press and hold red SOS button
(on back of phone) for 3 seconds
to trigger emergency button.
SOS button requires setup –see
“Emergency/SOS button” section
of manual for more details.

5
Volume Buttons:
Used to change volume
Power Key:
Press and hold for 3 seconds to
power on / off
Hash (#) Key:
Used to change input methods
(capital/lower case when typing).
When on the home screen, press
and hold hash key for 3 seconds
to activate the silent mode.
Star (*) Key:
Light emitted from key (not always
present) represents battery
charge status. See Charging the
Battery section of the manual for
greater detail.
Keypad Lock:
Press and hold for 3 seconds to
lock or unlock the keypad.
Flashlight Key:
Unlock phone and press button for
3 seconds to turn flashlight on/off.
Magnifier Key:
Press to activate magnifier.
Maximum magnification x3

6
Hands Free/Loud Speaker:
Press to activate the loud speaker
function during call.
Number Keys:
When pressed momentarily, each
number key types their designated
number or letter as displayed on
the key. When “1” is pressed for 3
seconds it links to voicemail.
When 2-9 are pressed for 3
seconds they dial their allocated
speed dial number. (Please note:
users needs to program their own speed
dial numbers and speed dial needs to be
active for this feature to be used).
Display icon descriptions
Symbols
Explanation
Indicates the mobile phone
reception/service strength
Ringtone only (alert for
incoming calls/text messages)
Vibration only (alert for
incoming calls/text messages)
Indicates the Silent / Sleep
Mode is activated

7
(no ringtone or vibration for
incoming calls/text messages)
Phone will vibrate then ring for
incoming calls/text messages
Phone will vibrate and ring for
incoming calls/text messages
Headphones are plugged in
Phone is playing music
You have an unread
multimedia massage (MMS)
You have an unread text
message (SMS)
Alarm is on
Indicates charging status and
battery level
You have an unacknowledged
missed call
Bluetooth function is active
Phone is using the 2G network
Phone is using the 3G network
Keypad lock is on
You are using a foreign
network, additional costs may
apply

8
Specifications
Dimensions: 120 mm (height) X 59
mm (width) X 13.3 mm (depth)
Battery capacity: 1000mAh
Standby duration: 225 hours
When in service only. Ongoing searching for
network/service significantly reduces standby
time.
Call duration: 3.8 hours
Call duration (battery life) can differ depending
on network and location.

9
Setting up the phone
Insert SIM card
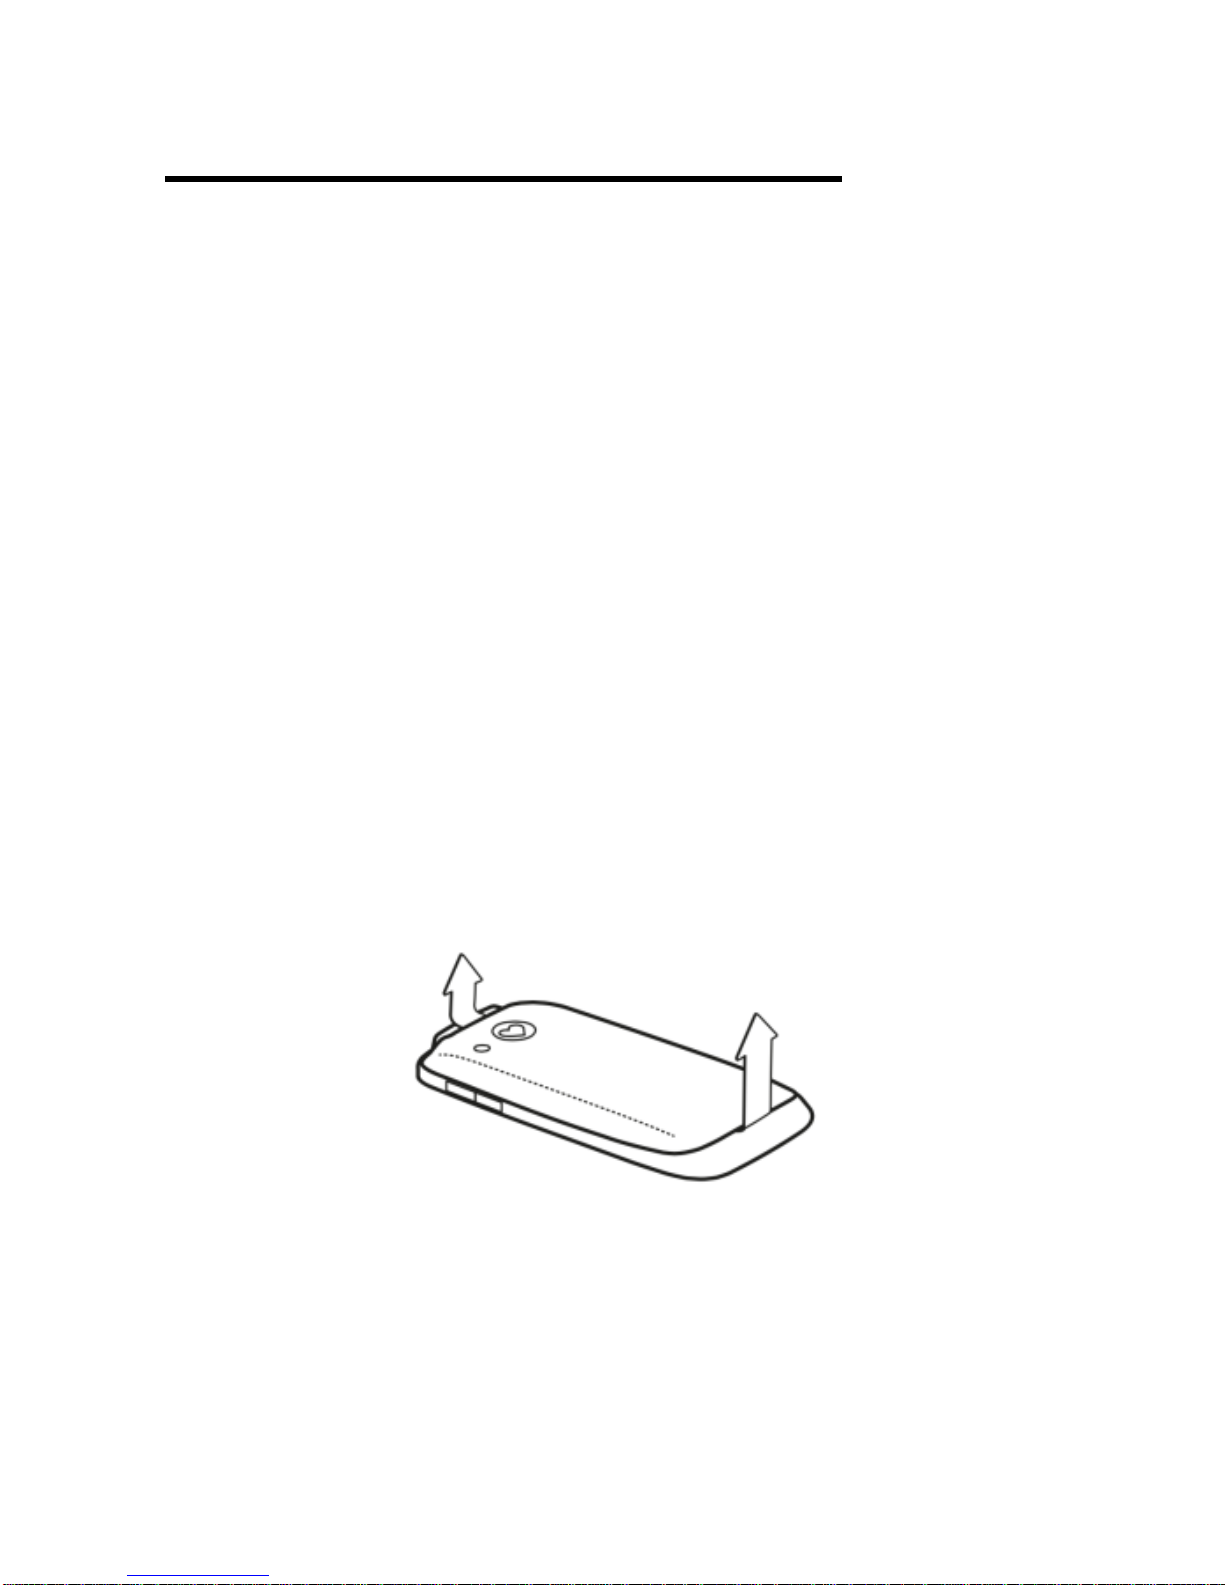
Step 1 - Remove the battery cover on
the back of the phone. To doso, find the
small recess in the top left corner of the
phones back cover. There is a small
raised marking on the back cover
above the camera lens to assist
locating the small recess (top left of
back cover). Lift from the small recess
to remove the back cover. Please note
it may be difficult to initially remove
back cover.
Step 2 –Remove the battery. The
location for the SIM card can now be
seen in the top left corner of the
exposed phone interior.

10
Step 3 - Insert the SIM card (standard
size) with the gold chip facing down,
oblique edge to the bottom right. The
SIM card should be positioned under
the large horizontal silver guard and not
be inserted further then the black
barrier on the upper edge of the SIM
slot.
Please note:
Before replacing the phones back cover
please insert the MicroSD card
(optional) and battery.
MicroSD card/Memory card
(Optional –not provided with phone)
A MicroSD card/memory card can be
inserted into the phone to provide
additional memory for the phone.

11
The maximum capacity MicroSD
card/memory card that should be used
with this phone is 16Gb.
Inserting the MicroSD card:
When the back cover and battery are
removed, the location for the MicroSD
card can be seen in the top right corner
of the exposed phone interior. Slide the
silver, rectangular panel (located above
the MicroSD card holder) towards the
top of the phone (only slides a small
distance –this unlocks it from its stable
position). Lift the rectangular panel
upwards from the bottom so that it is
sitting at a 90 degree angle from the
phone (see image on following page).
Insert the MicroSD card into the panel
with the chip facing forward. Close the
panel with card inserted. Slide the panel
down to lock it into a stable position (it
will only slide a small distance).

12
Precautions when inserting SIM card
and MicroSD card:
1. Keep the SIM card and MicroSD card
out of reach of children.
2. Do not touch the gold chip on the
SIM card/MicroSD card.
3. Keep the SIM card/MicroSD card
away from magnets.
4. Avoid putting the SIM card/MicroSD
card under direct heat such as sunlight.
5. Please be gentle with the
mechanisms that hold the SIM card and
MicroSD card. They are delicate and
can break if mishandled.

13
Insert the battery
Warning:Do not remove battery when
the phone is powered on or when the
phone is connected to the charger.
Failure to comply may result in damage
to the phone and attached accessories.
Step 1 - Remove protective tape from
conductors on top right edge of battery.
Step 2 - Insert the battery so the
conductors on the battery line up with
the conductors on the phone’s battery
port. Once inserted, the battery will sit
over the SIM card and MicroSD card (if
inserted).
Step 3 -Secure the battery cover in
place. To do so, first position the
bottom of the cover into place (two clips

14
are located on the bottom border of
phone cover, insert these into the two
holes at the bottom of the back
opening). Once the bottom of the cover
is in place, press the top of the cover
into place. Ensure all four corners of
cover are in place prior to use.
Please note:
1.Before using the phone for the first
time please charge the battery for at
least 4 hours. Violation of this charging
time may decrease the battery life.
2.During the charging process, do not
remove the battery from the phone.
Failure to comply may damage the
phone and attached accessories.
3. The phone/charger may be warm
during charging. This is normal.
4.If the battery capacity is exhausted it
may take several minutes into the
charging process before the charging
icon displays on the LCD screen.

15
Charging the Battery
Only use the Olitech battery and
charger with the phone. Failure to
comply with this may result in damage
to the phone and loss of warranty.
Do not attempt to insert the charging
cable into the headphone socket. This
could damage the phone/cable.
Battery charging options:
Charge with the wall charging plug
Connect the USB charging cable
to the wall charging plug.
Insert the charging cable into the
charging port on the top of the
phone (middle landmark).
Turn power on at power point.

16
Charge with the cradle charger
Connect the cradle charger to the
wall charging plug using the USB
charging cable.
Connect the wall charging plug to
the power point and turn power
point on.
Place/sit the phone into the
cradle charger (see image on
front cover of manual).
Charge using a computer
Connect the phone to your
computer using the USB charging
cable.
If the computer is powered on
charging will commence.
Additional information regarding
charging your phone
During the charging process:
If the phone is powered off, the
battery symbol will be displayed on

17
the screen and the star key [*] will
flash. If the phone’s battery is fully
exhausted prior to charging it may
take several minutes for these
indicators to be displayed.
If the phone is powered on, the
battery charge level is seen on the
LCD screen via the battery icon
and the star key (*) flashes.
When is the battery fully charged?
The phone battery is fully charged
when the battery icon shows full
bars and the star key (*) is
continuously lit.
The phone can now be removed
from the charging unit.

18
Calls
How to make a call
1. Enter telephone number with the
numeric keys.
2. Press green button to connect the
call. The call recipients name or
phone number will be displayed on
the screen for the duration of the
call.
How to end a call
1. To end a call, press the red button.
How to accept or reject an
incoming call
1. When you receive an incoming call,
the name of the caller (if saved to
your address book) or number of
the caller appears on the screen.
2. To accept the call, press the green
button.

19
3. To reject the call, press the red
button.
Hands Free/Loud Speaker
1. If you wish to use the hands
free/loud speaker function, once
the call is active, press the hands
free/loud speaker button
on the main keypad.
2. To return to handset mode press
the hands free/loud speaker button
again.
Missed Call
When you have missed an incoming
call, the message “1 missed call”
appears on the home screen and the
hash key (#) flashes. If you view the
missed call, the message disappears
and the hash key stops flashing. If you
do not view the missed call, the missed
call icon will be displayed on the
screen.

20
Messages
With your phone, you can write and
send text messages (SMS) and
Multimedia Messages (MMS). The
messaging feature of this phone is
accessed through pressing the Menu
key then selecting Messaging.
Writing messages
1. To write a text message or
multimedia message, press the
Menu key Messaging Write
message Text message OR
Multimedia message
2. Enter text using the keypad. The
hash key (#) can be used to
change between capital letters,
lower case letters and predictive
text. Press “Options” (green button)
to choose the recipient by
“Entering number” OR “Add from
Phonebook”
Table of contents
Other Olitech Cell Phone manuals