manuals.online logo
Brands
  1. Home
  2. •
  3. Brands
  4. •
  5. Omega
  6. •
  7. Measuring Instrument
  8. •
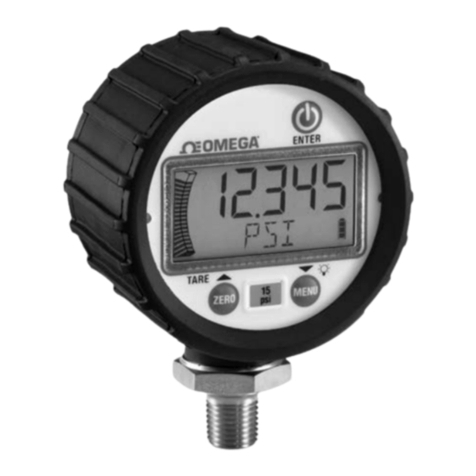
  9. Omega DP41-B Series User manual

Omega DP41-B Series User manual

DP41-B
Isolated Analog Output Option
Servicing North America:
USA: One Omega Drive, P.O. Box 4047
ISO 9001 Certified Stamford CT 06907-0047
T L: (203) 359-1660 FAX: (203) 359-7700
e-mail: [email protected]
Canada: 976 Bergar
Laval (Quebec) H7L 5A1
T L: (514) 856-6928 FAX: (514) 856-6886
e-mail: [email protected]
For immediate technical or application assistance:
USA and Canada: Sales Service: 1-800-826-6342 / 1-800-TC-OM GA®
Customer Service: 1-800-622-2378 / 1-800-622-B ST®
ngineering Service: 1-800-872-9436 / 1-800-USA-WH N®
T L X: 996404 ASYLINK: 62968934 CABL : OM GA
Mexico and T L: (001)800-TC-OM GA® FAX: (001) 203-359-7807
Latin American: n spañol: (001) 203-359-7803
e-mail: [email protected]
Servicing Europe:
Benelux: Postbus 8034, 1180 LA Amstelveen, The Netherlands
T L: +31 20 3472121 FAX: +31 20 6434643
Toll Free in Benelux: 0800 0993344
e-mail: [email protected]
Czech Republic: Rudé armády 1868, 733 01 Karviná 8
T L: +420 69 6311899 FAX: +420 69 6311114
e-mail: [email protected]
rance: 11, rue Jacques Cartier, 78280 Guyancourt
T L: +33 1 61 37 29 00 FAX: +33 1 30 57 54 27
Toll Free in France: 0800 466 342
e-mail: [email protected]
Germany/Austria: Daimlerstrasse 26, D-75392 Deckenpfronn, Germany
T L: +49 7056 9398-0 FAX: +49 7056 9398-29
Toll Free in Germany: 0800 639 7678
e-mail: [email protected]
United Kingdom: One Omega Drive
ISO 9002 Certified River Bend Technology Centre
Northbank, Irlam Manchester M44 5BD United Kingdom
T L: +44 161 777 6611 FAX: +44 161 777 6622
Toll Free in ngland: 0800 488 488
e-mail: [email protected]
OMEGAnet® On-Line Service
www.omega.com
Internet e-mail
[email protected]
®
®
M2548/0802
WA ANTY/DISCLAIME
OM GA NGIN RING, INC. warrants this unit to be free of defects in
materials and workmanship for a period of one (1) year from the date of
purchase. In addition to OM GA’s standard warranty period, OM GA
ngineering will extend the warranty period for four (4) additional years if the
warranty card enclosed with each instrument is returned to OM GA.
If the unit malfunctions, it must be returned to the factory for evaluation.
OM GA’s Customer Service Department will issue an Authorized Return (AR)
number immediately upon phone or written request. Upon examination by
OM GA, if the unit is found to be defective, it will be repaired or replaced at
no charge. OM GA’s WARRANTY does not apply to defects resulting from
any action of the purchaser, including but not limited to mishandling, improper
interfacing, operation outside of design limits, improper repair, or unauthorized
modification. This WARRANTY is VOID if the unit shows evidence of having
been tampered with or shows evidence of having been damaged as a result of
excessive corrosion; or current, heat, moisture or vibration; improper
specification; misapplication; misuse or other operating conditions outside of
OM GA’s control. Components which wear are not warranted, including but
not limited to contact points, fuses, and triacs.
OMEGA is pleased to offer suggestions on the use of its various
products. However, OMEGA neither assumes responsibility for any
omissions or errors nor assumes liability for any damages that result
from the use of its products in accordance with information provided by
OMEGA, either verbal or written. OMEGA warrants only that the parts
manufactured by it will be as specified and free of defects. OMEGA
MAKES NO OTHER WARRANTIES OR REPRESENTATIONS O ANY KIND
WHATSOEVER, EXPRESS OR IMPLIED, EXCEPT THAT O TITLE, AND
ALL IMPLIED WARRANTIES INCLUDING ANY WARRANTY O
MERCHANTABILITY AND ITNESS OR A PARTICULAR PURPOSE ARE
HEREBY DISCLAIMED. LIMITATION O LIABILITY: The remedies of
purchaser set forth herein are exclusive, and the total liability of OMEGA
with respect to this order, whether based on contract, warranty,
negligence, indemnification, strict liability or otherwise, shall not exceed
the purchase price of the component upon which liability is based. In no
event shall OMEGA be liable for consequential, incidental or special
damages.
CONDITIONS: quipment sold by OM GA is not intended to be used, nor
shall it be used: (1) as a “Basic Component” under 10 CFR 21 (NRC), used in
or with any nuclear installation or activity; or (2) in medical applications or used
on humans. Should any Product(s) be used in or with any nuclear installation
or activity, medical application, used on humans, or misused in any way,
OM GA assumes no responsibility as set forth in our basic
WARRANTY/DISCLAIM R language, and, additionally, purchaser will
indemnify OM GA and hold OM GA harmless from any liability or damage
whatsoever arising out of the use of the Product(s) in such a manner.
ETU N EQUESTS / INQUI IES
Direct all warranty and repair requests/inquiries to the OM GA Customer Service
Department. B FOR R TURNING ANY PRODUCT(S) TO OM GA,
PURCHAS R MUST OBTAIN AN AUTHORIZ D R TURN (AR) NUMB R
FROM OM GA’S CUSTOM R S RVIC D PARTM NT (IN ORD R TO
AVOID PROC SSING D LAYS). The assigned AR number should then be
marked on the outside of the return package and on any correspondence.
The purchaser is responsible for shipping charges, freight, insurance and
proper packaging to prevent breakage in transit.
FOR WARRANTY R TURNS, please
have the following information
available B FOR
contacting OM GA:
1. P.O. number under which the
product was PURCHAS D,
2. Model and serial number of the
product under warranty, and
3. Repair instructions and/or specific
problems relative to the product.
FOR NON-WARRANTY R PAIRS,
consult OM GA for current repair
charges. Have the following
information available B FOR
contacting OM GA:
1. P.O. number to cover the COST of
the repair,
2. Model and serial number of product,
and
3. Repair instructions and/or specific
problems relative to the product.
OM GA’s policy is to make running changes, not model changes, whenever
an improvement is possible. This affords our customers the latest in
technology and engineering.
OM GA is a registered trademark of OM GA NGIN RING, INC.
© Copyright 2002 OM GA NGIN RING, INC. All rights reserved. This
document may not be copied, photocopied, reproduced, translated, or reduced
to any electronic medium or machine-readable form, in whole or in part,
without prior written consent of OM GA NGIN RING, INC.
PATENT AND TRADEMARK NOTICE: This product is covered by one or
more of the following patents: U.S. Pat. No. Des. 336,895; 5,274,577;
6,243,021 / CANADA 2052599; 2052600 / ITALY 1249456; 1250938 /
G RMANY D 41 34398 C2 / SPAIN 2039150; 2048066 / UK Patent No. GB2
249 837; GB2 248 954 / FRANC BR V T NO. 91 12756. The “Meter Bezel
Design” is a trademark of Newport lectronics, Inc. US D UND R LIC NS .
Other U.S. and International Patents pending or applied for.
USA
MADE
IN
5 6
SETTING OUTPUT SCALE AND OFFSET (continued)
Out 1 (OUTPUT 1)
Press ‘RESET/ENTER’ 14)
Display flashes 1st digit of
previous "OUt 1" value.
Press ‘/MAX’ & ‘ /MIN’ 15) nter "OUt 1" value.
( xample 0000.00).
Press ‘RESET/ENTER’ 16) Display advances to
"REAd 2" Reading 2 menu.
REAd 2 (READING 2)
Press ‘RESET/ENTER’ 17)
Display flashes 1st digit
of previous "Reading 2" value.
Press ‘/MAX’ & ‘ /MIN’ 18) nter "Reading 2” value.
( xample 999999).
Press ‘RESET/ENTER’ 19) Display advances to
"OUt 2" Output 2 menu.
Out 2 (OUTPUT 2)
Press ‘RESET/ENTER’ 20)
Display flashes 1st digit of
previous "OUt 2" value.
Press ‘/MAX’ & ‘ /MIN’ 21) nter "OUt 2" value.
( xample 0010.00).
Press ‘RESET/ENTER’ 22)
Display Display shows
"StOREd" stored message
momentarily and then advances
to the "SP CN " SetPoint
Configuration menu.
The above example is for 0-10 V of the entire
range of the process input and analog output. For
0-20mA output you need to set "MOdE" to "CURRNt"
DC-Current output and "OUt 2" to 0020.00.
SPECIFICATIONS
Analog Output:
0-5 V, 1-5 V, 0-10 V, 0-20 mA, 4-20 mA level; 14-bit
resolution; 0.1% accuracy; 6 msec step response.
Isolation:
Power to Input / Analog, Comm, thernet, & Relay Output:
2500 Vac per 1 min. test
Relays to Inputs / Analog, Comm, & thernet Outputs:
2500 Vac per 1 min. test
thernet to Inputs / Analog Outputs:
1500 Vac per 1 min. test
Between Inputs / Analog & Comm Outputs:
500 Vac per 1 min. test
OPE ATION MANUAL
CONFIGU ING THE OUTPUT (continued)
MOdE
ENTER OUTPUT MODE CON IGURATION SUBMENU:
Press ‘RESET/ENTER’ 5) Display shows " StOREd"
stored message momentarily
and advances to "MOdE" to
allow users to select Output
type as Voltage (0-10Vdc or
Current (4-20mA-dc) source.
Press ‘RESET/ENTER’ 6) Display flashes "VOLt"
(default) DC-Voltage output
option or previous selection
("CURRNt" DC-Current output).
Out.tyP
ENTER OUTPUT TYPE CON IGURATION SUBMENU:
Press ‘RESET/ENTER’ 7) Display shows "OUt.tyP"
Output Type Submenu.
Press ‘RESET/ENTER’ 8) Display flashes "UN ILt"
Unfiltered option or previous
selection.
Press ‘/MAX’ 9) Scroll though and select
the following options for your
choice of setting:
"UN Ilt": Transmits the unfiltered value of your signal input.
"ILtRd" : Transmits the filtered value of your signal input.
"PEAk" : Transmits the recorded Peak "HI RdG" Reading
value(s).
or "VALLy" : Transmits the recorded Valley"LO RdG"
Reading value(s).
SETTING OUTPUT SCALE AND OFFSET
OT.SC.OF ENTER OUTPUT SCALE & O SET
CON IGURATION SUBMENU:
REAd 1 (READING 1)
Press ‘RESET/ENTER’ 10) Display shows "REAd 1"
Reading 1 menu.
Press ‘RESET/ENTER’ 11) Display flashes 1st digit of
previous "Reading 1" value.
Press ‘/MAX’ & ‘ /MIN’ 12) nter "Reading 1" value.
( xample 000000).
Press ‘RESET/ENTER’ 13) Display advances to
"OUt 1" Output 1 menu.
Ot.SC.OF
(Output Scale & Offset) REAd 1
value
OUt 1
value
REAd 2
value
OUt 2
value
FILtRd
(Filtered)
OUt.tyP
(Output Type)
UNFILt
(Unfiltered) PEAk VALLy
It is the policy of OM GA to comply with all worldwide safety and MC/ MI regulations
that apply. OM GA is constantly pursuing certification of its products to the uropean New
Approach Directives. OM GA will add the C mark to every appropriate device upon
certification.
This device is marked with the international hazard symbol. It is important to read
the Setup Guide before installing or commissioning this device as it contains
important information relating to safety and MC.
WARNING: These products are not designed for use in, and should not be used
for, patient connected applications.
The information contained in this document is believed to be correct but OM GA
ngineering, Inc. accepts no liability for any errors it contains, and reserves the right to
alter specifications without notice.
, omega.com ®are trademarks of OM GA ngineering, Inc.
®
RoHS 2 Compliant
FEATU ES OVE VIEW
1. Precise analog levels are generated from digital code
using a 14-bit DAC chip.
2. Voltage (to 10 V) is available at the same time as current
(to 22 mA), but the total current drawn should not exceed
24 mA.
3. Load resistance for the voltage output can be as low as
500 ohms (20 mA at 10 V out) when current output is not
used.
4. Loop resistance for the current output can be as high as
600 ohms (12 volts compliance) with negligible current
from the voltage output.
5. Both outputs are galvanically isolated from both power
and measurement circuits of the meter.
6. Precision calibration is applied by the meter to either the
voltage output or the current output (but not to both
simultaneously). When both outputs are used
simultaneously, the non-calibrated output is stable but
does require external adjustment if fine-trimming is
required.
7. Independent, 14-bit resolution OuTput SCale and OFfset
(OT.SC.OF) can convert a wide range of meter readings
to the desired current or voltage output span.
8. The output resolution permits good accuracy for
turndown ratios (offset/span) as high as 100:1.
9. 50° to 104°F (10° to 40°C) accuracy within 0.1% after
installation calibration.
10. 10% to 90% step response time is 6 milliseconds (plus
filter delay, if any, programmed for the analog output).
11. Configurable so that output will track the P AK or
VALL Y measurement.
BOA D INSTALLATION
To install optional Analog Output printed circuit board:
1. Refer to “Reveal the Main Board” in Main Operator’s
Manual Section 5.2, Disassembly.
2. Using figure below as a reference, insert analog option
board(s) into J12 connector on the main board.
WARNING: To avoid electrical shock be sure to
disconnect the unit from its power supply. After
you have opened the meter you are ready to
install option card.
LCk.CNF
ENTER LOCKOUT (ACCESS SECURITY)
CON IGURATION SUBMENU:
Press ‘MENU’ 1) Ten times, Display shows
"LCk.CN " Lockout (Access
Security) Configuration Menu.
Press ‘RESET/ENTER’ 2) Display shows "Id" Access
Security ID menu.
Press ‘RESET/ENTER’ 3) Display shows 4 numbers 0
(0000) with the first digit flashing.
Press ‘/MAX’ & ‘ /MIN’ 4) To enter Access Security ID
code.
• The default code is any 4-digit number that has the sum
of its 4 digits equal 10. For example 1234 is one of the
default ID code since 1+2+3+4 = 10.
• Use numbers that are easy for you to remember. If the ID
Code is forgotten or lost, Call customer service with your
serial number to access and reset to the default ID code.
Press ‘RESET/ENTER’ 5) Display shows "CHNG. Id"
Change ID Code menu; which
Implies that the ID code, was
just entered, is accepted other-
wise the meter will return to “Id"
ID Code menu and allows user
enter the ID code again if the
correct ID code still is not found
for over 3 attempts then display
shows "ERROR" and advances
to "RUN" Run mode.
Press ‘RESET/ENTER’ 6) Display shows 4 numbers 0
(0000) with the first digit flashing.
Press ‘/MAX’ & ‘ /MIN’ 7) To modify and enter new ID
code if necessary, otherwise
skip this menu by Press
‘RESET/ENTER’ again.
LOCk
Press ‘RESET/ENTER’ 8)
Display shows "StOREd"
stored message momentarily and
then advances to the "LOCk"
Lockout menu.

Press ‘RESET/ENTER’ 9)
Display shows "SP1" Setpoint 1
submenu. Use ‘MENU’ button to
regain accessibility or lockout the
other following menu functions in
the Main Menu:
"SP2", "SP3", "SP4", "INPUt",
"RdG.CN ", "INP.CN ", "MP.SC.O ",
"OUt.CN ", "SP.CN ", "AL.CN ",
"COMM"
(If Communication Option
Board installed), and "COLOR".
Press ‘RESET/ENTER’ 10)
Display flashes "dISAbL"
disable option or previous setting.
LOCk (continued)
Press ‘/MAX’ 11)
Scroll and select "ENAbLE" to
lockout "
OUt.CN
" Output Configuration
from any unauthorized modification or
skip this menu, just Press ‘RESET/ENTER’.
Press ‘RESET/ENTER’ 12)
Display shows "StOREd" stored
message momentarily and then
advances to the "
SP.CN
" submenu.
CONFIGU ING THE OUTPUT
OUt.CNF ENTER OUTPUT CON IGURATION MENU:
Press ‘MENU’ 1)
5 times or scroll though main
Menu until Display shows "OUt.CN "
Output Configuration Menu.
ANA.OUt
Press ‘RESET/ENTER’ 2) Display shows "ANA.OUt"
Analog Output Configuration
submenu.
Press ‘RESET/ENTER’ 3)
Display flashes "dISAbL"
(Default) or previous setting option.
Press ‘/MAX’ 4) Select "ENAbLE" to setup
Analog Output if your controller is
equipped With the optional Analog
Output board.
ANA.OUt
(Analog Output)
OUt.CNF
ENAbLE MOdE
dISAbL
OUt.tyP
(Output Type)
CURRNt
VOLt
FILtRd
(Filtered)
UNFILt
(Unfiltered)
PEAk
VALLy
OUt.CNF
ANA.OUt
(Analog Output)
Ot.SC.OF
(Output Scale & Offset)
ENAbLE MOdE
DISAbL OUt.tyP
(Output Type)
4
Start Here
23
BOA D INSTALLATION (continued)
Press This Button Analog Option Board and
Figure 1. Board Installation
WI ING CONNECTIONS
WARNING: Do not connect ac power to your
meter until you have completed all input and
output connections. Failure to do so may result in
injury! This device must only be installed
electrically by specially trained electrician with
corresponding qualifications.
Press This Button Isolated Analog Output
Figure 2. Analog Output Option Board Wiring Connection
LOCKOUT (ACCESS SECU ITY)
CONFIGU ATION MENU
•
To prevent unauthorized tampering with the setup
parameters, this instrument provides protection by requiring
the user to enter the ID (Access Security) Code before
allowing access any locked menu item on Main menu.
• The locked menu will be skipped and invisible during
Menu Navigation, however Display will show the locked
setpoint and value but editing mode is disabled (first digit
is not flashing).
•
Whether multiple or single menu accessibility/restriction
desired, there is only one ID code needed.
P5
1
2
3
Analog Voltage
0-10Vdc
Analog Current
4-20mA
Analog Return
+
+
SIGNAL INPUT BD
AC POW R BD
J12
10
1
ANALOG OUTPUT BD
P12 1
1
0
S1 A
S1
S1-A must
be closed.

Other manuals for DP41-B Series

3

Other Omega Measuring Instrument manuals

Omega OM-143 User manual

Omega

Omega OM-143 User manual

Omega DPG2001B User manual

Omega

Omega DPG2001B User manual

Omega DP18-RV1 User manual

Omega

Omega DP18-RV1 User manual

Omega HHLM-2 User manual

Omega

Omega HHLM-2 User manual

Omega CMDP Series User manual

Omega

Omega CMDP Series User manual

Omega DP41-W User manual

Omega

Omega DP41-W User manual

Omega CL551 User manual

Omega

Omega CL551 User manual

Omega HH800-SW User manual

Omega

Omega HH800-SW User manual

Omega PRESSURE GAUGES DPG5000 User manual

Omega

Omega PRESSURE GAUGES DPG5000 User manual

Omega HHSL402SD User manual

Omega

Omega HHSL402SD User manual

Omega FPDM1000 User manual

Omega

Omega FPDM1000 User manual

Omega HHF144 User manual

Omega

Omega HHF144 User manual

Omega DP26-RTD Instruction manual

Omega

Omega DP26-RTD Instruction manual

Omega ACC320 User manual

Omega

Omega ACC320 User manual

Omega RH62F User manual

Omega

Omega RH62F User manual

Omega RHXL5SD User manual

Omega

Omega RHXL5SD User manual

Omega FPD-4000 Series User manual

Omega

Omega FPD-4000 Series User manual

Omega HHP-SG User manual

Omega

Omega HHP-SG User manual

Omega DPF20 Series User manual

Omega

Omega DPF20 Series User manual

Omega RD-MV100 Series User manual

Omega

Omega RD-MV100 Series User manual

Omega USB-4750 User manual

Omega

Omega USB-4750 User manual

Omega HHG1394 User manual

Omega

Omega HHG1394 User manual

Omega Vortex FV100 Series User manual

Omega

Omega Vortex FV100 Series User manual

Omega DOH-10 Series User manual

Omega

Omega DOH-10 Series User manual

Popular Measuring Instrument manuals by other brands

Scaletron AccuPro-5000 Operator's manual

Scaletron

Scaletron AccuPro-5000 Operator's manual

Sper scientific 850014 instruction manual

Sper scientific

Sper scientific 850014 instruction manual

PCB Piezotronics IMI SENSORS 66103PPZ1 Installation and operating manual

PCB Piezotronics

PCB Piezotronics IMI SENSORS 66103PPZ1 Installation and operating manual

AstroAI 202D user manual

AstroAI

AstroAI 202D user manual

Chauvin Arnoux C.A 6528 quick start guide

Chauvin Arnoux

Chauvin Arnoux C.A 6528 quick start guide

Diamond SX-600 quick start guide

Diamond

Diamond SX-600 quick start guide

Golfzon Wave RADAR quick start guide

Golfzon

Golfzon Wave RADAR quick start guide

HHB Portadisc MDP500 Quick reference guide

HHB

HHB Portadisc MDP500 Quick reference guide

DeFelsko PosiTector SPG instruction manual

DeFelsko

DeFelsko PosiTector SPG instruction manual

AKO AKO-59820 instructions

AKO

AKO AKO-59820 instructions

WYLER Clinotronic S manual

WYLER

WYLER Clinotronic S manual

Landis & Gyr Ultrasonic UH50 General information

Landis & Gyr

Landis & Gyr Ultrasonic UH50 General information

IWH 019060 instruction manual

IWH

IWH 019060 instruction manual

Resonance Technology RX-25b Short manual

Resonance Technology

Resonance Technology RX-25b Short manual

az-instrument 8921 Operation manuals

az-instrument

az-instrument 8921 Operation manuals

ELBRO LX-1148SD Operation manual

ELBRO

ELBRO LX-1148SD Operation manual

Heise CC Installation and maintenance manual

Heise

Heise CC Installation and maintenance manual

Shodex RSpak DE-613 Operation manual

Shodex

Shodex RSpak DE-613 Operation manual

manuals.online logo
manuals.online logoBrands
  • About & Mission
  • Contact us
  • Privacy Policy
  • Terms and Conditions

Copyright 2025 Manuals.Online. All Rights Reserved.