manuals.online logo
Brands
  1. Home
  2. •
  3. Brands
  4. •
  5. OMPHOBBY
  6. •
  7. Toy
  8. •
  9. OMPHOBBY Edge 540 User manual

OMPHOBBY Edge 540 User manual

GlobalProfessionalRCModelBrand
InstallationManual
OMPHOBBY74”Edge540KevlarReinforced
BalsaAirplane
ZhuhaiEdgeSmartDriveTechnologyCo.,Ltd.
www.omphobby.com
OMPHobby74”BalsaAirplane
ZhuhaiEdgeSmartDriveTechnologyCo.,Ltd.
www.omphobby.com
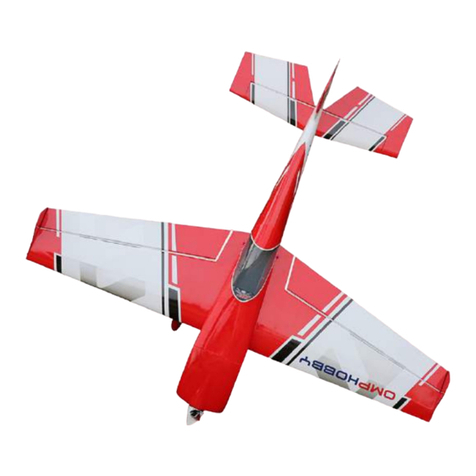
OMPHobby74”EDGE540,notonlyhasthelowspeedstability,
lowstallpoint,excellent3Dperformance,butalsoveryfastroll
rateoftraditionalEDGE,andprecisenavigationcontrol.The
traditionalsecuringmethodofthemotorbaseandthelanding
skidbasehavebeenchanged,preventingthelooseningofthe
anti‐graspingnut.Wing,wingfence,newquickdisassembly
design,significantlyreducedtheinstallationtime.Thehorizontal
tailandthefuselageareconnectedbyaslotSecuringdesign,
whichincreasesthestrengthofthehorizontaltailandmakesthe
installationmoreaccurateandconvenient.Eachaircrafthasa
metalnameplatewithauniqueserialnumber.
OMPHobby74”BalsaAirplane
ZhuhaiEdgeSmartDriveTechnologyCo.,Ltd.
www.omphobby.com
ZhuhaiEdgeSmartDriveTechnologyCo.,Ltd.
www.omphobby.com
OMPHobby74”BalsaAirplane
ØOptions:Fourcolorsforchoosing:
Orange-White,Green-Black,Red-White,Yello-White
ØUnboxing-What’sintheBox?
LandinggearAssembly
ØLandingGearInstallation
ZhuhaiEdgeSmartDriveTechnologyCo.,Ltd.
www.omphobby.com
5. Slidethecuffsoverthelandinggearandsecurewithscrews.
Becarefultonotbreakthescrews.Ifthescrewseemstobe
difficulttoinsertuseadrilltoopenupthehole.(Some
peoplehavefoundtheypreferadobofsiliconeinsidethe
cuffholdthemsecure.)
2. Unscrewhexagonscrewsonthelandinggearplate.
3. Applygluetohexagonscrews,useittosecurethe
carbonfiberlandinggeartolandinggearplate.
4. Putlandinggearcoverplateintoaslotandstickit
withtransparenttape.
1. Landinggearpartscontentsareshownbelow.
7. Installwheelcowls,tightenscrews.
ZhuhaiEdgeSmartDriveTechnologyCo.,Ltd.
www.omphobby.com
TailwheelAssembly
ØTailWheelInstallation
6. Installwheels,securewheelswithgasketandscrew.
(Applygluetoscrews)
1. Unscrewthescrewsonthefuselage
2. Installthetailwheelassemblyonthefuselageusing
washersandsocketheadscrews.Werecommendusinga
threadlockeronthesescrews.
WingsAssembly
3. Pulloutthewhitepolyesterthreadfromtheservoholewith
tweezers,tieupwithaileronservoconnector.
ØAileronServoInstallation
1. Carefullylocatetheslotwhichhasbeenmadeonthewing
tail,lightlycutthroughthecoveringbutnotintothebalsa
sheeting.
2. Usesandpapertoroughentherootofcontrolarm.Tryto
insertitintothemountingslottoadjustthepositionatfirst,
thentakeitout,applygluetotheslotandtherootofthe
controlarm,insertittotheslottosecureit.
ZhuhaiEdgeSmartDriveTechnologyCo.,Ltd.
www.omphobby.com
4. Findtheotherheadofwhitepolyesterthreadfromwingside,
pullituntilaileronservoisplacedinservohole.
ZhuhaiEdgeSmartDriveTechnologyCo.,Ltd.
www.omphobby.com
5. Removeblackrubberringfromthewingside,pass
aileronservowireintotheblackrubberringand
secureittotheoriginalposition.
WingsAssembly
6. Secureaileronservoarmandcontrolarmswithballhead
pullrod,putthecupheadhexagonalscrew,gasket,ballhead
onservoarm,secureitwithironpliers,adjusttheballhead
pullrodstoproperlength.
7. Securescrew,washer,ballheadtocontrolarm,controlarmis
at90degreesagainstservo.
8. Checkthedegreesbetweenservoarmandcontrolarms.
ZhuhaiEdgeSmartDriveTechnologyCo.,Ltd.
www.omphobby.com
WingsAssembly
9. Assemblethewingtubeintothefuselagethen
installwings,turnwhitescrewstosecurethewings.
10. Unscrewtheretainingscrewsonthewing,installwingtip.
ConnectReceiverandBattery
ElevatorAssembly
ØElevatorServoInstallation
1. Finda60‐coreextensioncableonthefuselage,tearoffthe
sticker,thenconnectitwithelevatorservo.
2. Findthewhitepolyesterthreadinthefuselageframe,gently
pullituntiltheservoisplacedintotheopenedservohole.
3. Runtheelevatorservoextensionwiresthroughtheconduit
locatedinsidethefuselageandthenplacetheextensionwires
intoframeholes.
4. Securetheservousingthescrews.
ØHorizontalTailInstallation
1. Carefullylocatetheslotwhichhasbeenmadeon
horizontaltail,lightlycutthroughthecoveringbutnot
intothebalsasheeting.
ZhuhaiEdgeSmartDriveTechnologyCo.,Ltd.
www.omphobby.com
ElevatorAssembly
ØHorizontalTailInstallation
2. Usesandpapertoroughentherootofcontrolarm.Tryto
insertitintothemountingslottoadjustthepositionat
first,thentakeitout,applygluetotheslotandtheroot
ofthecontrolarm,insertittotheslottosecureit.
3. Removethesecuredplateusedforfillingthehorizontal
tailslot,insertthehorizontaltailintofuselage,pleasetake
notethatitmustbefullyinsertedintothefuselage.
ZhuhaiEdgeSmartDriveTechnologyCo.,Ltd.
www.omphobby.com
4. Insertsecuredplatetofillthehorizontaltailslot,use502
gluingthegapallaroundthehorizontaltail.
ElevatorAssembly
ØHorizontalTailInstallation
5. Aftertheglueisdried,assembletheservoarmand
controlhornwithballheadpullrod,securethecuphead
hexagonalscrew,gasket,ballheadtotheservoarm,
secureitwithironpliers,adjusttheballheadpullrodsto
properlength.
6. Securescrew,washer,ballheadtocontrolhorn.
7. Checktheanglebetweentheservoarmandcontrolarm.
(Makesurethecontrolhornisat90degreesagainst
servo.)
ZhuhaiEdgeSmartDriveTechnologyCo.,Ltd.
www.omphobby.com
RudderAssembly
ØRudderInstallation
1. Carefullylocatetheslotwhichhasbeenmadeonthevertical
tail,lightlycutthroughthecoveringbutnotintothebalsa
sheeting.
2. Grindtherootofcontrolarms,tryitfirsttoinsertitintothe
slottoadjusttheposition,thentakeitout,applygluetothe
slotandtherootofthecontrolhorn,insertittotheslotto
secureit.
3. Remove4hingeswhichareinsertedintherudder.InjectAB
glueintotheholes,applyglueto4hingeswithappropriate
lengthfromitsbottom,theninsert4hingesintotherudder.
4. InjectABglueintotheholesinfuselage,applygluetothe
otherendofhingeswithappropriatelength,theninsertitinto
fuselage.
ZhuhaiEdgeSmartDriveTechnologyCo.,Ltd.
www.omphobby.com
RudderAssembly
6. Applygreaseorengineoilonalljointsbetweenrudderand
fuselage,andaroundthehinges,toavoidaffectingthe
sensitivityofrudderaftergluedried.
7. Tierudderwithmaskingtapewhileglueisstillwetto
preventloosening.
8. Makesuretheshaftisinthemiddleposition,andkeepthe
gapbetweenrudderandfuselagewithin1mm.
ZhuhaiEdgeSmartDriveTechnologyCo.,Ltd.
www.omphobby.com
9. Findthecenterpositiontosecurethetailwheelbracketto
rudder,drillahole,securethetailwheelbracketwithscrews.
(Noneedtofullyscrewedin)
10. Aftertheglueisdried,securetheservoarmandcontrol
armswithaballheadpullrod.
11. Makesuretheangleofservoandcontrolhornsis90° and
180°oblique,ensurerudderissymmetricaltothe2sidesof
fuselage.
GasEngineAssembly
ØGasEngineInstallation
ZhuhaiEdgeSmartDriveTechnologyCo.,Ltd.
www.omphobby.com
1. Pastedouble‐sidedtapeonthebackoftheengineperforated
plate
2. Thefourlinesofthemountingplatearealignedwiththe
tensionlinesonthefirewall
3. Drillholeswitha5mmdrillbit(thespecificsizeofthedrillbit
dependsonthesizeofthescrewholeoftheengineormotor
mountingpostused)
4. Lightlytapwithascrewdrivertoremovethethrottleservo
mountingpositionandthefuselageairoutletwoodenboard.
5. Useautilityknifetoopentheairoutlet.
6. Useautilityknifetoopentheoutletoftheexhaustplate.
7. Aftertheguideplateisinstalledinplace,installtheexhaust
platewithscrews,asshowninthefigure
GasEngineAssembly
ØGasEngineInstallation
ZhuhaiEdgeSmartDriveTechnologyCo.,Ltd.
www.omphobby.com
8. Thefueltankfirstfixesthebottomwithvelcro,thenusethe
magiccabletietotieitaccordingtothedirectioninthe
picture.
9. Theinstallationdirectionandheightofthethrottleservo
dependondifferentengines,thefigureusesDLE35RA.
10. Accordingtothecarburetortierodandcarburetoroilinlet,
opentheoilpipeholeandthetierodhole.
11. Theoilpipeholeshouldbeenlarged,andacircleof
electricaltapeiswrappedaroundtheoutsidetoprotectthe
oilpipe.
12. Snapthecowluptoopentheheatdissipationventandthe
exhaustpipeexhaustport
ZhuhaiEdgeSmartDriveTechnologyCo.,Ltd.
www.omphobby.com
13. CDIcanbeinstalledinsidethetopplateofthefirewall,
applylow‐strengthscrewgluetothescrews.
GasEngineAssembly
14. Stickthemaskingtapeonthefuselage,anduseamarker
pentomarkthepositionofthefixingscrewofthecowl,the
cowlmustbesnappedintoplace,otherwiseitmaycause
inaccurateinstallation
15. Fixthecowlfirmlywithmaskingtape,drillscrewholeswith
aholesaw,tightenthescrewstocompletethecowl
installation
ElectricPowerAssembly
ØMotorInstallation
1. Unscrewsocketheadscrewsfromtheheadplateoffuselage.
2. Putthescrewsintomotormountandputaluminumcolumns
totheothersideofscrews.
3. Applygluetothescrewsandinstallmotortomotorholder.
ZhuhaiEdgeSmartDriveTechnologyCo.,Ltd.
www.omphobby.com
ØESCInstallation
1. AttachtheconnectedESCtoESCholderwithdouble‐sidedtape
andSecurewithcableties.
2. TiethewiresofESCandmotorwithfasteningstrap.
CowlPartAssembly
ØCowl,Propeller,SpinnerInstallation
1. Installcowltofuselage(pleasetakenotethatmotor
mustbeincenterposition)
2. Removethepropellerspinneradapterandscrewgasket,
installthealuminumspinnerback‐plate,propeller,
propellerspinneradapterandscrewgasketin
succession.
ZhuhaiEdgeSmartDriveTechnologyCo.,Ltd.
www.omphobby.com
3. Securethespinnerwithscrews,pleasepayattention
thatspinnermustbelocatedinthecentrepositionof
thecowl,andspinneredgeisparalleltothecowl,gapis
about1.5mm.
4. Securethecowlwithscrews,twoscrewsforeachoftwo
sides.secure
74”Edge540BalsawoodAirplane
ParameterSpecification
Rate EXP Direction Throw
Aileron
High 35~40% Up 36~39°
Low 40~45% Down 20~26°
Elevator
High 38~45% Up 45~53°
Low 45~55% Down 30~35°
Rudder
High 38~45% Up 42~50°
Low 45~55% Down 28~32°
RecommendedSettingsofDualRatesandExponentialsofControlSurfaces
Item: 74”EDGE540 Color: Green▢Red▢
Yellow▢Orange▢
WingSpan: 1880mm(75in) FullLength: 1800mm(72in)
FlightWeight: 4.8~5.3KG TheCenterofGravity(CG): Approx.120-135mm
WingArea: 70.51g/d㎡WingLoad: 68~75.1g/d㎡
WingAngleofIncidence: 0°MotorThrustAngles: Down0°&Right2°
PackageDimension 144*56*30(L*H*W)cm GrossWeight: 15.3kg
Servo:20~35Kg*5(Aileron*2,Elevator*1Rudder*1Throttle*1)
GasPower(Recommended):30-35CC,Propeller:19x8/19x9/19x10/20x8/20x9
ElectricPower(Recommended):
Option1:Motor:Sunnysky7015,ESC:X120A,Propeller:20x8/20x9,Lipo8s4000mah/12s3300mah3700mah4000mah
Option2:Motor:Sunnysky6220,ESC:X120A,Propeller:20x8/20x9;Lipo6S5000mah/8s3300mah3700mah4000mah

Other manuals for Edge 540

1

This manual suits for next models

2

Other OMPHOBBY Toy manuals

OMPHOBBY M1 EVO User manual

OMPHOBBY

OMPHOBBY M1 EVO User manual

OMPHOBBY M2 User manual

OMPHOBBY

OMPHOBBY M2 User manual

OMPHOBBY M4 User manual

OMPHOBBY

OMPHOBBY M4 User manual

OMPHOBBY M1 User manual

OMPHOBBY

OMPHOBBY M1 User manual

OMPHOBBY Challenger User manual

OMPHOBBY

OMPHOBBY Challenger User manual

OMPHOBBY ZMO User manual

OMPHOBBY

OMPHOBBY ZMO User manual

OMPHOBBY M2 User manual

OMPHOBBY

OMPHOBBY M2 User manual
OMPHOBBY BIGHORN 49" User manual

OMPHOBBY

OMPHOBBY BIGHORN 49" User manual

OMPHOBBY M2 User manual

OMPHOBBY

OMPHOBBY M2 User manual

OMPHOBBY OMPP004R User manual

OMPHOBBY

OMPHOBBY OMPP004R User manual

OMPHOBBY M1 User manual

OMPHOBBY

OMPHOBBY M1 User manual

OMPHOBBY M4 MAX User manual

OMPHOBBY

OMPHOBBY M4 MAX User manual

OMPHOBBY Edge 540 User manual

OMPHOBBY

OMPHOBBY Edge 540 User manual
OMPHOBBY M1 EVO User manual

OMPHOBBY

OMPHOBBY M1 EVO User manual

OMPHOBBY M2 Evo User manual

OMPHOBBY

OMPHOBBY M2 Evo User manual

OMPHOBBY Decathalon 55 ARF User manual

OMPHOBBY

OMPHOBBY Decathalon 55 ARF User manual

OMPHOBBY 49" Bighorn ARF User manual

OMPHOBBY

OMPHOBBY 49" Bighorn ARF User manual

OMPHOBBY M2 2020 User manual

OMPHOBBY

OMPHOBBY M2 2020 User manual

OMPHOBBY M1 User manual

OMPHOBBY

OMPHOBBY M1 User manual
OMPHOBBY OMPHOBBY User manual

OMPHOBBY

OMPHOBBY OMPHOBBY User manual
OMPHOBBY M2 User manual

OMPHOBBY

OMPHOBBY M2 User manual
Popular Toy manuals by other brands

WARCRADLE STUDIOS DYSTOPIAN WARS IMPERIUM SUPPORT SQUADRONS Assembly instructions

WARCRADLE STUDIOS

WARCRADLE STUDIOS DYSTOPIAN WARS IMPERIUM SUPPORT SQUADRONS Assembly instructions

Molt models Tyro 150 Building instructions

Molt models

Molt models Tyro 150 Building instructions

Smoby 810402 Assembling manual

Smoby

Smoby 810402 Assembling manual

Fisher-Price POWER WHEELS 74780 user manual

Fisher-Price

Fisher-Price POWER WHEELS 74780 user manual

Trix Elektrolok Baureihe TRAXX 2 E 186 22165 manual

Trix

Trix Elektrolok Baureihe TRAXX 2 E 186 22165 manual

John Adams Golden coin maker manual

John Adams

John Adams Golden coin maker manual

REVELL Focke Wulf FW190F-8/A-8 & BV 246 "Hagelkorn" Assembly manual

REVELL

REVELL Focke Wulf FW190F-8/A-8 & BV 246 "Hagelkorn" Assembly manual

The Learning Journey Techno Gears Monster Truck 2.0 instruction manual

The Learning Journey

The Learning Journey Techno Gears Monster Truck 2.0 instruction manual

Lionel Zenith Express owner's manual

Lionel

Lionel Zenith Express owner's manual

REVELL KIT 5319 Assembly manual

REVELL

REVELL KIT 5319 Assembly manual

NINCOAIR NH92007 RTF manual

NINCOAIR

NINCOAIR NH92007 RTF manual

OA Composites F3Klaus NRJ Building instructions

OA Composites

OA Composites F3Klaus NRJ Building instructions

TWM INTRUDER 90R instruction manual

TWM

TWM INTRUDER 90R instruction manual

Fleischmann BR 110 operating instructions

Fleischmann

Fleischmann BR 110 operating instructions

Proxima G14408 Assembly instructions

Proxima

Proxima G14408 Assembly instructions

Hobbico AQUACRAFT U-18 MISS VEGAS Assembly and operation manual

Hobbico

Hobbico AQUACRAFT U-18 MISS VEGAS Assembly and operation manual

4iQ Tomek Assembly instruction

4iQ

4iQ Tomek Assembly instruction

Bandai Namco Choppertchi Nano x One Piece - New World instruction manual

Bandai Namco

Bandai Namco Choppertchi Nano x One Piece - New World instruction manual

manuals.online logo
manuals.online logoBrands
  • About & Mission
  • Contact us
  • Privacy Policy
  • Terms and Conditions

Copyright 2025 Manuals.Online. All Rights Reserved.