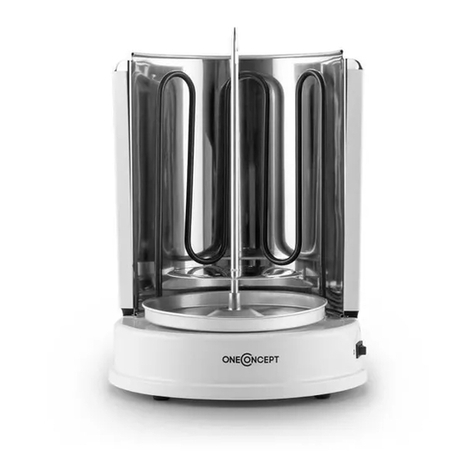
oneConcept Kebap Master Pro User manual

Kebap Master Pro
Vertikalgrill
Vertical Grill
Parrilla vertical
Gril vertical
Griglia verticale
10009355


3
DE
English 11
Français 19
Español 27
Italiano 35
Sehr geehrter Kunde,
wir gratulieren Ihnen zum Erwerb Ihres Gerätes. Lesen
Sie die folgenden Hinweise sorgfältig durch und befolgen
Sie diese, um möglichen Schäden vorzubeugen. Für
Schäden, die durch Missachtung der Hinweise und
unsachgemäßen Gebrauch entstehen, übernehmen wir
keine Haftung. Scannen Sie den QR-Code, um Zugriff
auf die aktuellste Bedienungsanleitung und weitere
Informationen rund um das Produkt zu erhalten.
INHALTSVERZEICHNIS
Sicherheitshinweise 4
Geräteübersicht 5
Vor dem ersten Gebrauch 5
Den Grill als Bräter verwenden 6
Kebab mit dem Grill zubereiten 8
Den Grill mit dem Fischkorb verwenden 9
Reinigung und Pflege 10
Hinweise zur Entsorgung 10
TECHNISCHE DATEN
Artikelnummer 10009355
Stromversorgung 220 V ~ 50 Hz
Leistung 1500 W
HERSTELLER & IMPORTEUR (UK)
Hersteller:
Chal-Tec GmbH, Wallstraße 16, 10179 Berlin, Deutschland.
Importeur für Großbritannien:
Chal-Tec UK limited
Unit 6 Riverside Business Centre
Brighton Road
Shoreham-by-Sea
BN43 6RE
United Kingdom

4
DE
SICHERHEITSHINWEISE
• Schließen Sie das Gerät so an, dass der Netzstecker jederzeit leicht
zugänglich ist.
• Untersuchen Sie das Netzkabel regelmäßig auf Beschädigungen. Falls das
Netzkabel beschädigt ist, muss es vom Hersteller oder einem autorisierten
Fachbetrieb oder einer ähnlich qualizierten Person ersetzt werden.
• Reparaturen dürfen nur von Fachpersonal ausgeführt werden, versuchen
Sie nicht das Gerät selbst zu reparieren.
• Schließen Sie das Gerät nicht an einen Timer oder eine ferngesteuerte
Steckdose an.
• Tauchen Sie das Gerät, das Netzkabel und den Stecker niemals in Wasser
oder andere Flüssigkeiten.
• Fassen Sie den Stecker nicht mit nassen Händen an.
• Ziehen sie den Stecker nicht am Kabel aus der Steckdose, sondern halten
Sie ihn beim Abziehen mit der Hand fest.
• Benutzen Sie das Kabel nicht als Handgriff.
• Verlegen Sie das Kabel so, dass keiner darüber stolpert.
• Lassen Sie das Kabel nicht über scharfe Kanten verlaufen.
• Benutzen Sie das Gerät nicht in nassen Räumen oder im Regen.
• Stellen Sie das Gerät so auf, dass es nicht in Wasser fallen kann. Sollte es
doch in Wasser fallen, ziehen Sie sofort den Stecker aus der Steckdose und
fassen Sie das Gerät erst dann an.
• Ziehen Sie den Stecker aus der Steckdose wenn Sie das Gerät nicht mehr
benutzen.
• Halten Sie das Gerät fern von offenem Feuer und Wärmequellen.
• Kinder ab 8 Jahren, psychisch, sensorisch und körperlich eingeschränkte
Menschen dürfen das Gerät nur benutzen, wenn sie vorher von einer für
sie verantwortlichen Aufsichtsperson ausführlich mit den Funktionen und
den Sicherheitsvorkehrungen vertraut gemacht wurden und die damit
verbundenen Risiken verstehen.
• Halten Sie Kinder vom Grill fern und lassen Sie das Gerät während des
Betriebs nicht unbeaufsichtigt.
• Stellen Sie das Gerät auf einen stabilen, ebenen Untergrund.
• Achten Sie darauf, dass sich um den Grill herum keine leicht entzündlichen
Gegenstände und Materialien benden.
• Halten Sie mindestens 30 cm Abstand zu Wänden.
• Fassen Sie während des Betriebs nicht den Grillrost oder andere heiße
Oberflächen an.
• Bewegen Sie das Gerät erst wenn es komplett abgekühlt ist. Fassen Sie das
Gerät nur an den dafür vorgesehenen Griffen an.
• Stellen Sie das Gerät nur auf hitzeunempndliche Oberflächen. Stellen Sie
das Gerät so auf, dass es nicht zu nah am Rand steht.
• Um einen Hitzestau zu vermeiden, stellen Sie das Gerät nicht direkt unter
Küchenschränke oder regale.
• Stellen Sie das Gerät nicht auf oder in die Nähe eines Herdes.

5
DE
GERÄTEÜBERSICHT
A: Obere Abdeckung
B: Basis
C: Heizelement
D: Türgriff
E: Glastür
F: Zeitregler (Timer) G:
Betriebsanzeige
H: Drehspieß
I: Kebabhalter
J: Oberer Halter (Kebab)
K: Unterer Halter (Kebab)
L: Tropfschale
VOR DEM ERSTEN GEBRAUCH
Lesen Sie die Anleitung sorgfältig. Diese Informationen sind für den Gebrauch
des vertikalen Grills notwendig.
Stellen Sie den Grill auf eine ebene Oberfl äche, wie eine Küchenarbeitsplatte
oder Tisch. Rund um das Gerät muss ein Abstand von 10 cm zu Wänden,
Schränken oder anderen Gegenständen eingehalten werden. Entfernen Sie
sämtliche Aufkleber vom Gerät. Entnehmen Sie die Tropfschale, Drehspieß,
Gabeln und Kebabhalter und waschen diese in warmem Wasser mit etwas
Spülmittel oder in der Spülmaschine ab. Trocken Sie diese vor dem Einsetzen
gründlich ab.

6
DE
Hinweis: Der Türgriff ist abnehmbar, so
können Sie die Innenseite leichter reinigen.
Bringen Sie den Griff vor der Benutzung
wie auf dem Bild gezeigt an.
Vergewissern Sie sich, dass während
der Vorbereitung der Regler TIMER auf
“Off” steht und das Gerät vom Stromnetz
getrennt ist. Es wird empfohlen, dass
Gerät probeweise einzuschalten und so
Produktionsrückstände zu entfernen.
Stecken Sie den Netzstecker in eine
120V-Steckdose. Stellen Sie den Regler
TIMER auf “20” Minuten. Es kann etwas
Qualm und Geruch dabei entstehen. Dies
ist normal. Um Kratzen, Verklebungen,
Entfärben oder Feuer zu vermeiden, darf
nichts oben auf dem Ofen gelegt werden.
Dies gilt vor allem während des Gebrauchs.
DEN GRILL ALS BRÄTER VERWENDEN
VORSICHT
Die Oberfl ächen des Geräts werden während des Gebrauchs
und bleiben auch danach heiß! Legen Sie nichts auf das Gerät.
Tragen Sie immer schützende, isolierende Ofenhandschuhe
wenn Sie Gegenstände in das Gerät legen oder entnehmen.
Verwenden Sie das Gerät nie ohne Tropfschale.

7
DE
Hinweis: Schalten Sie den Grill nicht ein, bevor die Tür geschlossen und das
Licht erloschen ist.
1. Schieben Sie eine Endgabel mit den Zinken zur Mitte zeigend auf den
Drehspieß und ziehen Sie die Schraube fest. Führen Sie das spitze Ende
mittig durch die zu bratenden Lebensmittel.
2. Schieben Sie die andere Endgabel so auf den Drehspieß, dass die Zinken
zum Grillgut zeigen.
3. Richten Sie das Grillgut mittig aus, sichern dieses mir der Endgabel und
ziehen die Schraube fest. Beim Kochen von Gefl ügel sollten die Schenkel
und Flügel mit Küchengarn am Körper befestigt werden, dass sich der
Spieß leicht drehen kann.
4. Würzen oder garnieren Sie das Grillgut nach Ihren Wünschen. WICHTIG!
Stellen Sie die Tropfschale zum Auffangen der Tropfen unten in das Gerät.
5. Stecken Sie das feste Ende des Drehspießes in die Antriebsöffnung in der
Mitte der Tropfschale. Stecken Sie das genutete Ende in den Halter oben
im Inneren des Ofens.
6. Schließen Sie die Glastür und das Innenlicht schaltet sich automatisch ab.
7. Stellen Sie den Regler TIMER je nach Rezept ein (Siehe Rezepte). Ist
die Zeit mehr als 1 Stunde, stellen Sie den Regler auf “Stay On” und
kontrollieren das Gerät nach Ablauf der Zubereitungszeit. Ist das Grillgut
fertig, stellen Sie den Regler auf “Off” und ziehen den Netzstecker.
VORSICHT
Verbrennungsgefahr! Der Grill ist oben und an den Seiten
sehr heiß. Verwenden Sie zum Entnehmen des Grillguts
Ofenhandschuhe oder andere hitzefeste Handschuhe. Sie
können auch eine Bratengabel oder Zange verwenden.
8. Entfernen Sie den Drehspieß durch Anheben und zu sich ziehen. Der
untere Teil muss aus der Antriebsöffnung gehoben werden, danach
können Sie das Grillgut auf ein Schneidbrett legen. Legen Sie das Grillgut
auf ein Schneidbrett oder eine Servierplatte und lassen es 10-15 Minuten
ruhen.
9. Lösen Sie die Schrauben der Endgabel mit einem Topfl appen und
entfernen diese vom Drehspieß. Entfernen Sie danach vorsichtig das
Grillgut vom Spieß und schneiden es.

8
DE
KEBAB MIT DEM GRILL ZUBEREITEN
Falls ein Kebabhalter im Lieferumfang enthalten ist, folgen Sie diesen
Anweisungen für die Verwendung.
VORSICHT
Die Oberfl ächen des Geräts werden während des Gebrauchs
und bleiben auch danach heiß! Legen Sie nichts auf das Gerät.
Tragen Sie immer schützende, isolierende Ofenhandschuhe
wenn Sie Gegenstände in das Gerät legen oder entnehmen.
Verwenden Sie das Gerät nie ohne Tropfschale.
1. Bauen Sie den Kebabhalter wie auf den Bildern zu sehen zusammen.
2. Stellen Sie die runde Tropfschale zum Auffangen der Tropfen unten in das
Gerät.
3. Stecken Sie das feste Ende des Drehspießes in die Antriebsöffnung in der
Mitte der Tropfschale.
4. Stecken Sie das genutete Ende in den Halter oben im Inneren des Ofens.
5. Stellen Sie den Regler TIMER je nach Rezept ein (Siehe Rezepte). Ist
die Zeit mehr als 1 Stunde, stellen Sie den Regler auf “Stay On” und
kontrollieren das Gerät nach Ablauf der Zubereitungszeit.
6. Ist das Grillgut fertig, stellen Sie den Regler auf “Off” und ziehen den
Netzstecker.

9
DE
DEN GRILL MIT DEM FISCHKORB VERWENDEN
Falls zwei Fischkörbe im Lieferumfang enthalten sind, folgen Sie diesen
Anweisungen für die Verwendung.
VORSICHT
Die Oberfl ächen des Geräts werden während des Gebrauchs
und bleiben auch danach heiß! Legen Sie nichts auf das Gerät.
Tragen Sie immer schützende, isolierende Ofenhandschuhe
wenn Sie Gegenstände in das Gerät legen oder entnehmen.
Verwenden Sie das Gerät nie ohne Tropfschale.
Hinweis: Schalten Sie den Grill nicht ein, bevor die Tür geschlossen und das
Licht erloschen ist.
1. Bringen Sie den Kebabhalter an Ende des Drehspießes an und ziehen Sie
die Schraube fest. An diesem Halter werden die Fischkörbe angebracht.
2. Legen Sie Fisch oder anderes Grillgut in die Körbe. Achten Sie darauf, dass
kein Grillgut die Oberseite oder Sie Seitenfl ächen gerührt.
3. Stellen Sie die runde Tropfschale zum Auffangen der Tropfen unten in das
Gerät.
4. Stecken Sie das feste Ende des Drehspießes in die Antriebsöffnung in der
Mitte der Tropfschale.
5. Stecken Sie das genutete Ende in den Halter oben im Inneren des Ofens.
6. Schließen Sie die Glastür und das Innenlicht schaltet sich automatisch ab.
7. Stellen Sie den Regler TIMER je nach Rezept ein (Siehe Rezepte). Ist
die Zeit mehr als 1 Stunde, stellen Sie den Regler auf “Stay On” und
kontrollieren das Gerät nach Ablauf der Zubereitungszeit.
8. Ist das Grillgut fertig, stellen Sie den Regler auf “Off” und ziehen den
Netzstecker.

10
DE
Garzeiten
• Hühnchen, Ente 30~45 Minuten
• Steak 45~60 Minuten
• Kebab 20~30 Minuten
• Fisch 20~32 Minuten
• Gemüse 15~20 Minuten
REINIGUNG UND PFLEGE
• Ziehen den Netzstecker aus der Steckdose. Lassen Sie den Grill vollständig
abkühlen. Entfernen Sie sämtliches Zubehör.
• Verwenden Sie zum Reinigen des Gehäuses einen feuchten und/oder
weichen Lappen. TAUCHEN SIE DAS GERÄT NIE IN WASSER. Reinigen
Sie die Innenseiten mit Wasser und einem trockenen Tuch. Verwenden
Sie keine starken Reiniger. Sämtliches Zubehör kann mit Seifenwasser
gereinigt werden.
• Reiben Sie die Wände mit einem feuchten Tuch ab.
HINWEISE ZUR ENTSORGUNG
Wenn es in Ihrem Land eine gesetzliche Regelung
zur Entsorgung von elektrischen und elektronischen
Geräten gibt, weist dieses Symbol auf dem Produkt
oder auf der Verpackung darauf hin, dass dieses
Produkt nicht im Hausmüll entsorgt werden darf.
Stattdessen muss es zu einer Sammelstelle für das
Recycling von elektrischen und elektronischen Geräten
gebracht werden. Durch regelkonforme Entsorgung
schützen Sie die Umwelt und die Gesundheit
Ihrer Mitmenschen vor negativen Konsequenzen.
Informationen zum Recycling und zur Entsorgung
dieses Produkts, erhalten Sie von Ihrer örtlichen
Verwaltung oder Ihrem Hausmüllentsorgungsdienst.

11
EN
Dear Customer,
Congratulations on purchasing this device. Please read
the following instructions carefully and follow them to
prevent possible damages. We assume no liability for
damage caused by disregard of the instructions and
improper use. Scan the QR code to get access to the
latest user manual and more product information.
CONTENT
Safety Instructions 12
Product Overview 13
Before rst Use 13
Using the Grill as a Roaster 14
Preparing Kebabs with the Grill 16
Using Your Grill with Fish Basket 17
Cleaning and Care 18
Hints on Disposal 18
TECHNICAL DATA
Item number 10009355
Power supply 220 V ~ 50 Hz
Power consumtion 1500 W
MANUFACTURER & IMPORTER (UK)
Manufacturer:
Chal-Tec GmbH, Wallstrasse 16, 10179 Berlin, Germany.
Importer for Great Britain:
Chal-Tec UK limited
Unit 6 Riverside Business Centre
Brighton Road
Shoreham-by-Sea
BN43 6RE
United Kingdom

12
EN
SAFETY INSTRUCTIONS
• Connect the device so that the mains plug is easily accessible at all times.
• Inspect the power cord regularly for damage. If the power cord is
damaged, it must be replaced by the manufacturer or an authorized
service center or a similarly qualied person.
• Repairs may only be carried out by qualied personnel, do not attempt to
repair the device yourself.
• Do not connect the unit to a timer or a remote control power outlet.
• Never immerse the appliance, power cord or plug in water or other liquids.
• Do not handle the plug with wet hands.
• Do not pull the plug out of the socket by the cable, but hold it rmly by
hand when pulling it off.
• Do not use the cable as a handle.
• Lay the cable in such a way that no one will trip over it.
• Do not let the cable run over sharp edges.
• Do not use the unit in wet rooms or in the rain.
• Place the appliance in such a way that it cannot fall into water. If it does fall
into water, immediately unplug the appliance from the wall outlet and only
then touch the appliance.
• Unplug the appliance from the wall outlet when it is no longer in use.
• Keep the appliance away from open re and heat sources.
• This device may be only used by children 8 years old or older and persons
with limited physical, sensory and mental capabilities and / or lack of
experience and knowledge, provided that they have been instructed in
use of the device by a responsible person who understands the associated
risks.
• Keep children away from the grill and do not leave the appliance
unattended during operation.
• Place the appliance on a stable, level surface.
• Make sure that there are no easily inflammable objects or materials
around the grill.
• Keep at least 30 cm away from walls.
• Do not touch the grill grate or other hot surfaces during operation.
• Do not move the appliance until it has cooled down completely. Only touch
the appliance by the handles provided for this purpose.
• Only place the appliance on surfaces that are insensitive to heat. Position
the appliance so that it is not too close to the edge.
• To avoid heat build-up, do not place the appliance directly under kitchen
cabinets or shelves.
• Do not place the appliance on or near a stove.

13
EN
PRODUCT OVERVIEW
A: Top housing
B: Base station
C: Heating element
D: Door handle
E: Glass door
F: Timer
G: Indicate light
H: Rotisserie spit
I: Kabob
J: Upper support (Kabob)
K: Lower support (Kabob)
L: Drip pan
BEFORE FIRST USE
Read the instructions carefully. This information is necessary for using the
vertical grill.
Place the grill on a fl at surface, such as a kitchen worktop or table. Around the
appliance, keep a distance of 10 cm from walls, cupboards or other objects.
Remove all stickers from the appliance. Remove the drip tray, spit, forks and
kebab holders and wash them in warm water with some detergent or in the
dishwasher. Dry them thoroughly before use.

14
EN
Note: The door handle is removable, in
order to let you take it out and clean the
inside of unit. Before you use the oven,
please assem- bly the handle yourself by
the following assembly instruction picture.
When you are ready to use the grill, be
sure that the TIMER Control is in the “Off”
position and unplugged. We recommend a
trial run to familiarize yourself with your grill
and to eliminate any protective substance
or oil that may have been used for pa- cking
and shipping. Plug the cord into a 120-volt
AC outlet. Set the TIMER Control to “20”
minutes. A small amount of smoke and odor
may be detected. This is normal. To avoid
scratching, marring, discoloration or re
hazard, do not store anything on top of the
oven, especially during operation.
USING THE GRILL AS A ROASTER
CAUTION
The surfaces of the device become hot during use and remain
hot afterwards! Do not place anything on the appliance.
Always wear protective, insulating oven gloves when placing
or removing objects from the appliance. Never use the
appliance without the drip tray.

15
EN
Note: Do not switch on the grill until the door is closed and the light has
gone out.
1. Place one rotisserie fork on the end of the rotisserie spit opposite the
point with the tines facing the cen- ter and tighten the screw slightly.
2. Slide the pointed end of the rotisserie spit through the center of the
food to be cooked. Place the other rotisserie fork on the other end of the
rotisserie spit with the tines facing the roast.
3. Adjust the roast so that it is centered on the rotisserie spit. Make sure the
forks are secure on the roast and on the spit and tighten the screws. When
cooking poultry, it may be necessary to secure legs and wings to the body
with butchers twine to make the roast as compact as possible for smooth
movement of the rotisserie spit.
4. Season or baste the roast as desired. IMPORTANT! Place the round drip
pan into the receptacle at the bottom of the oven to catch the drippings.
5. Put the solid end of the rotisserie spit in the drive socket on located in
the center of the drip pan. Place the grooved end on the spit support on
located on the top interior of the oven.
6. Close the glass door and the inner light will be off automatically.
7. Set the TIMER Control to the time according to RECIPE. If more than 1
hour, set to “Stay On” and check after the setting time. When the roast is
done, turn the TIMER Control to “Off” and unplug the oven.
CAUTION
Risk of burns! The grill sides and top are hot, use oven mitts
or temperature resistant gloves when removing the chicken.
You can also use a carving fork and set of tongs to remove the
roast.
8. Remove the rotisserie from the top by lifting up and out towards you. Pull
the bottom part of the spit out of the drip pan receptacle and place onto
a carving station. 14. Place the roast on a cutting board or platter and
allow standing for 10-15 minutes, this allows the juices to redistribute
throughout the roast making for a moister, fl avorful roast.
9. Using a pot holder, loosen the screws on the rotisserie forks and remove
the rotisserie spit from the roast. Carefully remove the rotisserie forks and
carve the roast.

16
EN
PREPARING KEBABS WITH THE GRILL
If a kebab holder is included, follow these instructions for use.
CAUTION
The surfaces of the device become hot during use and remain
hot afterwards! Do not place anything on the appliance.
Always wear protective, insulating oven gloves when placing
or removing objects from the appliance. Never use the
appliance without the drip tray.
1. Assemble the kebab holder as shown in the pictures.
2. Place the round drip tray at the bottom of the appliance to catch the drops.
3. Insert the xed end of the rotating spit into the drive opening in the middle
of the drip tray.
4. Insert the grooved end into the holder at the top inside the oven.
5. Set the TIMER control according to the recipe (see Recipes). If the time is
more than 1 hour, set the controller to „Stay On“ and check the appliance
after the preparation time has expired.
6. When the food is ready, set the controller to „Off“ and unplug the
appliance.

17
EN
USING YOUR GRILL WITH FISH BASKET
If your grill comes with 2 pieces of Fish Basket, please follow the instructions
for use.
CAUTION
The surfaces of the device become hot during use and remain
hot afterwards! Do not place anything on the appliance.
Always wear protective, insulating oven gloves when placing
or removing objects from the appliance. Never use the
appliance without the drip tray.
Note: The unit will never start before you close the door well and the inner
light is off.
1. Place the bottom kabob support on the end of the rotisserie spit opposite
the point and tighten the screw slightly. It is as the holder of the basket,
and then let the spit go through the grid that bulged out of the basket.
2. Put sh or other roast into the baskets. Make sure the roast will not touch
sides or top of grill.
3. Place the round drip pan into the receptacle at the bottom of the oven to
catch the drip- pings.
4. Put the solid end of the rotisserie spit in the drive socket on located in the
center of the drip pan.
5. Place the grooved end on the spit support on located on the top interior of
the grill.
6. Close the door and the inner light is off automatically.
7. Set the TIMER Control to the time according to recommended Recipe. If
more than 1 hour, set to “Stay On” and check after the shortest time.
8. When the roast is done, turn the TIMER Control to “Off” and unplug the
grill.

18
EN
Cooking times
• Chicken, duck 30~45 minutes
• Steak 45~60 minutes
• Kebab 20~30 minutes
• Fish 20~32 minutes
• Vegetables 15~20 minutes
CLEANING AND CARE
• Pull the power plug out of the socket. Let the grill cool down completely.
Remove all accessories.
• Use a damp and/or soft cloth to clean the housing. NEVER IMMERSE THE
APPLIANCE IN WATER. Clean the insides with water and a dry cloth. Do
not use strong cleaners. All accessories can be cleaned with soapy water.
• Rub the walls with a damp cloth.
HINTS ON DISPOSAL
If there is a legal regulation for the disposal of electrical
and electronic devices in your country, this symbol
on the product or on the packaging indicates that this
product must not be disposed of with household waste.
Instead, it must be taken to a collection point for the
recycling of electrical and electronic equipment. By
disposing of it in accordance with the rules, you are
protecting the environment and the health of your
fellow human beings from negative consequences. For
information about the recycling and disposal of this
product, please contact your local authority or your
household waste disposal service.

19
FR
Cher client,
Toutes nos félicitations pour l’acquisition de ce nouvel
appareil. Veuillez lire attentivement les instructions
suivantes de branchement et d’utilisation an d’éviter
d’éventuels dommages. Le fabricant ne saurait être tenu
pour responsable des dommages dus au non-respect
des consignes de sécurité et à la mauvaise utilisation de
l’appareil. Scannez le QR-Code pour accéder à la dernière
version du mode d‘emploi et à d‘autres informations
concernant le produit.
SOMMAIRE
Consignes de sécurité 20
Aperçu de l’appareil 21
Avant la première utilisation 21
Utiliser le gril comme rôtissoire 22
Préparer un kebab avec le gril 24
Utiliser le grill avec le panier à poisson 25
Nettoyage et entretien 26
Conseils pour le recyclage 26
FICHE TECHNIQUE
Numéro d’article 10009355
Alimentation 220 V ~ 50 Hz
Puissance 1500 W
FABRICANT ET IMPORTATEUR (UK)
Fabricant :
Chal-Tec GmbH, Wallstraße 16, 10179 Berlin, Allemagne.
Importateur pour la Grande Bretagne :
Chal-Tec UK limited
Unit 6 Riverside Business Centre
Brighton Road
Shoreham-by-Sea
BN43 6RE
United Kingdom

20
FR
CONSIGNES DE SÉCURITÉ
• Brancher l’appareil de telle manière à ce que la che d’alimentation soit
facilement accessible à tout moment.
• Contrôler régulièrement l’état du cordon d’alimentation pour déceler
d’éventuelles détériorations. Si le cordon d‘alimentation est endommagé, il
doit être remplacé par le fabricant, une entreprise spécialisée habilitée ou
une personne présentant une qualication analogue.
• Les réparations doivent être effectuées uniquement par un personnel
spécialisé et ne jamais essayer de réparer l’appareil soi-même.
• Ne pas brancher l’appareil à une minuterie ou à une prise de courant
télécommandée.
• Ne jamais plonger le cordon d’alimentation dans l’eau ou dans tout autre
liquide.
• Ne pas toucher la che d’alimentation avec des mains humides.
• Ne pas tirer sur le cordon d’alimentation pour débrancher la che de la
prise, mais le saisir fermement au niveau de la che pour le débrancher.
• Ne pas utiliser le câble comme une poignée.
• Disposer le cordon d’alimentation de telle manière à ce que personne ne
trébuche dessus.
• Ne pas faire passer le câble au-dessus de rebords coupants.
• Ne pas utiliser l’appareil dans des pièces humides ou sous la pluie.
• Installer l’appareil de sorte à ce qu’il ne puisse pas tomber dans de l’eau. S’il était
amené à tomber à l’eau, débrancher immédiatement l’appareil avant de pouvoir
le toucher.
• Débrancher l’appareil après utilisation.
• Tenir l’appareil éloigné des flammes nues et des sources de chaleur.
• Cet appareil peut être utilisé par des enfants de 8 ans ou plus et des
personnes ayant des capacités physiques, sensorielles et mentales limitées
et / ou dénuées d‘expérience et de connaissances, à condition d‘avoir été
instruits au fonctionnement de l‘appareil par une personne responsable et
d‘en comprendre les risques associés.
• Tenir les enfants éloignés du grill et ne jamais laisser l’appareil fonctionner
sans surveillance.
• Installer l’appareil sur une surface stable et plane.
• Veiller à ce qu’aucun objet ou substance facilement inflammables ne se
trouvent autour de l’appareil.
• Maintenir une distance minimale de 30 cm entre l’appareil et les murs
environnants.
• Ne pas toucher la grille ou toute autre surface brûlante pendant le
fonctionnement du grill.
• Déplacer l’appareil uniquement lorsqu’il a complètement refroidi.
Manipuler l’appareil uniquement en saisissant les poignées prévues.
• Installer l’appareil uniquement sur des surfaces thermorésistantes. Ne pas
placer l’appareil trop près du bord.
• Pour éviter une accumulation de chaleur, ne pas placer l’appareil
directement sous un placard ou sous une étagère de cuisine.
• Ne pas placer l’appareil sur une cuisinière ou à proximité de celle-ci.
This manual suits for next models
1
Table of contents
Languages:
Other oneConcept Grill manuals

oneConcept
oneConcept 10009355 User manual

oneConcept
oneConcept 10030531 User manual

oneConcept
oneConcept 10028472 User manual

oneConcept
oneConcept 10030539 User manual

oneConcept
oneConcept Woklette User manual

oneConcept
oneConcept 10026798 User manual

oneConcept
oneConcept 10009353 User manual

oneConcept
oneConcept 10009353 User manual

oneConcept
oneConcept 10027911 User manual

oneConcept
oneConcept 10030029 User manual