System Start-Up Information
Read the installation and maintenance instructions as well as the recom-
mended safety practices in this manual and your shop vacuum’s owner’s
manual before assembling and using the Dust Deputy®.
Some dusts are highly ammable or explosive. Learn / know what you
are dealing with. Follow all local, state, federal & NFPA codes and
guide lines.
Safety Instructions to be Strictly Followed.
Wood dust mixtures are highly ammable and can be explosive.
NEVER introduce sparks or sources of ignition into collector.
1.) Dump drum after each use.
2.) Ground system. (See pg. 9) For added safety.
The Dust Deputy® is made from static dissipating plastic. Additional
grounding is recommended for increased safety. See grounding instruc-
tions.
Keep re extinguishers handy at all times.
Can be used for collecting non-ammable liquids.
Dispose of waste in a FIRE SAFE AREA.
NEVER leave wood dust in a building or vehicle.
Always read your shop vacuum owner’s manual for safety proce-
dures regarding the operation of your shop vacuum.
Do not vacuum, or use this Dust Deputy® near ammable or combus-
tible liquids, gases, or explosive dusts, such as gasoline or other fuels,
lighter uid, cleaners, oil-based paints, natural gas, hydrogen, coal dust,
magnesium dust, grain dust, aluminum dust, sugar dust, our dust or
gun powder.
Do not vacuum anything that is burning or smoking, such as cigarettes,
matches, or hot ashes or any hot substance!
To reduce the risk of health hazards from vapors or dusts, do not
vacuum toxic materials unless a HEPA lter is used. Do not use or store
near hazardous materials.
WARNING / SAFETY
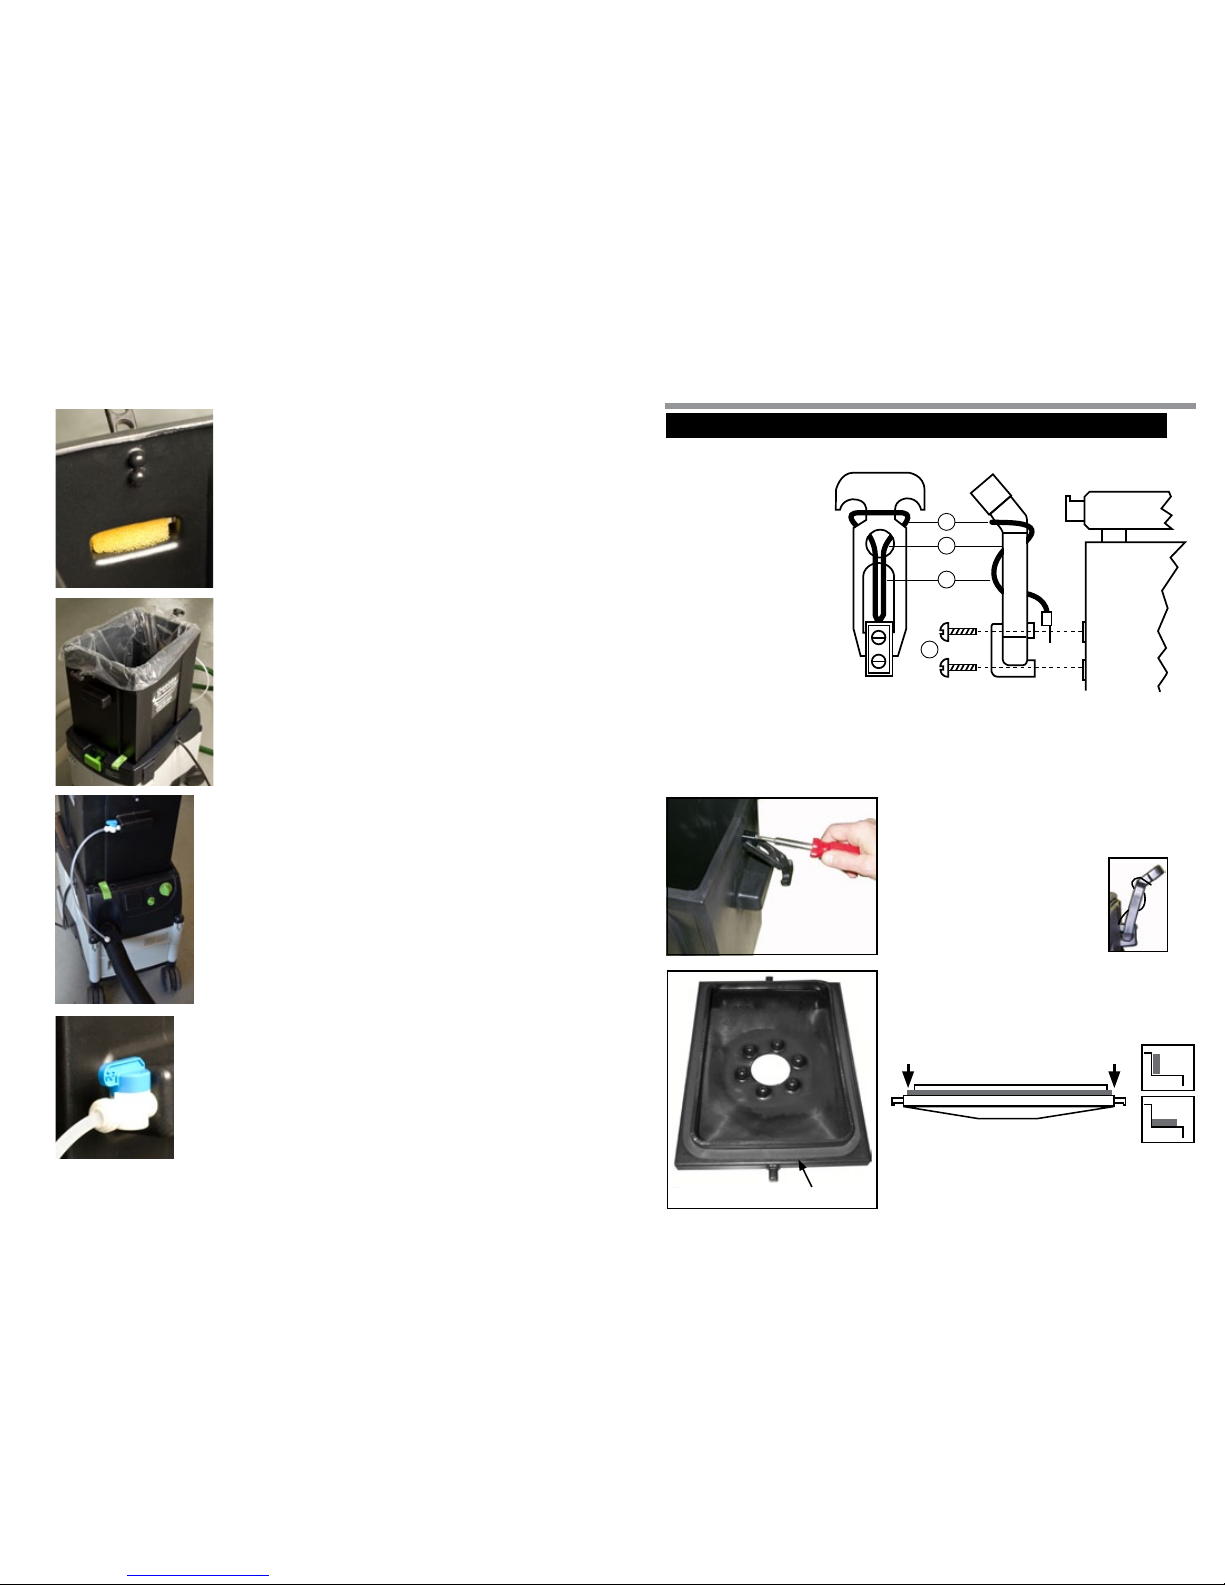
1. 10.
Fire Hazards and Codes
Warning! Explosion and re hazard! Never vacuum ammable uids or gas, oil, alcohol, solvents, etc. Do not
operate near ammable uids or gas. Never vacuum warm uids or materials at more than 140 deg. F (60 deg.
C), such as burning cigarettes, ashes, glowing coals, etc.
Warning! Do not vacuum hazardous / carcinogenic dust unless a HEPA lter is installed.
Always keep lter cartridge clean so the vacuum operates properly.
Empty Dust Deputy waste can frequently. Never leave ammable material in your Dust Deputy or shop vacuum.
Oneida Air Systems makes every effort to accurately represent our products and prices, however OAS
reserves the right to make changes to products and prices at any time. As a manufacturer, OAS reserves
the right to change product specications at any time in an effort to achieve better quality products.
Returned Goods Policy
Buyer must inform O.A.S. of any shortage or damage, by so noting in writing, on the freight delivery bill prior
to signing to indicate receipt of shipment. All claims, including claims covered under the limited warranty, are
subject to inspection and investigation by O.A.S. O.A.S. reserves the right to inspect, investigate all returned
products before Buyer’s claim is settled. All products returned for a cash refund must be unused, resaleable and
purchased within 30 days. There are no refunds on ex hose, custom made components or partial kit items. Kits
must be returned in full (all components) for credit. There will be a 25% restocking fee applied to any returned
items. Buyer must call and get an RMA (Return Authorization Number). Merchandise must be shipped
to us prepaid.
Limited Warranty
Terms & Conditions
Oneida Air Systems™ warrants the products manufactured by Oneida Air Systems, for a period of 90 days or
more depending on the product, to the original purchaser from the date of purchase unless otherwise specied.
Purchaser is responsible for returning warranty items to OAS at their expense. All parts must be returned with
an OAS provided Returned Material Authorization Number (RMA#). Any shipment without an RMA will be
refused. Items not manufactured by Oneida Air Systems are limited to their own manufacturer’s warranties. All
electrical items such as magnetic starters, remotes, sensors, pumps and accessories are limited to 90 days.
Oneida Air Systems warrantees that the product will be free from defects in materials and workmanship. This
warranty does not apply to defects due directly or indirectly to misuse, negligence, accidents, abuse, repairs,
alterations, improper wiring or lack of maintenance. This is Oneida Air Systems sole written warranty and
any and all warranties that may be implied by law, including any merchantability or tness, for any particular
purpose, are hereby limited to the duration of this written warranty. Oneida Air Systems does not warrant or
represent that the merchandise complies with the provisions of any law or acts unless the manufacturer so
warrants. In no event shall Oneida Air Systems’ liability under this warranty exceed the purchase price paid for
the product and any legal actions brought against Oneida Air Systems shall be tried in the State of New York,
County of Onondaga.
ONEIDA AIR SYSTEMS SHALL IN NO EVENT BE LIABLE FOR DEATH, INJURIES TO PERSONS OR
PROPERTY OR FOR INCIDENTAL, AND CONTINGENT, SPECIAL, OR CONSEQUENTIAL DAMAGES
ARISING FROM THE USE OF OUR PRODUCT.
Before Purchasing or Installing a dust collection system the buyer is cautioned to do so in accordance with
prescribed Federal, State, Local, OSHA, NFPA, and any other applicable codes or regulations relating to the
type of dust(s) you are collecting.
SOME TYPES OF DUST UNDER CERTAIN CONDITIONS HAVE THE POTENTIAL TO BE EXPLOSIVE.
Oneida Air Systems is not responsible for how the dust collector is used or installed. Dusts with deagration or
explosion risks, such as wood dust, may require additional safety equipment including but not limited to; vent-
ing, spark detection, suppression systems, back draft dampers or may require installation in an outside location
or in a protected area away from personnel. The customer assumes the responsibility for contacting their insur-
ance underwriter with regard to specic engineering controls or application requirements. (We suggest you
reference NFPA 664, 654 and 68 codes for more information) Oneida Air Dust Collection Systems may not
be suitable for some applications and are not designed to be used in explosive atmospheres. Oneida Air
Systems equipment should only be installed and wired by a licensed electrician following all
applicable local and national electrical codes.