Onyx RX32 User manual

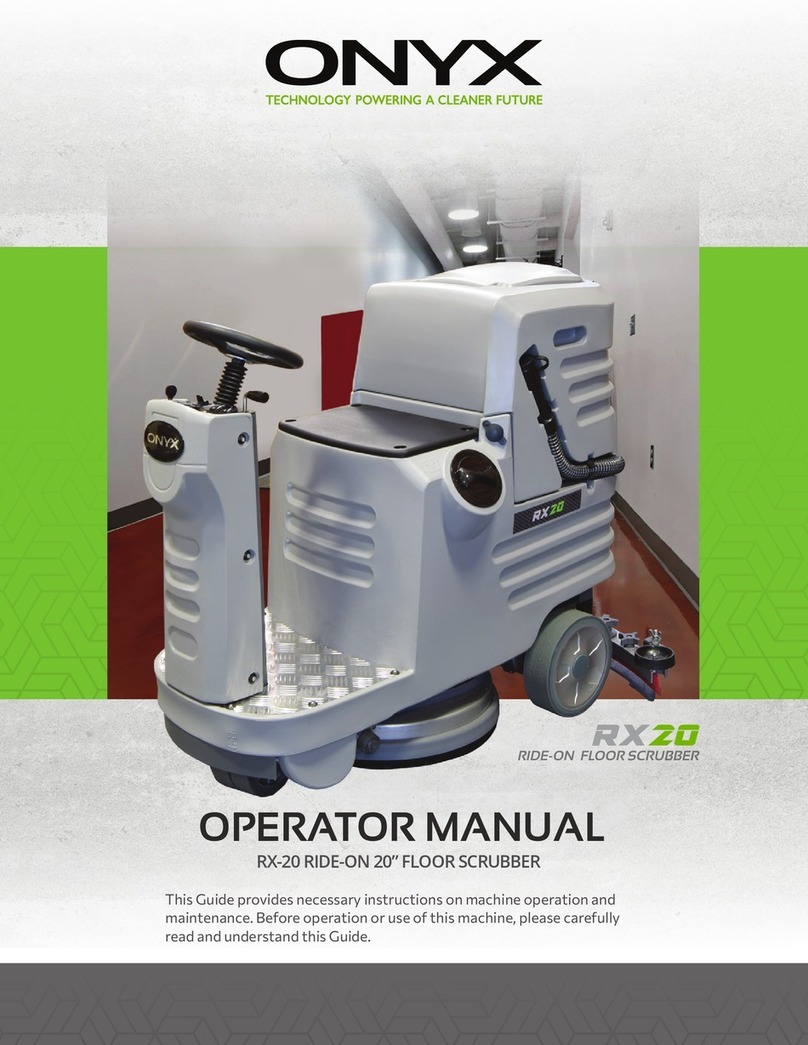
RIDE-ON FLOOR SCRUBBER
This Guide provides necessary instructions on machine operation and
maintenance. Before operation or use of this machine, please carefully
read and understand this Guide.
OPERATOR MANUAL
RX-32 RIDE-ON 30” DUAL HEAD / BATTERY SCRUBBER

Website: https://www.onyxsolutions.store/
No further notice will be given for possible change of specication and parts.
Machine Information:
Please ll in when installing for future reference.
Model number: _____________________________________________________________________
Machine serial number: ____________________________________________________________
Sales representative: _______________________________________________________________
PO number: _________________________________________________________________________
Date PO placed: _____________________________________________________________________
Installation Date: ____________________________________________________________________
12703 Commerce Station Dr • Suite 200
Huntersville, NC 28078
704.827.9368
RIDE-ON FLOOR SCRUBBER

TABLE OF CONTENTS
Parts Ordering
Warranty Claims
Technical Support
Protect the Environment
Safety Precautions
Machine Components
Machine Unpacking
Machine Installation Instructions
Battery Installation
Installation and Connection of Squeegee Component
Installation of Brush/Pad
Machine Operation
Machine Water Flow Adjustment
Information on Brush and Scouring Pad
Pre-operational Examination
Machine Operation
Machine Operation Duration
Battery power meter
Drainage of Water Tank
Drainage of Wastewater Tank
Battery Charging
Machine Maintenance
Daily Maintenance (after each use)
Monthly Maintenance (every 80 hours)
Machine Transport
Machine Storage
Troubleshooting Guide
Technical Parameters
Wiring Diagram/Schematic
4
4
4
4
5-7
8
9
9
9
10
11
12
12
12
13
14
15
16
16
16
17
18
18
19
19
20
21
22
23

4
PARTS ORDERING
When ordering the replacement parts, please refer to the ONYX website at www.onyxsolutions.com. Use
of the published Illustrated Parts Lists (IPL’s) to identify the correct part number required is required to
support accuracy of parts ordering.
Machine IPL’s can be found at the top of the SHOP page of the ONYX website. Before matching parts
or accessories, please rstly determine your machine model and serial number. You can order parts and
accessories from any authorized service center or dealer by telephone at 704-827-9368, or email us at
sales@onyxsolutions.com.
WARRANTY CLAIMS
ONYX Warranty Statement (policy) and Warranty Claim form can be found on the SUPPORT page of the
ONYX website, https://www.onyxsolutions.store/support.
TECHNICAL SUPPORT
Technical support is available by submitting a HELP TICKET on the CONTACT US page of the ONYX website,
https://onyxsolutions.odoo.com/contact.
PROTECT THE ENVIRONMENT
Please abandon the old machine components such as packaging material, battery,
etc. and toxic liquid such as anti-freezing agent and oil according to your local regu-
lations on waste disposal and on the premise of maintaining environmental safety.
Please ensure to carry out the recycling well.
12703 Commerce Station Dr • Suite 200
Huntersville, NC 28078
704.827.9368

5
SAFETY PRECAUTIONS
The ONYX RX-32 Ride-On scrubber is designed to scrub hard surfaces (concrete, asphalt, stone, syn-
thetic, etc) in an indoor environment. Typical applications include hotels, schools, hospitals, factories,
shops, oces, and rental businesses. Do not use this machine on carpeted surfaces. Use only recom-
mended pads and commercially available oor cleaners intended for machine application. Do not use
this machine on soil, grass, articial turf, or carpeted surfaces. This machine is intended for indoor use
only.
This machine is not intended for use on public roadways. Do not use this machine other than described
in this
Operator Manual.
This “WARNING” alert symbol and the “FOR SAFETY” alert symbol are used
throughout this manual as indicated in their description:
WARNING: To warn of hazards or unsafe practices which could result
in severe personal injury or death.
FOR SAFETY: To identify actions which must be followed for safe operation of equipment.
All operators must read, understand and observe the following safety precautions.
The following safety precautions signal potentially dangerous conditions to the operator or equipment.
If the following warnings are not observed, it may cause personal injury, electric shock, re or explosion.
WARNING: Fire or Explosion Hazard:
• Do not use ammable liquid; do not operate the machine close to or in the place where
there is ammable liquids, vapors or combustible dust.
• This machine is not equipped with explosion-proof motor. If this machine is used in the
place where there is ammable vapors, liquids or combustible dust, electric motor may
generate spark during the start and operation, which may cause ash re or explosion.
• Do not pick up ammable materials or reactive metals.
• The battery releases hydrogen. Please keep away from sparks or open ame. The battery
cabin must be kept open when charging.
WARNING: Electric Shock Hazard
• Please rst disconnect the battery cables before performing any maintenance on the
machine.
• If the charger supply cord is damaged or broken, it must be replaced by the manufacturer
or its service agent or a similarly qualied person in order to avoid a hazard.

6
WARNING: Operation of Rotary Brush: Always keep hands away from the live spinning
motor. Please turn o the power before maintaining the machine.
• Do not use ammable liquid; do not operate the machine close to or in the place where
there is ammable liquids, vapors or combustible dust.
• This machine is not equipped with explosion-proof motor. If this machine is used in the
place where there is ammable vapors, liquids or combustible dust, electric motor may
generate spark during the start and operation, which may cause ash re or explosion.
• Do not pick up ammable materials or reactive metals.
• The battery releases hydrogen. Please keep away from sparks or open ame. The battery
cabin must be kept open when charging.
FOR SAFETY: 1. Please do not operate the machine:
• When contacting ammable liquid or getting close to ammable vapors, otherwise
it may cause explosion or ash re.
• Unless having been trained and authorized to operate the machine.
• Unless having read and understood the operation manual.
• Under the inuence of alcohol or drugs.
• While using a cell phone or other types of electronic devices.
• Unless mentally and physically capable of following machine instructions.
• With brake disabled.
• If the machine is not in proper operating condition.
• If the battery emits an unusual odor. Move the machine to a ventilated area and con-
tact Customer Service immediately.
• If the battery is leaking any substance. Avoid contact with battery substance and
contact Customer Service immediately.
• If the battery becomes excessively hot. Disconnect battery charger. Move the ma-
chine to a ventilated area and contact Customer Service immediately.
FOR SAFETY: 2. Before starting the machine:
• Please ensure that all safety equipment is in place and operated correctly.
• Follow safety guidelines concerning wet oors.
• Make sure all safety devices are in place and operate properly.
• Check brakes and steering for proper operation.
• Adjust seat and fasten seat belt (if equipped).
FOR SAFETY: 3. When using the machine:
• Please drive slowly when encountering a slope and slippery surface.
• Follow site safety guidelines concerning wet oors.
• Please wear anti-skid shoes when operating the machine.
• Use brakes to stop the machine.
• Keep all parts of the body inside the operator station while the machine is moving.
• Use care when reversing the machine.
• Reduce speed when turning.
7
• NEVER allow children to play on or around the machine.
• NEVER carry passengers on the machine.
• Always follow safety and trac rules.
• Report machine damage or faulty operation immediately.
• Observe the mixing ratio and processing instructions on the chemical vessel.
• In areas that are too dark to safely see the controls or operate the machine unless
operating / headlights are turned on.
• In areas with possible falling objects unless equipped with overhead guard.
FOR SAFETY: 4. Before leaving or maintaining the machine:
• Stop and place the machine on a stable and at surface.
• Shut down the machine.
• Remove the key.
FOR SAFETY: 5. When repairing and servicing the machine:
• Avoid moving the parts. Please do not wear loose jacket, jewelry, shirt or over
sleeves.
• Before conducting service on the machine, please rst disconnect the battery wir-
ing.
• Block machine tires before jacking machine up.
• Jack machine up at designated locations only. Support machine with jack stands.
• Use a hoist or jack that will support the weight of the machine.
• Do not push or tow the machine on inclines with the brake disabled.
• When treating battery or battery wiring, please wear protective gloves and eye pro-
tection.
• Avoid contacting battery acid.
• Do not hose down or spray this machine with high pressure water.
• Use the replacement parts provided or recognized by the manufacturer.
• All maintenance must be carried out by qualied maintenance personnel.
• Relevant personal protective equipment (PPE) should always be worn when servic-
FOR SAFETY: 6. When transporting the machine:
• Shut down the machine. Remove the key.
• Drain tanks before loading.
• Lower scrub head and squeegee before tying down the machine.
• Use a recommended ramp when loading/unloading into/o truck or trailer.
• Use ramp, truck or trailer that will support the weight of the machine and operator.
• Use a winch. Do not push the machine onto/o the truck or trailer unless the load
height is 380 mm (15 in) or less from the ground.
• Block machine tires.
• Tie machine down to truck or trailer.
• Use tie-down straps to secure the machine to truck or trailer

8
MACHINE COMPONENTS
A. Steering wheel
B. Operator Seat
C. Recovery Tank
D. Batteries
E. Scrub head
F. Propel Pedal
G. Control Panel
H. Solution tank ll cap
I. Solution tank
J. Rear squeegee
K. Recovery tank drain hose
L. Recovery tank cover
A
B
C
D
E
F
L
G
H
K
J
I

9
MACHINE UNPACKING
MACHINE INSTALLATION INSTRUCTIONS
Note: Gently place each battery into the battery cabin to
avoid damage to the battery and the machine.
1. Please carefully check whether there is damage on the packing box of the machine. If there is, please imme-
diately contact the shipping carrier.
2. Unpack on a level and at surface.
WARNING: Fire or explosion hazard: The battery releases hydrogen. Please be away from
spark or open ame. The battery cover must be kept open when charging.
FOR SAFETY: Please wear protective gloves and eye protectors when treating the battery and battery
wiring when repairing and servicing the machine. Avoid contacting the battery acid.
Battery Installation
Battery Specication:
Four 6V 220Ah AGM Maintenance Free Batteries con-
nected in series to produce total battery power pack of
24 volt, 220 Ah AGM Maintenance Free Batteries.
1. Stop and place the machine on the level ground and
take out the key. Lift up the recovery tank to expose the
battery cabin.
2. Carefully install the four 6V batteries in the battery
cabin and connect the battery cable according to the
following gure:
3. Before connecting the battery, please rst ensure whether the electrodes and
electric terminals are clean. Use electrode cleaning uid and wire brush as required.
4. After the battery is installed, please check the scale of the battery power meter.
Charge the battery as required.
Hint: Paint a thin layer of metal-free lubricating oil or
protective spray on the connected wiring to avoid battery
corrosion.

10
INSTALLATION AND CONNECTION OF SQUEEGEE COMPONENT
1. Stop and place the machine on the level ground,
select the mode switch on the control panel to o.
Brushes and squeegee will automatically lift to the up
position, and take out the key.
2. Lower the lifting rod of the squeegee to the lower
position.
3. Install the squeegee to the squeegee installation
bracket as shown in the gure. Ensure to fully place the
fastening knob into the jack and then tighten the knob.
4. Connect the vacuum suction pipe to the squeegee
component.
5. Examine the squeegee adhesive tape and reasonably
adjust.

11
INSTALLATION AND CONNECTION OF SQUEEGEE COMPONENT
For suggested brush and pad selection, please refer to the section of [Information on Brush and Pad
below] in this Guide or consult your local authorized dealer.
1. Stop and place the machine on the level
ground, select the mode switch on the control
panel to o. Brushes and squeegee will auto-
matically lift to the up position and take out
the key.
INSTALLATION OF BRUSH/PAD
2. Lift skirt (should be loose)
3. Rotate counterclockwise to loosen and
remove brushes or pad driver.
4. To replace pads, remove blue retaining
clip by pinching nger points together. (see
image)
5. Place correctly sized pad on driver and
secure with blue retaining clip. Pinch nger
points together and press rmly until you
hear a click.
6. With pad/brush side down, lift up onto
driver and rotate clockwise until pad is secure.

12
Conventional Scrubbing/Cleaning:
Manually control the water valve to adjust the volume of the cleaning
liquid (water and detergent) owing to the ground.
The brush cleans the oor with the solution, mixing detergent and
water. While the machine advances, pick-up the wastewater on the
oor with the squeegee into the waste water tank.
Machine Water Flow Adjustment
MACHINE OPERATION
Information on Brush and Scouring Pad
To ensure the optimum eciency, please use the correct type of brush for cleaning.
The brush and scouring pad suggested for use are as follows:
It is suggested to
clean the coated oor
without damaging the
oor. Clean without
scratches.
Soft nylon brush
(white) It is used for scrubbing
slight dirt without
damaging the oor.
It is used for main-
taining a highly
smooth or polished
oor.
It is used for powerful-
ly removing the heavy
coating or base or
super-powerful scrub-
bing.
Crash pad (red)
Gravity folding pad
(black)
Polishing pad (white)

13
WARNING: Fire or explosion hazard: Do not operate the machine close to or in the place
where there is ammable liquids, vapors or combustible dust.
FOR SAFETY: Please do not operate this machine before reading and understanding the operation manual.
• Check the battery is well charged.
• Check the abrasion conditions of the pad/brush.
• Check the abrasion conditions of the squeegee blade and reasonably adjust the angle.
• Conrm that the wastewater tank is blank and has been equipped with a clean oating lter screen.
Pre-operational Examination
• Check the abrasion conditions of the skirt section of the brush head

14
MACHINE OPERATION
1. Sit on the machine, adjust the seat position to suit
leg position of driver/operator.
2. Switch the key of the main power supply to the
position of (I).
3. Select the operational mode required on the control
panel yellow switch.
4. Select the desired clean water solution ow rate by
using the valve on the dashboard.
5. Firmly grip the steering wheel and select forward or
reverse gear stick, push forward for forward drive, and
pull back for reverse.
6. Gently apply pressure to the right-hand drive foot
pedal.

15
MACHINE OPERATION DURATION
WARNING: Fire or explosion hazard: Please do not pick up ammable materials or
reactive metals.
1. Recommend each cleaning path overlaps by 2”.
2. Let the machine advance constantly to avoid ground damage.
3. If there is drag mark on the ground after the squeegee absorbs water, check the squeegee blade for
debris, and clean accordingly.
4. Do not operate the machine on the slope with a slope over 5% (3°).
5. If there is too much foam entering the wastewater tank, check the foamer/detergent concentration
and adjust accordingly.
Note: Do not let the foam enter the lter screen so as to avoid damage to vacuum motor. The foam
will make the switch of the lter screen invalid.
6. Replace or rotate the pad as required.
7. Observe the power consumption of the battery power meter.
8. Observe the residual liquid amount through the freshwater meter of the clean water tank. For
traditional scrubbing operations, the consumption is typically 10 liters of uid for each 10 minutes of
operation, roughly one liter per minute.
9. When the solution in the clean water tank is used up, empty the waste water tank by accessing the
waste water drain hose of the back of the machine, then re-pour the cleaning solution.
10. To stop machine operation, remove
foot from drive pedal, select OFF on
the Yellow control switch, park on level
ground and remove the power key.

16
BATTERY POWER METER
The battery power meter will display the
power quantity of the battery. When the
battery is full of power, all indicator lights
will be on. Along with the consumption of
the power quantity, the indicator lights
will go out from the right to the left. To
prolong the life of the battery, do not let
the indicator lights go out to below the
following power consumption.
Hint: To prolong the life of the battery,
please ensure to charge the battery after
the total use time of the machine exceeds
30min.
After each use, the wastewater tank shall be drained and cleaned. The clean water tank shall be periodically
cleaned to remove any corroded parts. Carry the machine to the drainage place, switch o the key of the
power supply, and drain the water according to the following drainage instructions:
DRAINAGE OF WATER TANK
FOR SAFETY: 4. Before leaving or maintaining the machine:
DRAINAGE OF WASTEWATER TANK
1. Unscrew the drain hose cover of the
waste water tank drain hose counter-
clockwise and drop the hose into waste
water drain.
2. Open the cover of the waste water
tank and ush the waste water tank with
a hose using fresh water.
3. Rinse the waste water lter screen and
remove any debris from inside the waste
water tank.

17
BATTERY CHARGING
Note: To prolong the life of the battery and ensure the optimum eciency of the machine, the battery
must be charged after the use time of the machine exceeds 30min. Please do not allow the battery to re-
main uncharged for long.
The following charging instructions are suitable for the charger. Please ensure to use the charger provided
with the machine to avoid battery damage. The specication of the battery charger:
1. Move the machine to the place with good ventilation for charging.
2. Stop and place the machine on the level ground and turn the key to the close position.
3. When charging, tilt back and leave open the waste water tank to facilitate ventilation.
4. Plug the AC (alternating current) power cord of the charger to the power socket with sound grounding.
5. Plug the red DC (direct current) power cord of the charger to the battery charging socket located on the
steering column of the machine.
6. The charger will automat-
ically start charging and will
automatically switch o
when charging is complete
and the batteries are fully
charged.
Hint: The machine will not
work when being connected
to the charger.
Note: during the charging of the charger, please do not pull the DC cord of the charger out of the socket
of the machine to avoid generation of arc strike. If the charging must be suspended during the charging,
please pull out the AC power cord rst.
• Charger type: - charger for aluminum acid battery
• Output voltage - 24V
• Output current - 15A
• Suitable for deep cycle battery charging
• APO circuit
WARNING: Fire or explosion hazard: The battery releases hydrogen. Please be away
from spark or open re. The battery cabin must be kept open when charging.
FOR SAFETY: Please wear protective gloves and eye protectors when treating the battery and battery
wiring when repairing the machine. Avoid contacting the battery acid. When charging, please open the side
of the wastewater tank to facilitate ventilation.

18
MACHINE MAINTENANCE
Only by following daily, weekly and monthly maintenance procedure can the machine be kept in the
optimum working state.
WARNING: Electric shock hazard: Please rst disconnect the battery wiring before
maintaining the machine.
Daily Maintenance (after each use)
1. Drain and clean the wastewater tank.
2. Rinse and ush the oating lter screen in the
wastewater tank.
3. Drain the clean water tank and ush the water tank
with hot water, no higher than 50° C as required.
4. Inspect the pad/brush after cleaning, ensure pad/
brush is still in good condition. If there is any abra-
sion, overturn or replace the brush/pad.
5. Wipe the squeegee blade.
6. Check the abrasion conditions of the scraper edge
of the squeegee blade. If there is any wear and tear,
exchange two sides of the blade.
7. Use multi-purpose detergent and wet cloth to wipe
the machine.
8. Check the abrasion conditions of the skirt side of
the brush head and replace it if there is any wear and
tear or damage.
9. Charge the battery. To prolong the life of the bat-
tery and ensure the optimum eciency of the ma-
chine, the battery must be charged after the use time
of the machine exceeds 30min.

19
MACHINE MAINTENANCE
Monthly Maintenance (every 80 hours)
1. Dismantle the lter of the clean water
tank from the bottom of the machine and
clean the lter screen. Ensure the clean
water tank is emptied before dismantling
the lter.
2. Clean the top of the battery to prevent
electrode corrosion (refer to [Battery
Maintenance]).
3. Check whether the battery wiring is
loose.
4. Check and clean the cover seal of the
wastewater tank and replace it if there is
any damage.
5. Spray the silica gel dry lubricant on all
pivots and wheels and cover a layer of wa-
ter-proof lubricating oil to ensure smooth
operation of wheels and pivots.
6. Check whether the nuts and bolts on the
machine are loose.
7. Check whether the machine leaks.
1. Park the scrubber and select OFF on Yellow control switch.
2. Switch power key to OFF position.
3. Drain machine tanks.
4. Switch power key or ON.
MACHINE TRANSPORT
When transporting the machine with truck or trailer, please ensure to following the following procedure:
FOR SAFETY: When loading/unloading machine onto or o of a truck or trailer, use a ramp, truck or
trailer that will support the weight of the machine and operator. Use tie- down straps to secure machine to
truck or trailer.

20
5. Load the machine using a ramp that can support the machine weight and driver (assume combined
weight of 1,000lbs)
6. Position the front of machine up against the front of the trailer or truck. Select brush and vacuum mode
of the Yellow mode switch on the main dash. This will lower the pad/brush head and squeegee.
7. Drive the scrubber onto the lift gate of the truck and position for transportation.
8. Set the parking brake, if equipped, and place a block behind each wheel to prevent the machine from
rolling.
9. Secure with tie-down straps. It may be necessary to install tie-down brackets to trailer or truck.
Note: Do not let the machine be subject to rain, excessive amounts of humidity and moisture, and store
indoor.
1. Please charge the battery before storage.
2. Yellow mode switch to OFF position, this will place pad/brush head and squeegee in up position.
3. Switch power key to OFF position.
4. Disconnect the batteries before any long-term storage.
5. Drain and ush thoroughly the bottom of the water tank.
6. Store the machine in a dry place.
7. Open the cover of the waste water tank.
8. Note: Do not let the machine be subject to rain, excessive amounts of humidity and moisture, and store
indoor.
9. If the machine is stored in a cold environment, drain all liquid in the machine.
MACHINE MAINTENANCE
MACHINE STORAGE
Table of contents
Other Onyx Scrubber manuals
Popular Scrubber manuals by other brands

Primus
Primus RF6 Programming manual

Electrolux Professional
Electrolux Professional Compass Pro WS6-8 installation manual

Kärcher
Kärcher B 260 RI manual

FIORENTINI
FIORENTINI ECOSMALL55-N1 Operating and maintenance manual

Clarke
Clarke Focus II Mid-Size Autoscrubber Disc 26 Operator's manual

Wetrok
Wetrok Duomatic Series operating instructions

Weller
Weller Zero Smog TL Translation of the original instructions

Taski
Taski swingo 1650 Translation of the original instructions of use

YANGZI
YANGZI YZ-X5 operating instructions

YANGZI
YANGZI YZ-X6 Operating instruction

Fimap
Fimap GL Pro Use and maintenance manual

Matrix
Matrix CHF611 Manual for installation, use and maintenance