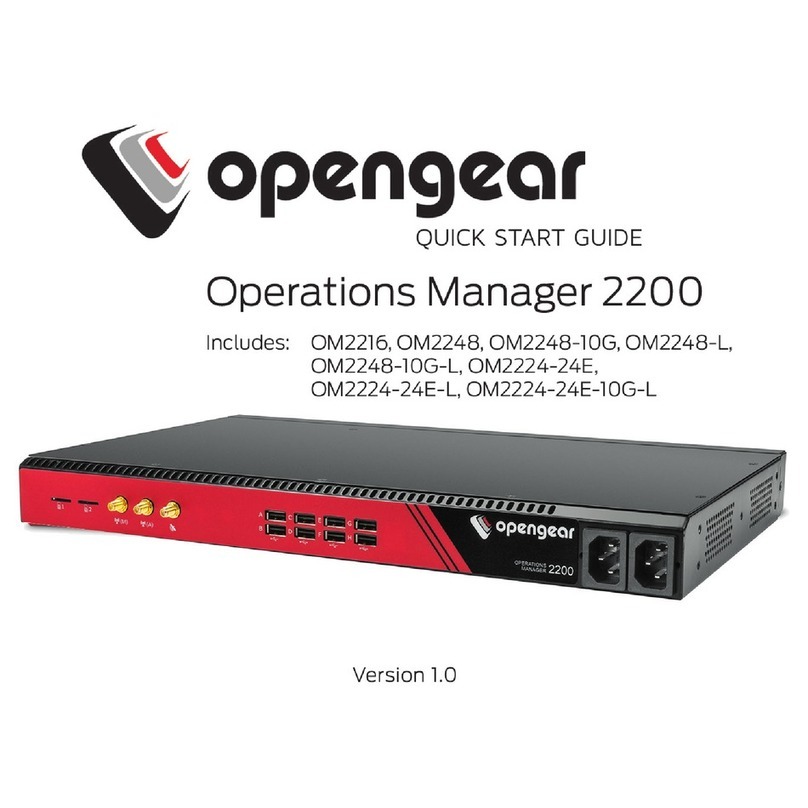
Opengear OM2200 Series User manual

Operations Manager
User Guide
20.Q4 November 2020

Contents
Copyright © 5
Safety & FCC Statement 6
About This User Guide 8
Installation And Connection 9
Power Connection 10
Connecting to the Network 11
Serial Connection 12
Cellular Connectivity 13
Reset and Erase 14
Initial System Configuration 15
Default Settings 16
Management Console Connection via CLI 19
Change the Root Password 20
Disable a Root User 22
MONITOR Menu 26
System Log 27
LLDP CDP Neighbors 28
Triggered Playbooks 29
ACCESS Menu 30
Local Terminal 31
Access Serial Ports 32

CONFIGURE Menu 35
Serial Ports 36
Local Management Consoles 40
Lighthouse Enrollment 42
Playbooks 44
PDUs 47
SNMP Alerts 49
Network Connections 51
Network Interfaces 52
Dual SIM 53
Network Aggregates - Bonds and Bridges 57
Spanning Tree Protocol 63
IPsec Tunnels 66
Network Resilience 70
OOB Failover 71
IP Passthrough 72
User Management 73
Groups 74
Local Users 77
Remote Authentication 82
RemoteLocal for AAA Server 88
Services 91
HTTPS Certificate 92
Network Discovery Protocols 94
Routing 95
SSH 96
Unauthenticated SSH to Console Ports 98
Syslog 104
Remote Syslog 106

Session Settings 111
Firewall 112
Firewall Management 113
Interzone Polices 120
Services - Firewall 121
Date & Time 123
Time Zone 124
Manual Settings 125
Automatic Settings 126
System 127
Administration 130
Factory Reset 131
Reboot 133
System Upgrade 134
SNMP 135
SNMP Service 136
SNMP Alert Managers 137
Multiple SNMP Alert Managers 139
Advanced Options 142
Communicating With The Cellular Modem 143
OGCLI 145
Docker 155
Cron 156
Initial Provisioning via USB Key 158
EULA and GPL 160
UI Button Definitions 161

Copyright ©
Opengear Inc. 2020. All Rights Reserved.
Information in this document is subject to change without notice and does not rep-
resent a commitment on the part of Opengear. Opengear provides this document
“as is,” without warranty of any kind, expressed or implied, including, but not limited
to, the implied warranties of fitness or merchantability for a particular purpose.
Opengear may make improvements and/or changes in this manual or in the product
(s) and/or the program(s) described in this manual at any time. This product could
include technical inaccuracies or typographical errors. Changes are periodically
made to the information herein; these changes may be incorporated in new editions
of the publication.
COPYRIGHT © 5

Safety & FCC Statement
Safety Statement
Please take care to follow the safety precautions below when installing and oper-
ating the OPERATIONS MANAGER:
lDo not remove the metal covers. There are no operator serviceable com-
ponents inside. Opening or removing the cover may expose you to dangerous
voltage which may cause fire or electric shock. Refer all service to Opengear
qualified personnel.
lTo avoid electric shock the power cord protective grounding conductor must
be connected through to ground.
lAlways pull on the plug, not the cable, when disconnecting the power cord
from the socket.
Do not connect or disconnect the appliance during an electrical storm. Also use a
surge suppressor or UPS to protect the equipment from transients.
FCC Warning Statement
This device complies with Part 15 of the FCC rules. Operation of this device is sub-
ject to the following conditions: (1) This device may not cause harmful interference,
and (2) this device must accept any interference that may cause undesired oper-
ation.
Proper back-up systems and necessary safety devices should be utilized to
protect against injury, death or property damage due to system failure. Such
protection is the responsibility of the user.
SAFETY & FCC STATEMENT 6

This device is not approved for use as a life-support or medical system.
Any changes or modifications made to this device without the explicit
approval or consent of Opengear will void Opengear of any liability or
responsibility of injury or loss caused by any malfunction.
This equipment is for indoor use and all the communication wiring are limited
to inside of the building.
SAFETY & FCC STATEMENT 7

About This User Guide
This user guide covers the Opengear Operation Manager products, including the
OM2200 family of rack-mountable appliances (available with combinations of up to
48 serial ports and 24 Ethernet ports) and the OM1200 family of small form-factor
appliances (available with combinations up to 8 serial and 8 Ethernet ports).
This manual is up to date for the 20.Q4 November 2020 firmware release. When
using a minor release there may or may not be a specific version of the user guide
for that release. The current Operations Manager user guide can always be found
here.
ABOUT THIS USER GUIDE 8

Installation And Connection
This section describes how to install the appliance hardware and connect it to con-
trolled devices.
INSTALLATION AND CONNECTION 9

Power Connection
The rack mountable units (OM2200) may be equipped with built-in single- or dual-
AC or DC power supplies. The small form-factor units (OM1200) use a single
external 12V power adapter.
OM2200 have dual universal AC power supplies with auto failover built in. These
power supplies each accept AC input voltage between 100 and 240 VAC with a fre-
quency of 50 or 60 Hz. The OM2224-24E-10G-L draws a maximum of 48W, while
non-24E are less than 30W.
Two IEC AC power sockets are located on the power side of the metal case, and
these IEC power inlets use conventional IEC AC power cords.
Note: Country specific IEC power cords are not included with OM2200s.
OM1200s are shipped with a 12VDC to universal AC (multicounty clips) wall
adapter.
INSTALLATION AND CONNECTION 10

Connecting to the Network
All Operations Manager products have two network connections labeled NET1 and
NET2. In the OM2200, there are options for copper wiring (on a standard RJ-45 con-
nector) and fiber (through a standard SFP module).
The network connections on the OM2200 are located on the serial port side of the
unit. Connect the provided shielded CAT5 cable to the NET1 to a computer or into
your network for initial configuration. By default NET1 and NET2 are enabled.
You can use either 10/100/1000BaseT over Cat5 or fiber-optical transceiver
(1Gbps) in the SFP slot for NET1 or NET2 on OM2200 (non-10G) and OM1208-8E.
INSTALLATION AND CONNECTION 11

Serial Connection
The serial connections feature RS-232 with software selectable pin outs (Cisco
straight –X2 or Cisco reversed –X1). Connect serial devices with the appropriate
STP cables.
INSTALLATION AND CONNECTION 12

Cellular Connectivity
The Operations Manager products offer an optional global cellular LTE interface
(models with -L suffix). The cellular interface is certified for global deployments with
most carriers and provides a CAT12 LTE interface supporting most frequencies in
use. To activate the cellular interface, you should contact your local cellular carrier
and activate a data plan associated to the SIM installed.
For -L models, attach the 4G cellular antennas to the unit’s SMA antenna sockets
on the power face (or to the extension RF cables) before powering on. Insert the
2FF SIM card on the power face with the contact facing up. Use the left SIM socket
first.
INSTALLATION AND CONNECTION 13

Reset and Erase
CONFIGURE > System > Reboot
The OPERATIONS MANAGER reboots with all settings (e.g. the assigned network
IP address) preserved.
To reboot the unit:
Select CONFIGURE > System > Reboot.
To erase the unit:
Push the Erase button on the port-side panel twice with a bent paper clip while the
unit is powered on.
This resets the appliance to its factory default settings. Any modified configuration
information is erased. You will be prompted to log in and must enter the default
administration username and administration password (Username: root Password:
default). You will be required to change this password during the first log in.
INSTALLATION AND CONNECTION 14

Initial System Configuration
This section provides step-by-step instructions for the initial configuration of your
OPERATIONS MANAGER.
By default, all interfaces are enabled. The unit can be managed via WebGUI or by
command line interface (CLI).
l"Default Settings" on the next page
l"Management Console Connection via CLI" on page19
l"Change the Root Password" on page20
l"Disable a Root User" on page22
l"Change Network Settings" on page22
lFor Configure Serial Ports (see "Serial Ports" on page36)
INITIAL SYSTEM CONFIGURATION 15

Default Settings
The OPERATIONS MANAGER comes configured with a default static IP Address
of 192.168.0.1 Subnet Mask 255.255.255.0.
The OM offers a WebGUI via web browser that supports HTML5.
1. Type https://192.168.0.1 in the address bar. HTTPS is enabled by default.
2. Enter the default username and password
Username: root
Password: default
3. After the first successful log in you will be required to change the root pass-
word.
INITIAL SYSTEM CONFIGURATION 16

4. Next, you will be presented with the ACCESS > Serial Ports page that shows
you a list of serial devices and links to a Web Terminal or SSH connection for
each.
Using the WebUI
The WebUI can switched between Light or Dark mode by adjusting the toggle on
the bottom left.
Light mode changes the user interface to display mostly light colors. This is the
default UI setting. Dark mode changes the user interface to display mostly dark col-
ors, reducing the light emitted by device screens.
INITIAL SYSTEM CONFIGURATION 17

The WebUI has three menu options on the upper right: Help,System, and Log
out.
The Help menu contains a link to generate a Technical Support Reportt that can
be used by Opengear Support for troubleshooting. It also contains a link to the
latest Operations Manager User Manual.
The System menu presents the Current version,REST API version,Hostname,
Serial Number, Model, and Current user.
INITIAL SYSTEM CONFIGURATION 18

Management Console Connection via CLI
The Command Line Interface (CLI) is accessible using your preferred application to
establish an SSH session.
1. Input the default IP Address of 192.168.0.1. SSH port 22 is enabled by
default.
2. When prompted, enter the log in and password in the CLI
3. After a successful log in, you’ll see a command line prompt
INITIAL SYSTEM CONFIGURATION 19

Change the Root Password
CONFIGURE > User Management > Local Users
For security reasons, only the root user can initially log into the appliance. Upon ini-
tial log in the default password must be changed. To change the password at any
time,
1. Click CONFIGURE > User Management > Local Users
2. Click the Edit User icon under Actions.
INITIAL SYSTEM CONFIGURATION 20
This manual suits for next models
3
Table of contents
Other Opengear Switch manuals
Popular Switch manuals by other brands

EUCHNER
EUCHNER NZ H/P Series operating instructions

Motorola
Motorola RFS Series reference guide

SMC Networks
SMC Networks D-H7A2*-588 Installation and maintenance manual

Analog way
Analog way CentriX CTX8022 user manual

Allied Telesis
Allied Telesis x530 Series installation guide

Digitus
Digitus DN-95359 Quick installation guide