INSTRUCTIONS
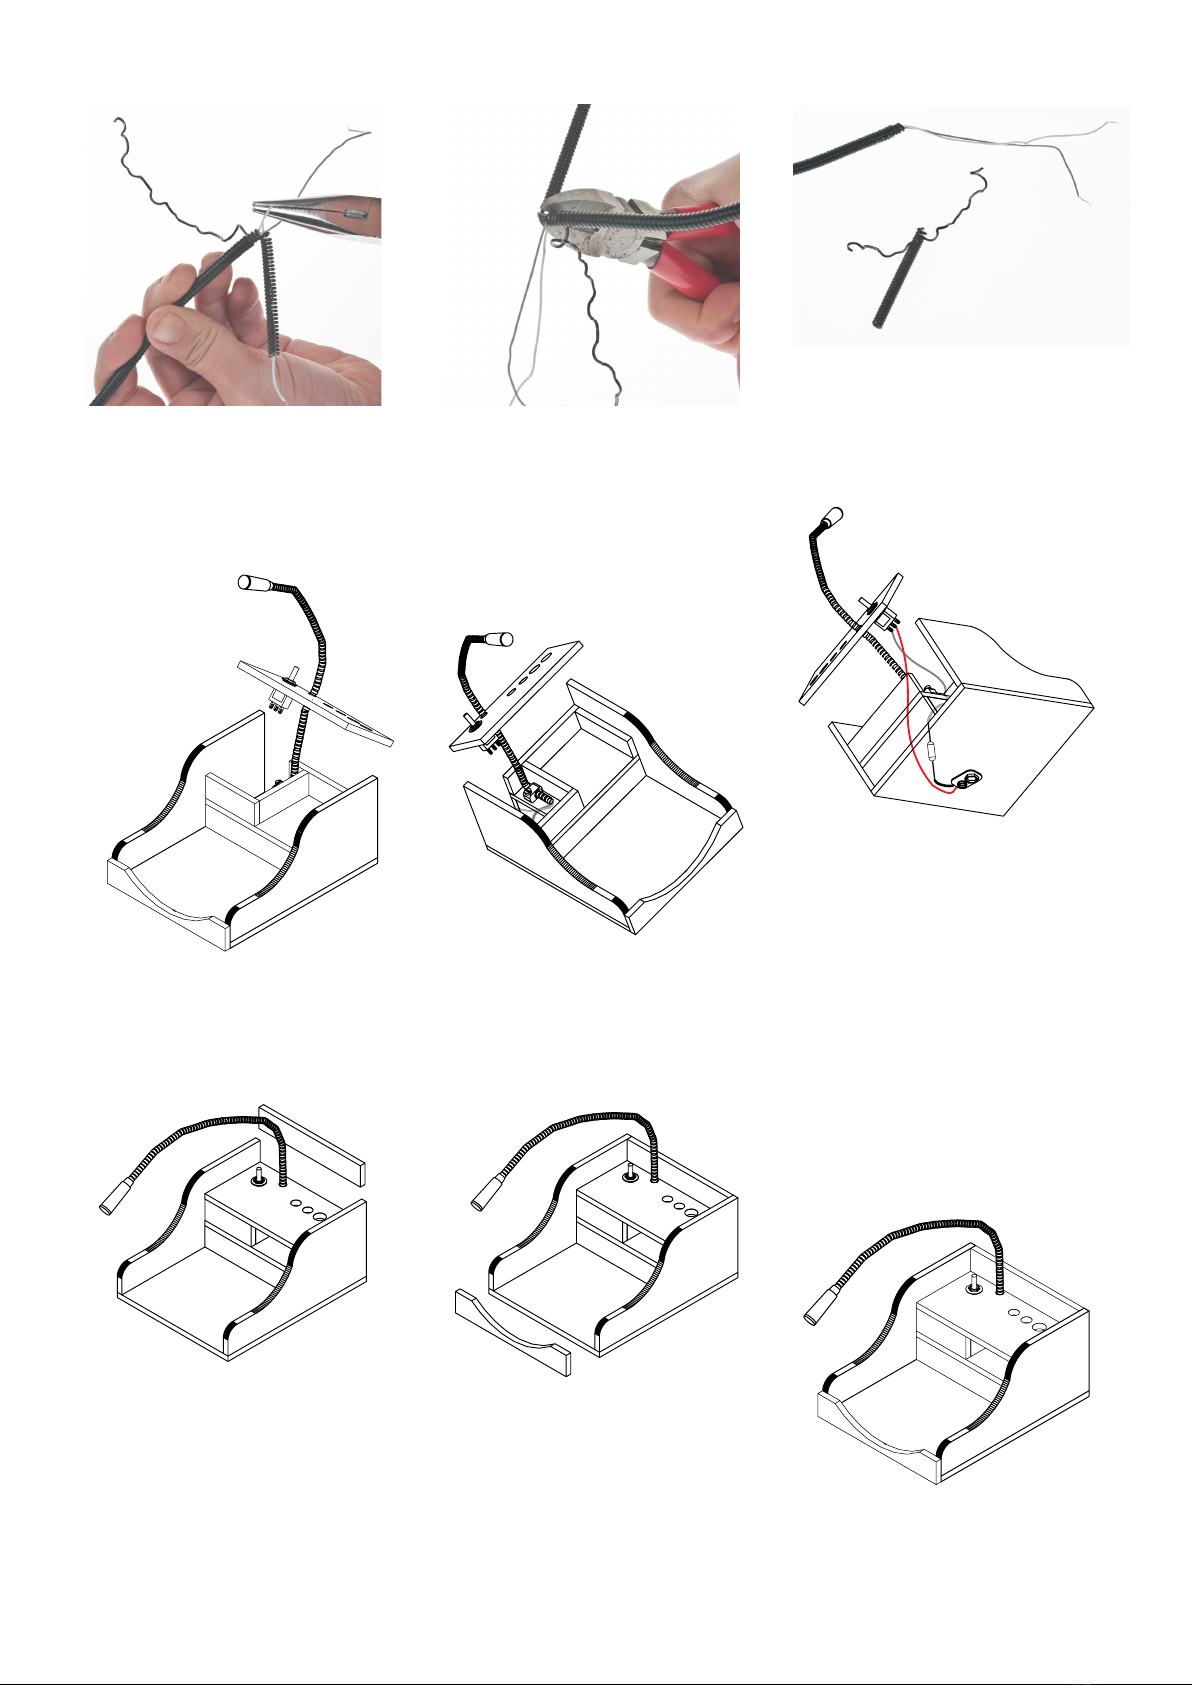
9. On the lamp (3) bend up about ca.
50 mm fom the coiled metal casing.
Using pliers bend the casing back
and insert it through the hole with
the cable (s. Dia.8)
10. Cut the metal casing with side cutters
(Dia. 9)
11. Remove the insulation from the
cables ca. 10mm, twist the wires
together and tin
Dia.8 Dia. 9 Dia. 10
12. Insert the lamp (3) through the
6mm hole in the shelf (e) (Dia.11)
Dia. 11 Dia. 12
13. Fix the lamp (3)with the clips (5)
and the screw (7) as shown (d)
14. Twist together and solder the black
cable fom the battery lead (6) and
the light grey cable from the lamp(3)
Solder/ twist the red battery lead to
the middle connecter on the switch
(4) Solder /twist the dark grey cable
from the lamp to the outer connec-
tion on the switch
Function test:
Connect a 9 volt battery and switch
on the lamp which should light
Finally glue in the shelf (e)
Dia.13
15. Glue the back wall (h)on the shelf
(e) as shown and the side parts
(b+c) (Dia. 14)
h
Dia. 14
16. Glue the front (n) in place as shown
(Dia.15)
Finished!