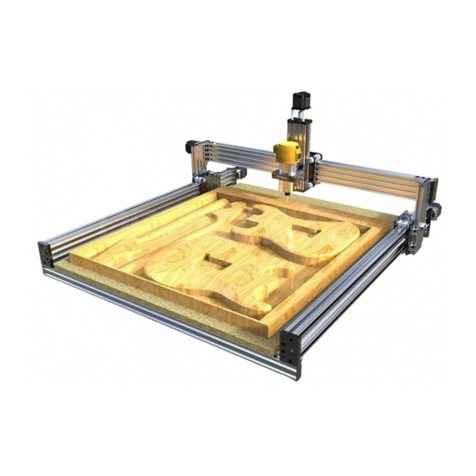
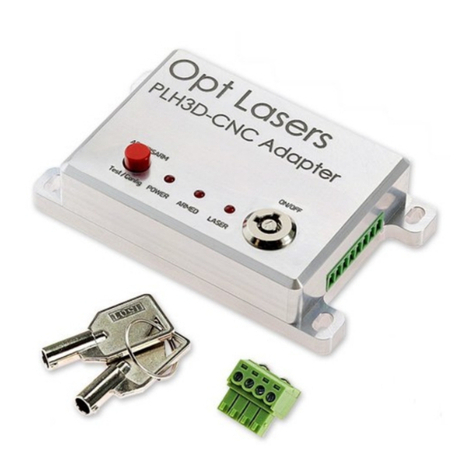
Opt Lasers PLH3D 6W-XF Guide


1
Table of Content:
1. Introduction.................................................................................................................................................2
Included Parts................................................................................................................................................3
Basic Safety...................................................................................................................................................5
Technical data................................................................................................................................................6
2. Setup Hardware .........................................................................................................................................7
Mounting Setup..............................................................................................................................................7
Wiring Setup..................................................................................................................................................9
3. Setup Software.........................................................................................................................................12
Test Fire the Laser.......................................................................................................................................12
Firmware Settings: Make a Backup..............................................................................................................13
Firmware Update .........................................................................................................................................14
Firmware Configuration................................................................................................................................15
4. LightBurn: Setup and Configuration..........................................................................................................16
Device Setup ...............................................................................................................................................16
5. Usage and Operation: Software and Hardware ........................................................................................20
Basic Safety Guidelines...............................................................................................................................20
Basic Operation Guidelines..........................................................................................................................20
Common Cutting Parameters.......................................................................................................................20
6. LightBurn: Basic Usage............................................................................................................................21
Laser Operations .........................................................................................................................................21
Image Types.............................................................................................................................................21
Vector Engraving......................................................................................................................................21
Raster Engraving......................................................................................................................................21
Preform Engraving....................................................................................................................................22
7. GRBL Firmware Update (Needed for LaserMode)....................................................................................27
Preparation..................................................................................................................................................27
Backup/Export..............................................................................................................................................27
Flashing.......................................................................................................................................................28
8. CNCjs.......................................................................................................................................................29
Software Setup ............................................................................................................................................29
Software Usage ...........................................................................................................................................29
9. Opt Lasers Software Usage......................................................................................................................32
Opt Lasers G-Code Generator.....................................................................................................................32

2
1.Introduction
This sub-assembly is a high-power engraving laser head with thermal protection and a professional high-speed
driver. Its design ensures that the head doesn’t require any additional cooling. The fan and airflow design make
it perform as a fully customized air nozzle protecting lens from dirt and cooling the laser head. This sub-
assembly takes advantage of a PLHD 3D 6W driver which ensures proper function of the laser head while
protecting the laser diode from overheating.
There is an automatic thermal cutoff where at 45°C the laser head switches off. A turn to adjust collimating lens
allows you to easily change the beam focus distance. Air flow from the fan is designed to keep the lens clean
during operation. You can use two type of lens with our PLH3D laser heads. G2 lenses are popular because of
the efficiency but efficiency is not necessarily the most important parameter. While laser engraving, power
density is more important –unfortunately G2 lenses do not provide as small beam spot (while focused) as
most three element lenses. The three-element lens though it causes a bigger optical power loss, allows you to
obtain a smaller beam spot. This helps to obtain a higher power density to area ratio, while also giving the
added benefit of a thinner cutting path.
The choice is up to customer’s requirements, since in some situation it is better to use G2 lens and sometimes
three elements lens. This laser head allows you to cut or engrave materials such as rubber, wood, paper,
leather, plastic, cardstock and many other. Thanks to full analog power modulation it is possible to engrave in
shades of grey or change the output power during turns. The same effect can be achieved by using PWM
signal which is fully compatible with PLH3D driver. High speed modulation (up to 100 kHz) allows to use high
movement speed during engraving even complicated patterns.
This module is using our brand new NUBM44 450nm diode (capable of 6W) which is the strongest available on
market blue laser diode. Our recommended power supply units are 12V or 24V with current capacity at least
1.5A (24V PSU), 2.5A (12V PSU).
The lifetime of laser diode given by manufacturer is 10000 hours. There also an optional additional aluminum
holder which allows easy mounting of the engraving laser head onto your gantry of choice that can be
purchased.

3
Included Parts
PLH3D-6W-XF Engraving Laser Head
PLH3D-6W LaserDock Docking Station
PLH3D Series Adapter for X-Carve Machine
PLH3D-6W Nozzle - 43mm Spindle Adapter
450nm Laser Safety Goggles
PLH3D Lens Regulator

4
X-Carve Mount for PLH3D-Series
Collimator 400-700nm
12V 3.5A power supply. Includes adapters for wall plugs.

5
Basic Safety
Only person with specialized training and appropriate laser safety knowledge can
use and maintain the laser head. The laser head operator must be aware of laser
radiation hazard.
While laser head is operating protection Laser Glasses designed for 190 –540 nm
(OD 7+) should be used. Make sure that all personnel in the same room worn
protection glasses.
Eye exposure to the direct or diffusely reflected laser beam is a hazard. The laser
head beam may cause permanent eye damage.
Skin exposure to the laser beam is a hazard. The laser beam may cause serious
skin burns. Laser beam may easily burn cloth.
It is possible to get serious injury while using this product or being in the vicinity of
an individual using it. Improper use of the laser head can result in injury or death.
Flammable substances exposure to the laser beam may pose fire hazard. The laser
head operation in an explosive atmosphere may be dangerous. The working area
must be well ventilated. During the operation laser beam may ignite gases or
flammable liquids.
Be aware of poisonous and deadly gases which are released while engraving or
cutting some synthetic materials. Precautions must be taken.
Do not engrave or cut any kind of material that contains vinyl, or material with a
similar chemical composition. Such material is corrosive and deadly dangerous.
Before making any adjustments, changing accessories or performing
maintenance, the laser should be powered off and disconnected from the power
supply and CNC main board.
The laser head must be properly mounted to a rigid body such that it cannot be
moved unintentionally. Unintentional move of the laser head is dangerous.
The unauthorized personnel must have no access to the system into which the laser
head is integrated. The laser head must be stored out of the reach of children.
Untrained persons are not allowed to operate, maintain and observe operation of
the laser head.
Specular reflection materials should not be placed in front of operating lasers
head. Remember, diffused reflection of the laser beam is uncontrolled and may
pose hazard to eye.
Appropriate shielding should be used around the system into which the laser head
is integrated. The system in which laser head is used must be equipped with key
switch and safety interlock.
Responsibility of use or misuse belongs to the end user. Tomorrow’s System and its affiliates accept no
responsibility for use or misuse by the user. If you may not be able to use this product properly, we
recommend that you do not begin use or cease use immediately.

6
Technical data
1Since the working distance and lens choice can both have a slight effect on the amount of power from the laser head, it is difficult to
specify an exact power value.
“Laser Off” state is <2 V. “Laser On” state is 3 – 24V.
2 To use a PSU with voltage outside of this range, see the available accessories on our website.
We also offer a 12V power supply.
Optical Specifications, PLH3D-Series1
High-Resolution
Lens2
High-Efficiency
Lens3
Recommended Working Distance4
20 –120 mm
25 –80 mm
Beam Spot Width
0.1 mm
0.15 mm
Beam Spot Height
0.1 –0.5 mm
0.2 –0.6 mm
Example Focused Beam Spot Size,
d = 80 mm (3.2”)
0.1 x 0.3 mm
(0.004” x 0.012”)
0.15 x 0.6 mm
(0.006” x 0.024”)
Example Focused Beam Spot Size,
d = 50 mm (2”)
0.1 x 0.2 mm
(0.004” x 0.008”)
0.15 x 0.5 mm
(0.006” x 0.020”)
1 Specifications customizable for OEM customers on request.
2The High-Resolution Lens is a triplet (three-element) lens, f = 8 mm. This lens is recommended for applications requiring a more circular
beam spot, higher power density or medium to long working distance.
3 The High Efficiency Lens is an aspheric lens, f = 4 mm. This lens is recommended for applications requiring a higher power when it is
practical to use a shorter working distance.
4Working distance is adjustable. The focused beam spot size depends on focal distance; shorter focal distance results in a smaller focused
beam spot size
Basic Specifications
PLH3D-6W-XF
Laser Diode Optical Power1
6 W
Dimensions of Laser Head
(L x W x H)
40 x 55 x 78 mm
(1.6 x 1.7 x 3.1 in.)
Weight of Laser Head, Typ.
210 g (7.4 oz.)
Flow Rate of Fan
43 m3/h (25 CFM)
Fan Noise
58 dBA
Mounting Hole Pattern
4 Holes, 24 x 15 mm
(0.94 x 0.59 in.)
Mounting Hole Type
M3 x 0.5 x 4.5 mm
Ambient Temperature Range
(Operating)
0°C to 45°C
(32 °F to 113°F)
Electrical Specifications
PLH3D-6W-XF
Modulation Input 1
Analog/TTL/PWM,
0 –5 V
Modulation Input 21
TTL/PWM 0 –24 V
Recommended PWM Base Frequency
5 –10 kHz
Max. Modulation Bandwidth
30 kHz
Input Impedance of Mod. In. 1 and 2
>1 k-Ω
Power Supply Unit Voltage2
12 –24 V
12 V PSU Min. Current
2.5 A
24 V PSU Min. Current
1.25 A
Cable Length, Typ.
14 cm (5.5 in.)
Wire Area (Gauge)
0.34 mm2(22 AWG)
Max. Power Consumption
30 W

7
2.Setup Hardware
To mount the PLH3D-6W Series laser head, following tools are required:
1. Small flathead screwdriver
2. Hex Key H2.5
3. Hex Key H3
Note: Items will arrive wrapped in packaging material used to protect the hardware is transit during shipping.
Be careful when removing/unwrapping the components from their packaging. It’s advised not to use a box
blade or razor blade to unwrap or open the packaging to minimize the risk of nicking or cutting a cable.
Mounting Setup
1. Install Opt Lasers PLH3D-6W Series X-Carve Mounting Plate onto the X-Carve Spindle Holder.
There are two primary ways to install the Mounting Plate to the Spindle Holder, and one less conventional way
that is compatible with the Inventables X-Carve Dust Collection System.
Mounting Option 1(recommended)
Mounting Option 2
Mounting Option 3
Mounting Plate installed on to the Accessory
mount of the Spindle Holder. This is the most
common way to mount the laser module.
Mounting Plate installed on to the clamping
side of the Spindle Holder.
This option is compatible with the Inventables X-
Carve Dust Collection System.
3D print this X-Carve Laser Mount for Opt Lasers
PLH3D 6W Laser,
2. Install Docking Station
Install Docking Station into Mounting Plate / Holder and Laser Module if you have it. Install the Docking
station base onto the Mounting Plate / Holder.

8
Install Docking Station onto Laser Module. Be sure to check screws length when installing.
3. Test Mounting
The docking station should snap into place with the magnets.

9
Wiring Setup
1. Unpackage the Opt Lasers PLH3D Series Adapter, cut the zip ties.
2. Connect the 2 core wire Adapter inputs to the spindle outputs on your X-Controller.
○Connect the Brown wire to "Spindle (PWM)".
○Connect the White wire to "GND".
3. Open the cable drag chain on the X-Carve.
○Use a small flathead screwdriver to open the cable chain.

10
4. Feed the 5-core wire from the Adapter through the entire drag chain. Feed the wire all the way to the
Mounting Plate / Holder on the spindle mount.
○Make sure that there is enough wire when the Z-Axis is lowered all the way.
5. Close the cable drag chain on the X-Carve.
6. Insure that the pinout for the Docking Station connector is correct on the
○Laser Module
○Adapter Mounting Plate (on spindle mount)
NOTE: The pinout for the Adapter Mounting Plate / Holder Docking Station should mirror the
Laser Modules pinout.
7. Attach the laser module to the spindle mount.

11
8. Put on your safety glasses and ensure nothing unintended is in the path of your laser.
9. Ensure that the Adapter is Off. Connect Power Supply to the Adapter.
10. Turn on your Adapter, the switch should glow red, and the fans on the laser module should spin-up.
11. Done, ready to engrave.
NOTE: The laser should NOT produce a beam / spot at this time.
We have to send the laser a signal to fire. This is done in the following section.

12
3.Setup Software
This section of the guide will show you how to backup your GRBL Settings, update your GRBL Firmware, and
make some GRBL Settings changes. This guide will use Inventables Easel to do all of this. However, there are
alternatives. Insure the Easel Drivers are Installed, and your machine is connected to your USB port.
Test Fire the Laser
Be sure to have your Laser Safety Glasses / Goggles on for this step, or whenever you have your laser powered.
A. Goto and Sign into: Easel ( http://easel.inventables.com )
■You might have to create an account if you have not yet.
B. In a new or existing Project,
■Goto: Easel > Machine > Advanced
C. Click on "Machine Inspector"
D. In Machine Inspector
■Fire the Laser.
Be sure everyone in the area has Laser Safety Glasses / Goggles on for this step!
1. Scroll to "Console".
2. Paste: "$32=0", and press enter. Insure that Laser Mode is Disabled.
3. Paste: "M3 S1", and press enter. THIS WILL FIRE THE LASER
a. Laser should fire at its lowest power, if it is powered (fan spinning)
4. Paste: "M5", and press enter.
a. This will stop firing the laser.
■Confirm / Note PWM Min & Max Settings, and that Laser Mode is disabled.
1. Scroll to "Settings" and take note of the values of each setting.
2. The settings should be something similar to this. This is just an example
Setting
Description
$30=12000
Maximum spindle speed / RPM
$31=0
Minimum spindle speed / RPM
$32=0
Laser-mode enable, Boolean
3. NOTE: Insure that Laser Mode is disabled "$32=0".
a. Disable Laser Mode by pasting "$32=0" into Console and pressing enter.
b. While Laser Mode is enabled ($32=1), your laser will not fire unless it is
moving. Laser Mode alters the output based on the feed rate.
4. NOTE: With the above settings (Laser Min / Max) = (Spindle "M3 S" 0 / 12000)

13
These settings directly relate to and dictate the laser Min & Max output value.
Firmware Settings: Make a Backup
Before we update the GRBL firmware it’s a good idea to backup your settings.
A. Goto and Sign into: Easel ( http://easel.inventables.com )
B. In a new or existing Project,
■Goto: Easel > Machine > Advanced
C. Click on "Machine Inspector"
D. Copy all the text in the "Settings" section and save to a text file in-case you need to reference
and restore settings. These setting are your GRBL Settings.
■Example Settings
Settings
Description
$0=10
Step pulse time, microseconds
$1=255
Step idle delay, milliseconds
$2=0
Step pulse invert, mask
$3=4
Step direction invert, mask
$4=0
Invert step enable pin, Boolean
$5=0
Invert limit pins, Boolean
$6=0
Invert probe pin, Boolean
$10=15
Status report options, mask
$11=0.020
Junction deviation, millimeters
$12=0.002
Arc tolerance, millimeters
$13=0
Report in inches, Boolean
$20=1
Soft limits enable, Boolean
$21=1
Hard limits enable, Boolean
$22=1
Homing cycle enable, Boolean
$23=3
Homing direction invert, mask
$24=25.000
Homing locate feed rate, mm/min
$25=800.000
Homing search seek rate, mm/min
$26=250
Homing switch debounce delay, milliseconds
$27=1.000
Homing switch pull-off distance, millimeters
$30=1000
Maximum spindle speed, RPM
$31=0
Minimum spindle speed, RPM
$32=0
Laser-mode enable, Boolean
$100=40.000
X-axis travel resolution, step/mm
$101=40.000
Y-axis travel resolution, step/mm
$102=188.976
Z-axis travel resolution, step/mm
$110=8000.000
X-axis maximum rate, mm/min
$111=8000.000
Y-axis maximum rate, mm/min
$112=500.000
Z-axis maximum rate, mm/min
$120=250.000
X-axis acceleration, mm/sec^2
$121=250.000
Y-axis acceleration, mm/sec^2
$122=25.000
Z-axis acceleration, mm/sec^2
$130=770.000
X-axis maximum travel, millimeters
$131=780.000
Y-axis maximum travel, millimeters
$132=94.000
Z-axis maximum travel, millimeters

14
Firmware Update
There are a few ways to update the firmware on your X-Controller / GRBL Shield.
See the Advanced Users >: GRBL Firmware Update section for more information on other methods.
A. Goto and Sign into: Easel ( http://easel.inventables.com )
B. In a new or existing Project,
■Goto: Easel > Machine > Advanced
C. Backup Settings
■In Machine Inspector
1. Scroll down to "Settings"
2. Copy all the contents to a text file and save in-case you need it.
D. Update Firmware
■Click on "Upload Firmware"
■NOTE: If you are not able to click the Upload Firmware option, make sure that:
1. Easel Drivers are Installed
2. Make sure your machine is connected to your USB port.
3. Stop any programs that also are automatically using serial ports, like MakerWare.
4. If you have Easel open in any other browser tabs or windows, try closing them
■Firmware version should be 1.1f or higher.
E. After any Firmware Update, check that you check that your machine is working properly.
Firmware updates can change settings. In the following section of this guide we will cover
"Check your Current Settings".
■If you are still having issues getting your machine to behave as expected, go through the
X-Carve Machine Setup.

15
Firmware Configuration
Lastly some settings need to be confirmed / changed to make sure GRBL will output the correct power.
A. Go to and Sign into: Easel ( http://easel.inventables.com )
B. In a new or existing Project,
■Go to: Easel > Machine > Advanced
C. Click on "Machine Inspector"
D. In Machine Inspector
■Check your Current Settings.
1. Scroll down to "Settings"
2. Check your current settings against any
backups of your settings you might have.
3. If you have settings you need / want to
change, paste them into the console. If
accepted, you will get an "ok" in reply.
4. If you are still having issues getting your
machine to behave as expected, go through
the X-Carve Machine Setup.
■Configure / Note PWM Min & Max
1. Scroll down to "Console"
2. Paste in the following settings one at a time.
Press Enter after each entry. You should get
an "ok" in response after each entry.
3. NOTE: While Laser Mode is enabled
($32=1), your laser will not fire unless it is
moving. This because laser mode alters the
output based on the feed rate.
4. NOTE: If your Router / Spindle is controlled
by GRBL PWM, then disable laser mode
before you carve / mill anything. Laser Mode
can be disabled with "$32=0", and enabled
with "$32=1". (Some users might need to set:
$30=12000)
Setting
Description
$30=1000
Maximum spindle speed / RPM
$31=0
Minimum spindle speed / RPM
$32=1
Laser-mode enable, Boolean

16
4.LightBurn: Setup and Configuration
Copyright (c) 2018, LightBurn Software, LLC
●LightBurn Documentation (GitHub)
●LightBurn Video Tutorials
LightBurn is the recommended software for laser engraving.
There are other options if you decide not to use LightBurn.
You are not limit to just this software for generating your G-Code and sending it to your CNC Machine.
See the Advanced Users section of this manual once you are confident and feeling adventurous.
Device Setup
1. Download LightBurn.
2. Install LightBurn.
○Windows may ask if you trust the software, as LightBurn is not currently digitally signed.
3. Launch LightBurn.
○macOS may require that you:
■Go to > System Preferences > Security and Privacy > General.
■Click "Open Anyway".

17
■Click "Open".
4. Device Setup
The first time that you launch LightBurn you will be promoted to setup your device (laser
engraver). See LightBurns documentation for additional information.
○Select "GRBL".
○Select "Serial/USB".
○Input the name of your device
■Example: "X-Carve (GRBL)".
○Input the X-Axis Length, and Y-Axis Length.
■This is the max travel in the X axis and Y axis.
●You Can look up your X-Carves max travel here at Inventables Support.
○1000mm X-Carve: [ X-Axis = 770mm ], [ Y-Axis = 780mm ]
○750mm X-Carve: [ X-Axis = 550mm ], [ Y-Axis = 550mm ]
○500mm X-Carve: [ X-Axis = 300mm ], [ Y-Axis = 300mm ]
●Also, Reference your GRBL settings by sending "$$" to view your max travel.
○The example below is for the 1000mm X-Carve
○$130=770.000 (X-axis maximum travel, millimeters)
$131=780.000 (Y-axis maximum travel, millimeters)
○Set the Zero Point to Front Left.
○Review settings and Click Finished.

18
○Make your new device the default and click OK.
5. Additional Device Settings
The bellow settings are here to get you the maximum performance out of your Opt Laser.
Depending on whether or not you updated your GRBL firmware and GRBL settings
○GRBL v1.1f, v0.9c and newer
■LightBurn > Edit > Device Settings
●G-Value Max: 1000 (GRBL: $30=1000)
●Enable Z-axis
●Relative Z moves only
●Fast Whitespace Scan: 8000 mm/min
●Enable Laser Fire Button
○GRBL v0.9j and older, if GRBL setting "$30" (Maximum spindle speed / RPM) can't be altered.
■G-Value Max
GRBL v0.9j and older does not have the ability to change the set Spindle PWM range.
There are also some cases, like when your spindle is controlled by this value, and need
to be set in software.
Because of this we will have to change a setting in LightBurn.
■LightBurn > Edit > Device Settings
●G-Value Max: 12000
●Enable Z-axis
●Fast Whitespace Scan: 8000 mm/min
●Enable Laser Fire Button

19
Table of contents
Other Opt Lasers Engraver manuals