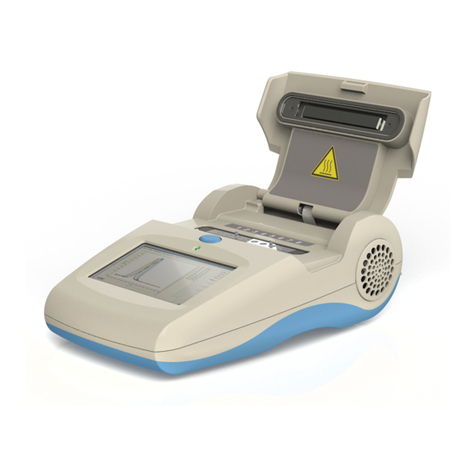
Optigene Genie II User manual

User Manual
(Instrument Software Version v2.34.3)

Unit 5, Blatchford Road
Horsham
West Sussex
RH13 5QR
United Kingdom
Tel: +44 (0) 1403-274980
Fax: +44 (0) 1403-271017
www.optigene.co.uk
If you have any feedback or comments about the instrument please email:
feedbac[email protected]
Information in this document is subject to change without notice.
OptiGene Ltd. assumes no responsibility for any errors that may appear in this document. This document is believed
to be complete and accurate at the time of publication.
In no event shall OptiGene Ltd. be liable for incidental, multiple, or consequential damages in connection with or
arising from use of this document.
Genie® II and its design is a registered trademark of OptiGene Ltd. or its subsidiaries in the UK and other countries

SAFETY NOTICES ................................ 3
SUPPORT ............................................ 6
How to obtain support....................... 6
Supported consumables .................... 6
BOX CONTENTS .................................. 7
SITE PREPARATION ............................ 8
How to set up Genie® II ..................... 8
Connections ....................................... 9
Opening & Closing the Lids .............. 10
Inserting Tubes ................................ 10
Battery ............................................. 10
Battery monitor ............................... 11
Screen Brightness Control ............... 12
USER INTERFACE .............................. 13
Genie® II Welcome Screen ............... 13
Main Menu ...................................... 14
Toolbox ............................................ 14
Colours ......................................... 14
Buttons......................................... 15
Power ........................................... 15
Utilities ......................................... 16
Run ................................................... 21
Quick Start ................................... 23
Profile Screen ............................... 23
To create a new profile ................ 23
To load a saved profile ................. 24
Active ............................................... 28
Profile .......................................... 28
Temperature ................................ 28
Amplification ............................... 29
Anneal .......................................... 29
Results ......................................... 30
Additional Options ....................... 33
View ................................................. 36
GENIE RESULT CALLING ................... 39
Overview .......................................... 39
Result Calling Interface .................... 39
Target parameters ....................... 40
Regions of interest ....................... 42
Result Definitions ........................ 48
Overall Result .............................. 51
CONNECTING TO EXTERNAL DEVICES
......................................................... 53
Pendrive ........................................... 53
Wired Connection ............................ 53
Genie® II Software updates ............. 56
GENIE® II TECHNICAL SPECIFICATION
......................................................... 58
Table of Contents

Version 1.07
3
SAFETY NOTICES
Please read the following notices carefully before using
Genie® II.
The Genie® II is specifically designed to run any isothermal amplification method that employs target detection
by fluorescence measurement. Genie® II will detect all dyes that can be excited from a blue light source and with
an emission above 510 nm. Further uses include enzyme kinetic analysis and protein denaturation analysis using
fluorescent dyes.
The equipment supplied has been designed to be completely safe to use. However to avoid any risk to the safety
of the equipment, operator, or anybody in the vicinity of the equipment, please read this chapter before
unpacking and using the instrument. If there is any doubt as to the correct use of the equipment contact the
vendor.
Notices
Using the instrument in a manner not specified by OptiGene may result in personal
injury or damage to the instrument and the protection provided by the equipment
may be impaired.
Always ensure that the surface on which the instrument is placed is level and stable
and will not cause the instrument to topple over. Ensure that the surface is suitable for
the weight and size of the instrument. If the instrument is dropped it may be
damaged.
The instrument should never be lifted by its covers. Always ensure that the base or
sides are used as the lifting point.
Chapter

Version 1.07
4
The instrument is electrically powered. Please ensure that the correct voltage settings have
been applied before applying power to the instrument. If in doubt consult a qualified
electrician. The instrument has a rating label affixed to the rear. Please consult this if
needed.
Always disconnect the equipment before moving or removing any guards or covers.
Switch off at the mains, remove the mains plug from the wall socket and remove the
cable from the inlet socket on the rear.
While every effort has been made to protect the inside of the instrument against
splashes, the instrument carries no IP rating. If fluids are spilt on the instrument they
may cause damage and cause an electrical hazard.
If a spill occurs, remove power from the instrument. Do not touch the instrument or
any fluid flowing from it while it is connected to the mains supply. Always follow local
health and safety guidelines.
Normal safe local operating standards should be applied at all times. The warnings above are for guidance only.
Please consult the instrument supplier if there is any doubt.
Disconnection Method
Genie® II is disconnected by removal of incoming mains power source to the
unit. Following disconnection the unit should be left for a period of at least 5
minutes before any internal assemblies are removed or examined.
When in use the heating blocks and heated lids are hot, so allow to cool before
touching the surfaces.
Safe removal of fluids from Genie® II will depend on the chemistry used. This will
also require knowledge of the fluids used in the system to adhere with local health
and safety and COSHH regulations. If in doubt, consult the person responsible for the
equipment in the laboratory.

Version 1.07
5
Cleaning Method
The Genie® II can be disinfected using the following procedure. This same procedure can be used as a safety
measure if this equipment is routinely exposed to bio-hazardous materials.
1. Wipe all outside surfaces of the Genie® II with a 10% bleach solution.
2. After 10 minutes wipe all the same surfaces with a 70% ethanol solution.
CAUTION: Do not allow any of the bleach or alcohol solution to enter the wells as this can cause damage.

Version 1.07
6
SUPPORT
HOW TO OBTAIN SUPPORT
For the latest services and support information go to http://www.optigene.co.uk/support.htm
IMPORTANT! When directed to do so, contact OptiGene Ltd. to schedule maintenance or calibration of
a Genie® II instrument.
IMPORTANT! If a Genie® II instrument is kept in a very cold environment, the battery will not begin
charging until the internal temperature has reached 15°C.
SUPPORTED CONSUMABLES
IMPORTANT! Genie® II uses a proprietary tube strip that maximises optical and thermal efficiencies.
Other tubes and strips will not fit.
IMPORTANT! Forcing non-supported consumables will cause damage to the instrument and invalidate
the warranty.
IMPORTANT! The shape of the tubes is such that they will only fit in one way round. The locating pins
on the block have corresponding holes in the strips.
Chapter

Version 1.07
7
BOX CONTENTS
The following is a list of contents in the box for Genie® II:
Genie® II instrument
Power supply
Power lead
USB connection lead
Stylus
USB memory stick containing Genie® Explorer and this manual as a ‘.PDF’ file
Chapter
Chapter

Version 1.07
8
SITE PREPARATION
HOW TO SET UP GENIE® II
The laboratory bench should be level and stable. The instrument should be placed centrally on the lab bench
and the surfaces surrounding the instrument must be clear of obstructions at all times.
Care must be taken not to unduly restrict the air at the front of the instrument and the outlet vents at the rear.
Restricting airflow may impede operation and could affect performance.
Electrical points should be close to the instrument to avoid injury from trailing wires.
It is recommended that the instrument is kept away from sinks and other wet areas. Genie® II is an electrical
instrument and care should be taken not to operate if there is a risk of water damage.
Chapter
Chapter

Version 1.07
9
CONNECTIONS
Genie® II is ready to use straight out of the box without any external connections. It can be operated standalone,
taking power from its internal battery. In order to charge the battery or to use Genie® II with a computer or
external devices, such as a printer, barcode scanner or pendrive, some connections must be made.
Connect the power supply plug into the back of the instrument and then attach the power cable to the supply.
Located at the rear of the instrument is an on/off power switch. When in the on position Genie® II will power up
and progress through its checks.
POWER INLET USB (TO PC) POWER SWITCH USB (TO
EXTERNAL
DEVICES)
USB (TO
EXTERNAL
DEVICES)

Version 1.07
10
OPENING & CLOSING THE LIDS
Gently lift the lids upwards. Close the lids by lowering gently.
Care must be taken to ensure that objects are not obstructing the lids when trying to
close it and under no circumstances should the lids be forced open or closed.
INSERTING TUBES
IMPORTANT! Genie® II uses a proprietary tube strip that maximises optical and thermal efficiencies.
Other tubes and strips will not fit.
IMPORTANT! The shape of the tubes is such that they will only fit in one way round. The locating pins
on the block have corresponding holes in the strips.
BATTERY
Genie® II has an internal rechargeable battery. When Genie® II is delivered the battery should be fully charged
by the user.
The battery monitor is on the status bar next to the block temperature reading.
To see more details on the battery, press the battery icon and the monitor will appear as a pop-up in the bottom
right hand corner of the screen. To remove the pop-up press on the status bar indicator again.
Battery monitor pop-up
IMPORTANT! Genie® II’s internal battery will only charge when the instrument is plugged into mains
electricity and the instrument is switched on. Genie® II can be placed into standby using the power button in
the bottom left corner. The LED above the display will glow brightly until the battery is fully charged. At this
point Genie® II can be switched off using the switch on the rear.

Version 1.07
11
Note: If this button is pressed during a run, Genie® II will not enter standby.
When in standby, normal operation can be resumed by pressing anywhere on the screen.
BATTERY MONITOR
The battery status can be seen but
there is no pop-up.
Here the pop-up shows that the
battery is currently charging.
Here the pop-up shows that the
battery is fully charged.
Here the pop-up shows that the
instrument is discharging.

Version 1.07
12
SCREEN BRIGHTNESS CONTROL
Next to the battery icon is the brightness control.
Touch the icon and a slider will appear on the right hand side of the screen. Move the slider to the desired
position. Press the icon again to remove the slider.
It is not recommended to set the
brightness at 100% for long periods
of time, as this will significantly
decrease battery life.

Version 1.07
13
USER INTERFACE
Genie® II uses a touchscreen for viewing and inputting data.
Touch the screen gently and press the appropriate keys when required. The touch screen can be operated while
wearing protective gloves or by using the stylus included with the instrument.
IMPORTANT! Do not use a pen or any other sharp implements to touch the screen.
GENIE® II WELCOME SCREEN
When switching on, the LED above the screen will be amber in colour. Wait for the light to change to green,
then touch the screen to access the main menu.
Chapter
Chapter

Version 1.07
14
MAIN MENU
To start a predefined run, touch the name of
the assay and it will begin. Alternatively,
touch ‘Other…’ to create a new profile, or
open a saved profile.
To view profiles or data from previous runs
touch the folder icon on the status bar.
To access the toolbox touch the spanner icon
on the status bar.
IMPORTANT! When running for the first time check that the date and time on the status bar are
correct. These can be changed by clicking on the date and time or from the ‘Utilities’ screen in the toolbox.
TOOLBOX
Pressing the spanner icon in the taskbar will load the toolbox.
COLOURS
The background colour and the default
colours of the lines on graphs can be
changed here. Click the background
button or a graph number and then
drag the cursor on the colour chart to
select a colour.
The two small coloured boxes on the
right show the colour that is currently
set (Cur.) and the default (Def.) colour.
Pressing on either will set the colour.
The ‘Grid’ box alters the colour used for
the gridlines on all graph screens.

Version 1.07
15
BUTTONS
Set up the quick start buttons on the
main screen.
Touching ‘…’ will allow the user to
browse the saved profiles on the
instrument and assign that profile to the
corresponding quick start button on the
main screen.
To remove the buttons, untick the box
next to the profile name.
POWER
These settings only apply when battery
powered.
Backlight: An alternative way to set the
backlight power. It is not recommended
to set the brightness at 100% for long
periods of time, as this will significantly
decrease battery life.
Display dim time: how long the
instrument waits without input before
dimming the display.
Display dim level: the brightness level
the instrument will use after the
specified idle time.
Standby time: how long the instrument
waits before turning off the display.

Version 1.07
16
UTILITIES
Date & Time: Set the time and date
within the instrument.
Screenshot: A small yellow, moveable
icon will appear on the screen, which,
when pressed, will take a screenshot of
the current screen. This will be saved
into the CAPTURE directory on the
instrument’s internal memory.
Touchscreen: This will start the
touchscreen calibration (see below).
Lid Sensors: Allows the user to
recalibrate the lid sensors.
Self Test: This will run a diagnostics on
the instrument to see if there are any
problems and report back if there is.
Replay: This will replay a run file as if it
were running in real-time
Update: Allows updating of the
instrument software (See Chapter 7).
Admin: This allows Administrators to set
up different levels of user access as well
as language.
TOUCHSCREEN CALIBRATION
Touching anywhere on the screen with
the exception of ‘Test’ or ‘Skip’ will
invoke the touchscreen calibration.
To check the sensitivity of the screen
press ‘Test’. Any point pressed on the
screen will then be marked.

Version 1.07
17
Calibrate the touchscreen by touching
the target points shown on the screen
(the stylus should be used for this).
It is also possible to run the touchscreen calibration when the instrument first starts. Press and hold down on
the welcome screen for 5 seconds to initiate.
LID SENSORS
Touching ‘Start’ on the screen will start
the calibration.
Follow the instructions at the top of the
screen.
Place Genie on a flat, level table, close
the lid and press ‘continue’.

Version 1.07
18
Follow the instructions at the top of the
screen.
Tilt the whole Genie back, keeping the
rear feet on the table and press
‘continue’
The calibration is complete. The
calibration can be tested by tilting the
Genie in different directions. If done
correctly, the green and blue circles
should remain inside the red circle as it
moves around. Press ‘Okay’ to save the
calibration or Cancel to disregard
changes.
DATE AND TIME
Date: click in the white box for date and
enter in the format DD/MM/YY.
Time: click in the white box for time and
enter in the format HH:MM:SS.
Press ‘Set’ to save or click the cross to
cancel.
SELF TEST

Version 1.07
19
The ‘Self Test’ function allows the
Genie® to check that it is fully working
correctly and check for any faults, and if
so report them to the user who should
send the result back to OptiGene Ltd for
analysis.
Part of this procedure includes allowing
checking of the calibration which can be
run with additional kits from OptiGene
(contact us for more information).
ADMIN
Default language: This sets the default
language of the instrument.
Default access: This sets the default
access when the instrument is turned
on. By default the instrument will be in
Admin mode. In this mode all features
are fully available. When Login Required
is selected, the instrument will not be
able to be used until a user has logged
in.
If any level is selected and the
instrument is restarted. This is the level
that the instrument will default to on
startup.
At end: At the end of a run, if the boxes
are ticked, the Genie will automatically
create a PDF report, a CSV (comma
separated value) file, and print the
result table to the connected printer
(accessory). The separator of the CSV
file can be set between a tab and a
comma, depending on what is required,
and the CSV data can be the results
only, the raw data, all data (including all
signal processing steps) and data
Other manuals for Genie II
1
Table of contents
Other Optigene Laboratory Equipment manuals
Popular Laboratory Equipment manuals by other brands

ThermoFisher Scientific
ThermoFisher Scientific Thermo Scientific Sorvall Legend XF instruction manual

Thermo Electron
Thermo Electron Thermo Spectra-Tech Collector II user manual

Applied Biosystems
Applied Biosystems 7500 Getting started guide

Bruker
Bruker 600'54 Ascend ULH user manual

Iluminarc
Iluminarc LOGIC POE Injector Quick reference guide

SteriFeed
SteriFeed S180 operating manual