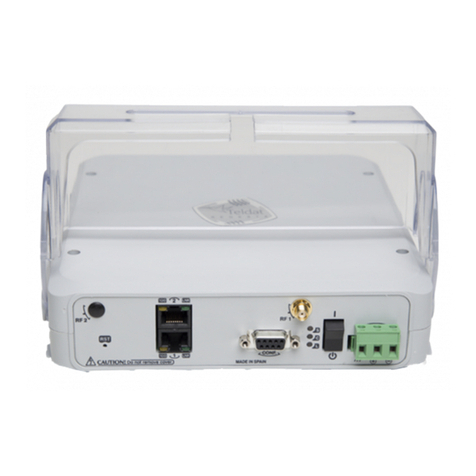
Teldat bintec elmeg Regesta PRO PLC User manual

Regesta PRO PLC
Installation Manual
Copyright© Teldat Dm692-I Version 0.9 1/2019 Teldat S.A.
Teldat S.A. Manual
Regesta PRO PLC 1

Legal Notice
Warranty
This publication is subject to change.
Teldat S.A. offers no warranty whatsoever for information contained in this manual.
Teldat S.A. is not liable for any direct, indirect, collateral, consequential or any other damage connected to the deliv-
ery, supply or use of this manual.
Manual Teldat S.A.
2 Regesta PRO PLC

Table of Contents
I Relateddocuments................................. 1
Chapter1 Aboutthismanual ................................. 2
1.1 Supporteddevices................................... 2
1.2 Who should read this manual? . . . . . . . . . . . . . . . . . . . . . . . . . . . . . . 2
1.3 When should this manual be read? . . . . . . . . . . . . . . . . . . . . . . . . . . . . 2
1.4 Whatisinthismanual?................................. 2
1.5 Whatisnotinthismanual? ............................... 2
1.6 How is the information organized? . . . . . . . . . . . . . . . . . . . . . . . . . . . . 2
1.7 Technicalsupport.................................... 2
Chapter 2 Regesta PRO PLC router . . . . . . . . . . . . . . . . . . . . . . . . . . . . . 4
2.1 Features........................................ 4
2.1.1 Powersupply ..................................... 4
2.1.2 Hardwaremonitoring.................................. 4
Chapter 3 Components and power supply . . . . . . . . . . . . . . . . . . . . . . . . . . 6
3.1 Components...................................... 6
3.1.1 Frontpanel ...................................... 6
3.1.2 Rearpanel....................................... 8
3.1.3 Undersidepanel.................................... 8
3.1.4 Upperpanel...................................... 9
3.2 Assembly...................................... 10
3.2.1 Attaching the DIN rail mounting bracket . . . . . . . . . . . . . . . . . . . . . . . . . 10
3.2.2 Attaching the safety cover . . . . . . . . . . . . . . . . . . . . . . . . . . . . . . . 11
3.3 Powersource .................................... 12
3.3.1 Workplace conditions. Main characteristics . . . . . . . . . . . . . . . . . . . . . . . 12
3.3.2 Connecting the power supply. . . . . . . . . . . . . . . . . . . . . . . . . . . . . . 12
3.3.3 Connecting ..................................... 13
3.3.4 Disconnecting.................................... 13
3.4 RSTbutton ..................................... 13
3.4.1 Restartingthedevice................................. 13
3.4.2 Restoring the factory default settings . . . . . . . . . . . . . . . . . . . . . . . . . . 14
3.5 Connectingthedata.................................. 14
3.5.1 Ethernetport..................................... 14
3.5.2 WWAN antenna connection (RF connectors) . . . . . . . . . . . . . . . . . . . . . . . 14
3.5.3 Connecting the serial ports. . . . . . . . . . . . . . . . . . . . . . . . . . . . . . . 15
Teldat S.A. Table of Contents
Regesta PRO PLC i

3.6 SIMcardinstallation ................................. 16
3.6.1 IdentifyingtheSIMtrays................................ 17
3.6.2 How to install the SIM card. . . . . . . . . . . . . . . . . . . . . . . . . . . . . . . 18
Chapter4 Compliance.................................... 19
4.1 Manufacturerinformation ............................... 19
4.2 Safetywarnings ................................... 21
4.3 WEEEInformation.................................. 21
4.4 REACH....................................... 22
4.5 EC declaration of conformity . . . . . . . . . . . . . . . . . . . . . . . . . . . . . . 22
4.6 CEmarking..................................... 22
4.7 Nationalrestrictions.................................. 23
4.8 Operatingfrequency ................................. 23
Appendix A Technical information . . . . . . . . . . . . . . . . . . . . . . . . . . . . . . 24
A.1 Troubleshooting................................... 24
A.2 Updatingthesoftware................................. 24
A.2.1 Connectingtotherouter................................ 25
A.3 Connectors ..................................... 26
A.3.1 LANconnector.................................... 26
A.3.2 WWAN/Cell connector (female). . . . . . . . . . . . . . . . . . . . . . . . . . . . . 26
A.3.3 Configurationconnector................................ 27
A.3.4 RS-232 serial port connectors . . . . . . . . . . . . . . . . . . . . . . . . . . . . . 27
A.3.5 RS-485 serial port connectors . . . . . . . . . . . . . . . . . . . . . . . . . . . . . 27
A.4 Technicalspecifications................................ 27
A.4.1 PRIMEPLCinterface................................. 28
A.4.2 LANinterface .................................... 28
A.4.3 WWANinterface................................... 28
A.4.4 Configurationinterface ................................ 28
A.4.5 RS-232serialinterface................................ 28
A.4.6 RS-485serialinterface................................ 28
A.4.7 Powersupply .................................... 29
A.4.8 Dimensionsandweight................................ 29
A.4.9 Environmental specifications . . . . . . . . . . . . . . . . . . . . . . . . . . . . . . 29
AppendixB Radioinformation................................. 30
B.1 RF GSM/WCDMA specifications . . . . . . . . . . . . . . . . . . . . . . . . . . . . 30
Table of Contents Teldat S.A.
ii Regesta PRO PLC

I Related documents
Teldat Dm748-I Software Updating.
Teldat Dm781-I Cellular Interface.
Teldat S.A. Related documents
Regesta PRO PLC 1

Chapter 1 About this manual
This is the installation manual for the Regesta PRO PLC router and contains information on how to correctly install
this device in a working environment.
1.1 Supported devices
The information provided in this installation manual only applies to the Regesta PRO PLC router, models 2G / 3G.
1.2 Who should read this manual?
This manual should be read by support personnel who need to install, configure, maintain and monitor the device.
1.3 When should this manual be read?
Read this guide as soon as you are ready to familiarize yourself with the device and its components.
This manual will give you a greater understanding of your new device.
1.4 What is in this manual?
This installation guide contains the following information:
• A description of the features that are available in the Regesta PRO PLC.
• Technical specifications.
• Power supply requirements.
• Connector and LED descriptions.
• Troubleshooting.
1.5 What is not in this manual?
This document does not contain information about the device software or its configuration. For information on how to
configure this device, please see the relevant protocol manuals which can be found at the Teldat website:
http://www.teldat.com
1.6 How is the information organized?
Each chapter focuses on a specific part of the hardware and its components. Technical descriptions and information
about the components can be found in the relevant chapter.
1.7 Technical support
Teldat S.A. offers a technical support service. Firmware can be upgraded on a regular basis for maintenance pur-
poses or to add new features.
Contact information:
Web: http://www.teldat.com
Tel.: +34 918 076 565
Fax: +34 918 076 566
1 About this manual Teldat S.A.
2 Regesta PRO PLC

Chapter 2 Regesta PRO PLC router
2.1 Features
The Regesta PRO PLC router family is a range of IP routers specially designed for use in hostile and extreme envir-
onments. The ruggedized mechanics and special characteristics of these routers, allowing them to resist extreme
temperatures, makes them particularly suited for harsh industrial environments such as oil and gas, power and en-
ergy and water, industrial telecontrol, etc.
The most important characteristic of these routers is that they can allow communication between a virtual concentrat-
or integrated in a management system (i.e., system software that includes a DLMS client) and the smart meters re-
gistered on a PLC PRIME network controlled by the Regesta PRO PLC. In this scenario, the Regesta PRO PLC
works as a Base Node. The main communication method is a TCP transport layer for DLMS, with extensions for op-
timal multiplexing of IEC 61334-4-32 connections (also known as Ticket 67) over a Wireless WAN (WWAN) data net-
work on private or public networks or a LAN connection.The number of smart meters controlled depends on the li-
cense.
The Regesta PRO PLC can also be configured to act as a Service Node. In this case, the Regesta PRO PLC allows
PRIME communications to be transferred over an Ethernet interface using the specifications defined in the PRIME
Auxiliary nodes connection proposal for multi-transformer substations (also known as Ticket 65).
The module design of these routers means they can quickly adapt to the latest WWAN technologies. The Regesta
PRO PLC family supports a wide variety of wireless technologies, including GPRS, EDGE, UMTS, HSDPA, HSUPA,
HSPA+, LTE, CDMA 2000 1xRTT and CDMA Ev-Do. A basic license provides connection through GPRS/EDGE
technology and additional licenses allow technologies with wider bandwidths to be supported. These devices also
come with dual SIM card slots for holding two SIM cards: one active SIM and the other used as backup.
As for LAN networks, these devices incorporate a 10/100 BaseT LAN Ethernet port with a 10KV isolation option.
The RS-232 console port on these devices can be configured as a DCE asynchronous serial communications port
with a maximum speed of 38400 bps and without control signals. The devices can incorporate two additional asyn-
chronous serial ports with a maximum speed of 115200 with DCE RS-232 technology or with 2-4 wire RS-
485/RS-422. The serial port connectors are DB9.
The devices have a clear safety cover fitted to prevent connectors from being touched while the device is running.
Fig. 1: Regesta PRO PLC
2.1.1 Power supply
For further information on the Regesta PRO PLC power supply, please see Power source on page 12.
2.1.2 Hardware monitoring
You can monitor the Regesta PRO PLC hardware through the LEDs on the front panel. The LEDs provide visual in-
formation about the hardware components, indicating whether there is connectivity, data flow, etc.
2 Regesta PRO PLC router Teldat S.A.
4 Regesta PRO PLC

Chapter 3 Components and power supply
This chapter describes the Regesta PRO PLC chassis and its main components. The following sections are in-
cluded:
• Components.
• Assembly instructions.
• Power supply.
• RST button.
• Data connection.
• SIM card installation.
3.1 Components
3.1.1 Front panel
The following image shows the device's front panel:
Fig. 2: Front panel
The front panel components are as follows:
Front panel components
Item Description
A Fast Ethernet Port.
B RST. Reset button. For more information on how the reset button works, please see RST
button on page 13.
C CONF. DB9 connector providing access to the device's local console for configuration and
monitoring purposes. (This connector can also be used as an RS-232 asynchronous DCE
serial port).
D RF2. WWAN antenna connector.
E RF1. WWAN antenna connector.
F I/O. ON/OFF power switch, position I for ON and position O to switch it OFF.
G POWER. Power connection. For further information on the power connection, please see
Power source on page 12.
In addition to the connectors, the front panel also contains a set of LEDs that indicate router status.
3 Components and power supply Teldat S.A.
6 Regesta PRO PLC

3.1.1.1 LEDs
The LEDs are located on the front panel of the router as shown in the following image:
Fig. 3: Front panel LEDs
LED “L” lights up in green while the device is in startup mode. Once the device has started up, the LEDs indicate the
following:
LEDs
LED Associated Inter-
face
Status Description
SCellular interface Green
Amber
SK1 operating SIM. This processes traffic through the carrier
for the SIM installed in this tray.
SK2 operating SIM. This processes traffic through the carrier
for the SIM installed in this tray.
CCellular interface Red
Amber
Green
Cellular interface is unavailable, not installed or not registered.
The device has registered in the network and is in the process
of establishing a PPP protocol connection.
The device is registered, the PPP connection has been estab-
lished, and IP traffic can be sent through the PPP interface.
• Steady: Data is not being transferred.
• Blinking: Data is being transferred.
LCellular interface Green
Yellow
Red
Off
Coverage level above -90dBm.
Coverage level between -90dBm and -100dBm.
Coverage level below -100dBm.
Cellular interface is not active.
UMulti standard seri-
al interface Green
Yellow
Red
Off
Communications established.
Establishing the link.
Port has been initialized.
Port has not been initialized.
PPLC interface Red
Yellow
Green
PRIME PLC interface is not available, not installed or not re-
gistered.
PRIME PLC is running but no SNs are currently detected.
PRIME PLC is running and maintaining a connection to one or
more SNs. PRIME traffic can be sent through the PLC inter-
face.
Teldat S.A. 3 Components and power supply
Regesta PRO PLC 7

• Steady: Data is not being transferred.
• Blinking: Data is being transferred.
EEthernet (LAN) in-
terface Green ON -> Ethernet connection (link) established:
• Steady: Data is not being transferred.
• Blinking: Data is being transferred.
OFF -> Ethernet connection is not established.
3.1.2 Rear panel
The following image shows the rear panel of the Regesta PRO PLC router where you can see the other connectors.
Fig. 4: Rear panel
The following table describes each connector:
Rear panel components
Item Description
A COM1, COM2. DCE RS-232 serial ports or 2-4 wire RS-485/RS-422.
3.1.3 Underside panel
The following components can be found on the underside panel:
3 Components and power supply Teldat S.A.
8 Regesta PRO PLC

Fig. 5: Underside panel
The following components can be found on the underside panel:
Underside panel components
Item Description
A Inserts for attaching a DIN rail mounting bracket. For further information about this
accessory, please see Attaching the DIN rail mounting bracket on page 10.
B Panel containing the product information label. This label contains information on
the device model, MAC, serial number, etc.
3.1.4 Upper panel
The following image shows the the upper panel:
Teldat S.A. 3 Components and power supply
Regesta PRO PLC 9

Fig. 6: Upper panel
The upper casing components are as follows.
Upper casing components
ItemsDescription
A, B, C, D Screws that allow you to disassemble the router’s upper casing.
3.2 Assembly
3.2.1 Attaching the DIN rail mounting bracket
The Regesta PRO PLC comes with a special kit for mounting the device on a DIN rail.
The kit contains a DIN rail mounting bracket that you attach via the threaded inserts on the underside of the device.
The bracket can be secured in one of two positions using the two supplied screws:
3 Components and power supply Teldat S.A.
10 Regesta PRO PLC

Fig. 7: DIN rail mounting bracket: Position 1
Fig. 8: DIN rail mounting bracket: Position 2
3.2.2 Attaching the safety cover
The Regesta PRO PLC has a clear safety cover to prevent the connectors from being touched while the device is
running. The safety cover is not attached to the device when you take it out of the package so you will need to attach
it.
The following image shows you how to attach the safety cover.
Teldat S.A. 3 Components and power supply
Regesta PRO PLC 11

Fig. 9: Attaching the safety cover
3.3 Power source
The Regesta PRO PLC router is powered by an external AC source. The nominal power voltages are 100-240 V AC.
Note
Please read the following instructions carefully before connecting the router!
3.3.1 Workplace conditions. Main characteristics
• Do not place the device among papers, magazines or other elements that could hinder natural air circulation.
• Avoid knocks and/or strong vibrations during operation, transport and storage.
Warning
The electric current in power cables, telephone lines and communication cables is dangerous. To pre-
vent electric shock, be sure to connect and disconnect the cables according to the instructions set forth
in Connecting on page 13 andDisconnecting on page 13 before installing, moving or opening the cas-
ing.
3.3.2 Connecting the power supply
To connect the power supply to the device, please follow the steps outlined in Connecting on page 13.
Warning
To prevent electric shock, residual current circulation and any other unwanted effects that may also dis-
rupt communications, the following is recommended:
All interconnected communication devices should be plugged into THE SAME GROUNDED POWER
OUTLET, which should at the same time be of good quality (lower than 10 ohms).
We recommend connecting all data devices to the same power source regardless of whether the work-
place has an uninterrupted power supply system (UPS), a regulated supply or is independent of other
power supplies (such as lighting, etc.). This will help to prevent malfunctions and premature aging of
the drivers and other components.
3 Components and power supply Teldat S.A.
12 Regesta PRO PLC

3.3.3 Connecting
• Make sure that the router’s power supply switch is in the OFF position (0).
• Ensure that the power supply is NOT connected to either the electricity supply
or the router.
• Connect all data cables.
• Connect the power supply cable to the device.
• Connect the power supply cable to the electricity supply.
• Place the router’s power supply switch in the ON position (1).
• Lower the safety cover.
3.3.4 Disconnecting
• Raise the safety cover.
• Make sure that the router’s power supply switch is in the OFF position (0).
• Disconnect the power supply from the electricity supply.
• Disconnect the power supply from the router.
• Disconnect the data cables.
Fig. 10: Power supply connector
The connector has 2 terminals for powering.
To connect the power to the device, please follow the steps indicated in Connecting on page 13: check that the
power switch is in the OFF position (0) and that the power source is NOT connected to the electricity network; find
the Power Supply connector (located on the front panel) and insert the power cable connector.
3.4 RST button
There is a button labeled “RST” on the front panel of the Regesta PRO PLC router. This button has two functions.
• To trigger a restart.
• To restore the device to factory default settings. All switch ports are assigned with the factory default IP address
192.168.1.1.
The external button is physically protected to prevent it from being accidentally pushed. You will need to use a thin
pointed object to activate it.
3.4.1 Restarting the device
Follow the steps below to restart the device:
(1) Press the RST button. Three LEDs (S, C and L) on the front panel light up in amber to indicate that the device is
in reset mode.
(2) Stop pressing the RST button as soon as the three LEDs on the front panel are lit up.
(3) The device will restart with the S and C LEDs unlit and the L LED in green.
Teldat S.A. 3 Components and power supply
Regesta PRO PLC 13

3.4.2 Restoring the factory default settings
Complete the following steps to reset the device with its factory default settings:
(1) Press the RST button. Three LEDs (S, C and L) on the front panel light up in amber to indicate that the device is
in reset mode.
(2) Keep pressing the RST button. The S LED flashes green while you are pressing the RST button. This state im-
plies that the factory default settings have been restored.
(3) Stop pressing the RST button so that the device can restart.
(4) The device will restart with the S and C LEDs unlit and the L LED in green.
(5) Now that the device has been reset with the factory default settings, you can access it through the IP (the
device's default address is 192.168.1.1 and is accessible from any switch port).
3.5 Connecting the data
The Regesta PRO PLC router has the following data connections.
3.5.1 Ethernet port
The Regesta PRO PLC router incorporates a 10/100 BaseT Ethernet port with automatic MDI/MDIX to connect to a
local area network (LAN). The LED labeled "E" indicates physical connection.
Fig. 11: LAN port
3.5.2 WWAN antenna connection (RF connectors)
The Regesta PRO PLC router has two RF antenna connectors. The antennas are assembled and disassembled by
screwing/unscrewing them into the connectors labeled RF1/RF2 on the front panel of the device.
The RF1 connector is connected to the module’s MAIN connector and the RF2 connector to the AUX connector.
Using these antennas with the Regesta PRO PLC router improves the quality of the signal received and transmitted
by the WWAN module (GPRS, UMTS, HSDPA, HSUPA, etc.).
Fig. 12: WWAN antenna connectors
3 Components and power supply Teldat S.A.
14 Regesta PRO PLC

Note
The WWAN antennas should be connected to the router at all times in order to deliver high-quality per-
formance. All devices in this range have working WWAN interfaces with access to 2G networks
(GPRS/EDGE). Additional licenses must be installed in the device for access to 3G networks
(UMTS/HSDPA/HSUPA) or HSPA+).
If the RF1 and RF2 antennas are connected via extension cables rather than being screwed directly into the router,
they should be separated from each other by a minimum of 7 cm. The maximum recommended distance between
the two antennas is 25 cm.
To achieve optimum performance, install all radio frequency accessories (antennas and cables) as per our recom-
mendations.
We offer a range of accessories (90 degree antenna mounts, exterior antenna mounts, ceiling mounts, extension
cables, etc.) that allow you to install the devices in different locations.
3.5.2.1 Positioning the antenna
Device performance can be significantly influenced by antenna orientation and location with respect to other wire-
lessdevices and radiation sources (such as communication devices, personal computers, etc.).
Antennas transmit and receive radio signals. Performance is also affected by environmental factors (such as the dis-
tance between the device and the base station), physical obstacles and radio-frequency (RF) interference.
In order to receive better coverage, follow the instructions given below:
• Whenever possible, place the antenna away from physical obstacles. Obstacles between the antenna and the
base station degrade the wireless signal. Place the antenna above ground level and direct it towards the nearest
base station.
• Antennas are affected by the density of materials so place them away from walls, metal screens, mirrors, etc.
• Do not place the antenna near columns; these might throw shadows and reduce the coverage area.
• Keep the antenna away from metal pipes such as those used for plumbing, air-conditioning etc.
• Bear in mind that other wireless devices such as telephones, microwaves, etc., can temporarily interfere with
thequality of the wireless signal.
• Installing the antennas in racks alongside communication devices, computers, etc., is not recommended. Use an-
extension cable and place the antenna outside.
The following recommendations are applicable to all wireless devices:
• Do not touch or move the antenna while the device is transmitting or receiving.
• When the antenna is transmitting, do not touch equipment containing devices that radiate very close to, or touch-
ing, any exposed part of the body (particularly face and eyes).
• Do not install the device in areas where the atmosphere is potentially explosive.
• Wireless devices can cause interferences in other devices. Do not use the device in areas where medical equip-
ment is installed.
• In order to comply with the R&TTE 1999/5/EC directive, the device must be at least 15 cm away from a per-
son’sbody when operating.
3.5.3 Connecting the serial ports
Depending on the model, the Regesta PRO PLC can have one or several female DB9 connectors.
3.5.3.1 Console connector as serial port (CONF connector)
The console port can be converted into an RS-232 asynchronous DCE serial port with the following characteristics:
(1) DCE port.
(2) RS-232 norm.
Teldat S.A. 3 Components and power supply
Regesta PRO PLC 15

(3) Maximum speed of 38400 bps.
(4) Only the following signals are available: RxD (pin 2), TxD (pin 3) and GND
(5).
(5) DB-9 connector.
3.5.3.2 Asynchronous serial ports
Some models are equipped with two additional serial ports. These serial ports can be RS-232 or RS-485/RS-422 and
have the following characteristics:
3.5.3.2.1 RS-232
(1) DCE port.
(2) Maximum speed of 115200 bps.
(3) All control signals are available.
(4) DB-9 connector.
3.5.3.2.2 RS-485/RS-422
(1) 2/4 wires configurable through software.
(2) Bus termination configurable through software.
(3) Maximum speed of 115200 bps.
(4) DB-9 connector.
Fig. 13: Asynchronous serial connectors
3.6 SIM card installation
You may need to insert at least one SIM card in the Regesta PRO PLC before you can use the WWAN interface.
Some countries have services (CDMA) that do not require SIM cards.
The Regesta PRO PLC has two SIM trays located inside the device casing labeled SK1 and SK2.
Where installations require only one SIM card, the card should be installed in the main SK1 tray.
Warning
Never install the SIM cards when the device is switched on.
Always disconnect the device from the main power supply before installing the SIM cards.
Always disconnect the device before removing the casing to access the trays.
Please protect yourself against electrostatic discharge (ESD) when inserting the SIM cards.
Do not touch the SIM card connectors.
You will need to open the upper casing of the device in order to access the SIM tray. To do this, undo the fourscrews
on the top panel of the Regesta PRO PLC:
3 Components and power supply Teldat S.A.
16 Regesta PRO PLC
Table of contents
Other Teldat Network Router manuals
Teldat
Teldat M1 User manual

Teldat
Teldat M1 User manual
Teldat
Teldat C User manual
Teldat
Teldat Atlas-i70 User manual

Teldat
Teldat H1 RAIL Series User manual
Teldat
Teldat RS300 Series User manual

Teldat
Teldat Connect-4GePlus User manual
Teldat
Teldat H2 RAIL User manual

Teldat
Teldat RXL15000 User manual

Teldat
Teldat G1N User manual
Teldat
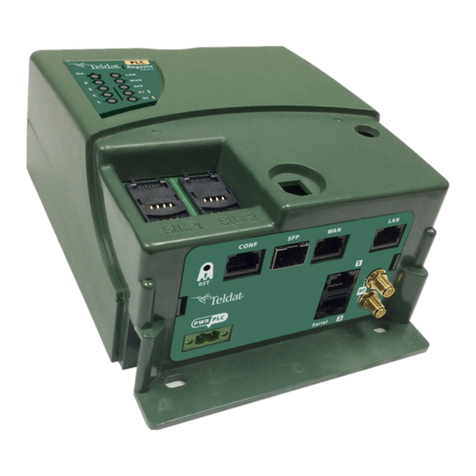
Teldat Regesta Smart PLC User manual
Teldat
Teldat C1+L User manual
Teldat
Teldat Connect-FW5G User manual
Teldat
Teldat TLDPV00A1 User manual

Teldat
Teldat Regesta Smart PRO User manual
Teldat
Teldat ATLAS 150 User manual
Teldat
Teldat RS1800 Series User manual
Teldat
Teldat C+ Series User manual
Teldat
Teldat iM8 User manual
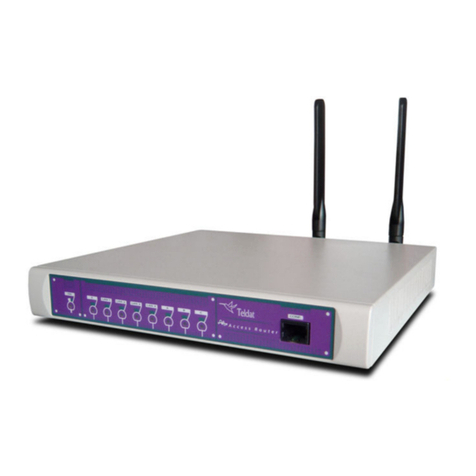
Teldat
Teldat H1 HSDPA User manual


