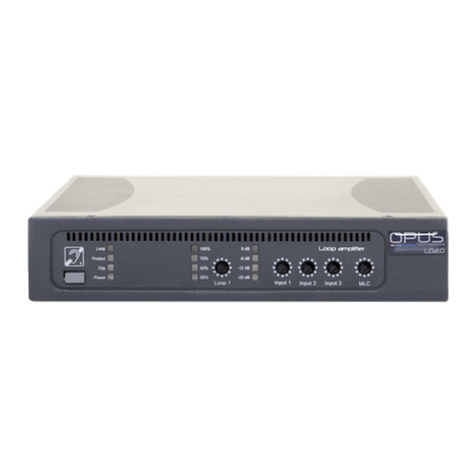
Opus Technologies LD Series User manual

EN
Installationand user
manual
LD 1.2 /2.2 /3.2
2-CHANNEL LOOP AMPLIFIER
LD SERIES
Class D loop amplifier

LD Series | Installation and user manual
User manual 2

TABLE OF CONTENTS | EN
User manual 3
LD Series | Installation and user manual
1. Introduction
5
1.1 Purpose
5
1.2 Target audience
5
1.3 Alerts
5
1.4 Icons
5
2. Loop amplifier presentation
6
2.1 Description
6
2.2 The product range
6
2.3 Package contents
6
2.4 Rack mounting kit: OP-R
6
2.5 Advice and safety
7
3. Technology presentation
8
3.1 What is an AFILS (Audio Frequency Induction Loop System) ?
8
3.2 Working principle
8
4. Controls, connections and adjustments
9
4.1 Control
9
4.2 Multi-loop output
9
4.3 Connecting several amplifiers
9
4.4 Front panel and adjustments
10
4.5 Rear panel and adjustments
11
4.6 Rack mounting
12
4.7 Adjustment and connection
14
4.8 Connecting two amplifiers
16
5. Setup
18
5.1 Settingup a simple perimeter loop
18
5.2 Settingup a Masterand a Slave amplifiers
18
5.3 Securing the settings
19
5.4 Metal loss compensationadjustment
19
5.5 Operationof the fault contact
19
5.6 Audioinput
19
6. Functioningand planning of a loop system
20
6.1 Preamble
20
6.2 Working principle
20
6.3 The differenttypes of installation
21

TABLE OF CONTENTS| EN
User manual 4
LD Series | Installation and user manual
7. The magnetic induction loop
23
7.1 Installingyour loop
23
7.2 Cable section
23
7.3 Connection
23
7.4 The magnetic field
23
7.5 Technicalstudy
24
8. Installation constraints
27
8.1 Magnetic overspill
27
8.2 Metal distortion
27
9. Information
28
9.1 Maintenance and care
28
9.2 Warranty
28
9.3 After-salesservice and return
28
9.4 Disposalof used electricand electronicunits
28
9.5 Technical specifications
29
9.6 CE certification
30
Certificateof conformityto the IEC-60118-4 standard
31

LD Series | Installation and user manual
1. Introduction
Thank you for having purchased an Opus Technologies
LD SERIES class D loop amplifier. Please take a few
moments to read this manual and follow the
recommended instructions, it will ensure the optimal
use of the product and many years of flawless service.
Keep this instruction manual in accessible place.
1.1 Purpose
The installation and user manual provides the needed
informations to install, configure and to use your LD
Seriesamplifier.
1.2 Target audience
The installation and user manual is destined to Opus
Technologies’ LD Series amplifiers installers and
users.
1.3 Alerts
This manualmentionsdifferent types of warning.
The type of alert is closely related to the effect that
may occur if the alert is not observed. These alerts,
ranked in increasing order of severity,are as follows:
•Caution
Failure to follow a cautionary warning may result in
propertydamage.
•Warning
Failure to heed a warning may result in serious
propertydamage and potential personalinjury.
1.4 Icons
1.4.1 NoteIcons
Warning icons used with the notes provide additional
information about the note. See the following
examples:
1.4.2 Caution and warning icons
The icons used in combination with Caution and
Warning indicate the type of risk. See the following
examples:
Note:
General Note Icon
Note:
Symbol referring to the
indicated information source.
This symbol is used to alert the user to
important operating or maintenance
instruction
User manual 5
This lightening bolt triangle is used to
alert the user to the risk of electic shock
This symbol alert the user to important
risk of electrostatic discharge
This symbol alert the user to important
risk of burn if customer is touching the
device while operating

The range of dual channel amplifiers is composed of
LD1.2, LD2.2 and LD3.2. They allow to cover different
surfaces as described below.
Opus Technologies’ LD1.2, LD2.2 and LD3.2 are a new
generation magnetic loop amplifiers, made in France.
These robust amplifiers are the most compact on the
market while offering the necessary features (AGC,
MLC, compressor, fault monitoring, etc.) to ensure an
installationin rooms from 100m² to 2000m².
•LD1.2 covers up to 600 m² (15*40 m²) (single loop)
and 300 m² (10*30 m²) (multipleloop)
•LD2.2 covers up to 1200 m² (20*60 m²) (single
loop)and 525 m² (15*35 m²) (multipleloop)
•LD3.2 covers up to 2000 m² (25*80 m²) (single
loop)and 1000 m² (20*50 m²) (multiple loop)
These coverage informations are given on an
indicative basis and depend on the configuration of
the room and project constraints (presence of metal
structures, overspill, room width, etc). Not taking
these constraints may lead to an installation not
complying with the IEC-60118-4 standard
requirements. It is essential to consult a loop specialist
for your project design. Our Smartloop simulation
software will help you designing project complying
with the IEC-60118-4 norm. Contact your closest
distributor for more information.
LD Series | Installation and user manual
2. Loop amplifier presentation
User manual 6
2.1 Description
The LD range is composed of magnetic induction loop
amplifiers allowing to equip rooms for people
suffering hearingloss.
The LD Series has been developed with strict and
rigorous specifications allowing us to offer a 5 year
warranty. The products have been designed with
optionsto facilitate their use and installation.
Product picture Figure1
2.2 The product range
2.3 Package contents
Upon reception of your amplifier, inspect the unit to
check if any damage have occurred during shipment.
If damages are noticed, report immediately to your
distributor and shipping company, indicating the
date of delivery, the nature of the damage, if it was
visible on the packaging before unpacking. If
possible, give the delivery note number and a
trackingnumber.
Package contents:
•LD1.2, LD2.2 or LD3.2 amplifier
•Power cable 1.5m, CEE 7/7 - C13 connectors
•2x 3-pin connectors
•1x 2-pin connector,output
•1x 2-pin connector, input
•A set of 3 stickers “Area adaptedfor the hard of
hearing people".
•Installationand user guide
•OP-R rackmountingkit
•Warrantycertificate
If any pieces are missing, please contact your reseller
or the manufacturer directly.
2.4 Rack mounting kit: OP-R
OP-R contents
•2x rack mountingbrackets
•2x mountingbrackets
•8x mountingscrews
Amplifier picture -Figure1

User manual 7
LD Series | Installation and user manual
2.5 Advice and safety
Most of defective loop installations are the result of
a lack of preparation. Take your time before starting
your installation and always keep this manual in an
accessible place.
Ideally, the loop driver should be placed near the
area to be covered. This may involve placing the loop
driver on a panel/wall, under a desk or under a
counter. Wall mounting accessories are provided in
the OP-R mounting kit.
Refer to figure 9 on page 13
To chose the location for your loop, take into
consideration the area that would be most likely
used by the end user. This area is called the
“listening area”.
For exemple, in a concert hall, you'll install your loop
cable around the audiance area rather than the
whole room. Covering also the stage may lead to
feedbacks effect due to a conflict between the loop
magnetic field and the dynamic microphones (guitar,
bass..)of the band playing on the stage.
•Clean the device only with a dry cloth. Cleaning
fluids may affect the equipment.
•Do not block any ventilation openings. Install in
accordance with the manufacturer’s instructions.
•Do not install this equipment near any heat
sources such as radiators, heating vents or other
apparatus that produces heat.
•Only power cords with the correct power
connector may be used to maintain safety. These
must be plugged into power outlets which provide
a protective earth.
•To prevent accidents or personal injury caused by
electrical shocks, never place any type of
container filled with a liquid, such as a vase, on or
around the device.
•Never pull on the power cord to remove the plug
from the wall outlet; always pull the plug.
•Do not operate the device near heat sources or in
rooms with high humidity. (Operating
temperature range 0-45°C).
•Do not cover the air vents so that any heat
generated by the device can be dissipated by
air circulation.
•Depending on the stress it is exposed to, the
device can develop high temperatures in the
heat sink and at the air vents. Be careful not to
touch these elements - risk of burns.
•An installation must be carried out by qualified
personnel.
•The device must be out of reach of
unauthorized persons.
•The device may only be operated by trained
staff qualified for loop installation.
•The device is intended to be used for inductive
loop systems only.
•To prevent potential injury, do not position
this device higher than 2 meters from the
ground.
•Connect the loop driver only to wiring which
complies to IEC-60364.
•In order to prevent children and people in
general to get injured, the amplifier must be
installed in a locked technical room only
accessible to trained authorized people.
•The amplifier must be earthed / grounded.
•Refer all servicing to a qualified staff. Servicing
is required when the device has been damaged
in any way, such as a power supply cord or
plug is damaged, liquid has been spilled or
objects have fallen into the device, if it have
been exposed to any rain or moisture, does
not operate normally or has been dropped.
•TO PREVENT ELECTRIC SHOCK DO NOT
REMOVE THE COVER. THERE ARE NO USER
SERVICEABLE PARTS INSIDE. REFER SERVICING
TO QUALIFIED STAFF.
•Warning : Connection to a100V line system
may involve the risk of electric shock. And
therefore must be carried out by an instructed
or skilled person.
LD Series | Installation and user manual
3. Technology presentation
3.2 Working principle
Hearing aid operating diagram with the T-position - Figure 3
Pictogram used to indicate a loop
system - Figure 2
Referto figure 2
User manual 8
An induction loop system is intented to help hard of
hearing people to receive a clear audio signal into
their hearing aid without being disturb by
background noises . Thanks to this system, the
sound coming from an audio source (speaker
microphone, sound system, television) is transmitted
by induction to hearing aid user who can thus enjoy
clear sound without being disturbed by any ambient
noise. This system is mainly used in public places
(conference rooms, cinemas, courts, churches, ticket
offices, etc.) but can also be installed at home. Many
conventional hearing aids have a "T" loop function.
3.1 What is an AFILS (Audio Frequency
Induction Loop System)?
A magnetic loop system consists of an electric wire
Layed down around a room forming a loop. The
cable is connected to a loop amplifier, connected
itself to an audio source. The loop amplifier convert
the audio signal into electric pulses transmitted
through the cable, creating a magnetic field. Heairing
aids equipped with a coil (often called a "T" or "T-
coil". ) will capture this signal and transmit it to
hearing impared.
By induction, the electrical signal present in the loop
ill be reflected in the coil of the hearing aid. The coil
transmits the signal of the loop in the internal
amplifier of the prosthesis, which then bring it to the
ear of the hearing impaired person, free of
background noise and environmentaldisturbances.
The audio source can come from various origins. In a
cinema, for example, the sound of the film will be
transmitted. In a conference room, the sound of the
speaker's microphone will be transmitted. In a
subway station, the voice of the agent will be
transmitted...
The loop can be installed on the floor or ceiling. The
loop is integrated into the building, just like the
electrical installation.
The presence of a hearing loop is often indicated by
a blue logo representing a barred ear and the letter
"T".

4. Controls, connections and adjustments
User manual 9
4.1 Control
The amplifiers comes with a fault synthesis allowing
you to monitor the main functions of the unit, such
as the amplifier’s power, the integrity of the loop
cable connected to the amplifier and the inputs.
If any of the functions are faulty and not working
properly, a red LED on the front panel of the
amplifier lights up and the fault relay opens (NO:
Normally Open).
4.2 Multi-loop output
The LD1.2, LD2.2 and LD3.2 amplifiers incorporate a
phase shift module that allows a master and a slave
loop to be connected to the amplifier, with a 90°
shift for a multi-loopinstallation.
To connect the loops to the amplifier use the Loop 1
and Loop 2 outputs on the rear panel of the
amplifier (see Figure 5 on page 11).
Depending on the layout of the loops, the aim is to
control the external overspill of the magnetic field
and/or the homogeneity of coverage or the coverage
area.
Refer to section Layout page –24
For more information on the installation of a loop
system using a master loop and a 90°phased shifted
slave loop, contact your local distributor.
You can also use our Opus Smartloop simulation
software or contact us at
contact@opus-technologies.fr.
4.3 Connecting several amplifiers
The LD1.2, LD2.2 and LD3.2 amplifiers have an
OUT output and an IN input on the rear panel
(see Figure 5 on page 11).
LD Series | Installation and user manual
This feature offers the possibility to connect several
amplifiers together, in series.
The purpose of this feature is to extend coverage in a
large area or in several rooms if they share the same
audio signal.

LD Series | Installation and user manual
4.4 Frontpanel and adjustments
Frontpanel-Figure4
1. LED "Protect 1", fault summary display. Error indicator. This red LED lights up when the master loop amplifier
is overloaded, when the input level of the master loop is too high or when the master loop is defective.
2. “Loop" LED, loop presence. This green LED is displayed when the loop is in working condition.
3. Output current control 1. Allows you to control the electrical output current distributed in the loop.
4. Output current setting 2. This controls the output current flowing in the loop.
5. INPUT 1 (line or microphone) input adjustment. Allows you to control the signal of the INPUT 1.
6. INPUT 2 (line or microphone) input adjustment. Allows to control the signal of the INPUT 2.
7. INPUT 3 (100V) input adjustment. Allows to controls the signal of the INPUT 3.
8. ON/OFF power button.
9. “LED " Protect 2 ", fault summary display. Error indicator. This red LED lights up when the Slave loop amplifier
is overloaded, when the input level of the Slave loop is too high or when the Slave loop is faulty.
10. “Power" LED, ON/OFF display. Power on indicator light of the unit.
11. Output 1 signal meter. Indicates the electric current in the induction loop.
12. Output signal meter 2. Indicates the electric current in the induction loop.
13. Input signal meter. Indicates the input signal level after adjustment.
14. MLC (Metal Loss Compensation) setting reduces interference problems due to the presence of metal
structures.
User manual 10

LD Series | Installation and user manual
4.5 Rear panel and adjustments
15. INPUT 3 Audio input Combo: microphone or line. This input allows you to connect external audio inputs from a
line level source (mixer, preamp, etc.) or from a microphone.The Combo connector accepts an XLR or a 6.35 jack.
16. Push button for line or microphone communication of the INPUT 1 input. Switch to commute the input
according to the source (microphone or line).
17. Push button for line or microphone communication of the INPUT 2 input. Switch allowing to commute the input
according to the source (microphone or line).
18. INPUT 2 Phoenix type terminal block: microphone or line. This terminal block input is used to connect external
audio inputs from a line level source (mixer, preamp, etc.) or from a microphone.
19. INPUT 1 Phoenix type terminal block: 100V priority. This terminal block input allows you to connect an external
audio input from a 100V sound system, the audio is directly recovered from the speaker’s line. Please ensure the
connexion is done by a trained staff only. Risk of injury.
20. Slave IN input. This input is used to connect a 0°or 90°output (Master/Slave) from another LD series loop
amplifier.
21. Output OUT to slave amplifier. These outputs are used to connect the Master amplifier to a Slave loop amplifier
from the LD range.
22. Location of the serial number label.
23. Mains power cord connection. Connects the loop amplifier to the power supply.
24. Phantom power selection switch. Allows you to send or not coltage to supply a microphone connected to INPUT
1 and/or INPUT 2
25. NO/NF fault relay. Allows the system status information to be sent via a relay.
26. Loop 1 output on Phoenix type terminal block. Used to connect the first wire loop to the amplifier.
27. Loop 2 output on Phoenix type terminal block. Used to connect the second wire loop to the amplifier.
Rear panel -Figure5
User manual 11

LD Series | Installation and user manual
4.6 Rack mounting
4.6.1 Ventilation and rack mounting
For better ventilation we recommend leaving a space
of 1U (44 mm) above the amplifier.
Leave at least 168 mm (5.5") of space between the
bottomof the rack and the amplifier.
4.6.2 Rack integration
Requiredaccessory: OP-R mountingkit
Attach the rack mounting brackets as shown below
(Figure 7) usingthe mountingscrews providedin the kit.
Then integrate the amplifier into the rack.
Amplifier ventilation-Figure6
Illustration of the
amplifier integration in
a rack - Figure 7
Caution, warning, danger:
The LD1.2, LD2.2, LD3.2 amplifiers contain
an advanced protection circuit, which
allowsthemtoreduce the output power
to maintain safe operating temperatures. Insufficient
ventilation may cause a reduction of the amplifier’
output power during normal operation (indicated by
illumination of the red PROTECT 1 / PROTECT 2
LEDs). To reduce the risk of thermal limitation and
allow proper heat dissipation, it is recommended to
keep clear the space directly above and behind these
amplifiers.It is also highly recommended not to place
anything directly on top of the amplifier.
User manual 12
The location must provide adequat
ventilation for the unit.

LD Series | Installation and user manual
User manual 13
4.6.4 Mounting the loop amplifier on a wall
Attach the mountingbracketsas shownbelow (Figure 9)
using the screwsprovided in the kit.
Then, attach the amplifier to the selected wall.
Illustration of 2 amplifiers integrated
in a rack - Figure 8
Illustration of an amplifier integration
ona wall - Figure 9
4.6.3 Rack-mounting two loop amplifiers
Requiredaccessory: OP-R mountingkit
Attach the rack mounting brackets as shown below
(Figure 8) using the mounting screws provided in the kit.
Then attach the amplifiers to each other with the
mountingbrackets.
Finally, integrate the amplifier into the rack.
Requiredaccessory: OP-R mountingkit

LD Series | Installation and user manual
4.7 Adjustment and connection
4.7.1 Loop connection
4.7.2 Audio inputs
The audio sources are connected via the 3 inputs
of the amplifier provided for this purpose. The
LD Serieshave 3 inputs:
•Input 1: 100 V
•Input 2: lines or microphones
•Input 3: lines or microphones
4.7.3 Priority INPUT 1 100V input
4.7.5 Line output
4.7.6 Power supply
The LD amplifiers have an integrated power supply of
230V (or 115V), with a power of 300VA.
4.7.7 Status relay
The status output is used to send a status of the loop
amplifierto externaldevices via a NO/NC relay.
4.7.8 Connectors
Symmetric:
Pin 1 :
Pin 2 :
Pin 3 :
Mass/Ground/ Schield
Hotspot(+)
Coldspot(-)
Asymmetric:
Pin 1 :
Pin 2 :
Pin 3 :
Mass/Ground
Signal(+)
Connectedto mass (pin 1)
3 pin-XLR
PUSH
2 1
3
Hot spot Cold spot Mass
6.35 mm jack
User manual 14
Refer to the types of connection in paragraph 4.7 and
the different typesof installation in paragraph 6.
The loop is connected via a green 2-point terminal
block located on the rear panel of the amplifier,
thanks to a twisted cable
Distance between the loop and the
amplifier must not exceed 15 m
The twisted cable cancels the magnetic
field and avoids inductions potentially created by
transformers external to the system. The references
OP-LI5/10 or 15 allow to create this type of
connection.
The loop circuit must use cabling conforming to the
IEC-60332-1-2, 60332-1-3, 60332-2-1, 60332-2-2 or
60695-11-21 standards.
The INPUT 1 (100V) of the LD series amplifiers has a
systems in case ofpriority for security sound
evacuation of the building.
If more than one audio source reaches the
amplifier's inputs, the priority input will always have
priority over the others, and the INPUT 2 and/or
INPUT 3 will be muted. In some cases, and if the
configuration allows it, we recommend connecting
the room sound system to INPUT 2 and INPUT 3 and
the security sound system to INPUT 1.
Warning : Connection to a100V line
system may involve the risk of
electric shock and therefore must be
carried out by an instructed or skilled
person.
It is possible to connect a recorder to the line output
of the loop amplifier. The line output of the amplifier
is a 6.35 OUT jack which is mainly used to link several
amplifiers when setting up complex systems (low
spill system) but the output can also be used as a
single line output.
4.7.4 Input and outputs jack 6.35
On the rear panel of the amplifier you can see three
6.35 jack inputs. These inputs and outputs allow you
to connect several loop amplifiers together to create
single phased loop systems, low loss systems or ultra
low loss systems.

Power
Loop
Protect 1
Protect 2
4.7.11 LEDs Protect 1 et Protect 2
LD Series | Installation and user manual
User manual 15
4.7 Adjustment and connection
4.7.9 Switching on
LoopOK
×Loop fault, input too high and/or
amplifieroverloaded
The "Protect 1" and "Protect 2" LEDs indicate
respectively the status of the Master or Slave part
of the device. These red LEDs light up if:
•The ohmic resistance of the inductive loop is
not between 0.5 and 3 Ohm.
•The corresponding conductor section is
overloaded or overheated.
•The input level is too high, causing clipping of
the audio signal.
The unit is powered up using the grey switch on the
front of the amplifier. If the amplifier is powered up,
the Power LED will light up in blue.
To turn the unit off, press again the Power switch on
the front of the amplifier. Please note that the unit
goes into standby mode when it is turned off. Unplug
the power plug from the wall outlet to completely
turn off the unit.
4.7.10 Loop integrity
The green LED on the front of the amplifier is used to
check the loop integrity. If the loop is cut or if the
loop impedance is not between 0.5 and 3 Ohm the
Loop LED will not be displayed and the Protect LED
will be light up. (See figure below)

Output to Slave
amplifier
OUT
User manual 16
Inputon slave amplifier
IN
LD Series | Installation and user manual
4.8 Connecting two amplifiers
4.8.1 Master over 1 Slave
Master amplifier Slave amplifier
To expand and duplicate an installation or to use a low spill system or high coverage system with the LD
Series 2-channel amplifiers:
1. Connect the loops to the terminals provided: Loop 1 and Loop 2 terminals on the amplifiers.
2. Insert an audio source in input 1, 2 or 3 of the master amplifier.
3. Connect the output OUT of the Master amplifier to the Slave amplifier using a 6.35mm link cable
4. Turn on the amplifiers and adjust them accordingly.
This allows you to use multiple amplifiers on the same input. This can be useful for very large rooms or if
several rooms share the same audio transmission.
4.8.2 Slave to slave
Connect the OUT jack of the slave loop amplifier to the IN jack of the next slave loop amplifier.
This allows you to connect several slave amplifiers. (See diagram on next page)

LD Series | Installation and user manual
4.8.3 Master to several slaves
Input on slave 4 amplifier
IN
To use a low spill or very high coverage system:
1. Connect the OUT jack of the master loop amplifier to the IN jack of the next slave loop amplifier (Slave Amplifier
1).
2. Connect the OUT jack of amplifier 1 to the IN jack of the next amplifier (unit 2).
3. Connect the OUT jack of amplifier 2 to the IN jack of the next amplifier (unit 3).
4. Connect the OUT jack of amplifier 3 to the IN jack of the next amplifier (unit 4).
5. Repeat if necessary.
6. Connect the respective out-of-phase loops to the terminal blocks of the correspondingamplifiers.
7. Switch on the amplifiers and adjust them accordingly.
This type of configuration will be used to cover large areas such as those of exhibition parks or sports halls or to
equip several areas with the same audio source.
Outputto
slave 1
amplifier
OUT
User manual 17
Master amplifier Slave 1 amplifier
Input on slave 1
amplifier
IN
And outputto slave
2 amplifier
OUT
Input on slave 2
amplifier
IN
and outputto slave 3
amplifier
OUT
Slave 2 amplifier Slave 3 amplifier
Input on slave 3
amplifier
IN
and outputto slave
4 amplifier
OUT
Slave 4 amplifier

LD Series | Installation and user manual
User manual 18
5. Setup
5.1 Setting up a simple perimeter loop
1. Turn on your amplifier and check that all
potentiometers are at 0 level
2. Connect your loops to the Loop 1 and Loop 2
terminal block
3. Connect a 1kHz sinusoidal source to one of the
inputs
4. Increase the input signal via the potentiometer on
the front of the amplifier until you reach
between -6 and 0 dB.
5. Increase the output current via the Loop 1 and
Loop 2 potentiometers on the front panel of the
amplifier until you reach between 75% and 85%.
6. Take a magnetic field meter such as OP-FSM*
and take a first measurement at the center of
your room.
7. Then readjust the settings until you reach -3dB at
the center of the zone
8. Then follow the test procedure described in the
OP-FSM manual for an installation that meets the
IEC60118-4 standard.
5.2 Setting up a dual Master and Slave amplifier
To know the different types of installation of a low
spill loop system or single phase loops, refer to
paragraphs 6.3.2 and 6.3.3.
Depending on the type of LD series amplifier, the
settingswill be made differently:
•LD1.2/2.2/3.2 series incorporate two amplifier in
one unit allowing you to use only one device for
low spill systems. A second device will be
required whenever a 3rd loop is installed.
•LD1.0/2.0/3.0 series units (not covered in this
user manual) incorporate one amplifier per unit
so you’ll need two devices to process a phase shift
•Installation
The Master amplifier is the unit to which the audio
signal at input 1, 2 or 3is connected. This will be the
basic signal. The phase shift module integrated in the
units will then shift this signal by 90°or 0°to inject it
into the next slave amplifier.
This feature is not physically visible when using the
LD1.2/2.2/3.2 amplifiers because the amplifier
integrates both the master and the slave amplifier
unlike the LD1.0/2.0/3.0 amplifiers.
There is no special setting to determine the Slave
amplifier, only the connection arrangement will define
the Slave amplifier (Loop 2) and the Master amplifier
(Loop 1).
1. Power up your amplifier and check that all
potentiometers are at 0
2. Connect your loops to the Loop 1 and Loop 2
terminals block
3. Connect a 1kHz sinusoidal source to one of the
inputs
4. Increase the input signal via the potentiometer on
the front of the amplifier until you reach between -
6 and 0 dB of the input meter
5. Increase the output current via the Loop 1 and Loop
2 potentiometers on the front panel of the
amplifier until you reach between 75% and 85%.
6. Take a magnetic field mesurer such as OP-FSM and
make a first measurement at the center of your
room
7. Then adjust the settings according to the
measurements made with your magnetic field
mesurer in order to achieve homogeneous
coverage in accordance with the IEC60118-4
standard.

LD Series | Installation and user manual
IN 3 IN 2
Mic PhantomLine
5.6. Audio input
5.6.1 Sensitivity
If the fault synthesis detects an operating problem
(broken loop, wrong loop impedance, amplifier
failure, etc.) the NO/NC relay is deactivated in the
normally open position: NO.
The level of INPUT 2 and INPUT 3 can be adjusted
according to the audio source used.
•When the audio source connected to one of the
inputs is a microphone, set the grey button to the
Mic position.
•When the audio source connected to one of the
inputs is line level, position the grey button
released onthe Line position.
5.6.2 Phantom power
The Phantom DIP switch on the rear panel of the
amplifier (see previous figure) enables or disables
phantom power for microphones that require
voltageto operate.
When using a phantom power:
•If the audio source of the INPUT 2 and/or INPUT
3is a microphone that needs voltage:
o The DIP switch must be up
•When the audio source of the INPUT 2 and/or
INPUT 3 is a microphone does not require
voltage:
o The DIP switchmust be down
•If the audio source is music:
o The DIP switchmust be down
If you detect signal distortion due to
presence of metal structure turn the
MLC (Metal Loss Compensation) control
on the front panel of the amplifier
clockwise.
Check your high frequency measurements with a 4kHz
sinusoidal signal and adjust the compensation settings to
achieve acceptable measurements to the IEC-60118-4
standard.
5.5 Operation of the fault contact
When the amplifier is working
properly, the NO/NC relay is
activated in the normally closed
position:NC.
5.4 Metal loss compensation adjustment
User manual 19
The OP-V plexiglass plate (optional: not supplied)
allows you to lock the settings while viewing the
amplifier's information
LEDs.
This plexiglass can be
installed with or
withoutthe OP-R
rack system.
Note: You can download a sample certificate of
conformity from our website www.opus-
technologies.fr in the download section. Or use the
one providedat the end of this manual.
For more information on IEC-60118-4 standard
adjustments contact us at contact@opus-
technologies.fr or contactyour local reseller.
5.3 Securing the settings
8. Connect the two loops and then adjust the
settings until a minimum signal of -3dB is achieved
in the weakest audio reception area.
9. Then follow the test procedure described in the
OP-FSM manual to perform an installation
accordingto the IEC-60118-4 standard.
5.2.3 Final adjustments

LD Series | Installation and user manual
6. Functioning and planning of a loop system
6.1 Preamble
A study revealed that more than 60%of the
Magnetic Induction Loop installations do not work or
work poorly, far from the requirements of the
standard (IEC-60118-4). Indeed, the main difficulty
lies in the implementation of the loop path. This
observation led us to seek and provide effective
solutions to meet this standard.
It is therefore important to carefully read the
following instructions to ensure proper operation of
the system and compliance with the IEC-60018-4
standard. Do not hesitate to contact your local
distributor, we can help you with the study phase
before the installation of the system.
6.2 Working principle
6.2.1 The magnetic field
When an alternating current flows through a copper
cable, it generatesa magneticfield.
The intensity of the magnetic field is directly related
to the intensity of the electric current flowing in the
cable.
6.2.2 Magnetic field diffusion in a loop
When the intensity of the current flowing in a loop is
adapted to the width of the room to be equipped, the
radiation of this one makes it possible to cover the
whole room.
Illustration of an electromagnetic wave
around a conductor - Figure 10
Top view of a loop installation in a room -
Figure 11
Cable (conductor)
The floor
No reception on the
cable (shadow zone) Area with a constant
magneticfield
Sectional view of a loop installation in a
room- Figure 12
Magnetic field
radiation
Audioreception
User manual 20
Other manuals for LD Series
2
This manual suits for next models
3
Table of contents
Languages:
Other Opus Technologies Amplifier manuals

Opus Technologies
Opus Technologies eLoop User manual

Opus Technologies
Opus Technologies LD Series User manual

Opus Technologies
Opus Technologies DCL20-65 User manual

Opus Technologies
Opus Technologies DCL20-SA User manual

Opus Technologies
Opus Technologies IL-EF11 User manual

Opus Technologies
Opus Technologies DCL20-K User manual

Opus Technologies
Opus Technologies LD Series User manual

Opus Technologies
Opus Technologies DCL20-PLUG User manual

Opus Technologies
Opus Technologies DCL20-K1 User manual