Oracing Wheelchairs Street Jet User manual

street jet
USER MANUAL
Oracing Wheelchairs
Torre Alcodar, 6
46071 GANDIA (Valencia)
SPAIN
+34 960 046 400

STREET JET USER MANUAL
1
Oracing:
We would like to thank you for your purchase, you have accquired the next step in the
future of mobility, so we are thankful for the trust you have bestowed upon us.
Street Jet is a pleasant, reliable, life changing and “zero emission” solution for those who
are willing to improve their mobility experience. We are proud to provide you with a
product that we are sure will accompany you for many years to come.
Should you have any question regarding your product, do not hestitate to contact us
and we would be glad to assist and help you in everything you might need.
Now, without further ado, we let you begin with your Street Jet experience.
Enjoy.
The Oracing Team
DO NOT USE YOUR STREET JET BEFORE READING THIS MANUAL
KEEP THIS MANUAL FOR FUTURE REFERENCE

STREET JET USER MANUAL
2
INDEX OF CONTENTS
1 SAFETY INSTRUCTIONS............................................................................................................ 4
2 PRODUCT DESCRIPTION........................................................................................................ 6
2.1 BATTERY............................................................................................................................ 7
2.1.1 GENERAL INFORMATION........................................................................................ 7
2.1.2 INSTALLATION AND REMOVAL............................................................................... 8
2.1.3 CHARGE................................................................................................................... 8
2.1.4 BATTERY CARE ......................................................................................................... 8
2.2 MOTOR ............................................................................................................................ 9
2.2.1 250 W –BAFANG FM G320.250.V.......................................................................... 9
2.2.2 500 W –Golden Motor Smart Pie 5..................................................................... 13
2.3 STAND ............................................................................................................................ 18
2.4 TILTING ARMS ................................................................................................................ 18
2.5 WHEELCHAIR ATTACHING CLAMPS ........................................................................... 19
3 USAGE ................................................................................................................................... 20
3.1 BEFORE........................................................................................................................... 20
3.1.1 PACKAGING AND DELIVERY................................................................................ 20
3.1.2 WHEELCHAIR ATTACHING CLAMPS .................................................................... 20
3.2 DURING.......................................................................................................................... 21
3.2.1 WHEELCHAIR ATTACHMENT ................................................................................. 21
3.2.2 STARTING................................................................................................................ 22
3.2.3 DRIVE ...................................................................................................................... 22
3.2.4 REVERSE-DRIVE (if installed) ................................................................................. 23
3.3 AFTER.............................................................................................................................. 23
4 MAINTENANCE..................................................................................................................... 24
4.1 PREDICTIVE MAINTENANCE......................................................................................... 24
4.1.1 TYRE MAINTENANCE ............................................................................................. 25
4.1.2 BRAKE MAINTENANCE .......................................................................................... 25
4.1.3 CLEANING AND HYGENE ..................................................................................... 25
5 RECYCLING .......................................................................................................................... 27
6 TROUBLESHOOTING ............................................................................................................. 28

STREET JET USER MANUAL
3
7 SPECIFICATIONS ................................................................................................................... 29
7.1 GENERAL ....................................................................................................................... 29
7.2 WEIGHT .......................................................................................................................... 29
7.3 WHEEL ............................................................................................................................ 29
7.4 TECHNICAL SPECIFICATIONS....................................................................................... 29
7.5 ENVIRONMENTAL CONDITIONS .................................................................................. 29
8 GUARANTEE.......................................................................................................................... 30

STREET JET USER MANUAL
4
1SAFETY INSTRUCTIONS
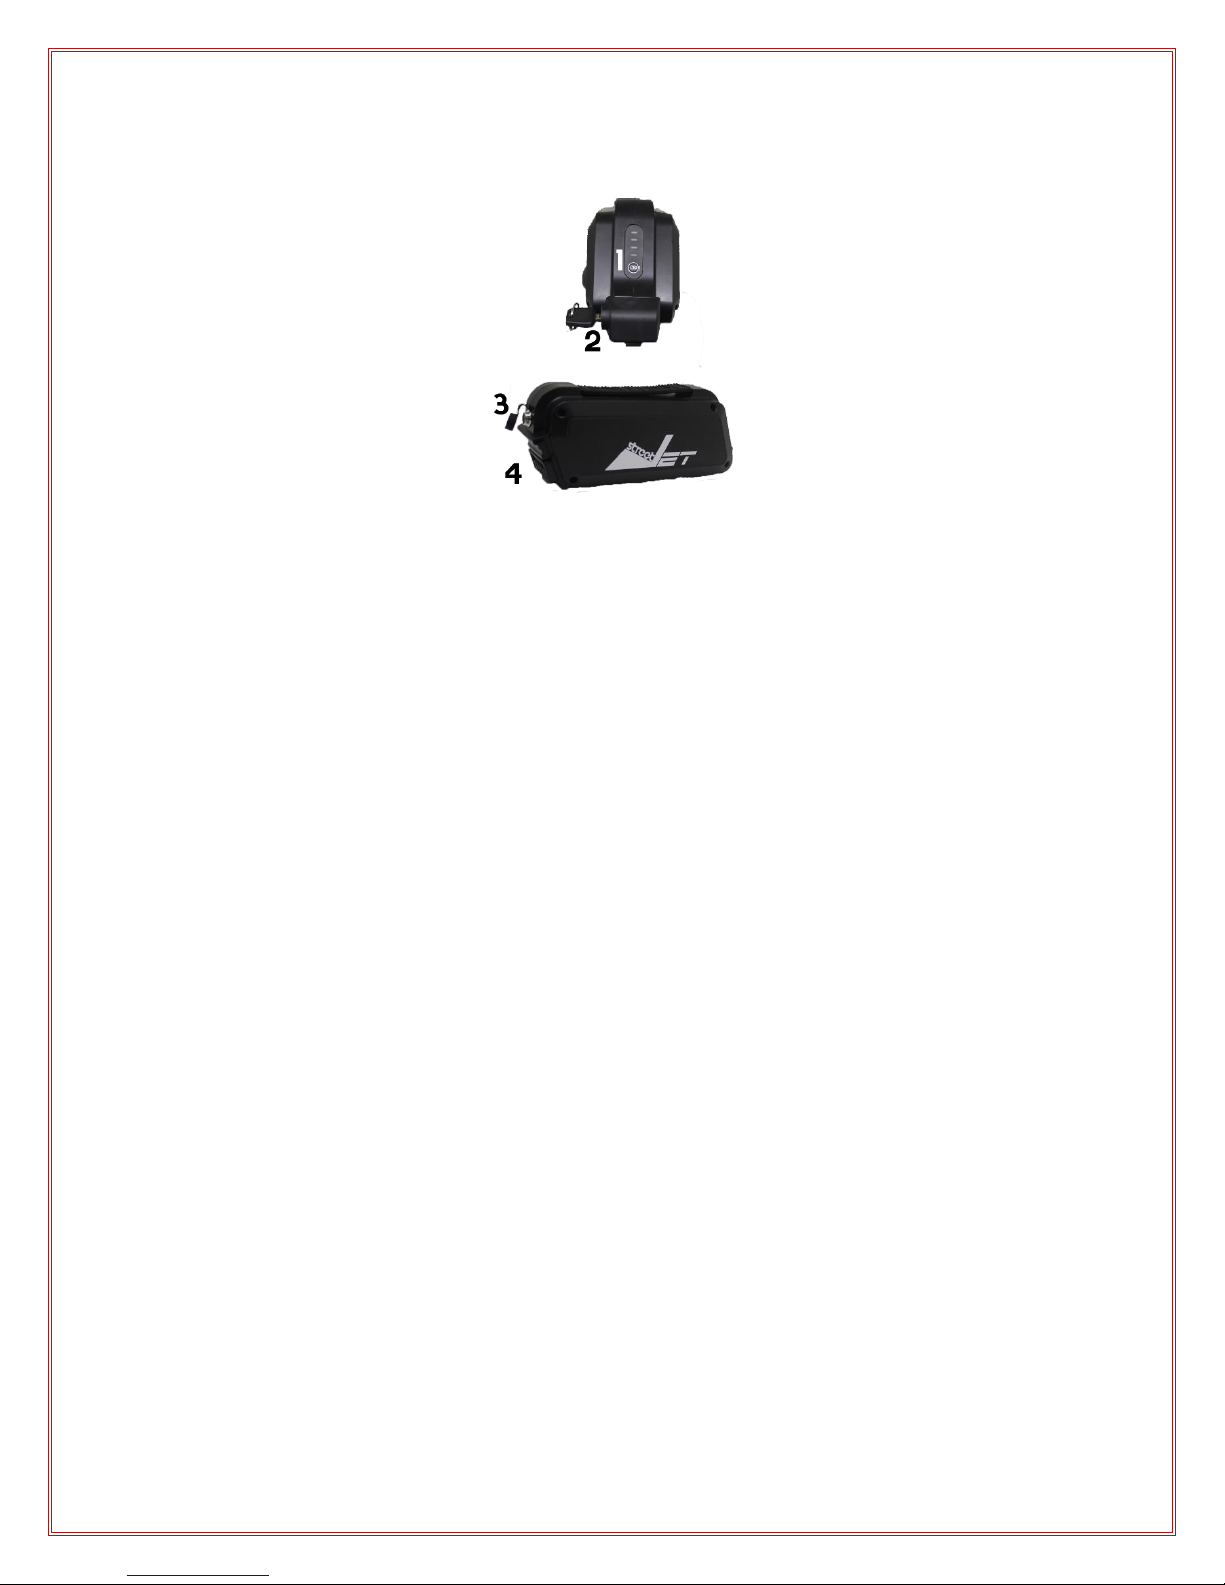
1. Completely charge the battery before using the Street Jet for the first time.
2. Before starting, check if the batteries are well connected.
3. Before starting, check the function of the brakes.
4. Attach the Street Jet tightly to your wheelchair. Make sure it is well adjusted and
does not move back and forth from the wheelchair.
5. If you have a stand, make sure you pull it from the ground before moving.
6. For security reasons, our Street Jet is valid for a maximum speed of 20 km/h, please
do not exceed this speed in any circumstance.
7. Always follow the traffic regulations of the country you are using your Street Jet in.
8. The maximum weight load is 120 kg.
9. When using downhill, please adapt your speed to enable safe breaking.
10. Please always hold the handle with both hands, both while accelerating and
breaking. We encourage you to keep both hands on the handles all the time and
not to attempt to drive single handed, for it can be dangerous for you and for those
around you.
11. Use always the Street Jet carefully and in a way that suits your grade of disability.
12. Drive carefully and slowly, especially around corners and turns, for high speeds can
make your wheelchair tip over. Have this in mind in particular if you have a narrow
chair with a short camber.
13. Do not leave your Street Jet under the sun for a long time, especially the batteries.
14. Batteries are polluting elements and must be recycled accordingly, following the
regulations for battery recycling.
15. Do not modify or repair the electric elements of your Street Jet. It can be dangerous
for your safety. Contact us or a specialized company for such issues.
16. Your Street Jet can stand mild splattering (e.g. light rain). Do not wash your vehicle
with pressurized water and do not allow any electric components to get wet.
17. Do not allow children to use the vehicle.
18. Do not let anybody put anything inside the battery, there could be a risk of
explosion.
19. Check the tyre pressure regularly. See specifications for more information about the
correct tyre pressure.
20. Check before every ride that the Street Jet is properly aligned, with the wheel
centric to the wheelchair. If the difference is more than 1cm, it needs adjustment.
21. Check that every screw is well adjusted regularly.

STREET JET USER MANUAL
5
22. Safe use of Street Jet comes with practice and experience. For beginners, it is
important to ride slowly and especially carefully. Avoid putting yourself in difficult
situations such as steep hills and roads in bad conditions until you get used to your
Street Jet.

STREET JET USER MANUAL
6
2PRODUCT DESCRIPTION
⚠NOTE ⚠
It is possible that the components of the Street Jet shown and described in this manual
are not exactly the same as the ones you own, as our products are in constant
improvement and development. All the figures, measurements and capacities here
shown are approximate and do not constitute specifications. We reserve our right to
modify, without previous notice, the weights, measurements and other technical data
that appear in this manual.
1. BATTERY
2. STAND
3. MOTORIZED WHEEL
4. BRAKE CALIPER
5. BRAKE LEVER
6. CLICK&GO CLAMPING PISTON
7. CLICK&GO CLAMPING LEVER
8. TILTING ARMS
9. MOTOR DISPLAY
10. REVERSE-DRIVE SWITCH
11. MOTOR DISPLAY CONTROLLER
12. ACCELERATOR
13. WHEELCHAIR ATTACHING CLAMPS

STREET JET USER MANUAL
7
2.1 BATTERY
1. CHARGE INDICATOR
2. KEYHOLE
3. CHARGER PLUG
4. MAIN CONNECTOR
2.1.1 GENERAL INFORMATION
The battery is a lithium ion rechargeable battery cell. It provides a nominal voltage of
48V and a nominal capacity of 11,6 Ah.
The Importer / Manufacturer :
Golden Motor Technology Co Ltd. Block 8, Modern Industrial Center, 801 Changwu
Middle Road, Changzhou, Jiangsu 213164 - CHINA
It meets the following standards:
Electromagnetic compatibility in accordance to the Directive 2004/108/EC
For which next norm has been followed:
EN 61000-6-1:2001 EN 61000-6-3:2001 + A11:2004
The following verifying tests have been performed:
TUV –18000556 001 TUV –18000555 001

STREET JET USER MANUAL
8
2.1.2 INSTALLATION AND REMOVAL
The battery can be easy mounted and removed from the Street Jet. In order to
place it on the frame, engage it in a downward movement until the terminals fit
(the main connector in the one placed on the Street Jet). Push it against the
Street Jet until it gets fixed into place.
In order to remove it, be sure it is switched off first. After this, while turning
the key in the keyhole, pull out the battery.
2.1.3 CHARGE
In order to check the charge level, turn on the display and look for the battery
charge indicator.
The charger is to be plugged in the charger plug on the bottom of the battery.
2.1.4 BATTERY CARE
2.1.4.1 GENERAL CARE
Do not disassemble the battery, it is a precision element that stores a great
amount of energy and might be dangerous.
Do not expose the battery to hits, extreme temperatures, water or humidity. Do
not store it inside a vehicle. Never touch the positive and negative terminals with
metallic objects.
Only use this battery with proper Golden Motor chargers or other authorised
reliable brands.
Check at least once per month the terminals and clean them with a dry tissue if
necessary. Check the cables and connectors and discard immediately should
there be a damaged one.
Check visually the state of the battery and discard any deformed battery, with a
damaged or discoloured case.
At the end of the battery life (less than 60% of the original capacity), discard in
the clean spots of your city.

STREET JET USER MANUAL
9
2.1.4.2 CHARGE
Always charge the battery after every use. The battery is better preserved when
fully charged.
Connect the charger to the battery FIRST and to the wall socket afterwards.
Never charge the battery without supervision or leave it charging during the
night. The battery must be charged in a clear area with ventilation and far from
children or animals reach.
2.1.4.3 STORAGE
Store the battery in an appropriate place, clean and dry, at a temperature not
lower than 5 ºC and not higher than 40 ºC.
The battery must be charged at least once every 30 days, independently of the
usage.
It is recommended to use the battery at least once every 60 days.
2.2 MOTOR
The motor is located on the wheel. Depending on your Street Jet power, you will have a
different motor:
-250 W: Bafang FM G320.250.V
-500 W: GoldenMotor Smart Pie 5
⚠NOTE ⚠
BE SURE THAT YOU CHECK THE INFORMATION FOR THE MOTOR THAT YOUR STREET JET USES
2.2.1 250 W –BAFANG FM G320.250.V
2.2.1.1 GENERAL INFORMATION
It is an electric and brushless engine with a nominal voltage controller of 36V. The
nominal power IS 250W with a maximum torque of 30 Nm and an efficiency of more
than 80%. It has a maximum nominal velocity of 45 km/h. The engine is controlled with a
trigger accelerator.

STREET JET USER MANUAL
10
The Importer / Manufacturer :
Suzhou Bafang Electric Motor Science-Technology Co. Ltd No.9,Heshun Road, Wuzhong
District, Suzhou, Jiangsu 215000, CHINA
It meets the following standards:
ISO 9001
Electromagnetic compatibility in accordance to the Directive 2004/108/EC
For which next norm has been followed:
EN 61000-6-1:2007 EN 61000-6-3:2071
The following verifying tests have been performed:
TUV –18000556 001 TUV –18000555 001
2.2.1.1.1 WARNING
Do not overload the motor in steep and long roads. Abusing of the electric
engine can damage (burn) the motor and the controller. The warranty will not
cover any overload of the electric systems.
2.2.1.2 DISPLAY AND CONTROLLER
1. DISPLAY CONTROLLER
2. REVERSE (SWITCH)
3. LCD DISPLAY
4. THUMB THROTTLE
5. NON FUNCTIONAL BUTTONS IN THIS CONFIGURATION

STREET JET USER MANUAL
11
2.2.1.2.1 SW900 LCD Display Manual
This manual will help you use the instrument correctly to achieve a variety of vehicle
control and vehicle status display.
All contents on the screen:
1. Headlight
2. Power status
3. Multi-functions
a. Total Distance(ODO)
b. Single Trip Distance(TRIP)
c. Error Code(Error)
d. Wattage(WATT)
e. Maintenance(Maintain)
f. DST TO GO(Unused temporarily)
4. E-Bike Mode
a. Economic mode(ECO)
b. Standard mode(STD)
c. Powerful model(POWER)
d. Hand speed-control model(SPEEDHANDLE)
e. Walk assisted model(WALK)
5. Speed display
a. Maximum speed(MAX)
b. Average speed(AVG)
c. MPH, KM/H are both optional.
(According Wheel size and signal data, the meter could figure out the real speed.)
6. Error display

STREET JET USER MANUAL
12
OPERATION
ON/OFF
Hold button (M button)long to turn on the power, and hold long for a
second time to turn off the power.
1. Turn on backlight and headlights
Hold + to turn on backlight and headlights (the controller should have
headlight drive output function); hold + long again to turn off the backlight
and headlights.
2. Power Assisted Select (PAS) or Throttle Level Select
Hold or shortly to switch 1-5 file gear. Gear 1 is for the minimum power, gear
5 is for the highest power..
3. 6 km/h assist function
When stopped, hold and WALK function will turn on, the vehicle drives at a
speed not more than 6 km/h.
4. Battery capacity indicator display
When the battery capacity is high, the five battery segments are all light. When the
battery is in low voltage, the last battery segment will flash at 1 Hz. It indicates that
the battery is severely low in voltage condition and needs to be recharged
immediately.
5. Speed display
When the Street Jet starts, the display will automatically show the current speed.
Hold and the display will show the MAX speed during this ride. Hold again
and the display will show the AVG speed during this ride. Hold again and the
display will turn to the current speed display.
6. Distance display (Riding Distance / Total Distance)
Press to switch between riding distance and total distance. This is convenient
for users to check the riding distance (TRIP) and the total distance (ODO).

STREET JET USER MANUAL
13
7. Error code display
Error Code
Error Status
0
Normal Status
1
Save
2
Brakes
3
PAS problem (a riding mark)
4
6 km/h cruising
5
Real-time cruising
6
Battery is under voltage
7
Motor’s problem
8
Throttle’s problem
9
Controller’s problem
10
Communication Receiving problem
11
Communication Sending problem
12
BMS Communication problem
13
Headlight problem
For internal parameter settings, please contact your distributor or look for further
information about the display. Oracing is not responsible for misuse or any problems
derived from a bad parameter setting by the user.
2.2.2 500 W –Golden Motor Smart Pie 5
2.2.2.1 GENERAL INFORMATION
It is an electric and brushless gearless engine with a built-in controller with a nominal
power of 500W (48 V). It has an efficiency of around 90%. It has a sine wave controller
that enables true vector control. Parameters can be changed, as the controller can be
programmed with an USB cable or by Bluetooth (iOS or Andoid compatible), too.
It also implements regenerative braking and cruise control. It has a maximum nominal
velocity of 45 km/h (48 V). The engine is controlled with a thumb accelerator.

STREET JET USER MANUAL
14
The Importer / Manufacturer :
Golden Motor Technology Co Ltd. Block 8, Modern Industrial Center, 801 Changwu
Middle Road, Changzhou, Jiangsu 213164 - CHINA
It meets the following standards:
ISO 9001
Electromagnetic compatibility in accordance to the Directive 2004/108/EC
For which next norm has been followed:
EN 61000-6-1:2007 EN 61000-6-3:2071
The following verifying tests have been performed:
TUV –18000556 001 TUV –18000555 001
2.2.2.1.1 WARNING
Do not overload the motor in steep and long roads. Abusing of the electric
engine can damage (burn) the motor and the controller. The warranty will not
cover any overload of the electric systems.
2.2.2.2 DISPLAY AND CONTROLLER
1. DISPLAY CONTROLLER
2. CRUISE CONTROL (RED SWITCH)
3. REVERSE (GREEN SWITCH)
4. DISPLAY
5. POWER ON/OFF
6. THUMB THROTTLE

STREET JET USER MANUAL
15
2.2.2.2.1 Smart LCD (BAC-601)
This manual will help you use the instrument correctly to achieve a variety of vehicle
control and vehicle status display.
OPERATION
ON/OFF
Turn on the LCD by pressing the button on the battery (POWER ON/OFF). The LCD shows
real time speed by default. Turn it off pressing again the POWER ON/OFF button that is
on the battery.
1. Speed & Distance display
Short press "MODE" button, the LCD will show:
SPEED (real-time speed km / h); AVG SPEED (current average speed km/h); SPEED
MAX (current maximum speed km/h); TRIP (current mileage km); TRIP TIME
(current driving time h); ODO (total cumulative mileage km).
①UP
②MODE
③DOWN

STREET JET USER MANUAL
16
2. Power Assisted Select (PAS) or Throttle Level Select
When LCD is on, short press "UP" or "DOWN" button switching PAS (pedal assistance or
electric power) levels and changing the electric motor power levels.
There are 0- 5 levels for rider to select:
0: No power
…
5: The highest level
When LCD is on PAS level is at "0" by default.
3. PAS Mode
Long Press "DOWN" button, the electric vehicle enters into PAS mode. Electric vehicle
will drive at constant speed 6km/h.
4. Battery Gauge
When the battery is full, the 5 bars are displayed, all the battery gauge is bright ; when
the battery is under voltage with one bar and blinking , you need to charge the battery
immediately.
5. Output Power Display
LCD will display the output power of the electric vehicle, the unit used is “Watt”.
Under Voltage

STREET JET USER MANUAL
17
6. Back Light
Long press “UP+MODE”, the back light will turn on. In order to turn it off, long press
“UP+MODE”again.
7. Speed and Mileage display
Speed and mileage can be displayed in metric or in imperial units.
8. Error code display
When the electric vehicle system fails, LCD will automatically display the error code.
Error Code
Error Status
0
No Failure
1
Brake Lever Failure
2
Throttle Failure
3
Hall Failure or Phase
4
Under Voltage
5
MOSFET Failure
6
Overheating
7
Over current
8
Over voltage
9
Communication Failure
Only after the failure has been cleared, LCD can exit the error display screen. The electric vehicle cannot
continue driving when the failure appears.
BACK LIGHT ON
BACK LIGHT OFF

STREET JET USER MANUAL
18
For internal parameter settings, please contact your distributor or look for further
information about the display. Oracing is not responsible for misuse or any problems
derived from a bad parameter setting by the user.
2.3 STAND
The Street Jet’s stand is designed so it can help in the process where your wheelchair’s
front wheels are lifted and the frontal weight is placed on the Street Jet and so it can be
easily put into place and transported. It is connected to the tilting mechanism, which
makes the lifting process possible and also keeps the stand from touching the ground
while driving. The mechanism’s manipulating instructions will be detailed further in this
manual (see USAGE DURING WHEELCHAIR ATTACHMENT).
2.4 TILTING ARMS
It is possible to adjust the width of the tilting arms by unscrewing the bolts (under the
central round tube) and moving the central bar outward or inward. This allows you to
adjust them to your wheelchair’s width

STREET JET USER MANUAL
19
2.5 WHEELCHAIR ATTACHING CLAMPS
In order to attach the Street Jet to your wheelchair, the attaching clamps have been
designed to fit every kind of frame shape. The whole system has 5 main parts, which
allow all its functionality:
To see how to adjust them, see USAGE BEFORE CHAIR CONNECTING CLAMPS.
1. ANGLE REGULATOR (XY AXIS)
2. FIXING SCREW
3. CLAMP
4. ANTI-SLIDE & PROTECTOR FABRIC
5. ANGLE REGULATOR SCREWS (YZ AXIS)
Table of contents
Popular Wheelchair manuals by other brands

Aquatec
Aquatec FLEXIBIL 10019-10 operating instructions

lopital
lopital Elexo XXL Instructions for use

PDG Mobility
PDG Mobility LUNA Owner's operation and maintenance manual

GENDRON
GENDRON REGENCY XLC 7700 owner's manual

Everest & Jennings
Everest & Jennings Paramount XD user manual

Amylior
Amylior LOGO SILVER OutoHAIR manual

Shoprider
Shoprider ISO13485 user manual

Invacare
Invacare Infinity Series brochure

AMG Medical
AMG Medical MedPro DEFENSE Zorbi 770-305 Assembly instructions

Quickie
Quickie Q7 Adjustable owner's manual

Aquatec
Aquatec OCEAN operating instructions

DeVilbiss Healthcare
DeVilbiss Healthcare drive D-LITE Instructions for use