Orbea R10 User manual

OWNERS
MANUAL
R10/ R50/ H10/ M1
M2/ CITY/ YOUTH
EN
CAST
FR
DE
IT
PR


Please read this manual carefully
before using your helmet
Conform to :
EN 1078:2012+A1:2012
CPSC 16 CFR Part 1203
EC Type examination conducted by: SGS
United Kingdom Ltd, Weston-super-Mare,
BS22 6WA, UK. Notied Body No: 0120
OWNERS
MANUAL
This manual is for pedal cycle,
skateboard and roller skate.

YOUR HELMET
The helmet you have just purchased provides
protection, whether helmet on or off the road. To insure
proper use of this helmet, familiarize yourself with its
features, t and care by carefully reading this manual
before wearing your new helmet.
Protection and ventilation: The outer shell allows the
helmet to be rated one of the lightest while providing
excellent durability and integrity. The multiple vents with
inner air channels draw air throughout the helmet and
over the brow for maximum cooling.
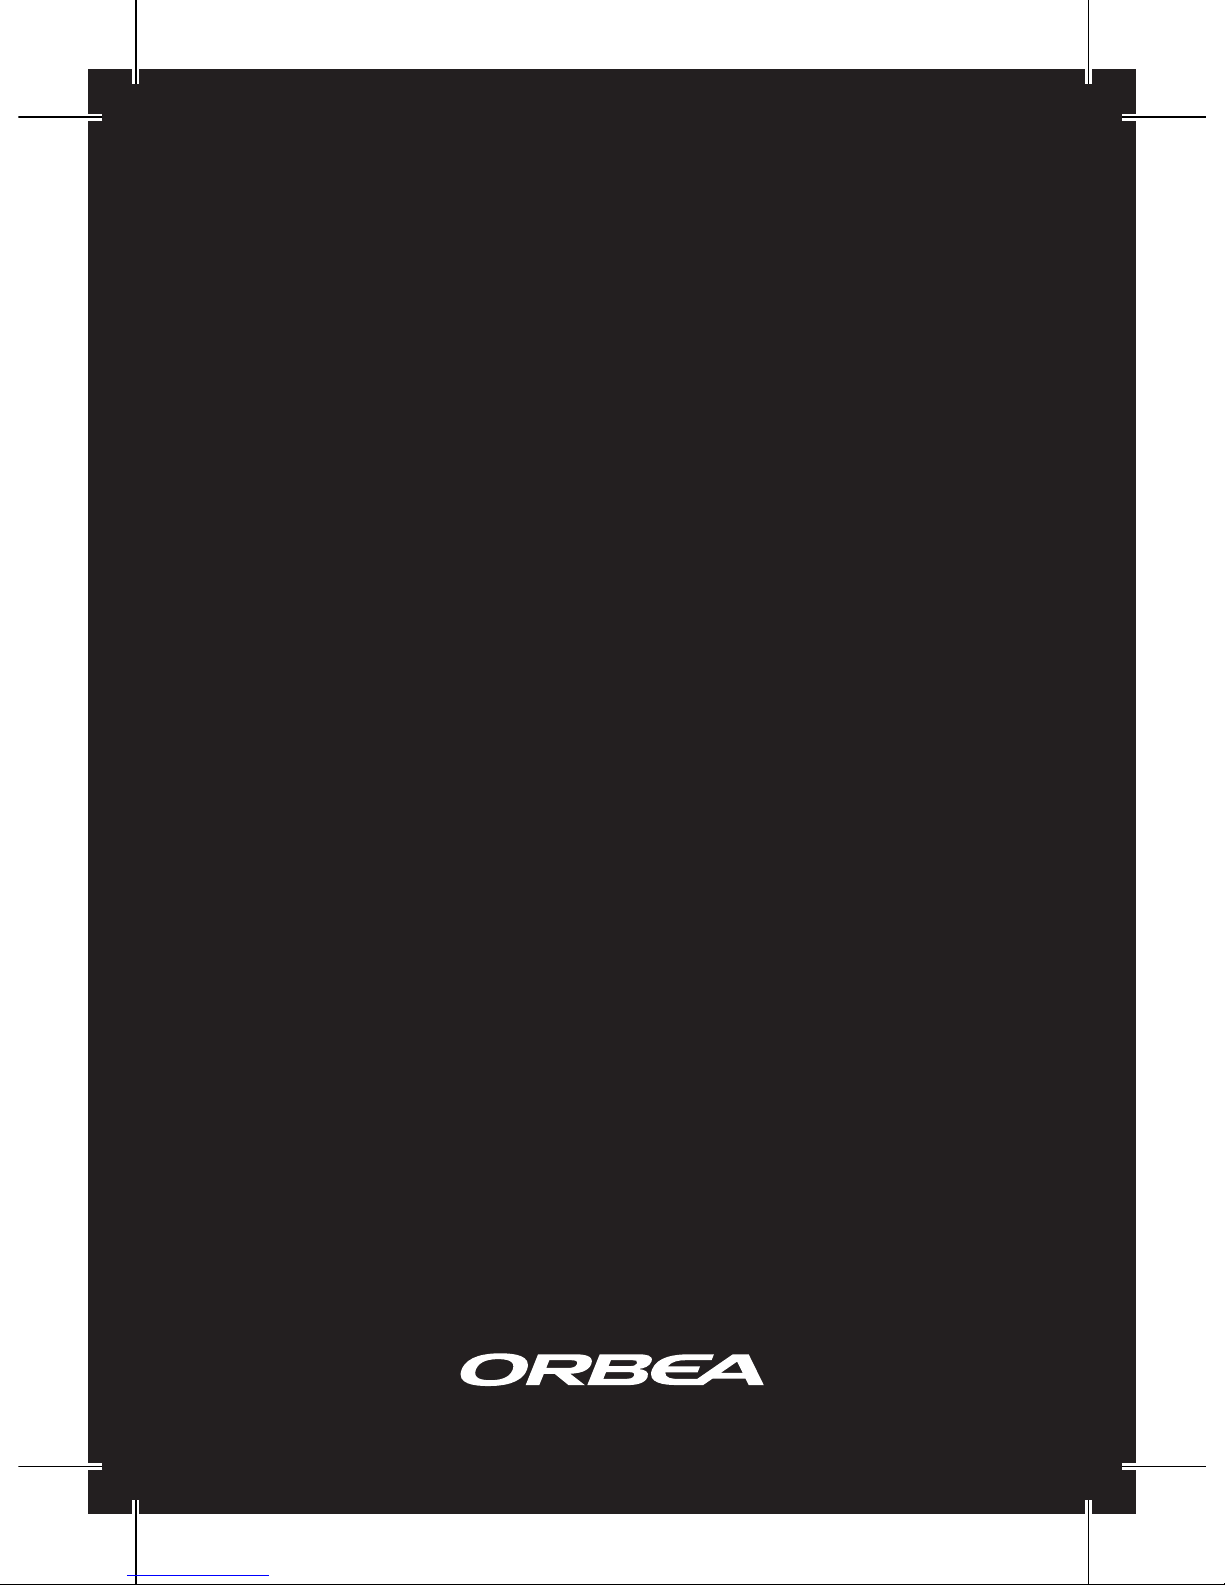
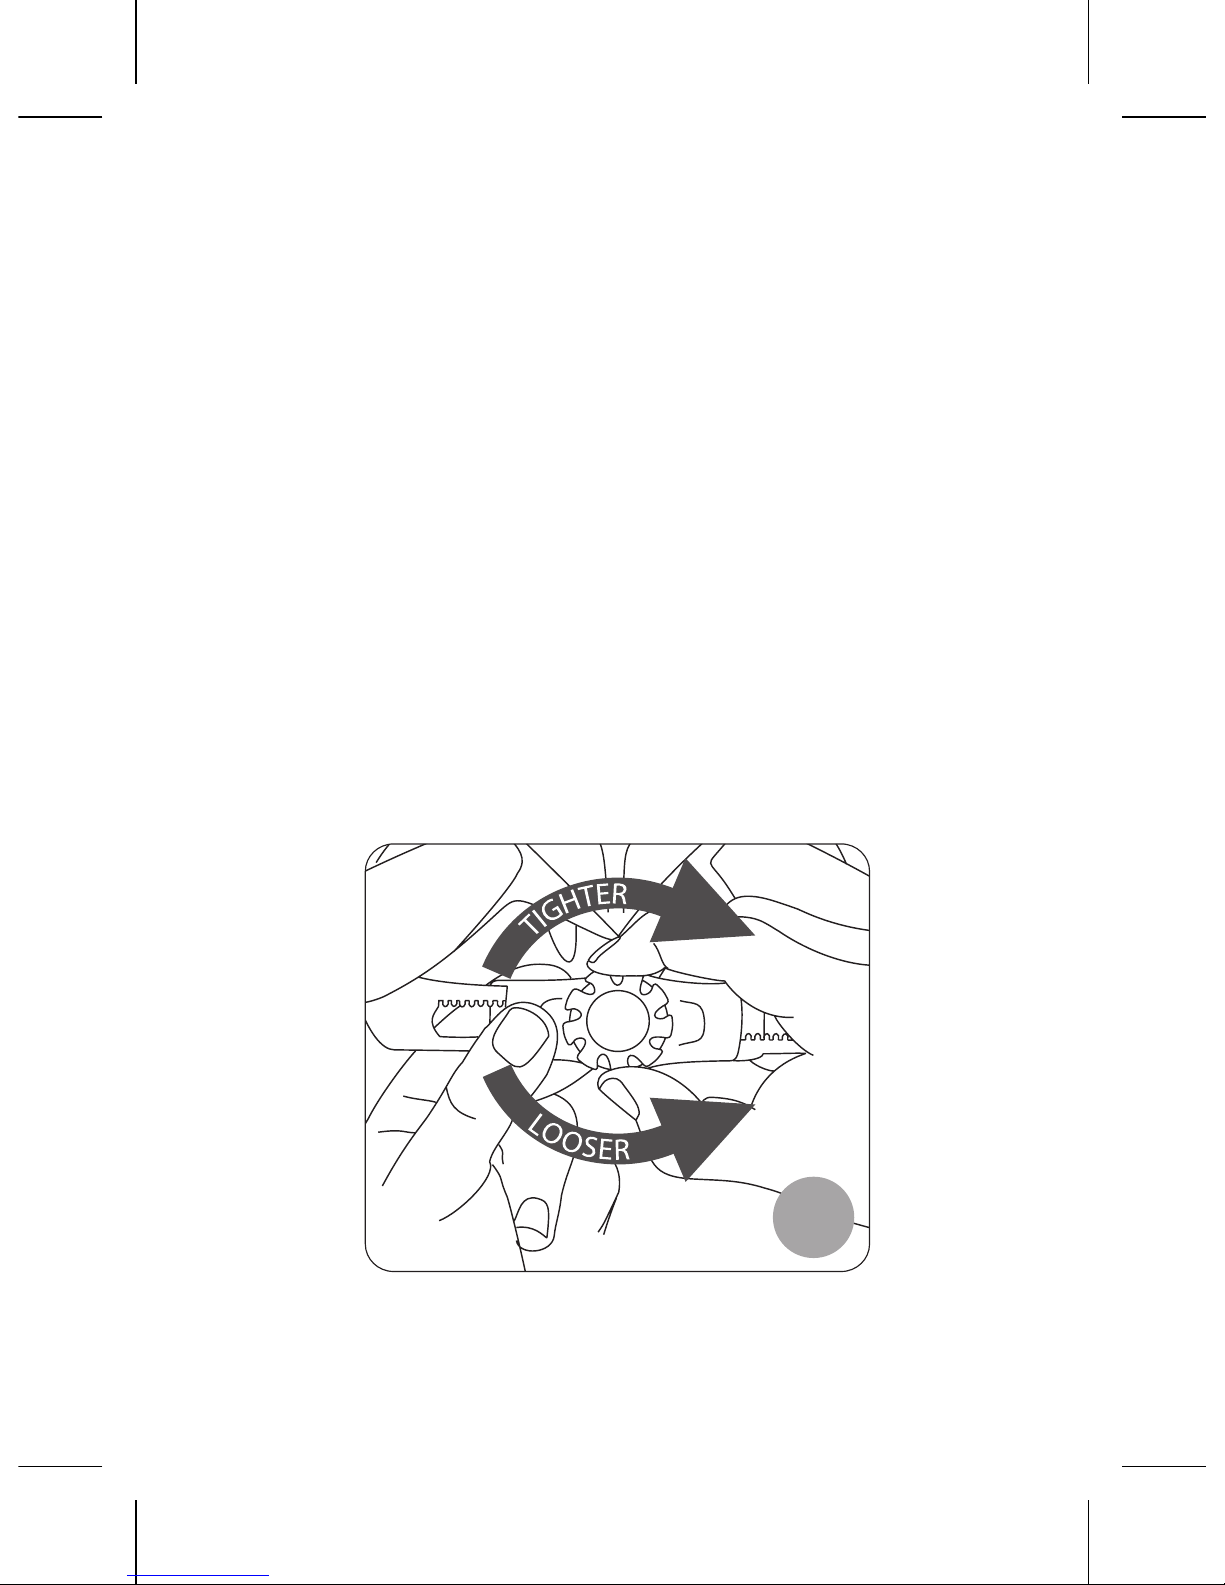
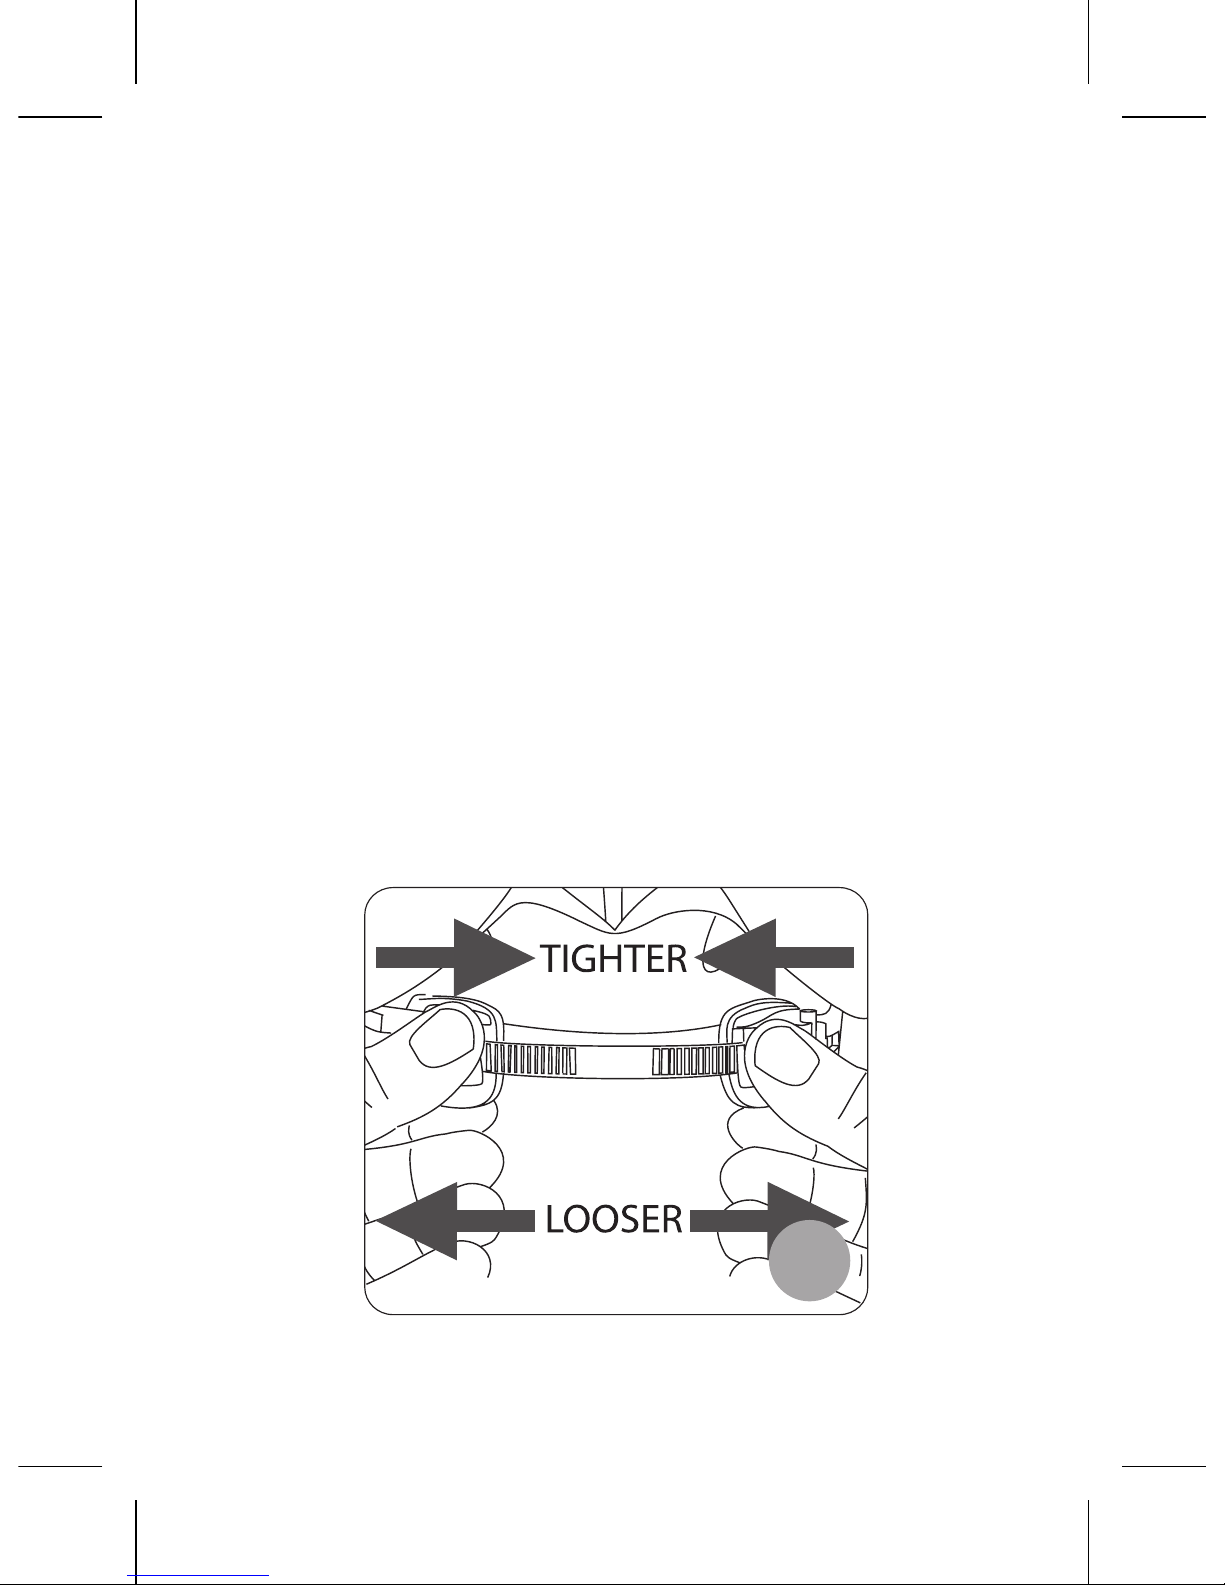
Fit System: The helmet must t properly to be effective.
With a proper t, the helmet will not move back and
forth or side to side while fastened. Your helmet has
one of three t systems.
If you cannot adjust your helmet to t as required DO NOT USE THIS
HELMET. Replace it with the proper size.
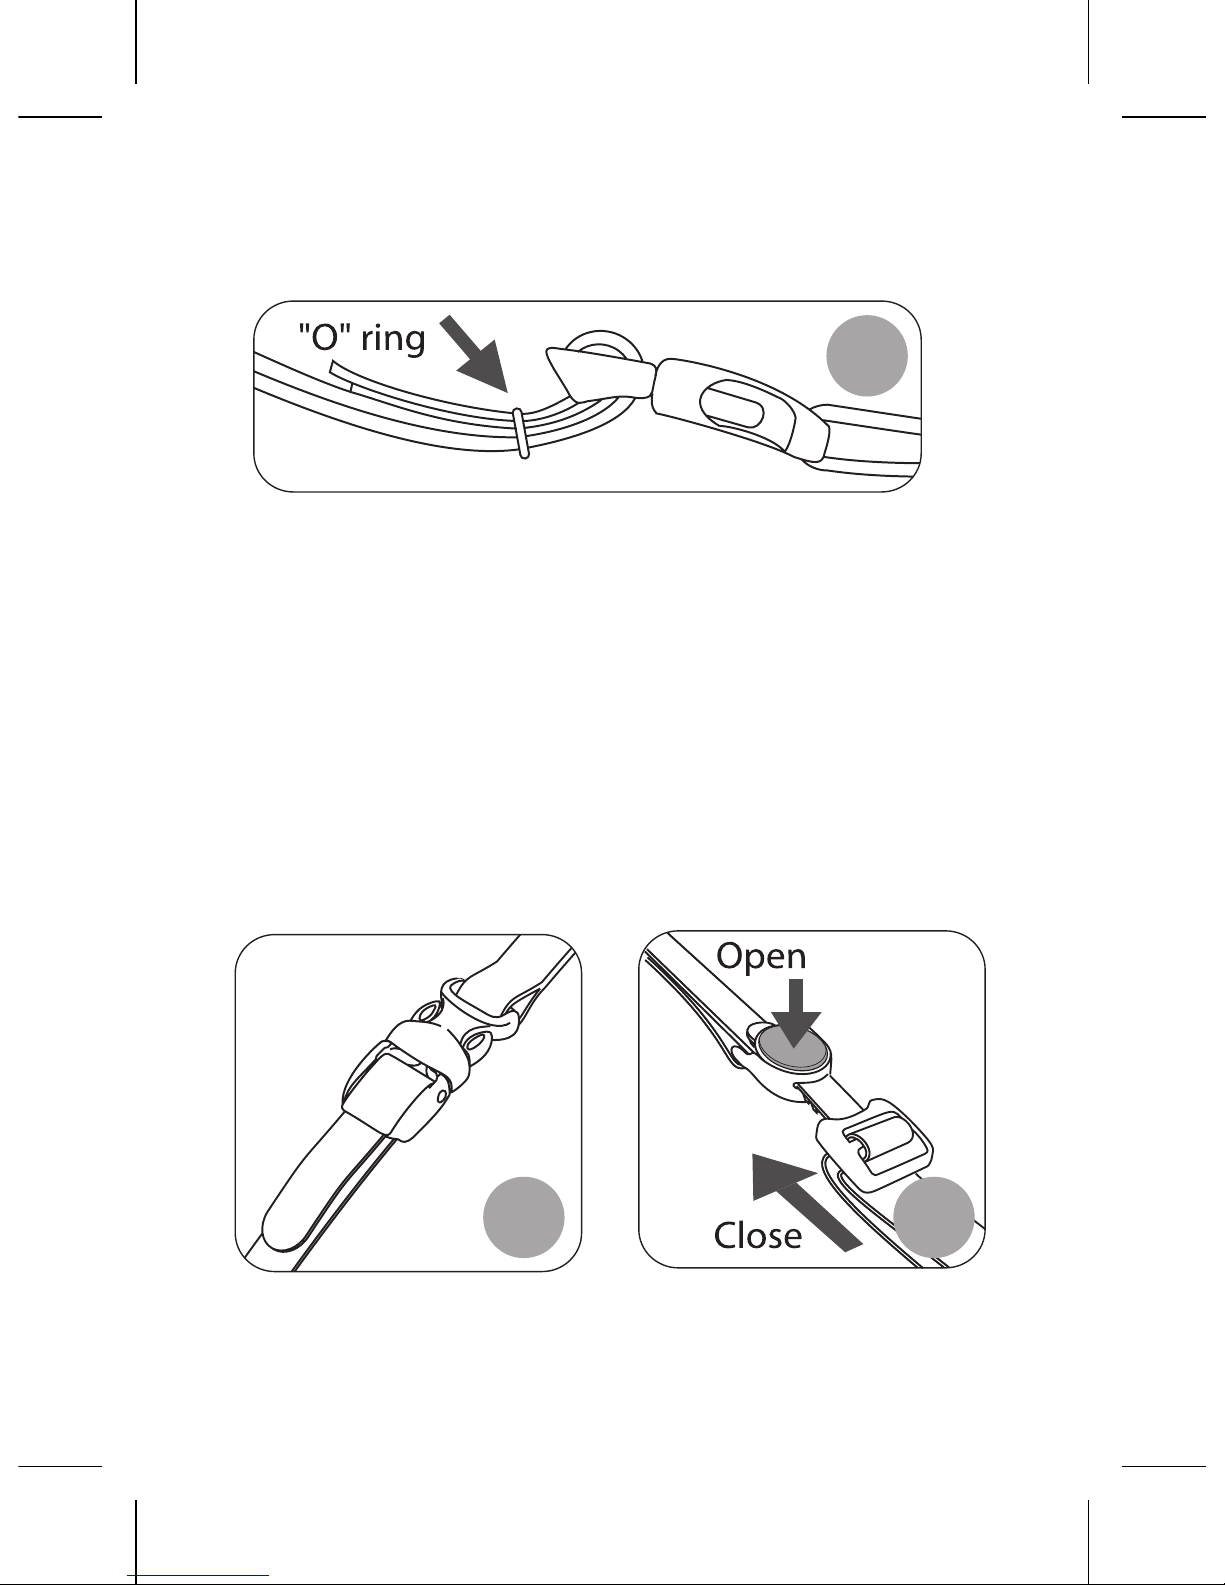
Turn Ring Fit PadDual Ratchet

TURNRING
Place the helmet on your head. Turn the ring clockwise
until the headband is rm yet comfortable.If you need
to loosen the headband, TAKE HELMET OFF, turn the
ring counterclockwise. All t adjustments must be made
with the helmet in the proper position. Failure to do this
will result in a poor t. A poor t will allow the helmet
to move out of position or come off in an accident.For
a proper turn ring operation, refer to Figure 1. For a
proper position, please refer to Figure 8.
Fig.1

DUALRATCHET
Place the helmet on your head. Push the Dual Ratchet
adjustors until the headband is rm yet comfortable.
If you need to loosen the headband depress the
levers on the adjustors and pull the sliders apart. All
t adjusments must be made with the helmet in the
proper position. Failure to do this will result in a poor t.
A poor t will allow the helmet to move out of position
or come off in an accident. For proper Dual Ratchet
operation, refer to Figure2. For proper position, please
refer to Figure 8.
Fig.2

FITPAD
Different thicknesses pads are provided for a good
t. Fit Pads are held in place by a hook and loop style
fastener. Try any combination of the various pads
provided until the helmetts rmly and comfortably. All
t adjustments must be made with the helmet in the
proper position. Failure to do this will result in a poor t.
A poor t will allow the helmet to move out of position
or come off in an accident. For proper pad placement,
refer to Figure3. For proper position, please refer to
Figure 8.
Fig.3

THEPROPER FIT
Retention system: This helmet uses a retention system
that is simple and can be buckled and unbuckled
without changing the adjustment. The straps must be
snugly and evenly tensioned. Place the helmet rmly on
your head and fasten the buckle make sure you press
rmly enough to hear a “click” sound.
To tighten the rear strap, pull excess from the rear of
strap 2. Hold the helmet with one hand. With the other
hand, hold the strap where they pass under your chin.
Then pull from side to side to balance the length of all
four straps. (see Figure 4).
“O”ring is used for tightening the chin strap. Hold
the buckle with one hand, then pull the excess strap
through. (Figure 5)
Fig.4

If your helmet came with a locking buckle, you will need
to ip the lock up, adjust the strap then lock the strap in
place by closing the lock. (Figure 6)
If your helmet came with a push button buckle, adjust
the straps then insert the clip to fasten.
Push the button to release. (Figure 7)
Fig.5
Fig.6 Fig.7

The helmet must sit rmly and level on your head. To
lower the front of the helmet to cover your forehead,
tighten the chin strap and loosen the rear strap. To raise
the front, loosen the chin strap and tighten the rear
strap. (Figure 8)
To check the proper tension, put on the helmet and
fasten the buckle. Open your mouth. You should feel
the strap pulling against your chin.
Correct Incorrect
Fig.8

The attempt to pull the helmet off, by pulling on the
front then the rear of the helmet. If the helmet comes
off, increase strap tension and examine if the pads
being used are thick enough. The helmet should not
roll forward or backward excessively.It should not be
possible to remove the helmet without unfastening the
buckle.
Final check
The important thing to remember is that the helmet ts
snugly. If you can tilt it forward or backward you need
to tighten the strap adjustment.
It is important for the helmet to t snugly on your head
and must be fastened to provide maximum protection.
NOTE: All adjustments should be checked each
time the helmet is worn, making sure it ts snugly
at all times.

HELMETCARE
CARINGFORYOURHELMET
Clean the headgear with mild soap and water only.
The use of any hydrocarbons, cleaning uids, paints or
decals can cause damage to the helmet and make it
ineffective in the result of an accident.
Keep the helmet
out of extreme heat
Helmets will be damaged if exposed to temperatures
exceeding 65º C (150 ºF). Dark vehicles and storage
bags can exceed this on very hot days. Heat damaged
helmets will have random disgured areas where
the texture appears bubbly and uneven. If damaged,
helmets should be destroyed and replaced immediately.

CLEANING
&STORAGE
Important information
This headgear is designed to absorb the energy of a
blow by partial destruction or damage of the helmet
itself. Even though such damage may not be visible, the
helmet should be destroyed or replaced if it is involved
in a crash or fall that causes the helmet to impact any
hard surface around it.

WARNING
This helmet is designed and intended exclusively
for the use of pedal cyclists, skateboards, and
roller-skates.It is not intended for and will not
provide adequate, safety protection if used during
motor sport or moped use.
No helmet can protect the wearer against all
unforeseeable impacts. However, for maximum
protection, the helmet must t well and all
retention straps must be securely fastened. Do not
modify or remove any of the original components
of this helmet other than what is recommended by
the manufacturer. This helmet should not be used
by children whilst cilmbing or doing other activities
when there is a risk of hanging if the child gets
trapped with the helmet on.
!

The helmet can only protect if it ts well and that
the buyer should try different sizes and choose
the size which feels secure and comfortable on
the head.
The buckle should be positioned away from the
jawbone.


MANUAL
DELUSUARIO
EN
CAST
FR
DE
IT
PR
R10/ R50/ H10/ M1
M2/ CITY/ YOUTH


Lea atentamente este manual antes
de usar el casco por primera vez.
El producto cumple con la normativa:
EN 1078:2012+A1:2012
CPSC 16 CFR Part 1203
MANUAL
DELUSUARIO
Este manual está dirigido a usuarios
de bicicletas, tablas de skate y patines.
EC Type examination conducted by: SGS
United Kingdom Ltd, Weston-super-Mare,
BS22 6WA, UK. Notied Body No: 0120

ELCASCO
El casco que usted ha adquirido ofrece protección
en carretera y en cualquier tipo de terreno. Para
usarlo adecuadamente, es necesario conocer sus
características, su modo de ajuste y sus instrucciones
de mantenimiento. Para ello, es conveniente leer este
manual antes de usar el nuevo casco.
Protección y ventilación: Gracias a su carcasa
externa, el casco está considerado uno de los más
ligeros y durables del mercado. Las múltiples aberturas
con canales de aire permiten el ujo de aire para una
sensación refrescante en todo el casco y en la frente.
Sistema de ajuste: Para que su ecacia sea óptima,
el casco debe estar perfectamente ajustado. Con un
ajuste adecuado, el casco no se desliza hacia delante
ni hacia atrás, ni tampoco hacia los costados. El casco
está provisto de uno de estos tres sistemas de ajuste:
Si no es posible ajustar correctamente el casco, NO SE LO DEBE USAR.
En ese caso, se recomienda cambiarlo por uno de una talla más adecuada.
Rueda Almohadillas
Doble corredera
dentada
This manual suits for next models
6
Table of contents
Languages:
Popular Motorcycle Accessories manuals by other brands

Eastwood
Eastwood L6700 instructions

GIVI
GIVI Trekker Alaska 36 lt owner's manual

hepco & becker
hepco & becker 6302543 00 01 manual

KTM
KTM 45312948444 Fitting instructions

hepco & becker
hepco & becker 6316502 00 01 R quick start guide

Sinister Sound
Sinister Sound 98-13 Road Glide/Ultra installation instructions

warmer
warmer TYD193-137-2D6C Series User instruction

Memphis Shades
Memphis Shades 2321-0238 quick start guide

Suzuki
Suzuki 99181-25L0 000 Series installation instructions

Cobra
Cobra 05-9349 instruction manual

hepco & becker
hepco & becker 400.963 Assembling instructions

schweisskraft
schweisskraft VarioProtect XXL-W TC AIR TH3 operating instructions