4. Insert welding rod and melt. Attention: Welding rod gets hot
5. Remove remaining plastic in hole with supplied cleaning stick
Naturally, the repaired part has to be finish sanded. For further processing of bare
plastics: see corresponding chapter. Painting can be done after welding (according to
the plastic type (where necessary, after primer treatment). Spray-on textured or matt
finishes can be used to simulate the original surface and colour.
6.3. Crack and hole repair
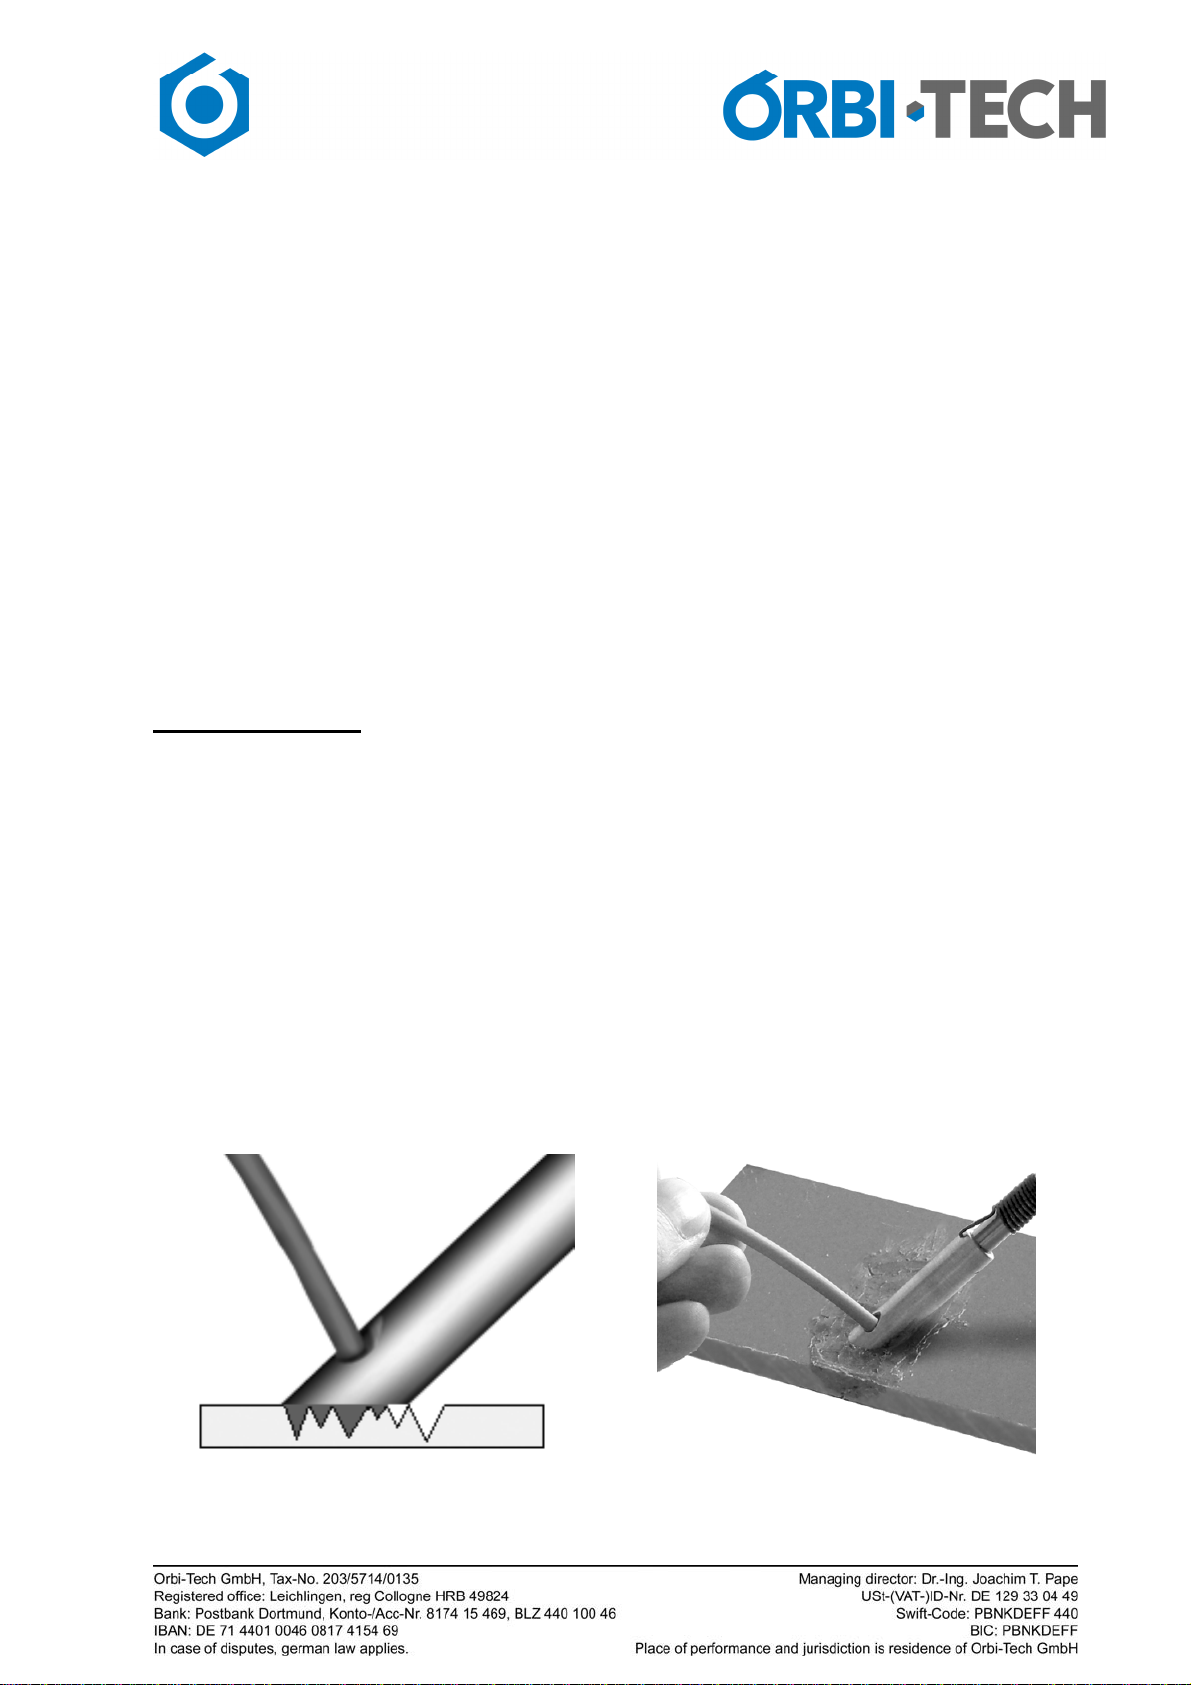
If the part has a crack, first you tack
weld the two parts. You can do this
by spot welding with the welding tip
with 2-5mm spacing (like stitching),
Next make sure penetration is
adequate and smooth the seam. If it
is possible to weld from both sides
the bond will be strong even with this
fairly simple method. If you can only
weld from one side, the bond is
not as strong but is enough to will
keep the parts from moving during the
welding process. To make the bond even stronger, the
reinforcing grid can be used. Cut a piece of the grid
with the scissors and put it on top of the crack. The grid
should extend at least 7 mm longer than the crack on either
side. Fix grid on the surface by using the flat part of the
welding tip to tack the grid bit by bit.
Start on one side in the middle of the grid.
Afterwards start to sink the mesh into
the plastic with the welding tip as
gently as possible with minimum
force. When the net sinks into the
plastic through melting of the surface,
pull back the foot about 2 to 3mm and
repeat the procedure. Push the
molten plastic on the hot part that you
have just worked on, thus covering
the mesh.
(picture 2). Repeat this procedure until the
mesh is fully below the surface. This requires patience. Plastic needs some time to
melt. Do not use excessive force or pressure.
Tacking plasitc parts with
stitching action
lternating „stitching“ and smoothing
Reinforcing grid should overlap
the crack to be repaired by at
least 7mm
Sink in the metal mesh with heat
and gentle pressure Cover the mesh with melted
plastic