manuals.online logo
Brands
  1. Home
  2. •
  3. Brands
  4. •
  5. Orbis
  6. •
  7. Switch
  8. •
  9. Orbis ASTRO NOVA CITY User manual

Orbis ASTRO NOVA CITY User manual

ASTRONOMIC TIME SWITCH
ASTRO NOVA CITY
INSTRUCTIONS FOR USE
DESCRIPTION
The ASTRO NOVA CITY is a time switch designed to control luminous loads in
function of dawn and dusk rimes. It includes a program that automatically adjusts
the dawn lighting-up and dusk switching-off times, without any need for
maintenance. The geographic position location is made by selecting the closest
city to your location from a list of the most important cities in your country.
Its small size of only two modules makes it ideal for installation on boards with little
available space. The unit includes 22 memory spaces in two independent circuits
that can be programmed in an astronomic manner or with fixed times.
INSTALLATION
WARNING: The assembly and installation of the electric apparatus must be
carried out by an authorised installer.
THE ELECTRIC PAOER MUST BE SWITCHED OFF BEFORE COMMENCING
INSTALLATION.
The unit is internally protected against interference by a security circuit. However,
certain especially strong fields could affect correct operation. Interference can be
avoided if the following installation rules are followed:
- The unit must not be installed close to inductive loads
(motors, transformers and contactors etc )
- It is recommended that a separate power line be employed
(fitted with a mains filter if necessary).
- Inductive loads must be fitted with interference suppressors (MOVs, RC filters).
If the time switch is used with other devices in an installation, it will be necessary
to verify that the overall assembly does not generate any parasitic interference.
INSTALLATION: Electronic control device, independently installed in a distribution
cabinet, fitted with 35-mm symmetric profile in accordance with EN 60715 (DIN
rail).
CONNECTION: In accordance with the wiring drawing
PUTTING INTO SERVICE AND INSTALLATION
All programming sections comply with the following rules:
- The data to be modified s identified by flashing.i
- Each press of the Δand ∇keys increases or decreases the flashing data. If it is
maintained pressed, the increase/decrease speed becomes five units per second.
- After the last data item, confirmation is given by OK or, if no key is pressed within
one minute, the unit returns to normal operation: the screen displays the current
time and the C1 and C2 circuit status.
The dawn and dusk times can be displayed in normal mode by pressing “C”, which
shows AST screen, together with current dawn and dusk times.
To install the ASTRO NOVA CITY as an astronomic time switch, it is only
necessary to enter the ZONE MENU, pressing the OK key and selecting the city
closest to the installation and confirm with OK: The CORR screen displays: NO
and the dawn and dusk times (automatically changes from one to another every
five seconds) corresponding to the selected zone. if no corrections are to be
performed, confirm with OK and the switch is programmed with the two circuits
operating in astronomic mode.
SELECTING LANUGUAGE
Pressing OK enters MENU and with the Δand ∇keys select LANGUAGE,
confirming with OK. The Δand ∇keys are used to select the desired language,
confirming with OK and returning to the main screen.
ZONE ASSIGNMENT
Pressing OK enters the ZONE MENU, pressing it again enters the city list, the Δ
and ∇keys are used to select the closest city to the installation zone. Confirm with
OK and the screen displays CORR. NO and the dawn and dusk rimes
alternatively. If the displayed dusk (switch-on) and/or dawn (switch-off) times are to
be modified, "YES” is selected with the Δand ∇keys, pressing OK to confirm,
dawn correction is entered and the screen displays CORR. DAWN, the dawn time
and 0:00 in the lower section, which indicates the correction time. Using the Δand
∇keys the value is modified increasing or decreasing it up to three hours. Confirm
with OK to display CORR. DUSK and the dusk time, the operation is repeated,
confirmed with OK and returning to the main screen.
MENU
ON
OFF
03 9612 24
15 18 21
C1 C2
C2C1
1
2
3
4
5
6
7
OKC
C1 circuit status
Day of the week
indicator
Current time
Summer time Winter time
12-hour
time format
Permanet
channel indicator
C2 circuit status
Vacations or
holiday program
Time scale
Decrease or move up menu /
C1 manual operation
Go back
Confirm screen option /
Access menu
Decrease or move down menu /
C2 manual operation
Screen
PREDEFINED PARAMETERS
The time switch leaves the factory programmed in the country language, set to the
official country date and time, with the zone set to the first alphabetical city to the
list, and 4 pre-established programs.
Program 01: C1 ON DUSK for all days of the week
Program 02: C1 OFF DAWN for all days of the week
Program 03: C2 ON DUSK for all days of the week
Program 04: C2 OFF DAWN for all days of the week
P1
P3 P2
P4
on
PREDEFINED
OPERATIONS
DUSK DAWN
Night period
off C1
C2
These programs remain in memory even if a reset is performed.
If any of these programs is not suitable, it can be modified or deleted by pressing
OK and entering the ZONE MENU, selecting PROGRAM MENU with the Δand ∇
keys and pressing OK again to display PROG 01. The program to be modified or
deleted in selected with the Δand ∇keys and OK is pressed. The program
number is displayed onscreen with ENTER (example: PROG:02 ENTER). Again
with the Δand ∇keys ENTER is selected if the program is to be modified or
DELETE if it is to be eliminated. If ENTER has been selected, the program to be
modified will be displayed. The Δand ∇keys are used to modify and OK to
confirm. If DELETE is selected, once the program has appeared onscreen, OK is
pressed and the program is deleted.
SETTING THE TIME
Pressing OK enters the ZONE MENU and the Δand ∇keys are used to select
DATE MENU, confirmed with OK to enter YEAR DATE with the year digits flashing
on the screen and the Δand ∇keys are used to change the year value with OK
confirming the entered digits. The MONTH, DAY, DAY OF THE WEEK, TIME and
MINUTES are similarly entered, confirming with OK to enter in ZONE.
CHANGING THE GEOGRAPHIC ZONE
If, once the unit is programmed we wish to change the zone, the dawn or dusk
times, ZONE MENU is entered again and the necessary parameters are changed
in the same way as in the Zone Assignment section.
PROGRAMMING
In normal mode press the OK key to access the ZONE MENU and select
PROGRAM MENU with the Δand ∇keys. OK is pressed and PROGRAM PROG
01 is displayed onscreen, if an operation is to be programmed in this program
press OK to display PROG 01 ENTER, press OK again and select the circuit and
the operation to be executed from: C1 ON, C1 OFF, C2 ON and C2 OFF. Confirm
the selection with OK and select the operation type, which may be: Fixed time,
Dawn (DAWN) astronomic time or Dusk (DUSK) astronomic time.
FIXED TIME OPERATION
If fixed time is selected, press OK and enter the hour and minutes, day or days of
the week information in those desired accepting or not, day by day, in those for
which the operation is to be performed, confirming with OK. If, when confirming the
day of the week with the OK key, this is maintained pressed, the operation will be
selected as a holiday, the word HOLIDAYS is displayed onscreen, together with
the symbol “ ···· ” and confirm with OK, the screen will display PROGRAM PROG
02.
123N
L
456
C1
C2
ASTRONOMIC OPERATION
Once the circuit is selected, together with the operation between C1 ON, C1 OFF,
C2 ON and C2 OFF, the type of operation to choose is displayed. The dawn
(DAWN) or dusk (DUSK) operation that is to be performed is selected and the
screen displays the possibility to correct the time for the displayed dawn or dusk
time. If we agree with the screen display the correction is left at zero and the hours
and minutes are confirmed with OK. If it is to corrected by more or less, the
correction time is entered in hours and minutes (up to ± 9 hours and 59 minutes),
automatically displaying the time at which the operation is to be performed, confirm
with OK then select the day or days of the week on which this operation is to be
carried out.
If, on confirming the last day of the week with the OK key, this is maintained
pressed, the operation will be selected as a holiday, the word HOLIDAYS is
displayed onscreen, together with the symbol “ ”.
WARNING: If an operation is programmed on a holiday, the HOLIDAYS
program cannot be used and is removed from the menu remaining as a
HOLIDAY period.
If astronomic (dawn - dusk) operations are programmed in the same circuit and
fixed time, they could overlap since astronomic operations move forward and
backward during the year and could lead to incorrect operations.
For example: A shop window lights are to be switched on at nightfall (astronomic
operation) and are to be switched off again at 21:30 (fixed time operation). Since
the astronomic switch-on operation is moved forward during summer, there will be
a time when dusk will fall after 21:30 and the switch-on will occur after the
programmed switch-off time so that no actual switch-off will occur and the lights
will remain on until another switch-off command.
Entering COUNTER EXTRA MENU display COUNTER C1 and the hours for which
C1 has been enabled (ON position), the Δand ∇keys are used to display channel
C2 counter. The counters only increase hours when power is switched on.
This situation can be resolved by putting the two circuits in series or by
programming another switch-off operation after the time of dusk.
PRIORITY
In a situation in which two operations coincide at the same time, the ASTRO
NOVA CITY will always perform the OFF operation. The counters are reset by entering the corresponding counter and pressing OK,
which will display DELETE C1 or DELETE C2 as required then selecting YES with
the Δand ∇keys and confirming with OK.
DISPLAYING THE PREOGRAMMED OPERATIONS
Press OK to enter the PROGRAM MENU, press OK again and the careen
changes to ENTER PROGRAM and again pressing OK the PROGRAM PROG 01
is entered and all programs from 1 to 22 can be displayed using the.
12H - 24H MODES
Enter the 12H – 24H EXTRAS MENU, press OK and select the desired time
display mode with the Δand ∇keys. Confirm the selection with OK.
TIMING DIAGRAM CONTRAST
Pressing “C” twice in normal mode C1 is displayed onscreen, together with its
status and timing diagram for the operations programmed in this circuit, “C” should
be pressed again to display the C” circuit status. Enter the CONTRAST EXTRAS MENU, press OK, which displays the CONTRAST
screen, together with a number between 0 and 9 (default 6) corresponding to
screen contrast. The Δand ∇keys are used to select the desired level of contrast
and confirm with OK.
RESET ZEROING
When the four keys are simultaneously pressed for more than three seconds, the
entire current programming is deleted and the LANGUAGE menu is entered. The
four factory-preset programs are retained in memory.
TECHNICAL SPECIFICATIONS
Power supply As indicated on unit
MODIFYING OR DELETING OPERATIONS Switching power: 2 x 16 (10) A/250 Vac
Press OK to enter the ZONE MENU and use the Δand ∇keys to select
PROGRAM MENU, press OK again and the screen changes to PROGRAM PROG
01, use the Δand ∇keys to select the program to be modified or deleted and
confirm with OK, which will display the selected program onscreen, together with
PROG X ENTER confirm with OK it is to be modified than proceed as in section
Programming. If the operation is to be deleted, use the Δand ∇keys to select
DELETE and confirm with OK.
Maximum recommended loads:
Incandescent lamps 3,000 W.
Uncompensated fluorescents 1,200 W.
Compensated fluorescents 1,200 W 150 μF
Low-voltage halogens 1,000 VA
Halogens (230 V.) 2,500 W.
Low-consumption lamps 10 x 23 W
MANUAL OPERATION
Channel 1 or 2 can be temporarily enabled or disabled from normal mode. Press ∇
for C2 and for ΔC1. Contact: AgSnO2 switched
Own consumption: 6 VA (1 W approx)
PERMANENT MANUAL OPERATION Assigned pulse voltage 2.5 kV
The PERMANENT MENU is entered. Confirm with OK and PERMANENT C1 is
displayed onscreen. Use Δand ∇to select: C1: YES, C1: NO, C2: YES or C2: NO
depending on the channel to be permanently enabled or disabled. The selected
channel permanently remains in the position it is in until its status is again modified
in the same way.
Type of action: Type 1B, 1S, 1T and 1U.
Memory spaces: 22
Types of operation ON OFF ASTRONOMIC
Operation precision: One second
Operation precision: ≤±1sec/ day at 23ºC
With the operation permanently enabled, it is possible to change its status (from
ON to OFF or vice versa) with the manual operation key ( C1) ( C2)
corresponding to the desired circuit without this disabling the permanent status.
None of the programmed operations are performed in permanent status. When a
circuit is in permanent status, the corresponding symbol is displayed on screen
( ).
The permanent mode is disabled in a similar fashion, select the channel to be
disabled, select NO and confirm with OK.
ADVANCED PROGRAMMING (SPECIAL FUNCTIONS) EXTRAS
TIMING CHANGE (SEASON) (PUTTING CLOCKS FORWARDS/BACKWARDS)
Press OK to enter the MENU and use the Δand ∇keys to select the EXTRAS
option. Confirm with OK and SEASON EXTRAS will appear onscreen, press OK
again and the screen displays SEASON: AUTO and the Δand ∇keys are used to
select one of the three options. AUTO, MANUAL and DISABLE and confirm the
selected option with OK.
(If there is one or more programmed operations coinciding with the time change
period, these will be duplicated or are not performed depending on the time
change).
AUTO (the time change is automatically carried out on the last Sundays in March
and October at 02:00 and 03:00 respectively.
This option does not permit changes. When this option is chosen EXTRAS MENU
is displayed.
MANUAL (allows day and time to be chosen for the time change).
When this option is chosen EST WÆS is displayed, together with the month and
change date from winter to summer, with the date corresponding to the month
flashing and the Δand ∇keys are used to program the month in which the time
change is to occur. Confirm with OK and the day figure flashes and the day, hour
and minutes are selected in the same manner, confirming with OK. EST S-W
(summer – winter)is displayed and the date and time are programmed in the same
fashion.
DISABLED (DIS) (no time change is made).
If this option is selected and confirmed with OK, no time change is performed and
EXTRAS MENU is entered.
PROGRAMMING THE HOLIDAY PERIOD
In this period, the unit only performs the operations programmed as Holidays, see
the PROGRAMMING section.
FIXED TIME OR ASTRONOMIC OPERATION The ( ) symbol is displayed
during the holiday period.
This menu only appears onscreen if operations have been programmed in the
PROGRAMMING MENU as HOLIDAYS.
Only one HOLIDAY period can be programmed. The HOLIDAYS EXTRAS MENU
is entered and the screen displays HOLIDAYS DIS, which enables the HOLIDAYS
program to be disabled.
If a holiday program is to be entered, press Δand ∇and EDIT HOLIDAYS is
displayed, confirm with OK and the START is programmed in the following order:
month, day, hour and minutes.
Then the holiday period END is programmed is the same way and in the same
order.
HOLIDAYS PROGRAM
No operations are performed in this period and the ( ) symbol is displayed.
The VACATIONS EXTRAS MENU is entered and the screen displays
VACATIONS DIS, which enables the vacations program to be disabled.
If a vacations program is to be entered, press and EDIT VACATIONS is
displayed, confirm with OK and the START is programmed in the following order:
month, day, hour and minutes.
Then the vacations period END is programmed is the same way and in the same
order.
WARNING: If an operation is programmed on a holiday, the VACATIONS
program cannot be used and is removed from the menu remaining as a
HOLIDAY period.
COUNTER
Ball test temperature: +100ºC.
Operation battery backup: Four years without power (lithium battery)
Operating temperature: From -10ºC to +45ºC
Protection type: IP 20 in accordance with EN 60529
Protection class: II in accordance with EN 60335 correctly
installed
Contamination situation: Normal
Logic support class and structure: Software class A
Sealable cover
DIMENSIONS
60
65
45
88
35
A016.26.54382
ORBIS TECNOLOGÍA ELÉCTRICA S.A.
Lérida, 61 E-28020 MADRID
Tel.: + 34 91 567 22 77 Fax + 34 91 571 40 06
E-mail: [email protected]
http://www.orbis.es

Other manuals for ASTRO NOVA CITY

3

Other Orbis Switch manuals

Orbis VEGA User manual

Orbis

Orbis VEGA User manual

Orbis DICROMAT+ User manual

Orbis

Orbis DICROMAT+ User manual

Orbis CITYLUX User manual

Orbis

Orbis CITYLUX User manual

Orbis DICROMAT MINI User manual

Orbis

Orbis DICROMAT MINI User manual

Orbis ALPHA User manual

Orbis

Orbis ALPHA User manual

Orbis DICROMAT+ User manual

Orbis

Orbis DICROMAT+ User manual

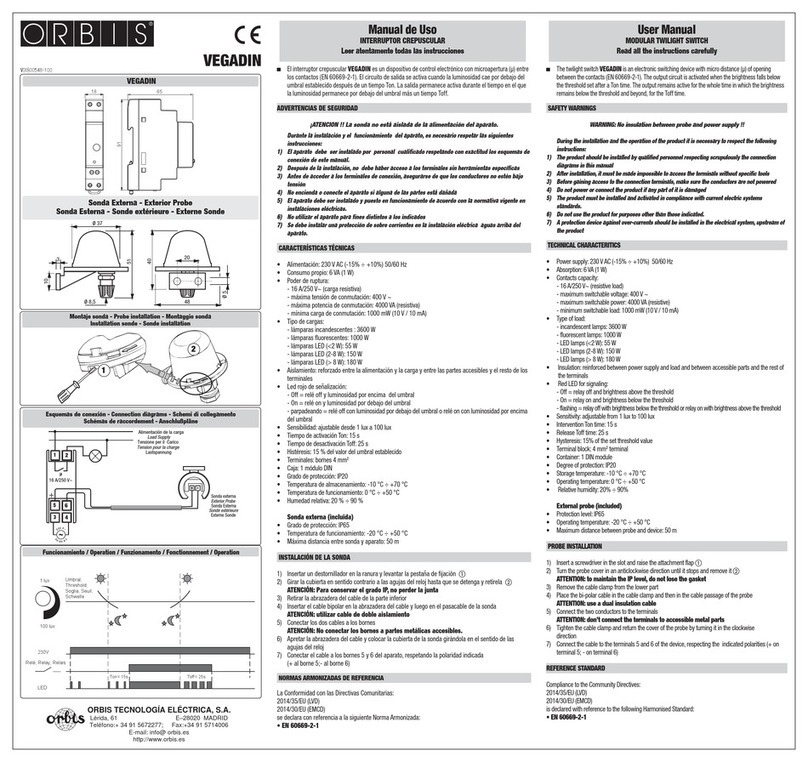
Orbis VEGADIN User manual

Orbis

Orbis VEGADIN User manual

Orbis ORBILUX User manual

Orbis

Orbis ORBILUX User manual

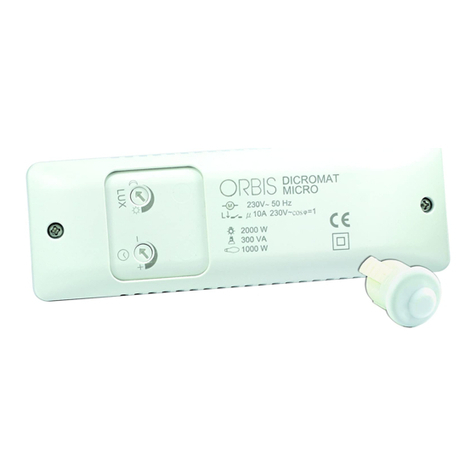
Orbis DICROMAT MICRO Instruction Manual

Orbis

Orbis DICROMAT MICRO Instruction Manual

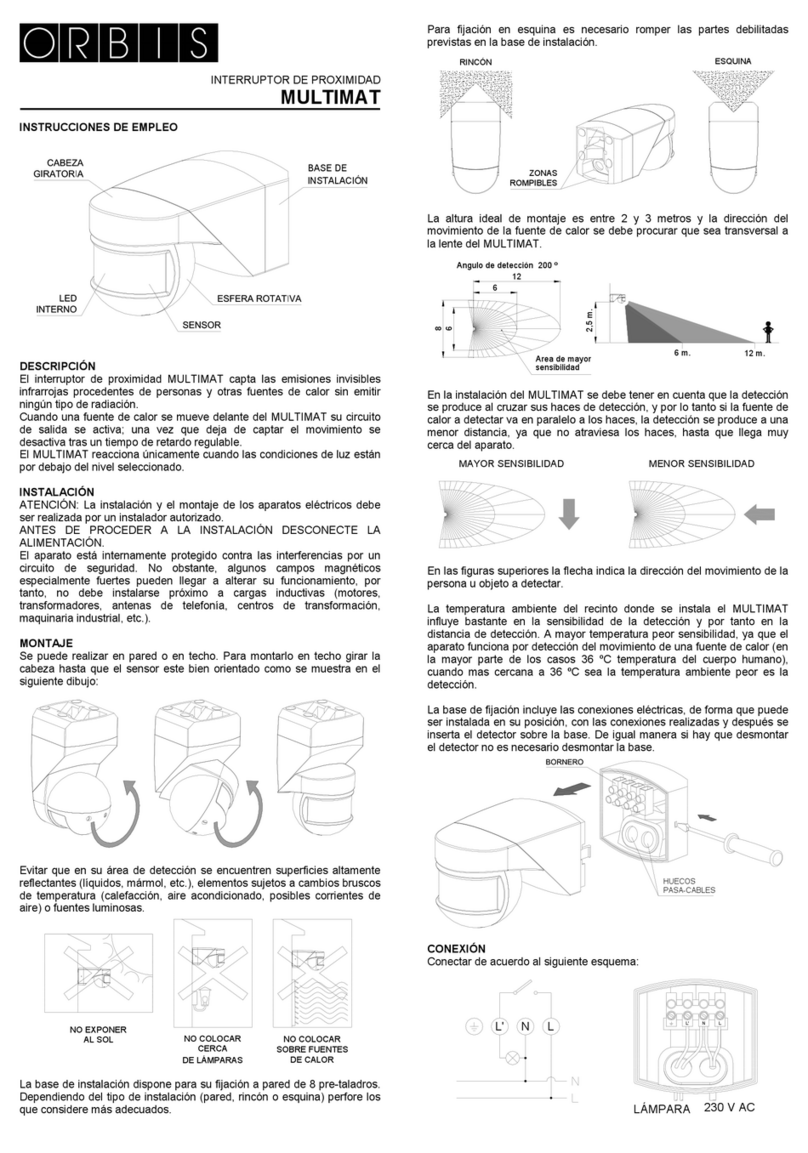
Orbis MULTIMAT User manual

Orbis

Orbis MULTIMAT User manual

Popular Switch manuals by other brands

PKP DP01 instruction manual

PKP

PKP DP01 instruction manual

Lenovo ThinkSystem NE1032 quick start guide

Lenovo

Lenovo ThinkSystem NE1032 quick start guide

Signature Hardware AIR SWITCH 948127 quick start guide

Signature Hardware

Signature Hardware AIR SWITCH 948127 quick start guide

Lenovo RackSwitch G8124E quick start guide

Lenovo

Lenovo RackSwitch G8124E quick start guide

Edge-Core AS6701-32X quick start guide

Edge-Core

Edge-Core AS6701-32X quick start guide

3Com CoreBuilder 2500 Getting started guide

3Com

3Com CoreBuilder 2500 Getting started guide

LEGRAND PRO 21 7756 29 manual

LEGRAND

LEGRAND PRO 21 7756 29 manual

Comtech EF Data Radyne RCS20 Installation and operation manual

Comtech EF Data

Comtech EF Data Radyne RCS20 Installation and operation manual

Compex SGX3226 Specifications

Compex

Compex SGX3226 Specifications

Alcatel-Lucent 1850 TSS-100 brochure

Alcatel-Lucent

Alcatel-Lucent 1850 TSS-100 brochure

Aqara Hub M2 quick start guide

Aqara

Aqara Hub M2 quick start guide

TRENDnet NWay user manual

TRENDnet

TRENDnet NWay user manual

Lindy 32810 user manual

Lindy

Lindy 32810 user manual

Ascale AS?2124 user manual

Ascale

Ascale AS?2124 user manual

Powtier Controls MAXIWAT TC230E Series instruction manual

Powtier Controls

Powtier Controls MAXIWAT TC230E Series instruction manual

Austin Hughes CyberView RP-120 user manual

Austin Hughes

Austin Hughes CyberView RP-120 user manual

Rosewill RC405 user manual

Rosewill

Rosewill RC405 user manual

Intercoax HPS-1008 quick start guide

Intercoax

Intercoax HPS-1008 quick start guide

manuals.online logo
manuals.online logoBrands
  • About & Mission
  • Contact us
  • Privacy Policy
  • Terms and Conditions

Copyright 2025 Manuals.Online. All Rights Reserved.