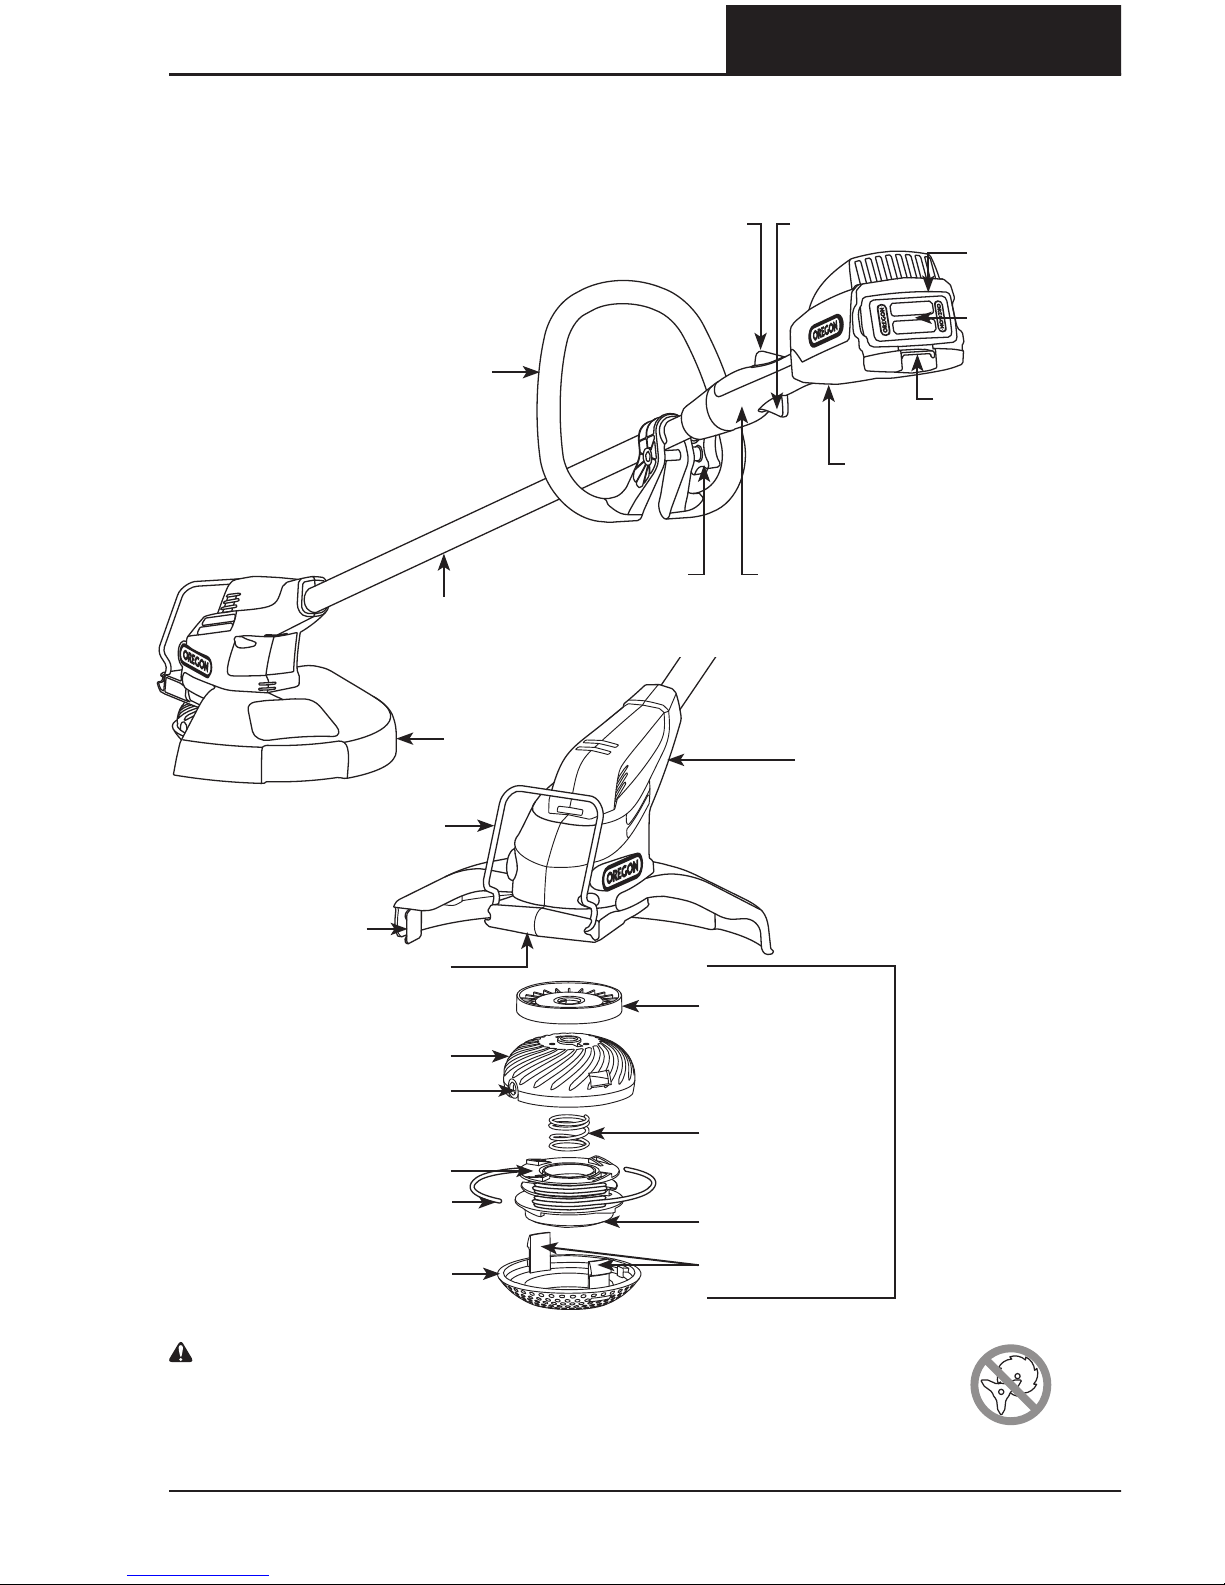
7
SAFETY RULES
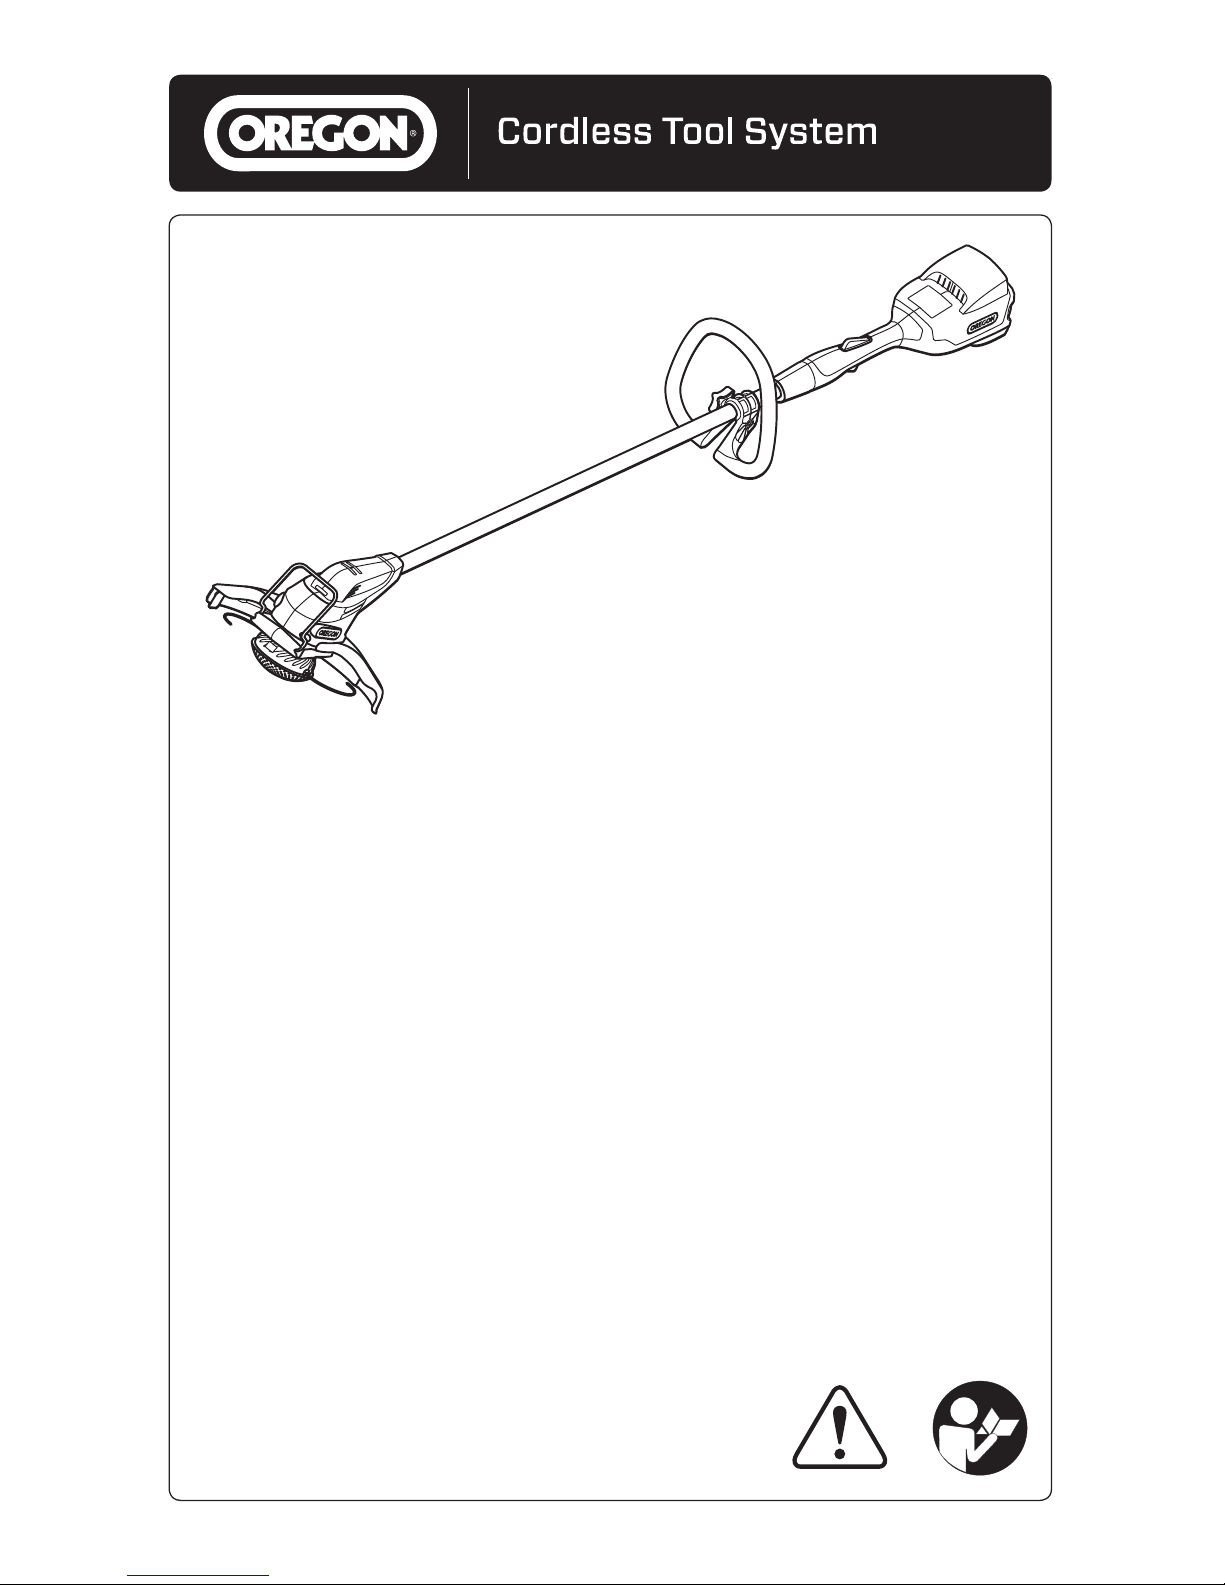
OREGON® Cordless Tool System
TRIMMER/EDGER MODEL ST275
AA 1013 - F/N 564572
• If operating a power tool in a damp
location is unavoidable, use a residual
current device (RCD) protected supply
or ground fault circuit interrupter
(GFCI). Use of a RCD (GFCI) reduces the risk of
electric shock.
• Hold the power tool by insulated
gripping surfaces only, because the
trimmer may contact hidden wiring.
Power tools contacting a “live” wire may make
exposed metal parts of the power tool “live”
and could give the operator an electric shock.
PERSONAL SAFETY
• Stay alert, watch what you are
doing and use common sense when
operating a power tool. Do not use a
power tool while you are tired or under
the influence of drugs, alcohol or
medication. A moment of inattention while
operating power tools may result in serious
personal injury.
• Use personal protective equipment.
Always wear eye protection.
Protective equipment such as dust mask,
non-skid safety shoes, hard hat, or hearing
protection used for appropriate conditions will
reduce personal injuries.
• Use personal protective equipment.
Always wear long pants and foot
protection.
• Prevent unintentional starting. Ensure
the switch is in the off-position before
connecting to power source and/or
battery pack, picking up or carrying
the tool. Carrying power tools with your
finger on the switch or energizing power tools
that have the switch on invites accidents.
• Remove any adjusting key or wrench
before turning the power tool on.
A wrench or a key left attached to a rotating
part of the power tool may result in personal
injury.
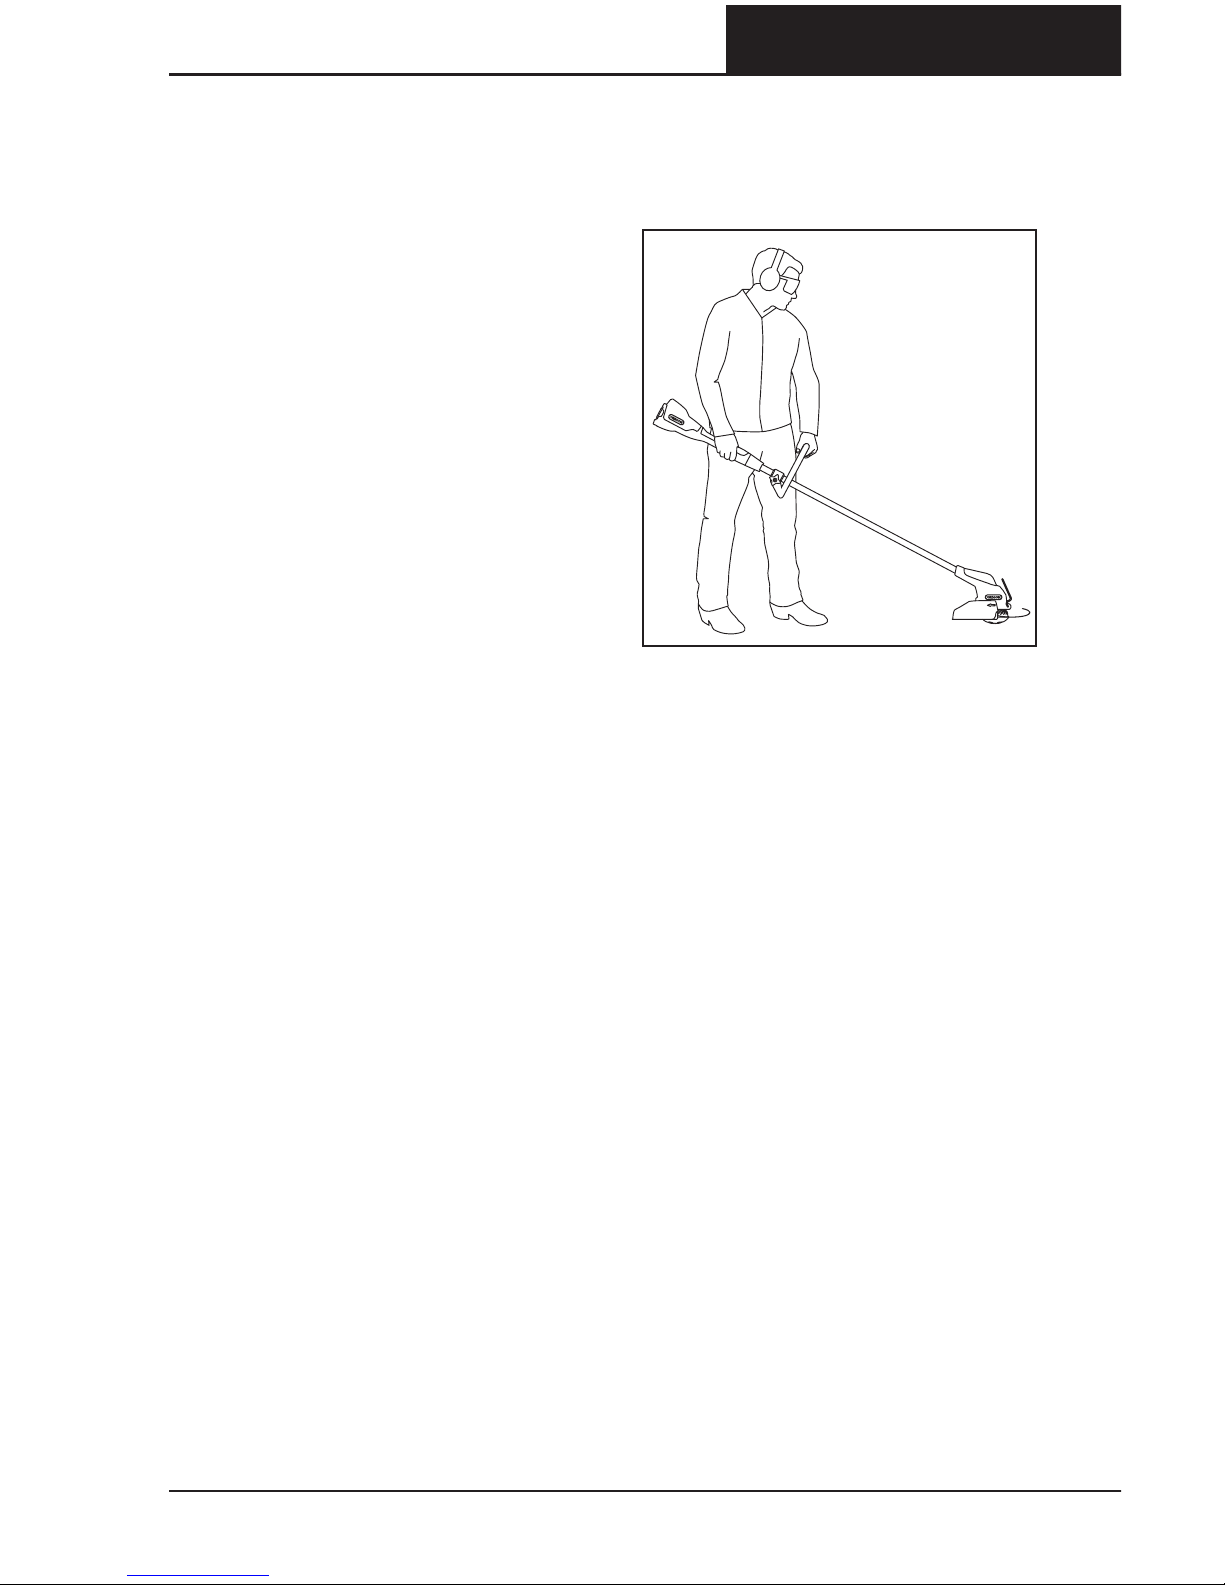
• Do not overreach. Keep proper footing
and balance at all times (Fig. ).
This enables better control of the power tool in
unexpected situations.
• Dress properly. Do not wear loose
clothing or jewelry. Keep your hair,
clothing and gloves away from moving
parts. Loose clothes, jewelry or long hair can
be caught in moving parts.
• If devices are provided for the
connection of dust extraction and
collection facilities, ensure these are
connected and properly used.
Use of dust collection can reduce dust-related
hazards.
• Prolonged use of power tools has been
reported to cause vascular, muscular,
or neurological disorders (such as
vibration white finger or Raynaud’s
syndrome). To reduce the risk of injury,
follow these instructions:
– Wear gloves and keep hands and body
warm.
– Maintain a firm grip on the trimmer/
edger, but do not use prolonged,
excessive pressure.
– Take frequent breaks.
The vibration in normal use can
differ from the values stated in the
“Specifications and Components” table
depending on the material being cut,
maintenance of the cutting system, and
other factors.
FIG. 2