General
Read the instructions and safety precautions before installation, usage and storage of the products to secure safety of the user and reliability of
the product.
- Hand over the instructions to the end-user and those responsible for installation and usage.
-Organic Lighting cannot be held responsible for improper handling, product installation, usage or storage.
Installation
- Attention: The power has to be switched off the main power supply or the connection before installation. Not doing so may damage the
product.
- Installation has to be done by a professional with knowledge of electrical circuits or a specialised maintenance person known with valid
directives.
-General and local construction-, safety- and installation regulations should be respected.
-Products may solely be installed in the areas according to their prescribed IP-rating, temperature range and chemical resistances.
Operation and use
- Use a suitable LED power supply / driver: 24 V DC constant voltage.
- Do not drive the product on other voltages than described in their datasheet/products specifications.
Warning
This product comes with a 2 year warranty.
Warranty void if:
1. The installation guide has not been consulted (installation mistake).
2. The installation is not done by a certified installer.
3. The invoice cannot be shown and/or has been altered.
4. Damage is caused by negligence, abnormal use or improper handling, use, maintenance and/or cleaning of the
product.
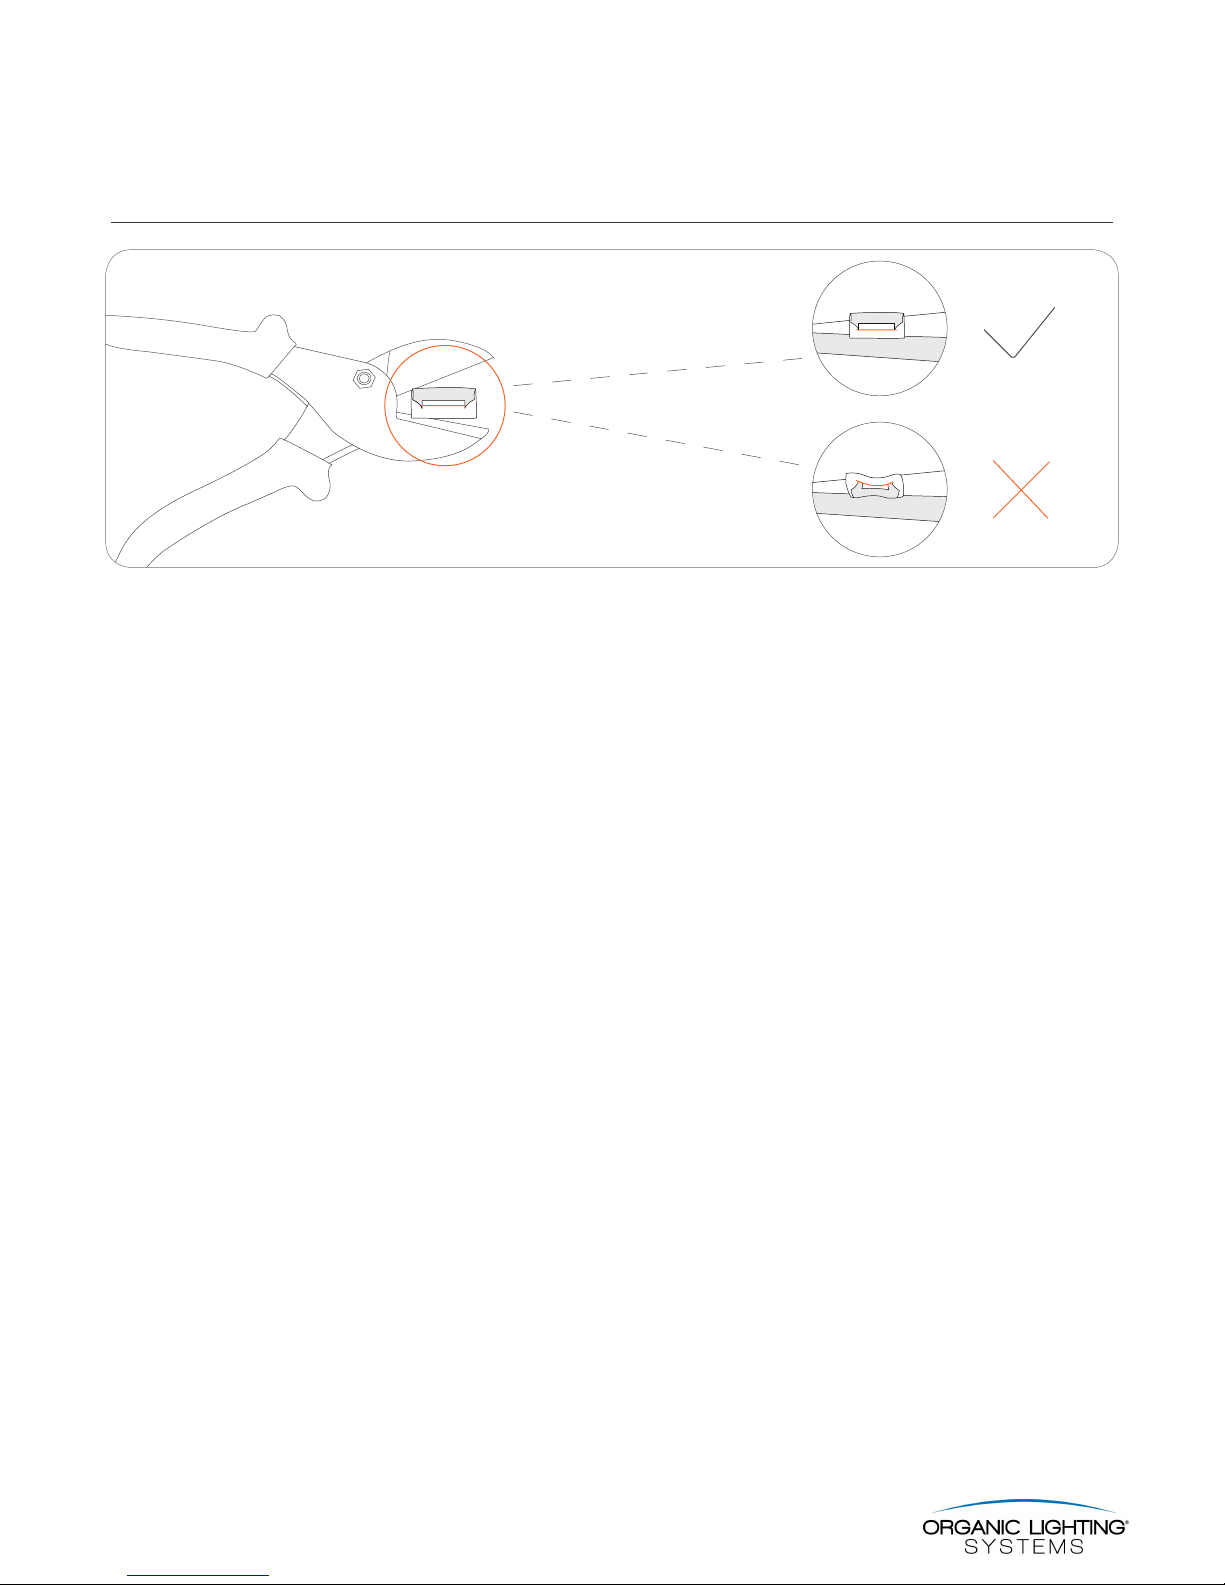
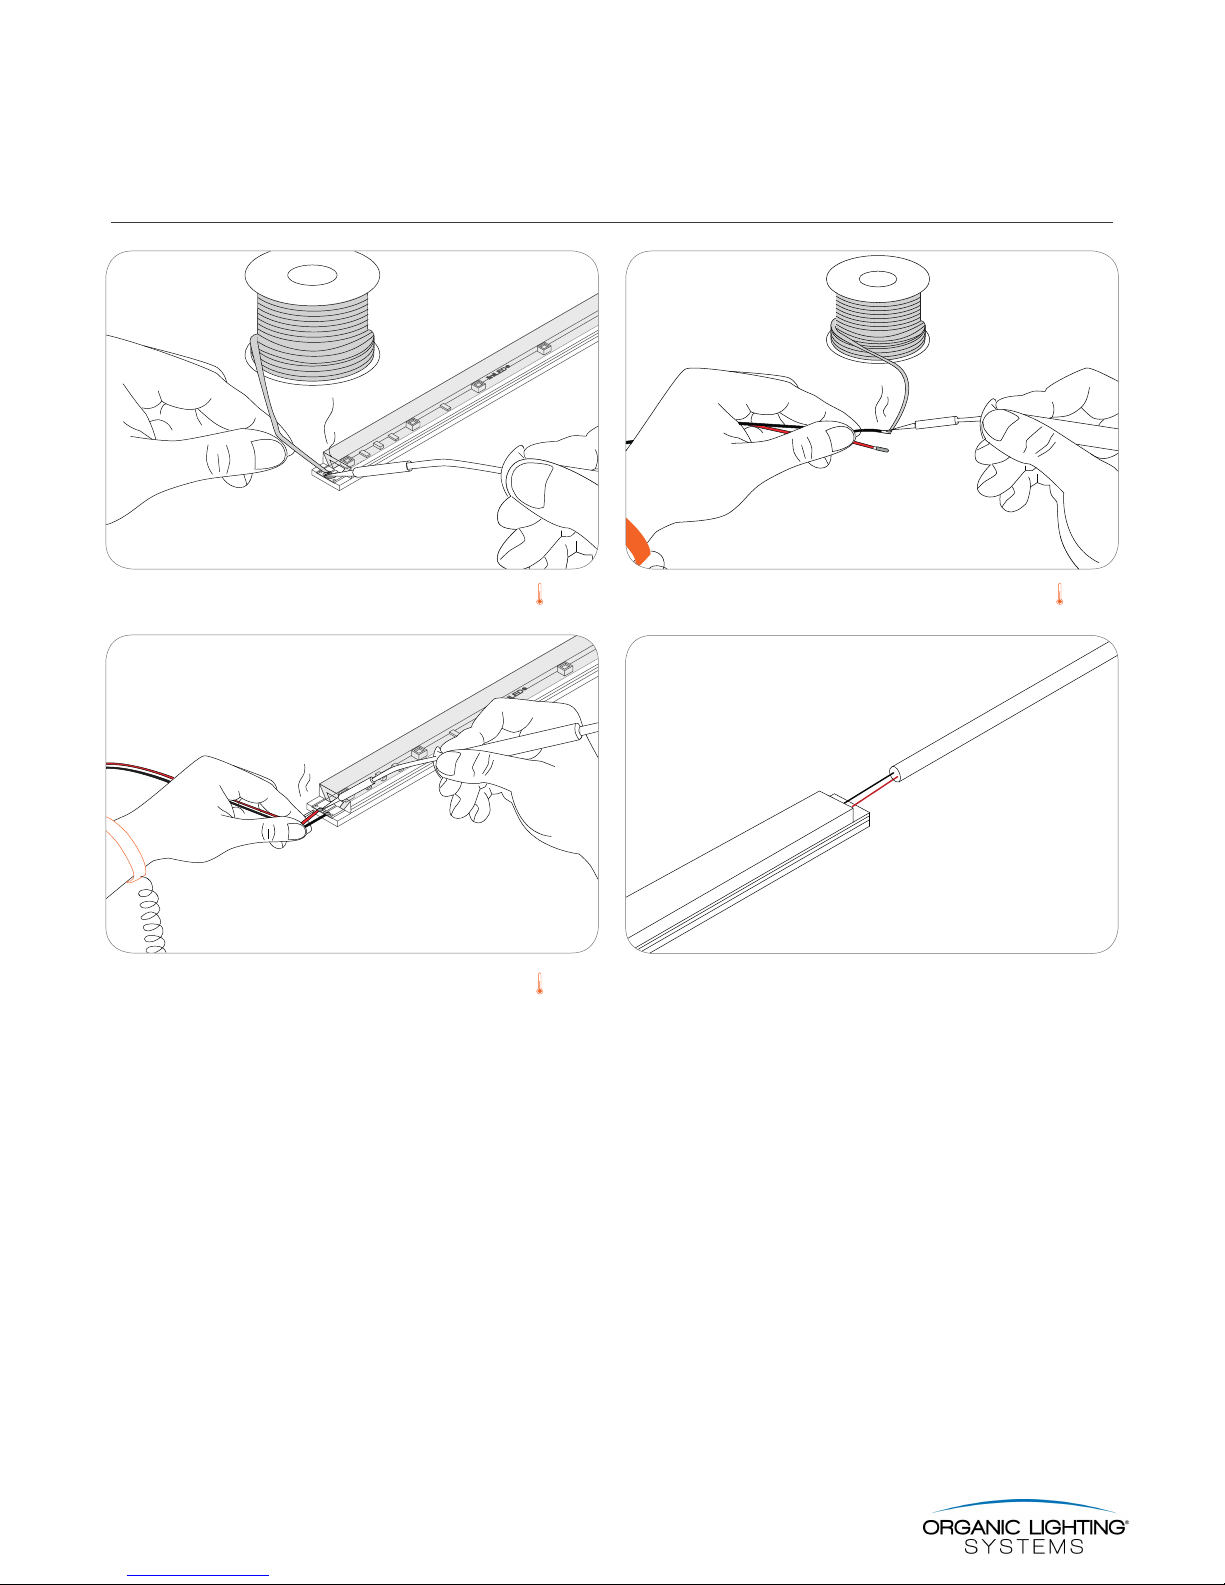
Cable selection
The liniLED® LED strips need a minimum voltage at the beginning of the LED strip to function according to the specifi cations. Please refer to
the specific Wire Gauge specification for maximum cable length based on the cable thickness and power supply voltage.