Orima ORS 688 BG User manual


MANUAL DE INSTRUÇÕES
ROBOT DE COZINHA MULTI-FUNÇÕES
ORS 688 BG
Leia atentamente este manual de instruções antes de começar a usar o aparelho.
ŐFig.1
Configuração
ķRecipiente para
carne a picar
ĸTubo de picar
ĹBotão de bloqueio
ĺTaça
ĻInterruptor de
bloqueio
ļTampa do picador
ĽI/R interruptor
ľCopo liquidificador
ĿLâmina
ŀEstrutura superior
ᬏBatedor
ᬐMotor
ᬑProtector
ᬒVara de mistura
ᬓInterruptor de
velocidade
ᬔSuporte de salsicha
ᬕCalcador de salsicha
ᬖCapa do
liquidificador
ķ
ĸ
Ĺ
ĺ
ļ
ľ
Ŀ
ŀ
ŋ
Ō
Ŏ
ŏ
ő
Ľ
Ļ
ō
Œ

Fig.2
Copo liquidificador
Fig.3
Picadora
1 Recipiente de
medição
2 Tampa
3 Copo de vidro
4 Anilha de vedação
5 Lâminas
6 Base do copo
1 Anel de fixação
2 Disco de mistura
3 Lâmina picadora
4 Espiral Rotativa
5 Recipiente funil
6 Tubo de picar
1
2
3
4
6
5

Conselhos importantes de segurança
Para evitar choques eléctricos, não use este aparelho na proximidade de água.
Não mergulhe o cabo de alimentação em água ou outro líquido.
Leia os conselhos de segurança e informações contidos no manual de
instruções cuidadosamente antes de utilizar a batedeira pela primeira vez.
Não torça ou aperte o cabo de alimentação. Para evitar tropeçar, não deixe o
cabo pendurado na extremidade de uma mesa ou balcão.
Certifique-se de que a voltagem indicada na placa de identificação corresponde
com a da fonte de alimentação. A placa de identificação encontra-se na parte
inferior do motor. A batedeira só deve ser ligada a uma fonte de AC (~). O motor
deve estar sempre desligado antes de ligar a batedeira à energia eléctrica.
(Interruptor (7) e interruptor (15) na posição "0").
Não use no exterior. Só é adequado para uso em ambientes fechados.
Este dispositivo não deve ser colocado junto a chamas, materiais facilmente
inflamáveis (cortinas, têxteis, etc.), um radiador, um forno ou outra fonte de
calor.
Antes de usar, coloque o aparelho numa superfície horizontal e plana.
Coloque o aparelho o mais aproximado possível da tomada para que possa
desligar a ficha rápida e facilmente.
O aparelho deve ser operado com a potência especificada na placa de
identificação. Se não tiver a certeza da potência da energia disponível em sua
casa, contacte o seu revendedor ou a empresa de fornecimento de energia
local.
Não tente reparar o aparelho, pois fica exposto a componentes perigosos ou
outros perigos decorrentes da abertura e remoção de tampas.
As reparações só devem ser realizadas por um técnico qualificado.
Isto não é um brinquedo! Mantenha afastado das crianças. O aparelho deve ser
usado e guardado fora do alcance das crianças.
É necessária uma supervisão cuidadosa quando o aparelho é utilizado por ou
na proximidades de crianças.
O aparelho só deve ser utilizado para a finalidade prevista.
Nunca o coloque a trabalhar vazio e sem supervisão.
Durante o uso, não toque nas partes móveis com os dedos.
Se passar o aparelho para uma terceira pessoa, o manual de instruções deve
ser incluído.
Não aceitamos responsabilidades por danos causados pelo uso inadequado ou
pela não observância das nossas instruções / indicações de segurança.
Desligue o aparelho quando não estiver em uso ou antes de limpar.
Se o cabo de alimentação estiver danificado, deve ser substituído pelo
fabricante, representante autorizado ou pessoa qualificada para evitar
acidentes.
As lâminas são muito afiadas. Tenha cuidado quando limpar a jarra.
Desligue o aparelho e retire a ficha da tomada antes de mudar os acessórios ou
se aproximar das peças que se movem em uso.
Este aparelho não se destina para uso por pessoas (incluindo crianças) com
capacidades físicas, sensoriais ou mentais reduzidas, ou com falta de
experiência e conhecimento, a não ser com a supervisão ou instruções relativas
à utilização do aparelho por uma pessoa responsável pela sua segurança.
As crianças devem ser supervisionadas para garantir que não brincam com o
aparelho.
Não utilize a batedeira e picadora ao mesmo tempo. Use uma função de cada
vez.
Informação Tecnica
Voltagem: 220-240V
Frequência: 50/60Hz
Potência: 1000W
Capacidade da taça: 5 Litros
Capacidade do copo de vidro: 1.5 Litros
Antes de usar pela primeira vez
Todas as componentes da batedeira devem ser cuidadosamente limpas antes
de serem utilizadas pela primeira vez. (Ver secção: limpeza).
Tire o comprimento necessário do cabo arrumado na base do aparelho e ligue à
corrente eléctrica.

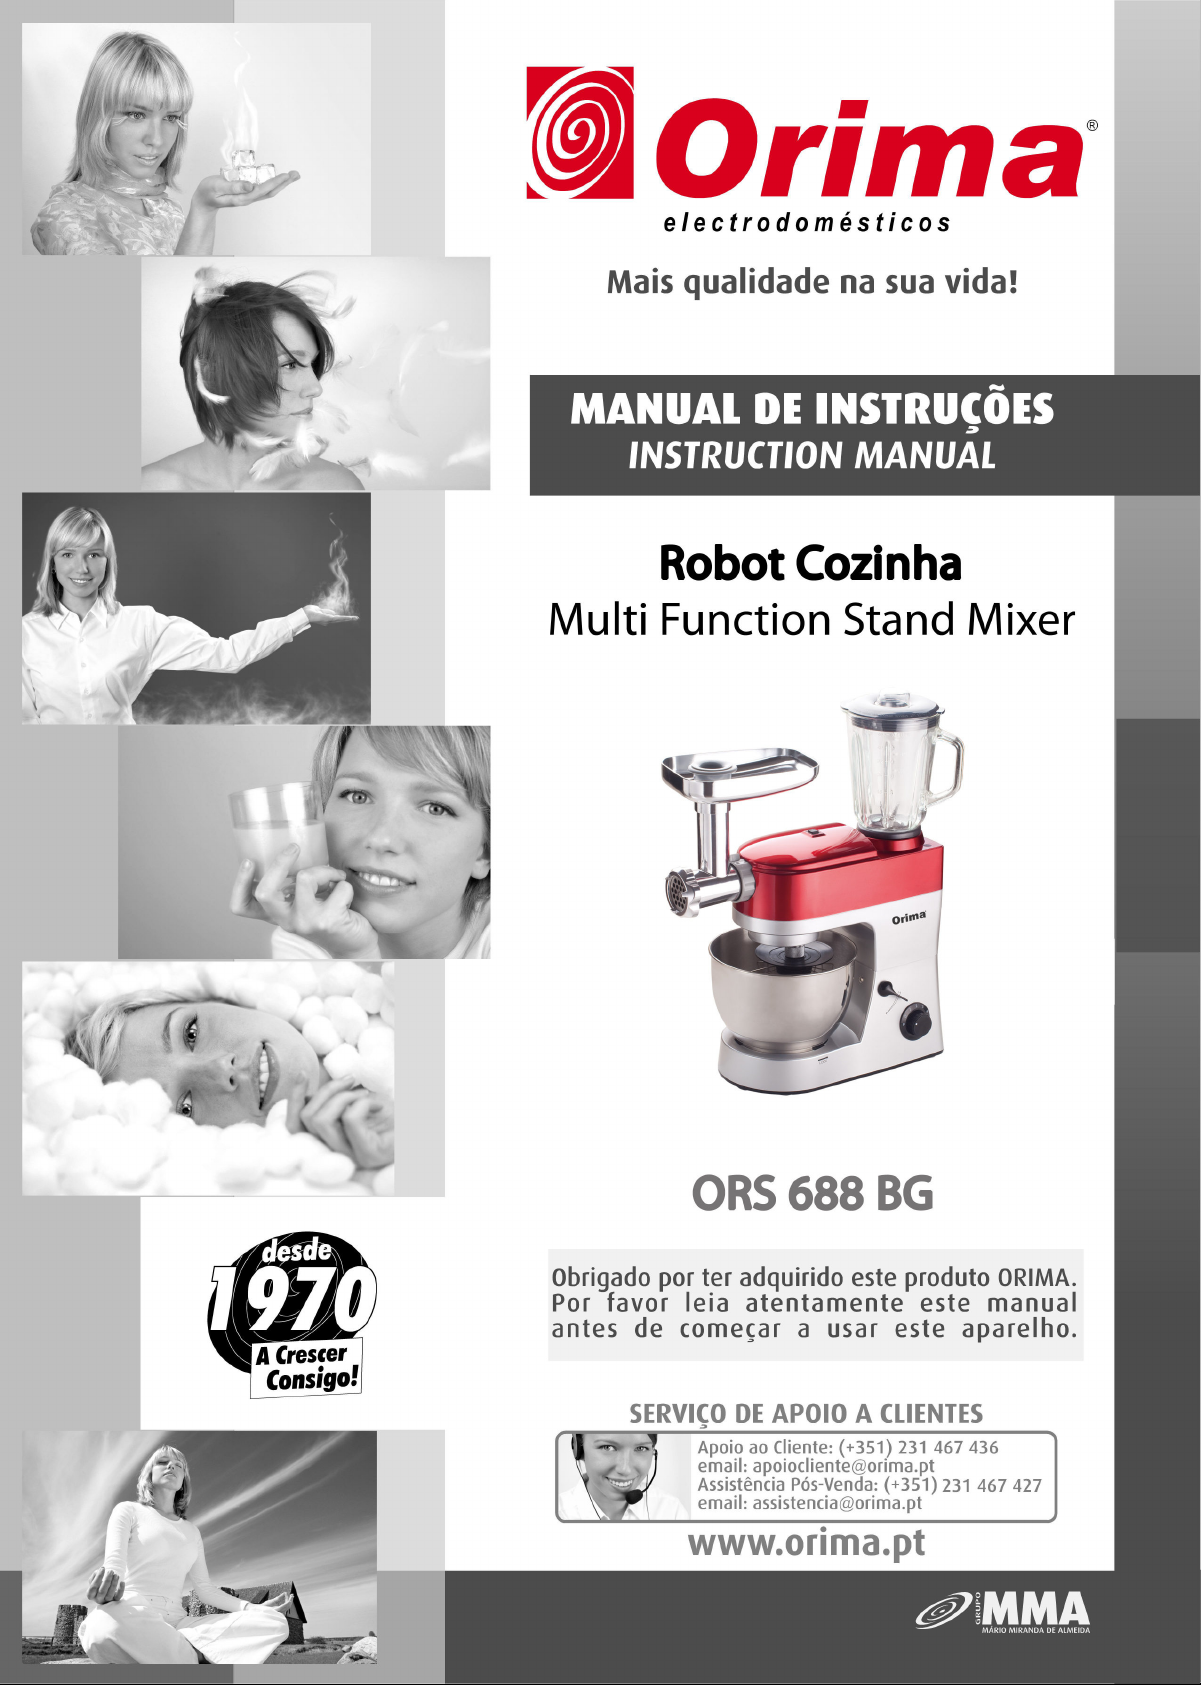
Conjunto do copo de vidro
1. Coloque a anilha de borracha de vedação na extremidade interna das lâminas.
2. Coloque as lâminas com a anilha na base do copo.
3. Monte o copo de vidro na base e ajuste a base e direccione para fixar.
4. Monte o copo na base.
5. Depois de colocar os ingredientes no copo, fixe a tampa, pressionando para
baixo.
6. Insira a tampa interna na abertura da tampa e ajuste-a no sentido anti-horário
para bloquear.
7. Coloque as lâminas com a anilha de vedação na base do copo.
8. Monte o copo de vidro e ajuste a unidade da base no sentido horário para fixar.
9. Fixe o copo na base.
10. Depois de colocar os ingredientes no copo, fixe a tampa, pressionando para
baixo.
Insira a tampa interna na abertura da tampa e ajuste-a no sentido anti-horário para
bloquear.
Uso experimental
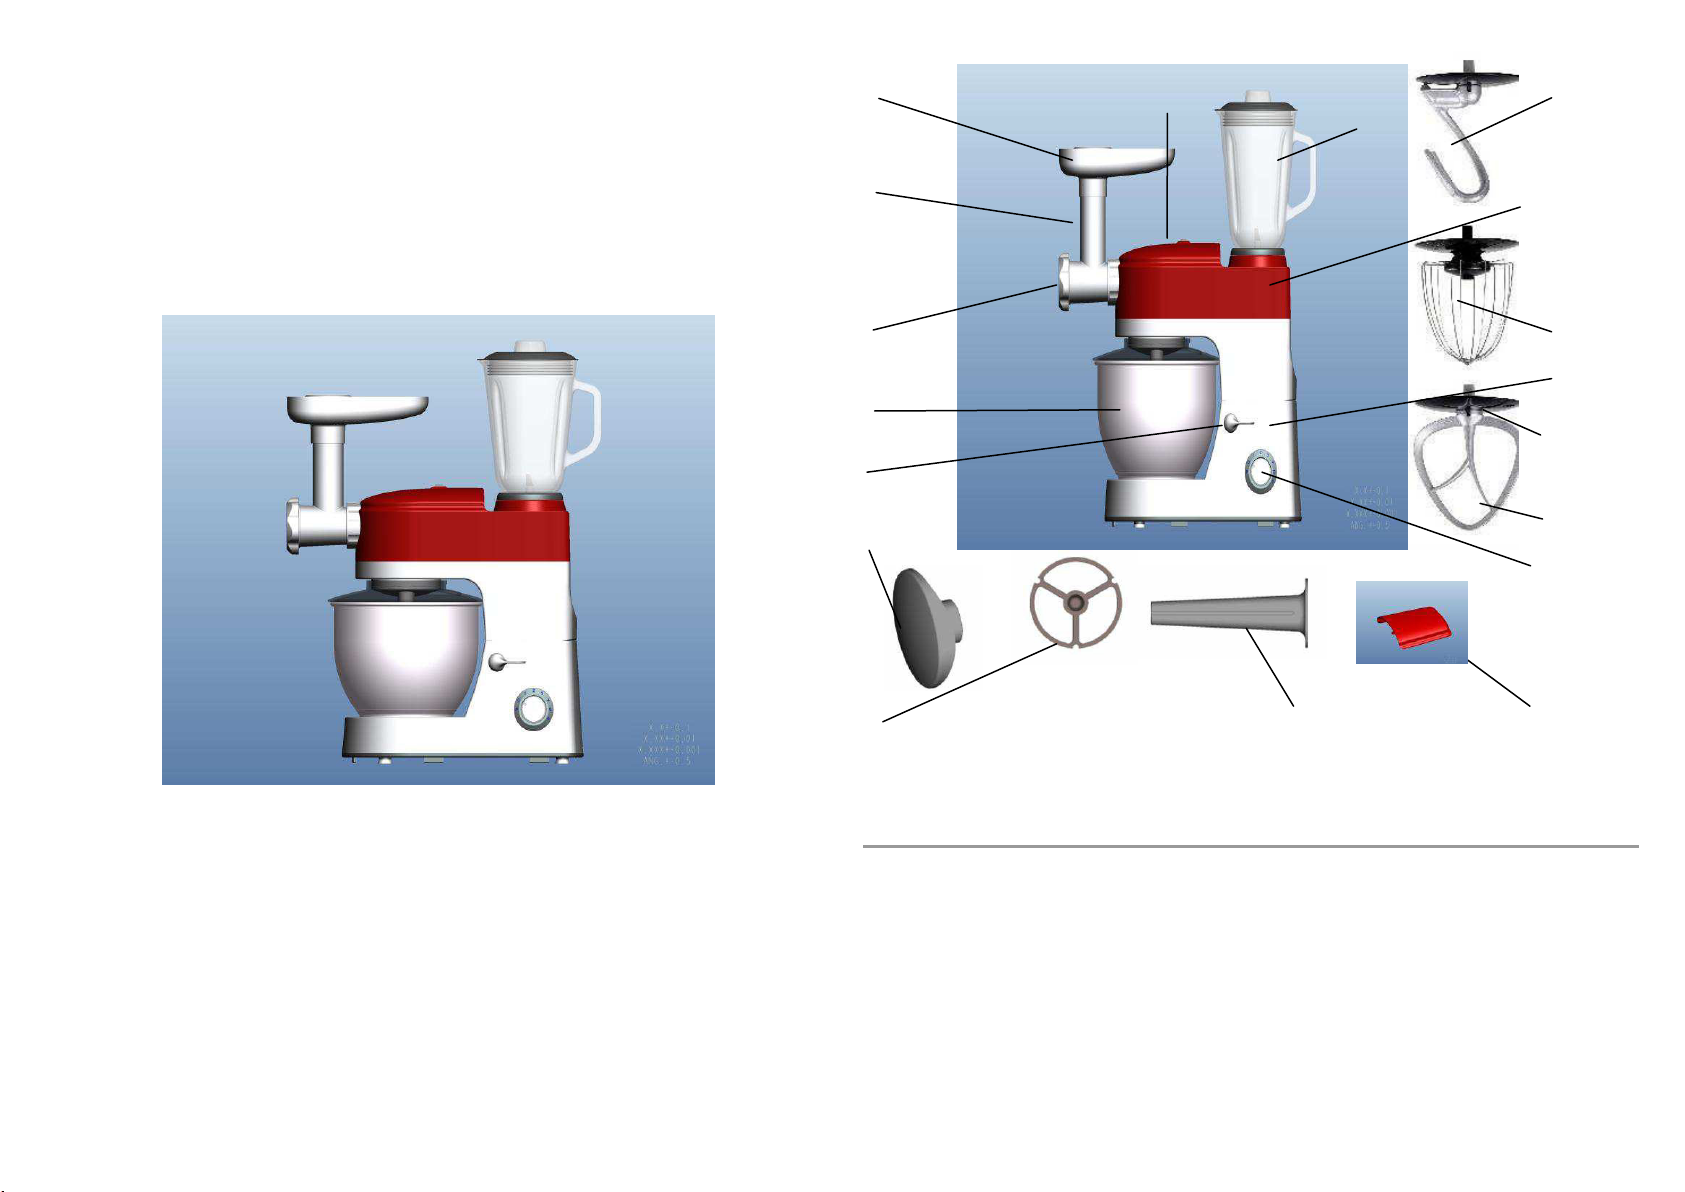
1. Rode o interruptor de bloqueio e, em seguida, levante o braço da máquina.
2. Coloque a taça na base e bloqueie como indica a seta.
3. Fixe a capa sobre a lâmina misturadora, e prenda a lâmina da máquina.
4. Rode o interruptor de bloqueio, em seguida, empurre a tampa superior para baixo
e faça o braço descer. Certifique-se de que o braço está fixado junto a base, e em
seguida, rode o interruptor de bloqueio até bloquear o braço firmemente.
5. Ligue o cabo e rode o interruptor I/R para “I”localizado na parte superior do
aparelho e, em seguida, experimente todas as velocidades por alguns segundos.
6. Depois de ensaiar, rode o interruptor para a velocidade 0.
7. Rode o interruptor de bloqueio e levante o braço e, em seguida, desmonte a
lâmina do fixador.
8. Retire a tampa de trás da estrutura superior.
9. Coloque um copo de água dentro do liquidificador, instale o copo na máquina e,
em seguida, repita a etapa 4, 5 e 6.
10. Tire o copo e coloque a tampa de trás da máquina.
Guia de funcionamento
Para misturar ou amassar massa:
1. Sugestão de farinha e água na proporção de 5 :3.
2. Inicia com a velocidade 1 durante 10 segundos, depois velocidade 2 por 10
segundos e, em seguida, velocidade 3 durante cerca de 3 minutos.
3. Ao encher a taça, certifique-se de que não excede a quantidade máxima.
4. A quantidade máxima de farinha é de 1500g.
5. Deve usar o batedor de massa ou batedor misturador.
6. Não use a lâmina de massa continuamente durante mais de 10 segundos na
velocidade 1 ou 2 e não mais de 5 minutos na velocidade 3.
7. Não utilize mais do que 5 minutos seguidos.
Bater claras de ovos ou creme:
1. Ligue da velocidade 4 à 6, bata as claras sem parar durante cerca de 5 minutos,
de acordo com o tamanho dos ovos, até ficarem firmes.
2. Quantidade máxima de ovos é 24.
3. Para chantilly, bata 250ml de leite fresco, creme ou outros ingredientes na
velocidade de 4 a 6 durante cerca de 5 minutos.
4. Ao encher a taça com leite fresco, creme ou outros ingredientes, certifique-se de
que não ultrapassa a quantidade máxima.
5. Deve usar o batedor de ovos.
6. Não utilize mais do que 5 minutos seguidos.
Preparar batidos, cocktails ou outros líquidos:
1. Misture os ingredientes de acordo com a receita disponível, da velocidade de 1 à
6 durante cerca de 5 minutos.
2. Não exceda a quantidade máxima da taça.
3. Deve usar o batedor misturador.
4. Não utilize mais do que 5 minutos seguidos.
Picar carne/salsicha
1. Corte todos os alimentos em pedaços (recomenda-se sem tendões, desossados
e sem gordura, tamanho aproximado: 20mm x 20mm x 60mm) para que entrem
facilmente na abertura do funil.
2. Mova a tampa do picador e coloque o tubo picador na posição e bloqueie;
3. Ligue o aparelho e ligue o interruptor I/R na posição "Ⅰ" e, em seguida, rode o
interruptor de velocidade para a velocidade 6.

4. Coloque os alimentos no recipiente para picar. Use-o apenas para puxar os
alimentos (para salsicha, monte o (16), (17) em vez do disco de mistura.)
1. Depois de usar desligue o aparelho e retire a ficha da tomada.
2. Não utilize mais do que 10 minutos seguidos.
Função inversa
1. Em caso bloqueio, desligue o aparelho pressionando o interruptor I/R para a
posição de "R".
2. A Espiral Rotativa gira na direcção oposta, e a cabeça fica livre.
3. Se não funcionar, desligue o aparelho e limpe-o.
Usar a função de liquidificador
1. Coloque os alimentos que desejar dentro do copo de vidro.
2. Coloque a tampa e feche bem. Mova a tampa do liquidificador, coloque o
recipiente de medição no orifício da tampa e gire no sentido horário para fechar.
3. Ligue na base do motor.
Velocidade
Uso
3-4
Para uso ligeiro com líquidos
5-6
Para uma consistência mais sólida –para misturar líquidos e
sólidos
P
Para picar gelo & movimentos de impulso curto e forte
(O interruptor não exerce permanentemente a configuração de "P".
Tem que segurar o interruptor na posição "P" ou ligá-lo várias
vezes)
4. Depois de usar o liquidificador, mova sempre o interruptor para a posição "0" e
retire a ficha da tomada.
5. Para retirar o copo de vidro levante-o apenas. Não é necessário girar para
remover.
6. Não utilize mais do que 3 minutos seguidos.
Limpeza
1. Antes de limpar, certifique-se de que o botão do interruptor está na posição "0" e
que a ficha está desligada da tomada.
2. Após usar, deixe-o arrefecer antes de começar a limpar.
3. Para limpar o exterior, use um pano húmido e detergente neutro.
4. Ao limpar o interior e exterior e tampa protectora de poeira (11), não utilize
quaisquer detergentes abrasivos ou álcool.
5. Nunca submergir em água.
6. O batedor de massa, batedor misturador, recipiente de funil, picador, tubo de
mistura e espiral rotativa não são laváveis na máquina. Os acessórios devem ser
limpos apenas em água morna e detergente líquido.
7. Os acessórios de plástico, taça de mistura, batedor de ovos, copo e lâminas
interiores devem ser limpos com água morna e detergente ou na máquina de lavar
louça. Não utilize detergentes abrasivos.
Composição de peças
Estrutura principal 1 conjunto
Taça 1 peça
Lâmina de mistura 1 conjunto
Batedor de massa 1 conjunto
Batedor de ovos 1 conjunto
Suporte de salsicha 1 peça
Tubo salsicha 1 peça
Copo misturador 1 conjunto
Picador 1 conjunto
Manual de Instruções 1 peça
GUARDE ESTAS INSTRUÇÕES
ESTE PRODUTO É APENAS PARA USO DOMÉSTICO!
Eliminação Correcta do Produto
Este símbolo indica que este produto não pode ser tratado como lixo
doméstico. Em vez disso, deve ser levado para os locais de recolha
adequados para a reciclagem de equipamento eléctrico e
electrónico. Garantindo que este produto é correctamente
eliminado, ajuda a prevenir consequências negativas para o
ambiente e saúde pública, que poderiam acontecer se este produto
fosse eliminado de modo incorrecto. Para informações mais
detalhadas sobre a reciclagem deste produto, por favor, contacte as
autoridades locais, a empresa de reciclagem ou a loja onde
comprou o produto.

INSTRUCTION MANUAL
MULTI-FUNCTION STAND MIXER
ORS 688 BG
Before operating this unit, please read these instructions completely
Fig.1
Configuration
Meat Filling pan
Mincing tube
Locking button
Mixing bowl
Locking Switch
Mincer cover
I/R switch
Blender jar
Kneading blade
Top housing
ᬏEgg whisk
ᬐMotor shelter
ᬑDusty cover
ᬒMixing blade
ᬓSpeed Switch
ᬔSausage holder
ᬕSausage presser
ᬖBlender cover

Fig.2
Blender Jar
Fig.3
Food mincer
1 Measuring cup
2 Lid
3 Glass Jar
4 Sealing ring
5 Blade set
6 Cup base
1 Fixing ring
2 Mixing disk
3 Mincing blade
4 Snake
5 Hopper plate
6 Mincing tube
1
2
3
4
6
5

Important safety advice
To avoid electric shocks, do not use this device in the vicinity of water. Do not
immerse the mains lead in water or other liquid.
Please read through the information and safety advice contained in these
operating instructions carefully and thoroughly before you use the stand mixer
for the first time.
Do not kink or clamp the mains lead. To avoid any risk of stumbling, do not
allow the mains lead to hang over the edge of a table or a counter.
Make sure that the voltage shown on the rating plate corresponds with that of
the mains supply. The rating plate can be found on the bottom of the motor
block. The stand mixer is only to be connected to an AC supply (~). The motor
must always be switching off before the stand mixer is connected with the
mains supply. (Switch (7) and Switch (15) in the “0” setting).
Do not use outdoors. Only suitable for use indoors.
This device should not be set up in close proximity to a naked flame, easily
flammable materials (curtains, textiles, etc.), a radiator, an oven or some other
heat source.
Before use, place the device on a horizontal and flat surface.
Place this device as close as possible to the power source so that you can
disconnect the plug quickly and easily.
The device must be operated with the type of power specified on the rating
plate. If you are unsure about the details of the available power supply, ask your
dealer or the local power supply company.
Do not attempt to repair the device yourself, since you will be exposed to
hazardous live components or other hazards by opening and removing the
covers.
Repairs should only be carried out in a qualified workshop.
This is not a toy! Keep away from children. The device should be used and
stored out of the reach of children.
Careful supervision is required when the device is used by or in the vicinity of
children.
The device should only be used for its intended purpose.
Never operate empty and without supervision.
During use, do not touch moving parts with your fingers.
Please note that when passing the device on to a third party, the operating
instructions must be included.
No liability is accepted for damage due to improper use or the failure to observe
our operating instructions / safety notes.
Unplug the appliance when not in use or before cleaning.
If the supply cord is damaged, it must be replaced by the manufacturer or its
service agent or a similarly qualified person in order to avoid a hazard.
The blades are very sharp. Be careful while clean the jar.
Switch off the appliance and disconnect from supply before changing
accessories or approaching parts that move in use.
This appliance is not intended for use by persons (including children) with
reduced physical, sensory or mental capabilities, or lack of experience and
knowledge, unless they have been given supervision or instruction concerning
use of the appliance by a person responsible for their safety.
Children should be supervised to ensure that they do not play with the
appliance.
Do not use mixing, mincing and blending function at the same time. Only use
one of them at a time.
Technical information
Voltage: 220-240V
frequency: 50/60Hz
Power: SM-1688X 800W
SM-1688HX 1000W
Agitator kettle capacity: 5 liters
Glass jar capacity: 1.5 liters
Before first use
All parts of the stand mixer are to be thoroughly cleaned before being used for
the first time. (See section: Cleaning).
Take out the required length of cable from the cable tidy on the base of the
blender and connect the device to the mains supply.

Assembly of the Glass jar
1. Put the rubber sealing ring on the inner edge of the blade unit.
2. Put the blade unit with sealing ring and ring into the cup base .
3. Mount the glass cup onto the cup base unit and tune the cup base unit, and wise
direction unit it is fixed.
4. Mount the cup with cup unit onto the base unit.
5. After putting the ingredients in the cup, fix the lid onto the cup by pressing down.
6. Insert the inner cover into the opening of the lid, and tune it in anticlockwise
direction unit it is locked.
7. Put the blade unit with sealing ring into the cup base.
8. Mount the glass cup onto the cup base unit and tune the cup base unit, and tune
the cup base unit in clockwise direction unit it is fixed.
9. Mount the cup with cup unit onto the base unit.
10. After putting the ingredients in the cup, fix the lid onto the cup by pressing down.
Insert the inner cover into the opening of the lid, and tune it in anticlockwise
direction unit it is locked.
Trial use
1. Revolve the locking switch, and then lift the machine arm.
2. Put the mixing bowl onto the base, and lock it as the arrowhead denotes.
3. Fix the dusty cover onto the mixing blade, and then lock the blade into the
machine’
4. Revolve the locking switch, then push the upper cover down and make the arm
down. Make sure the arm is fixed together the basc, then Revolve the locking switch
up to lock the arm solidly.
5. Plug-in the cord, and turn the I/R switch to I, then try every speed for a few
seconds.
6. After the trial, turn the switch to Speed 0.
7. Turn the locking switch and lift the arm, then take apart the mixing blade from the
blade conector.
8. Take off the back cover from the upper housing.
9. Pure a cup of water into the blender jar, set the blender jar onto the machine, then
repeat step 4, 5 and 6.
10.Take off the blender jar, and set the back cover to the machine.
Operation Guide
To mix or knead dough:
1. Suggestion flour and water at a ratio of 5 :3.
2. From speed 1 for mix 10 second, and speed 2 for mix 10 second, afterwards speed 3
for about 3 minutes.
3. When filling the agitator kettle, please ensure that the maximum quality is not
exceeded.
4. Maximum quantity of flour is 1500g.
5. The dough beater or mixer beater should be used.
6. Do not use the dough blade longer than 10 seconds continuously at speed level
1 or 2 and not longer than 5 minutes continuously at speed level 3.
7. No longer use than 5 minutes continuously at a time.
Whipping egg whites or cream:
1. Switch on speed 4 to speed 6, whip the egg whites without stopping for about 5
minutes, according to the size of the eggs, until stiff.
2. Maximum quantity 24 eggs.
3. For whipped cream, whip 250ml fresh cream at speed 4 to 6 for about 5
minutes.
4. When filling the agitator kettle with fresh milk, cream or other ingredients, please
ensure that the maximum quality is not exceeded.
5. The egg beater should be used.
6. No longer use than 5 minutes continuously at a time.
Mixing shakes, cocktails or other liquids:
1. Mix the ingredients according to the available recipe, from speed 1 to 6 for about
5 minutes.
2. Do not exceed the maximum quantity for the agitator kettle.
3. The mixer beater should be used.
4. No longer use than 5 minutes continuously at a time.
Mincing meat/sausage
1. Cut all foods into pieces (Sinewless, boneless and fatless beef or pork is
recommended, approximately size: 20 mm x 20 mm x 60 mm) so that they fit easily
into the hopper opening.
2. Move the mincer cover and put the mincing tube into the socket and locked;

3. Plug the unit on and switch I/R switch to "Ⅰ" ,then turn the speed switch to Speed
6.
4. Feed foods into the hopper plate. Use for it only the food pusher (For sausage,
assembled the (16),(17) instead mixing disk.)
5. After use switch the unit off and unplug it from the power supply.
6. No longer use than 10 minutes continuously at a time.
Reverse Function
1. In case of jamming switch off the appliance by pressing the Ⅰ/ R Switch to "R"
position.
2. Snake will be rotating in the opposite direction, and the head will get empty.
3. If it doesn't work, switch off the unit and clean it.
Use Blender function
1. Place the foodstuff you wish to process into the glass jug.
2. Put the lid on the glass jug and close securely. Move the blender cover, Place
the measuring cap into the hole in the lid and turn clockwise to lock.
3. Switch on the motor base.
Speed setting Use
“3-4 “setting for light usage with liquids
“5-6” setting for more solid consistency – for mixing liquids and solid
foodstuffs
“P” setting for ice crushing & short, powerful impulse movements
(The switch does not permanently engage in the “P” setting.
You have to hold the switch in the “P” setting or turn it
repeatedly into the “P” setting)
4.After using the blender, always move the switch into the ”0” setting and pull out the
mains plug.
5.To remove the glass jug just lift it up. You do not have to rotate the glass jug to
remove it.
6. No longer use than 3 minutes continuously at a time.
Cleaning
1. Before cleaning, please ensure that the Switch knob is at the “0”position and
that the plug has been disconnected from the socket.
2. After use, allow the device to cool down before you start to clean it.
3. To clean the exterior of the device, use a moist cloth and a mild detergent.
4. When cleaning the interior and exterior and protective dust cover do not use
any abrasive detergents or alcohol.
5. To clean the device, never submerge it in water.
6. The dough beater, mixer beater, Food mincer hopper plate, mixing tube and
snake are not dishwasher safe. The accessories must be cleaned only in warm
water and washing-up liquid.
7. The plastic accessories, Mixing bowl, egg beater, blender jar and
blades inside, Must be cleaned with warm water and washing-up
liquid or in dishwasher. Do not use any abrasive detergents..
Packing list
Main body 1 set
Mixing bowl 1 pc
Mixing blade 1 set
Dough hook 1 set
Egg whisk 1 set
Sausage holder 1 pc
Sausage tube 1 pc
Blender Jar 1 set
Food mincer 1 set
Instruction manual 1 pc
SAVE THESE INTRUCTIONS
THIS PRODUCT IS FOR HOUSEHOLD USE ONLY!
Correct disposal of this product
This marking indicates that this product
should not be disposed with other household wastes
throughout the EU. To prevent possible harm to the
environment or human health from uncontrolled waste
disposal, recycle it responsibly to promote the sustainable
reuse of material resources. To return your used device,
please use the return and collection systems or contact the
retailer where the product was purchased. They can take this
product for environmental safe recycling.
Table of contents
Languages: