Orion 14MDM User manual

Before operating the unit, please read this manual thoroughly.
Operating Instructions
AC/DC
COLOR TELEVISION

1.
2.
3.
4.
5.
6.
7.
Read Instructions Carefully - All the safety and operating instructions should be read
before the appliance is operated.
Operating Instructions Manual - The manual should be kept for future reference.
Moisture - The unit should be used in such a way that it is protected from moisture.
e.g.condensation, splashed water, etc.
Heat - The appliance should be placed away from heat sources such as radiators or
electric/gas fires and direct sunlight from windows.
When not in use - The power cord of the appliance should be unplugged from the Power
outlet when left unused for a long period of time.
Power Sources - The appliance should only be connected to a mains power supply as
specified in the operating instructions or as marked on the appliance.
Ventilation - The ventilation holes in the rear casing prevent overheating. Do not block or
cover these holes, especially with cloth or paper.
WARNING
TO PREVENT FIRE OR SHOCK HAZARD, DO NOT EXPOSE THIS EQUIPMENT
TO RAIN OR MOISTURE.
DO NOT REMOVE COVER, NO USER SERVICEABLE PARTS INSIDE.
REFER SERVICING TO QUALIFIED SERVICE ENGINEER. DISCONNECT FROM
MAINS SUPPLY WHEN NOT IN USE FOR LONG PERIODS.
POWER SOURCES
AC 110-240 Volts 50Hz or DC 12 Volts Only
WARNING
Never connect the AC power cord to any other voltages other than the one specified.
Use the attached power cord only.
NOTE:
Disconnect from the housing outlet when not in use for a long time.
SAFETY INSTRUCTIONS

FEATURES
AC/DC Power Operation
On Screen Programming
Daily 4 event Programmable ON/OFF Timer
Auto Tuning for Channel Presetting
110 Preset Channel
Sleep Timer (Up to 120 minutes)
Child Lock (Hotel Lock)
Automatic Power Shut Off
24:00 Clock Timer
2 Speaker
AUDIO/VIDEO IN & OUT Jack
5 Language on Screen Menu
Picture Adjustment
CATV Capability
NTSC 3.58/4.43 - PLAYBACK ON PAL 60Hz
PREPARATIONS
LOCATION OF CONTROLS............................................................................................ 2
REMOTE CONTROL ....................................................................................................... 3
ANTENNA CONNECTIONS ............................................................................................ 5
POWER SOURCES......................................................................................................... 5
SETTING LANGUAGE..................................................................................................... 6
PRESETTING THE CHANNELS ..................................................................................... 7
OPERATIONS
TV OPERATIONS.......................................................................................................... 11
SETTING THE CLOCK.................................................................................................. 12
SETTING THE ON/OFF TIMER..................................................................................... 13
CONVENIENT FUNCTIONS.......................................................................................... 15
PICTURE CONTROL..................................................................................................... 17
CHILD LOCK (HOTEL LOCK) ....................................................................................... 19
AV JACK CONNECTIONS............................................................................................. 21
TO WATCH NTSC VIDEO LASER DISC, DVD AND RECORDED VIDEO TAPE ........ 23
RECEPTION OF INTERFERENCE ............................................................................... 24
OTHERS
TROUBLESHOOTING GUIDE....................................................................................... 25
SPECIFICATIONS 1
CONTENTS
•
•
•
•
•
•
•
•
•
•
•
•
•
•
•


234
5678
9
+
–
POWER QUICK
VIEW
0
CH CALL
AV
MUTE
MENU SET ENTER
NORMAL
VOL
CH
SLEEP
SKIP
COLOR
SYSTEM
TUNING
1

BATTERY INSTALLATION
Use two "UM-4" size batteries.
If the polarities, + and –, are wrongly
aligned. If the batteries are weak.
If there is an obstacle between the TV
and the remote control handset.
NOTE:
Your TV will not work in the following cases. Check them carefully.
4
Slide the cover in the
direction of the arrow
and remove.
Load the two batteries
as shown below. Replace the cover.
REMOTE CONTROL (Continued)
If direct sunlight or other strong light is
shining on the remote control sensor.

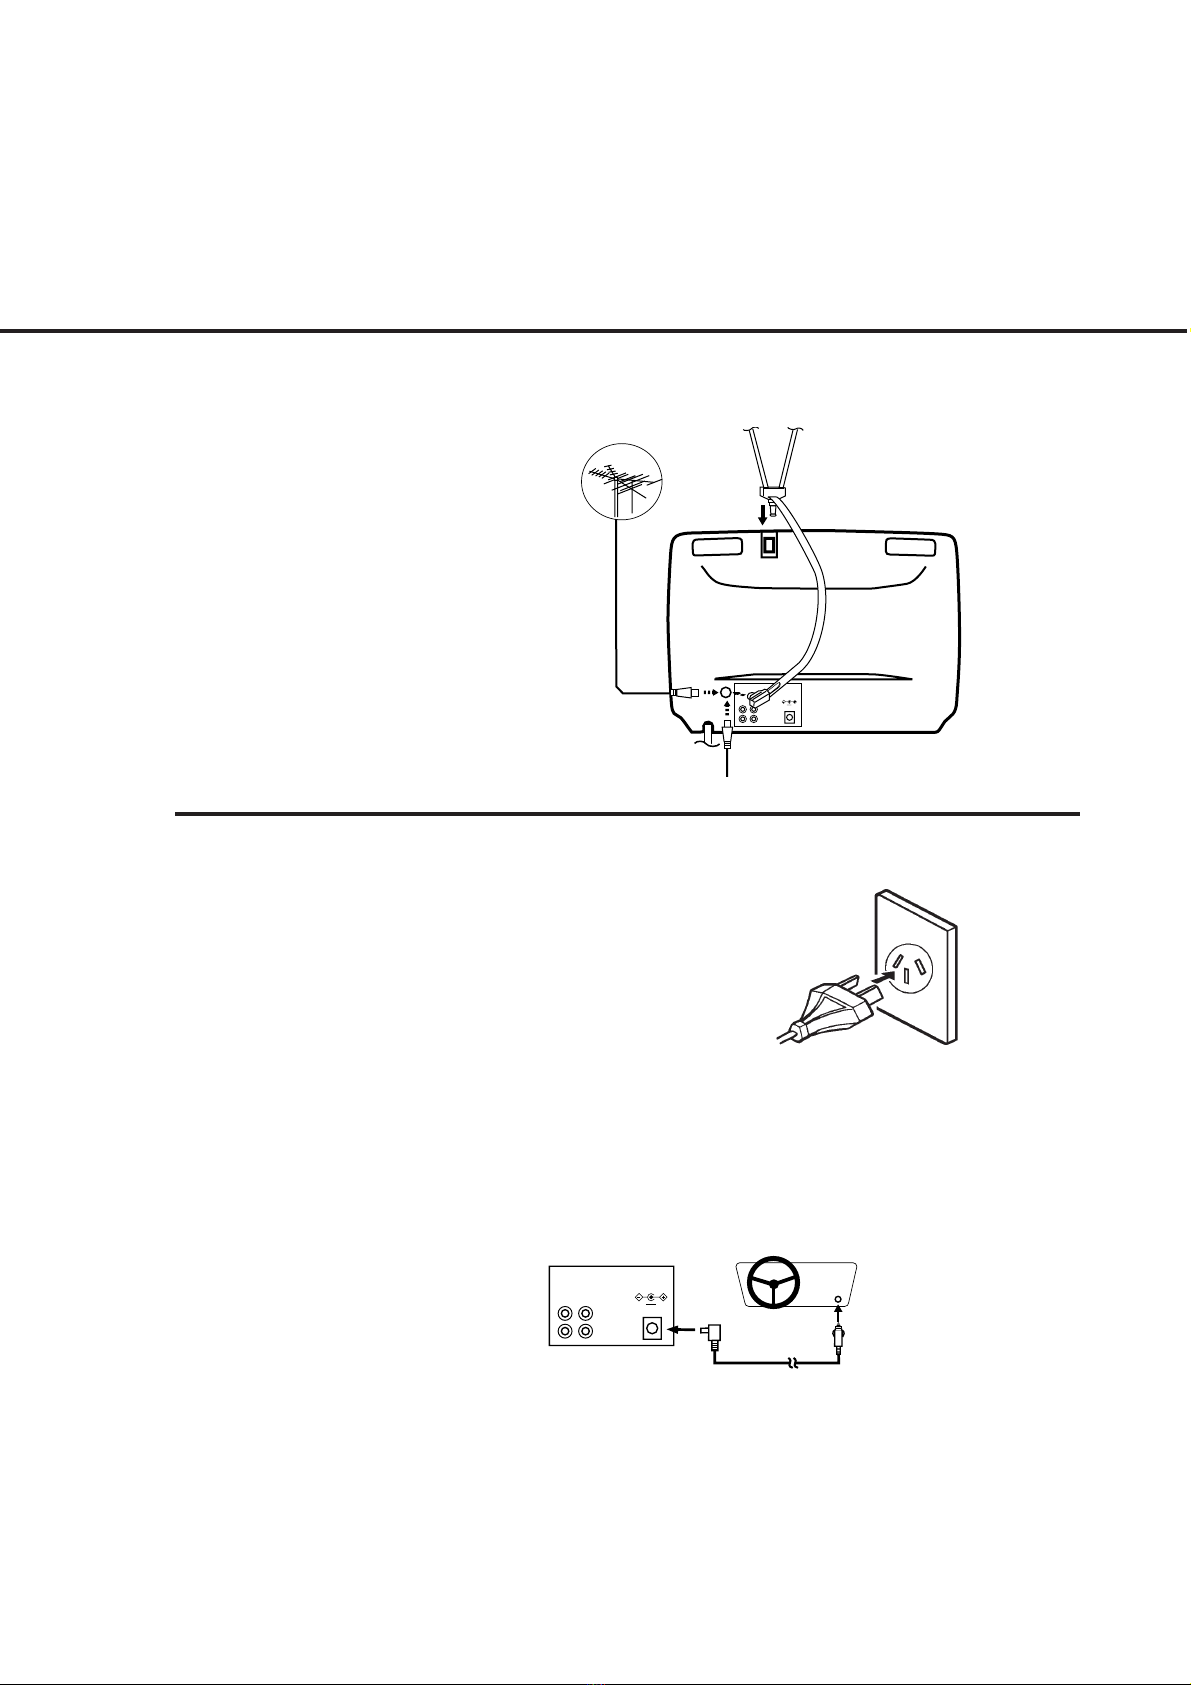
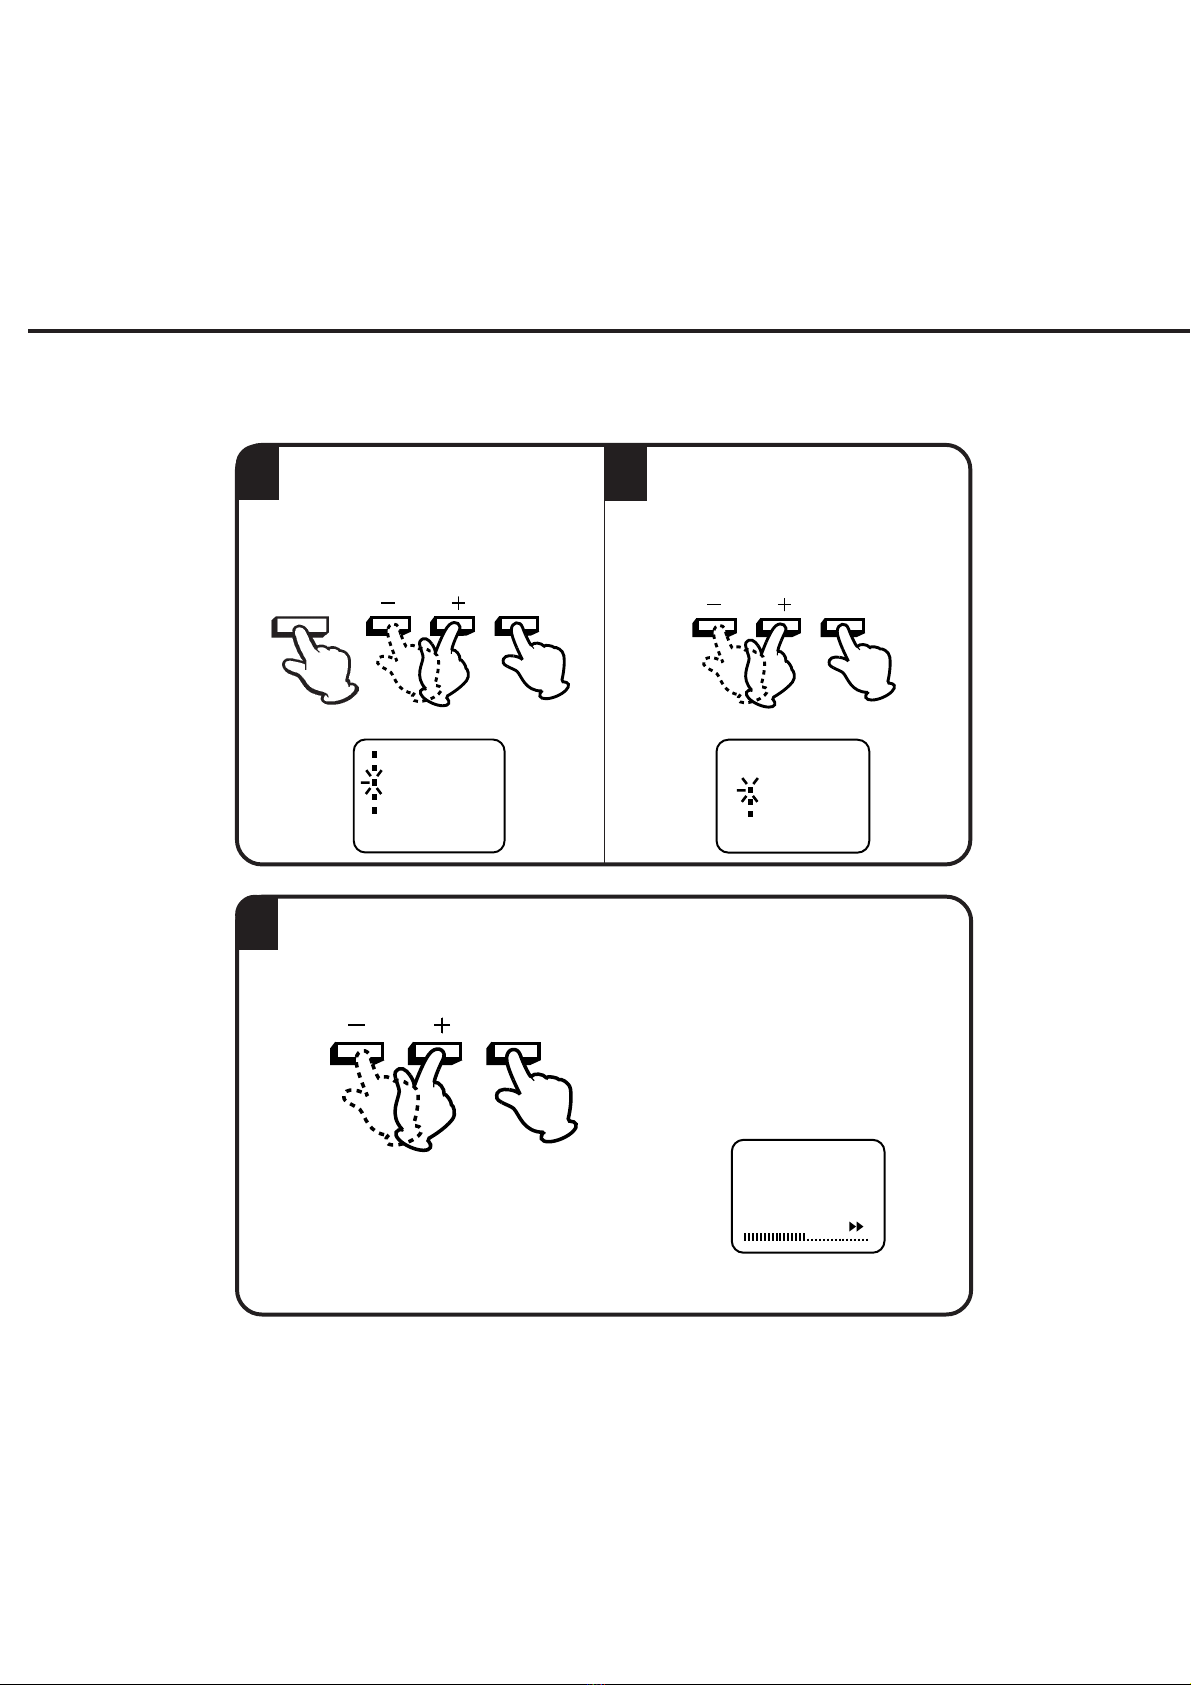
Connectthecablefromtheoutdoororindoorantennatotheantennajackontherearpanelas
shown below. For all antenna circuit problems, please consult your local dealer.
ANTENNA CONNECTIONS
5
OUT
VIDEO
IN
AUDIO
DC (- - - -) 12V
B)
A)
C)
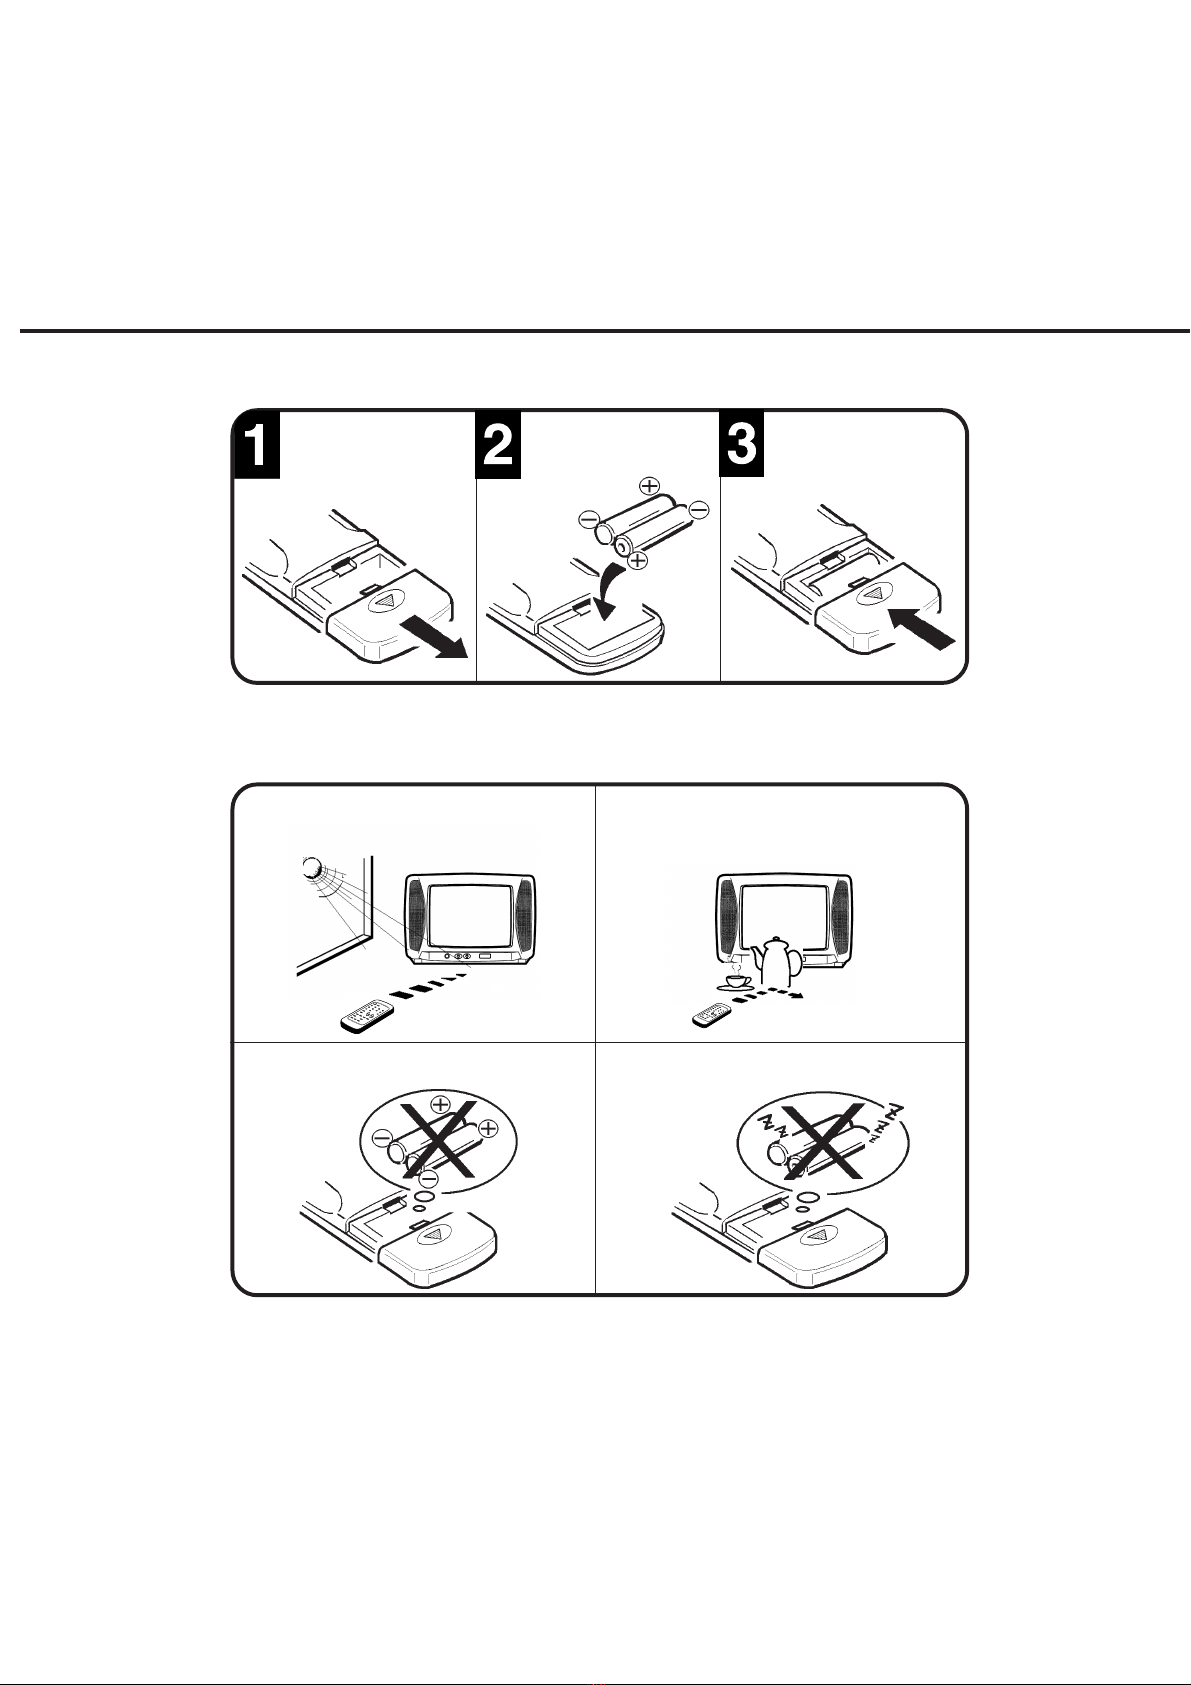
A twin-lead telescopic antenna is
supplied with the unit. Insert the
antenna post into the mounting hole
on the back cabinet until it locks into
place. Insert the antenna adaptor
(supplied) to the antenna jack. Adjust
the length and angle of both antenna
rods to receive the best possible
picture.
EXTERNAL ANTENNA
The antenna connection is equivalent
to DIN 45 325 for a combined UHF/
VHF antenna with 75 ohm coaxial
cable.
CATV cable
To receive special channels connect
the CATV cable to the antenna jack.
A)
B)
C)
POWER SOURCES
OUT
VIDEO AUDIO DC (- - - -) 12V
IN
Cigarette
Lighter Socket
Rear ofTV
DC Input Jack
TO USE AC POWER SOURCE
Use the AC line cord provided for operation on AC. Insert the AC cord
plug into a AC outlet.
NOTE:
1. NEVER CONNECT THE AC POWER CORD TO ANYTHING
OTHER THAN THE SPECIFIED VOLTAGE. USE THE
ATTACHED POWER CORD ONLY.
2. IF YOU EXPERIENCE A STATIC DISCHARGE WHEN TOUCHING
THE UNIT, AND THE UNIT FAILS TO FUNCTION, SIMPLY
UNPLUG THE AC POWER CORD FROM THE AC OUTLET, AND
PLUG IT IN AGAIN. THE UNIT SHOULD RETURN TO NORMAL
OPERATION.
NOTE:
•Use the supplied car cord only and
do not use it with a DC 24V type
battery such as bus or truck.
•Use the TV while the car engine is
on.
TO USE DC POWER
By using the DC car cord supplied with the TV, you can operate this TV from a cigarette lighter
socket in any vehicle that utilizes a negative grounding system.
The fused 12V DC car cord has been designed to power the unit from the external DC power (12
volt negative ground) through the DC input jack.
Connect the smaller plug on the end of the cord to the DC input jack on the rear of the TV, then
insert the other end of the car cord into the cigarette lighter socket of your car.

SETTING LANGUAGE
This TV has 5 different languages for MENU set up which can be selected through ON
Screen Display: English, German, French, Italian or Spanish.
3
1
MENU
4Press the MENU button to return to
the normal TV screen.
To select the desired language,
English (ENGLISH), Spanish
(ESPANOL), French (FRANCAIS),
German (DEUTSCH) or Italian
(ITALIANO), press the SET UP or
DOWN button.
Then press the ENTER button.
CH TUNING
ON/OFF TIMER SET
CLOCK SET
PICTURE
LANGUAGE
PRESS:+/-/ENTER/MENU

PRESETTING THE CHANNELS
- Automatic tuning All stations will be preset in sequence available in your area.
- Manual tuning You activate the auto search function until your preferred station is tuned in.
Then you memorize this station into the chosen channel memory. For each
station you repeat the same procedure.
7
After connecting, preset the desired channel (up to 110 channels) in the following procedure.
There are two types of station presettings you may choose from:
AUTOMATIC TUNING
2
1Press the SET UP or DOWN button
to select the AUTO mode, then
press the ENTER button.
Press the MENU button. Press SET
UP or DOWN button to select the CH
TUNING mode, then press the ENTER
button.
MANUAL
AUTO
CH ALLOCATION
PRESS:+/-/ENTER/MENU
CH TUNING
CH TUNING
ON/OFF TIMER SET
CLOCK SET
LANGUAGE
PRESS:+/-/ENTER/MENU
CH TUNING
ON/OFF TIMER SET
CLOCK SET
PICTURE
LANGUAGE
PRESS:+/-/ENTER/MENU
SET ENTER
SET ENTER
MENU
4Press the MENU button twice. The
TV will return to normal TV screen.
3
All available channels in your area are
automatically scanned and stored in
the memory of the TV.
When the TV find the broadcasting
channel, mark disappears.
After scanning, the previous step 2 screen
appears.
MENU
CH position
searching
direction
Tuning segment bar
NOTE: If you want to skip the channel, refer to page 16.
When the unit is in the AV mode, you can't preset the channels.
•
•
PAL CH 10

1
MENU
SET ENTER
SET ENTER
Press the SET UP or DOWN button
to select the MANUAL mode, then
press the ENTER button.
SET ENTER
3Press the SET UP or DOWN button until the picture appears on screen. Then
press the ENTER button. If this is not your desired channel, press the SET UP or
DOWN button until your desired channel appears.
PRESETTING THE CHANNELS
2
Press the MENU button.
Press the SET UP or DOWN button to
select the CH TUNING mode, then
press the ENTER button.
(Continued)
CH TUNING
ON/OFF TIMER SET
CLOCK SET
PICTURE
LANGUAGE
PRESS:+/-/ENTER/MENU
MANUAL
AUTO
CH ALLOCATION
PRESS:+/-/ENTER/MENU
CH TUNING
8
NOTE: Ifthe color ofthe pictureis poor,pressthe COLOR SYSTEM button.
MANUAL TUNING
- How to tune a station to channel 10 position.
PAL CH 1
NOTE: Ifyou need to makethepicture clearer,
pressfine TUNING Upor Downbutton.

SET ENTER
Press the SET UP or DOWN button
to select channel position No.10, then
press the ENTER button.
Repeatstep 3 through4 untilall the
requiredchannels have been stored.
45
When all desired channels have been set in your required position, press the MENU
button three times to return to normal TV screen.
6
PAL CH 10
3
4
MENU
9

Press the ENTER button. The broadcasting stations are changed. Repeat step
3 - 4 to change the other channel. Then press the MENU button three times to
return to normal TV screen.
10
PRESETTING THE CHANNELS
1Press the MENU button.
Press the SET UP or DOWN button to
select the CH TUNING mode, then
press the ENTER button.
2PresstheSETUPorDOWNbuttonto
select the CH ALLOCATION mode,
then press the ENTER button.
34Press the SET UP or DOWN button
to select the channel allocation No.
which you want to change.
Press the SET UP or DOWN button to
select the channel position No.
(broadcasting) which you want to
change. Then press the ENTER button.
SET ENTER
CH ALLOCATION CH1
CH 2
PRESS:+/-/ENTER/MENU
CH ALLOCATION CH 5
CH 2
PRESS:+/-/ENTER/MENU
MANUAL
AUTO
CH ALLOCATION
PRESS:+/-/ENTER/MENU
CH TUNING
5
CH ALLOCATION CH 2
CH 5
PRESS:+/-/ENTER/MENU
CH 2
Before setting
After setting
CH 2
TO CHANGE THE CHANNELS
EXAMPLE: Changingof channel positionfrom CH2to CH5.
SET ENTER
SET ENTER
CH 5
CH 5
SET
ENTER MENU
MENU
(Continued)
CH TUNING
ON/OFF TIMER SET
CLOCK SET
PICTURE
LANGUAGE
PRESS:+/-/ENTER/MENU

After completing the connection and presetting the channels, follow these steps for
viewing.
Pressthe POWER buttonon theTV. ThenpressPOWER button on theremote
controlto turn off(STAND BYindication willlightup) or on (STANDBY indicationwill
goesoff).
1
TV OPERATIONS
The VOLUME can be adjusted by pressing the VOLUME UP/DOWN button on the
remote control.
3
VOL
Direct Channel Selection buttons (0-9)
Press the Direct Channel Selection
button on the remote control.
1-9 CH: Press your required number
only.
10-99 CH: Press the two digits in
order.
100-110 CH: Press the three digits in
order.
CHANNEL UP and DOWN buttons
Press CHANNEL UP/DOWN button on
the remote control.
2
VOLUME 15
CH
NOTE: On screen display will disappear after 4 seconds.
Automatic Power Shut Off
If a station being viewed stops broadcasting for about 15 minutes, the TV will automatically
shut itself off and go into stand by mode.
11
POWER
(Continued)
POWER
9
2CH 29PAL

SETTING THE CLOCK
This TV set is fitted with a 24 hr. CLOCK/TIMER. This clock controls all timed functions and
the clock should be set to the correct time immediately.
MENU
EXAMPLE: If you want to set the time 12:34.
SET ENTER
12
1
SET ENTER
CLOCK SET
12:00
PRESS: +/-/ ENTER/MENU
CLOCK SET
PRESS: +/-/ ENTER/MENU
12:34
SET ENTER
3
NOTE: To reset the clock, follow steps 1-4 above.
Resetting of the time is required after a power failure, disconnection of power
plug.
•
•
Press the MENU buton. Press the SET UP or DOWN button
to select the CLOCK SET mode,
then press the ENTER button.
Press the SET UP or DOWN
button to set the present minute,
then press the ENTER button.
The clock will begin operation.
To set the present time, press the
SET UP or DOWN button to set
the present hour, then press the
ENTER button.
2
4

SETTING THE ON / OFF TIMER
The built-in timer function allows the TV to automatically switch 'ON' (or 'OFF') of up to 4
programsdaily.IfyouprogramtheONTIMERonce,theTVwillautomaticallyturnsondailyat
the same time and to the same channel (If you program the OFF TIMER once, the TV will be
turned off daily at the same time).
EXAMPLE: If you want to set channel 3 to come on at 7:30.
MENU
SET ENTER
13
12
SET ENTER SET ENTER
3
NOTE:

TO CANCEL THE ON / OFF TIMER
SET ENTER
MENU
SET ENTER
14
SETTING THE ON / OFF TIMER (Continued)
Press the SET UP or DOWN button to
select the CANCEL mode at step 7, then
press the ENTER button.
NOTE: If both the OFF TIMER and SLEEP TIMER are set at the same time, whichever set
timer comes on first will shut off the TV.
7To set the desired time in the
ON (or OFF) TIMER memory, press
the SET UP or DOWN button to
selecttheSETmode,thenpresstheENTER
button. To return to the normal TV viewing,
press the MENU button twice.
SET ENTER
SET ENTER
56Press the SET UP or DOWN button
to set the desired channel (only to set
the ON TIMER), then press the
ENTER button.
Press the SET UP or DOWN button
to set the desired minute, then press
the ENTER button.
7:30
CH 3 CANCEL
0:00
CANCEL
0:00
CANCEL
0:00
CANCEL
0:00
CANCEL
0:00
CANCEL
0:00
CANCEL
0:00
CANCEL
ON TIMER
OFF TIMER
CH 1
CH 1
CH 1
7:30
SET
0:00
CANCEL
0:00
CANCEL
0:00
CANCEL
0:00
CANCEL
0:00
CANCEL
0:00
CANCEL
0:00
CANCEL
ON TIMER
OFF TIMER
CH 3
CH 1
CH 1
CH 1
7:30
CH 3 CANCEL
0:00
CANCEL
0:00
CANCEL
0:00
CANCEL
0:00
CANCEL
0:00
CANCEL
0:00
CANCEL
0:00
CANCEL
ON TIMER
OFF TIMER
CH 1
CH 1
CH 1
7:30 CANCEL
0:00 CANCEL
0:00 CANCEL
0:00 CANCEL
0:00 CANCEL
0:00 CANCEL
0:00 CANCEL
0:00 CANCEL
ON TIMER
OFF TIMER
CH 1
CH 1
CH 1
CH 1

The following functions are available from the remote control handset only.
15
CONVENIENT FUNCTIONS
This button allows you to go back to the previous channel by pressing the QUICK VIEW
button. Press this button again to return to the channel you were watching.
QUICK VIEW
CH CALL
TV/AV Selection
Forreceiving the desired signal:
Pressthe AV selectbutton toselect theTVor AV mode.
3 TIMES
When you press this button once, the clock will appear. When you press this button
twice, the channel number and color system will appear. Press this button again for the
third time and the display will disappear.
CH CALL
ONCE TWICE
12 : 34 PAL CH 1.
TV position - to view a normal TV.
AVPAL
CH 5.PAL
AV position - to receive through the direct
Video input.
VIDEO indicator appears on the screen in
AV mode.
0 AV
CH 5.
CH 1.
QUICK
VIEW
C
ANCEL
C
ANCEL
C
ANCEL
C
ANCEL
L
L
L
L

MUTE
Whenthe MUTE buttonis pressed,the TVsoundsystem will be turnedoff completely.
Todisable this function,press thebutton again.Tocontrol the volume, pressVOLUME
UP/DOWN.
13Skip all unwanted
channels thesame way
followingstep1-2.
Press the CHANNEL
UP or DOWN button
to select the channel
which you want to skip.
Afterall channels availablein yourarea havebeenset in memory, youcanskip unwanted
channelsas follows.
SKIP FUNCTION
1
2
SLEEP
NOTE: To cancel the SKIP function, press the DIRECT CHANNEL SELECTION button
(numeric buttons) to select the channel which you want to cancel, then press the
SKIP button again.
16
MUTE MUTE
To set the sleep timer, press the SLEEP button on the remote control. The timer will change in
step of 10 minutes each time the button is pressed in the order of 120, 110, 100,...20, 10, 0. After
the sleep time is programmed, the display will disappear and will reappear momentarily at every
10 minutes. To confirm the sleep time setting, press the SLEEP button once and the remaining
time will be momentarily displayed.
To cancel the sleep time, press the SLEEP button repeatedly until the display turns to 0.
SLEEP SLEEP
120
CH SKIP
CONVENIENT FUNCTIONS (Continued)
2Press the SKIP button.
When a channel is
skipped, the channel
number will blink.

17
Thepicturesettinghavebeenadjustedatthefactoryunderoptimumsignalreceptionconditions.
However,youcanadjustforBRIGHTNESS,CONTRAST,COLOUR,SHARPNESSandTINT
toyour preference.
PICTURE CONTROL
BRIGHTNESS CONTRAST COLOUR
NOTE: Each time the ENTER button is pressed,
the on screen display will change as
shown below.
1
3-a
Press the SET UP or DOWN button
to select the PICTURE mode, then
press the ENTER button.
To adjust the BRIGHTNESS, press the SET UP or DOWN button, then press
the ENTER button.
Press the MENU button.
SET ENTER
MENU
NOTE:
SET ENTER
0
BRIGHTNESS
(Continued)
2
SHARPNESS
The picture setting can only be adjusted when they are displayed on screen.
TINT will appear only when the NTSC Color System is selected.
•
•
(TINT)
CH TUNING
ON/OFF TIMER SET
CLOCK SET
PICTURE
LANGUAGE
PRESS:+/-/ENTER/MENU

3-d
3-b
Pressing the NORMAL button will return all adjustments to their factory preadjusted
levels. This function is available in picture control mode.
NOTE:
MENU
4
To adjust the CONTRAST, press
the SET UP or DOWN button, then
press the ENTER button.
Picture looks sharpest in the daytime by
increasing the contrast.
At night, the sharpest picture is obtained by
reducing the contrast.
To adjust the COLOUR, press the
SET UP or DOWN button, then
press the ENTER button.
The control should be set to where colors
appear normal in intensity and brilliance.
Press the MENU button twice to
return to the normal TV screen.
To adjust the SHARPNESS, press
the SET UP or DOWN button, then
press the ENTER button.
Increasing the number makes the picture
clearer and decreasing the number makes
it softer.
SET ENTER
SET ENTER
-10
CONTRAST
17
COLOUR
SET ENTER
0
SHARPNESS
PICTURE CONTROL (Continued)
3-c
18
Table of contents
Other Orion TV manuals

Orion
Orion TV32LB2000(H) User manual

Orion
Orion LCD PIF26-D User manual

Orion
Orion LED 3241 User manual

Orion
Orion Color CRT TV User manual

Orion
Orion LCD T22-DVDC User manual

Orion
Orion TV20RN10D User manual

Orion
Orion MD17 User manual

Orion
Orion TV37RN10D User manual

Orion
Orion TV1329 User manual

Orion
Orion 14ARX User manual