Orion TV20RN10D User manual

Operating Instructions
Before operating the unit, please read this manual thoroughly.
Digital LCD Colour Television
TV20RN10D
32W0146A_ENG.indd 132W0146A_ENG.indd 1 6/6/07 10:53:59 AM6/6/07 10:53:59 AM

2
Features
LCD MONITOR
Resolution: 640 x 480 pixels
Aspect ratio 4:3
On-Screen Language Display in 13 languages (English, Spanish, German, French,
Italian, Swedish, Dutch, Russian, Portuguese, Turkish, Greek, Finnish or Polish)
NICAM/German A2 STEREO Hyperband cable DVB-T Combi-Tuner
99 analogue plus 1000 DVB-T Channel position memory
Videotext – Fastext/TOPtext
Remote control
Sleep timer plus EPG-Timer
Scart socket
S-Video input
Headphone Jack (for mini plug)
Surround sound feature
CE Symbol Guarante
eing Compliance to Currently Effective European Standards
Headphone Warning
Loud music can damage your hearing irreversibly, therefore do not set the volume to a high level when
listening through headphones, particularly for extended listening periods.
Battery notice
Look after our environment - contact your local authorities for advice on how to safely dispose of exhausted
batteries.
Information for the DVB-T function
Any function relative to the digital television (with the DVB logo) is available only within the country or area
where such signals are transmitted. Verify with the salesman if it is possible to receive a DVB-T signal in
the zone where you live.
Even if the television conforms to the DVB-T specifications, the compatibility to future digital DVB-T
transmissions is not guaranteed.
Some digital television functions may not be available in some countries.
The DVB-T system present in this device is FTA (Free to air).
Waste Disposal Tip
This symbol means that your electrical and electronic equipment should be disposed at the
end of its life separately from your household waste. There are separate collection systems
for recycling in the EU. For more information, please contact the local authority or your retailer
where you purchased the product.
* DVB is a registered trademark of the DVB Project. This logo indicates that the product is
compliant with European Digital Broadcasting.
•
•
•
•
•
•
•
•
•
•
•
•
•
•
•
•
32W0146A_ENG.indd 232W0146A_ENG.indd 2 6/6/07 10:54:00 AM6/6/07 10:54:00 AM

3
Contents
Features............................................ 2
Contents ........................................... 3
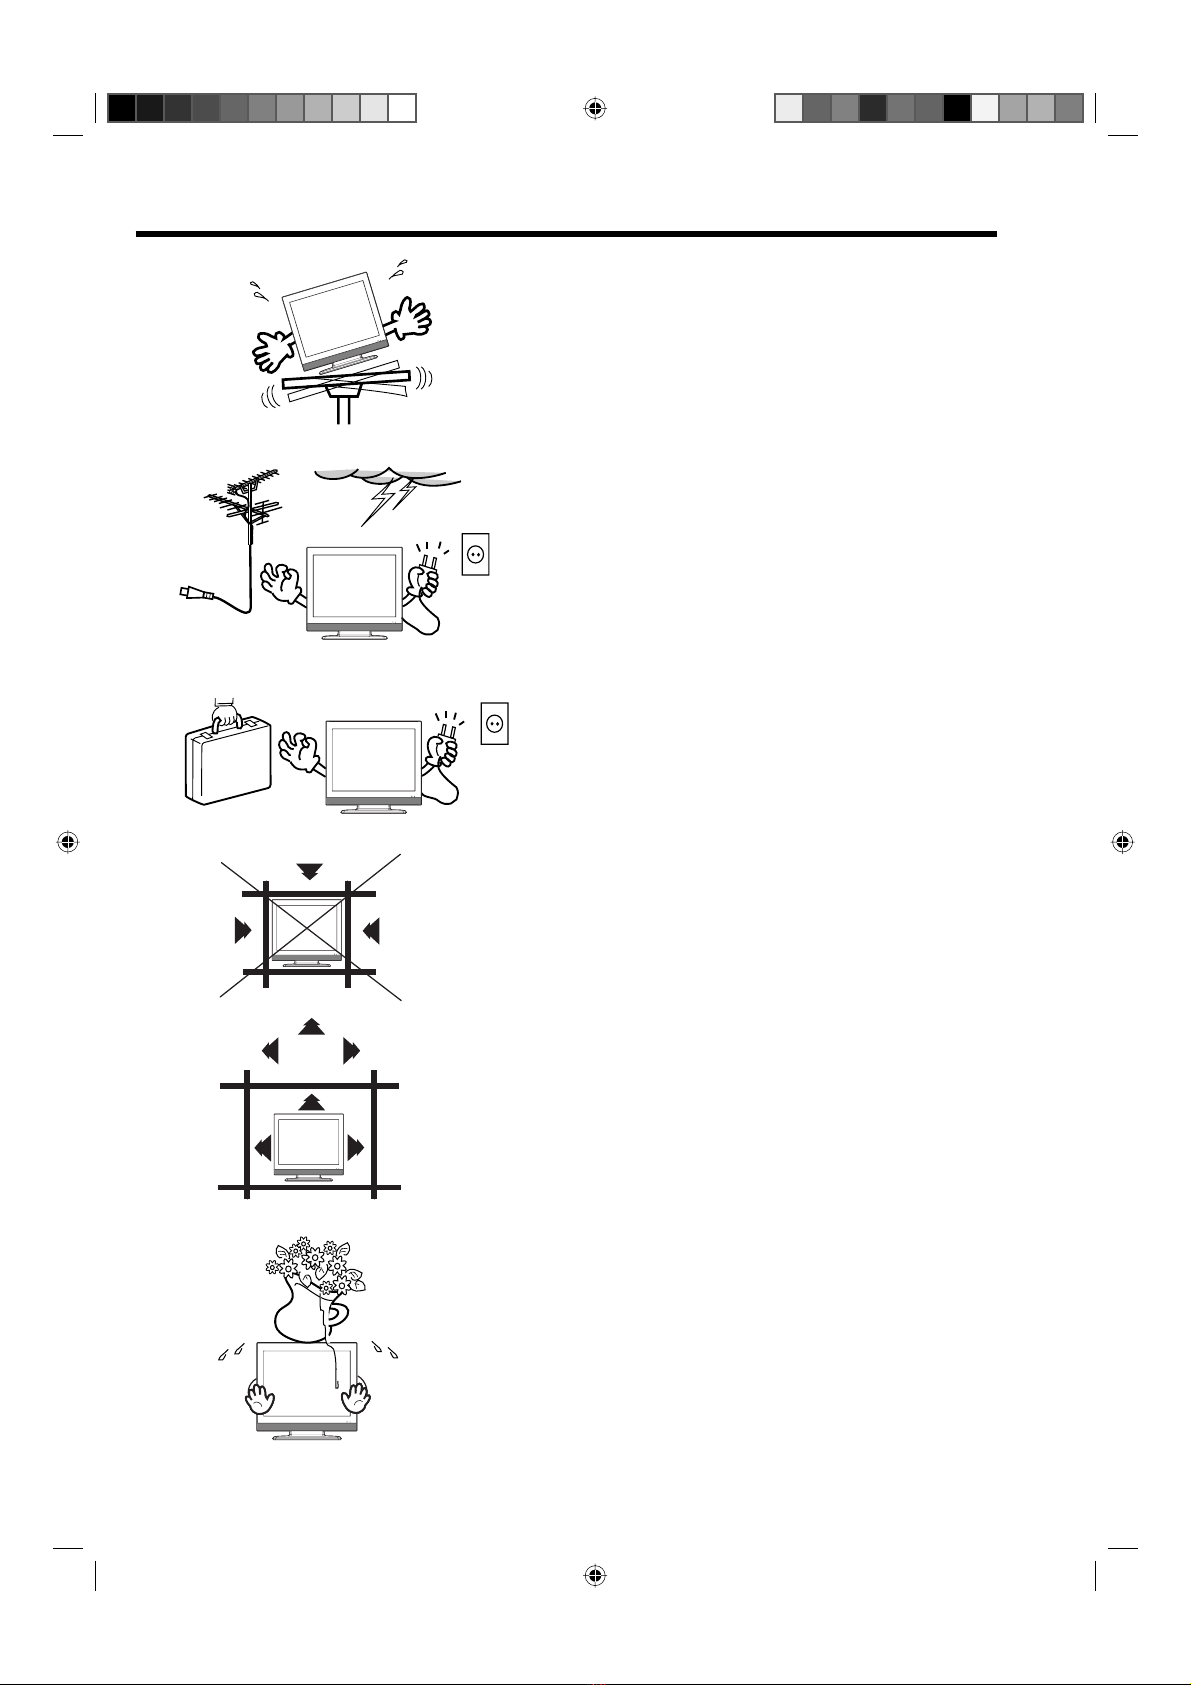
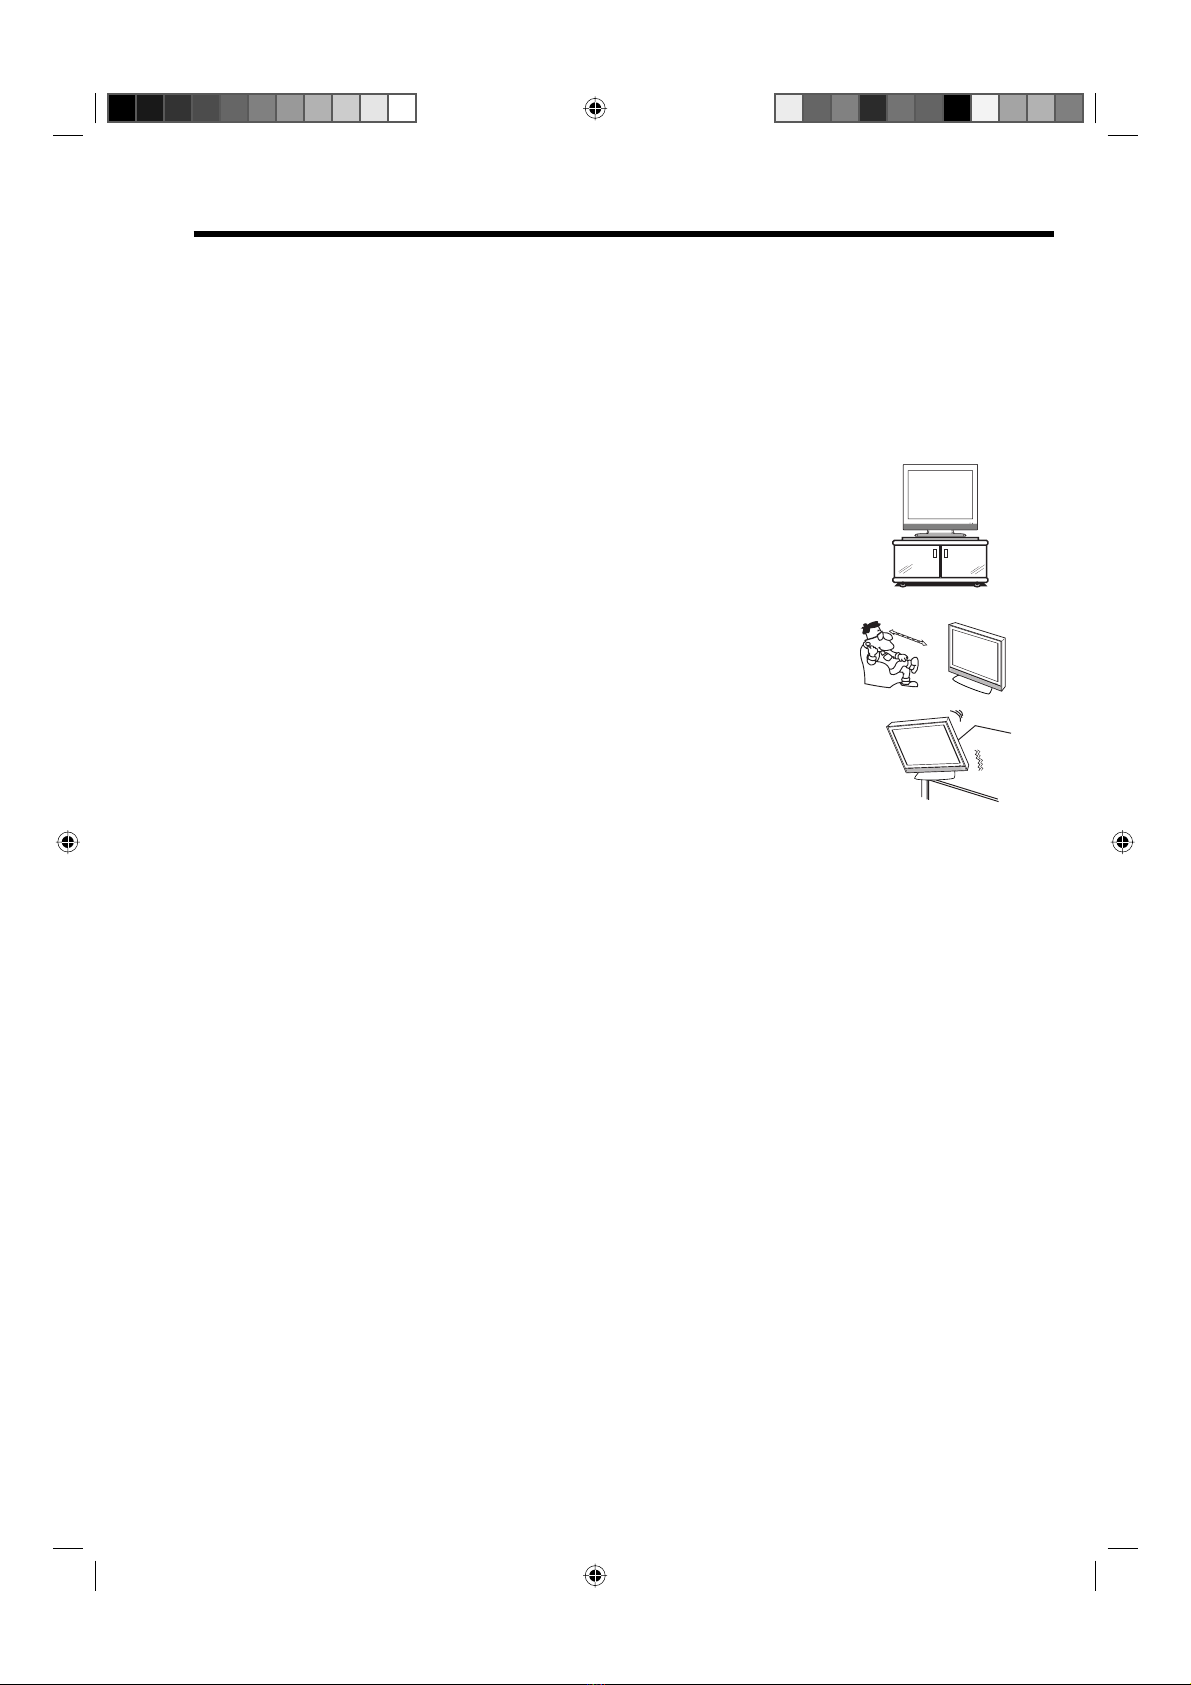
Important safety information.............. 4
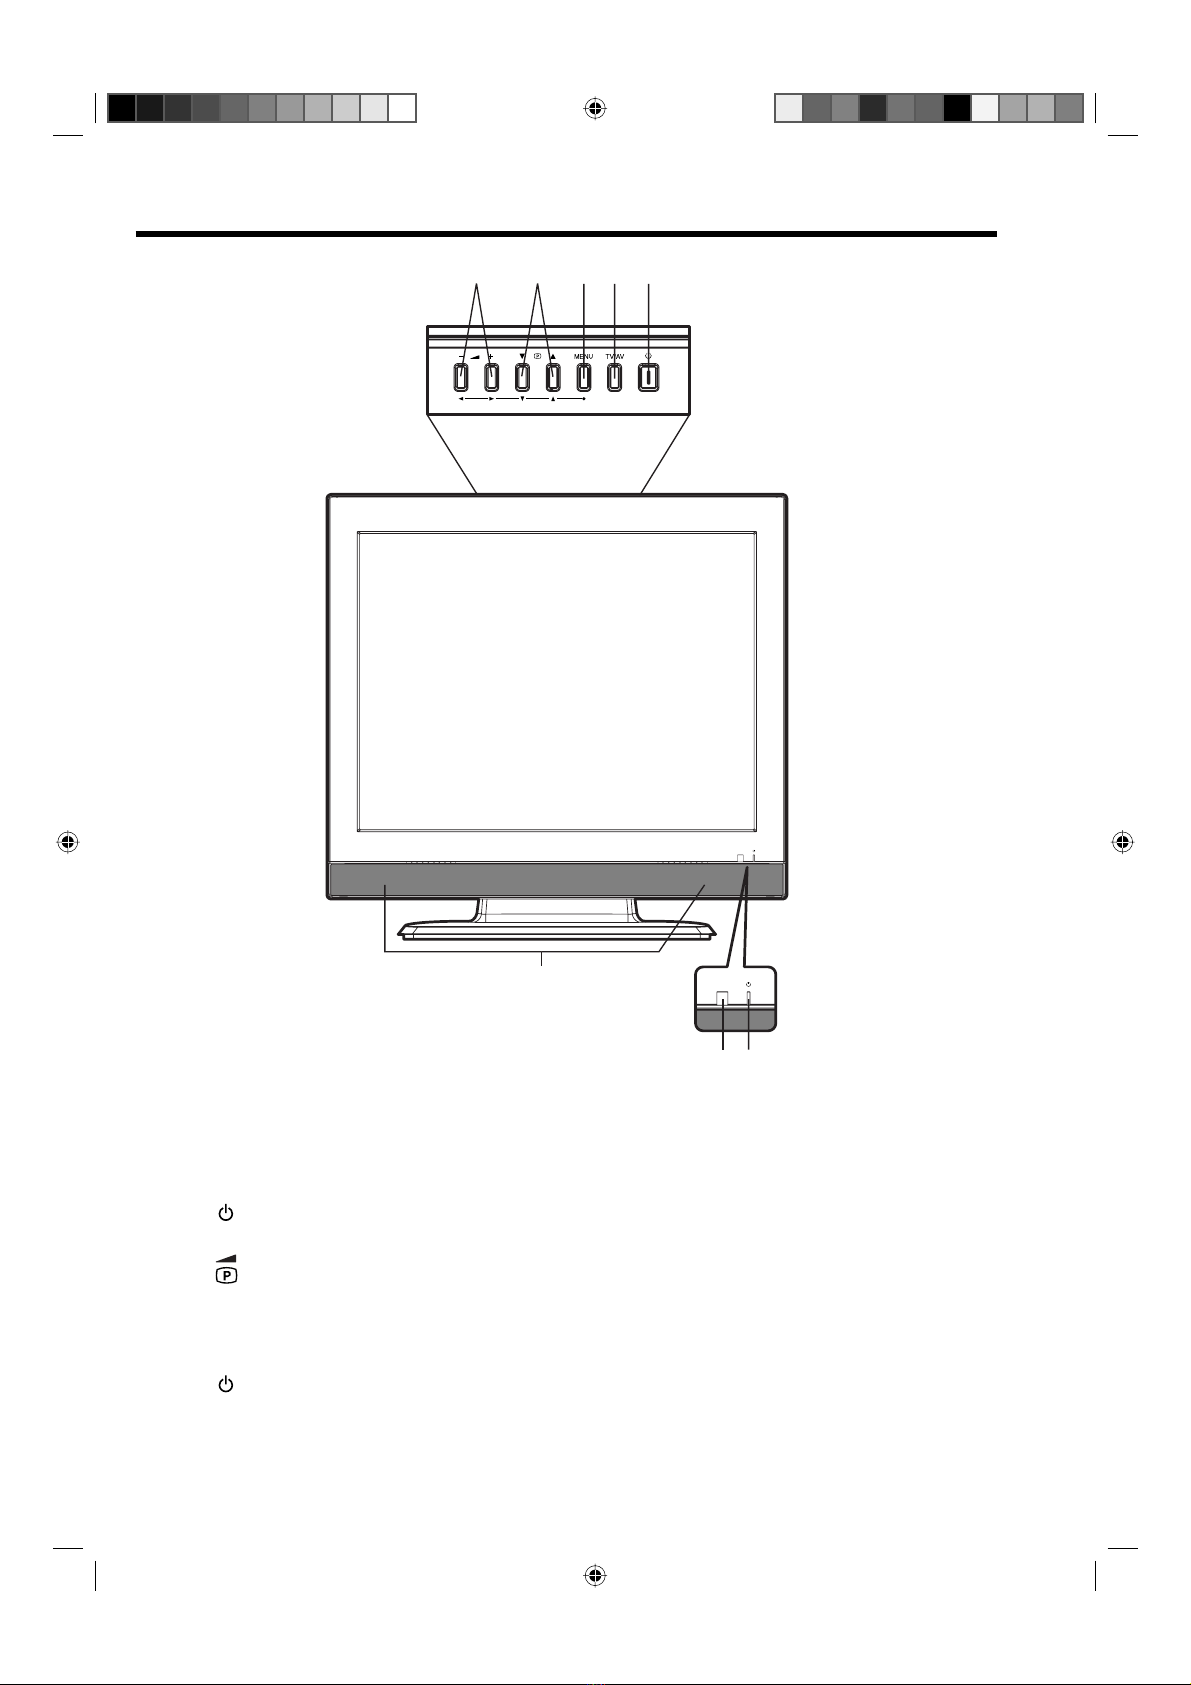
Location of controls........................... 7
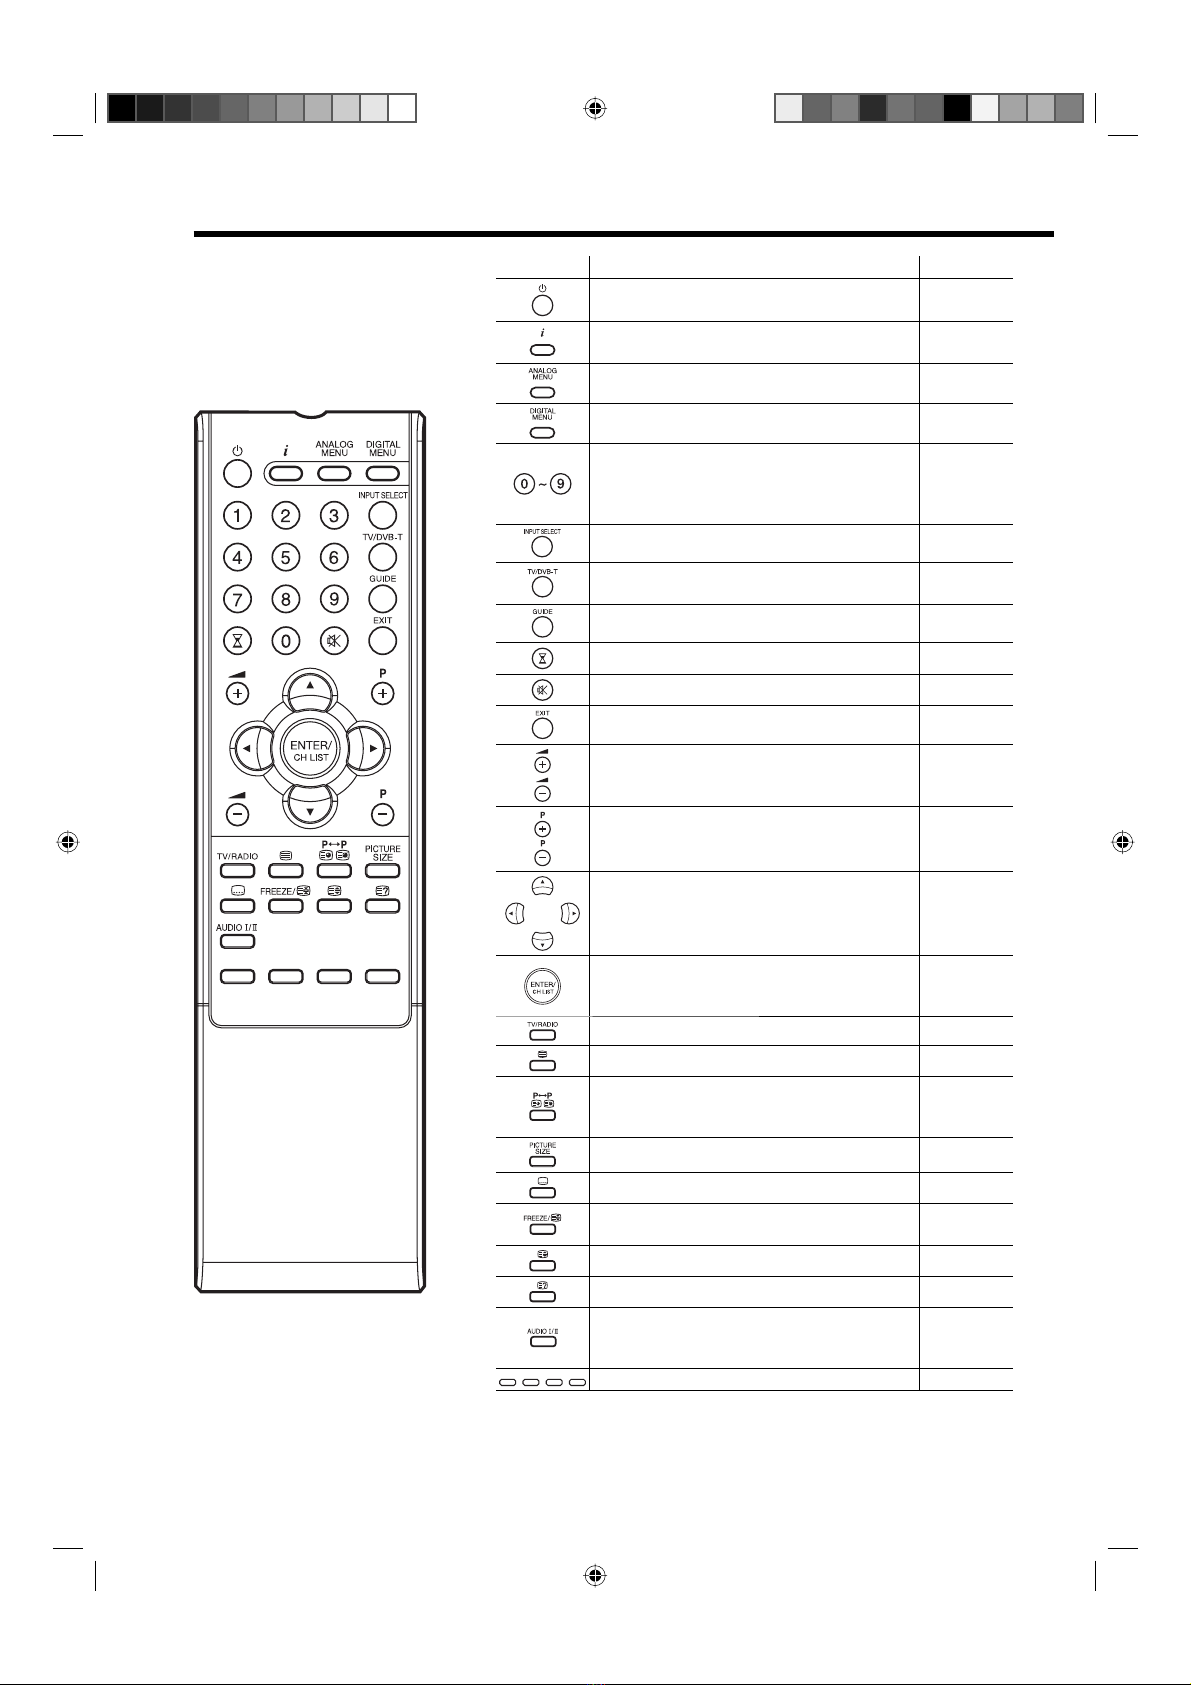
Remote Control................................. 8
Antenna connection........................ 10
Auto setup....................................... 11
Quick guide for ANALOG MENU
operation......................................... 12
Selecting the video input source ..... 12
On-screen Language Selection ...... 12
Automatic station presetting with the
built-in Tuner ................................... 13
Manual TV station presetting .......... 14
Changing the order of stored
channels ......................................... 15
Connection to Satellite Receiver..... 16
Basic Operation .............................. 17
Teletext ........................................... 18
Stereo reception with the built-in
analogue tuner................................ 20
Bass, Treble and Balance ............... 21
Using the surround sound feature... 21
Brightness, Contrast, Colour and
Sharpness ...................................... 21
DNR................................................ 22
Blue back........................................ 22
Rec screen status
(LCD Power on/off) ......................... 22
Selecting the colour temperature .... 23
Selecting the picture preference ..... 23
Picture format.................................. 24
Remarks on DVB-T system ............. 25
Language Setup ............................. 26
Auto Scan ....................................... 27
Manual Scan................................... 28
Carrier Setup .................................. 29
Channel Organizer.......................... 30
Favourite ......................................... 31
Lock................................................ 32
Skip................................................. 32
Go To .............................................. 33
Delete ............................................. 33
Rename .......................................... 34
Move............................................... 35
Move to ........................................... 35
View................................................ 35
Display Setup.................................. 36
Password Setup (Parental lock) ...... 37
Version............................................ 38
Software Upgrade........................... 38
Common Interface .......................... 39
Channel list ..................................... 40
Channel banner .............................. 40
Multi audio ...................................... 41
DVB-Subtitle ................................... 41
EPG (Electronic Program Guide) .... 42
EPG Timer ...................................... 43
Connection to other equipment....... 44
AV colour adjustment...................... 46
Troubleshooting table...................... 47
Specifications ................................. 47
32W0146A_ENG.indd 332W0146A_ENG.indd 3 6/11/07 10:35:00 AM6/11/07 10:35:00 AM

4
Important safety information
This unit has been produced according to all current safety regulations.The following safety tips should
safeguard users against careless use and the dangers connected with such use.
Although this appliance has been carefully manufactured and rigorously checked prior to leaving the
factory, as with all electrical appliances it is possible for problems to develop. If you notice smoke, an
excessive build-up of heat or any other unexpected phenomena, you should disconnect the plug from the
mains power socket immediately.
Ensure that the unit is sufficiently ventilated! Never place next to or underneath curtains!
This set should be only be connected to an AC 220~240V / 50/60Hz mains power supply - do not attempt
to connect it to any other type of supply.
The apparatus must be connected to a main socket outlet with a protective earthing connection.
The socket-outlet must be installed near the equipment and easily accessible.
Any repairs must be carried out by qualified service personnel only.
Do not open this unit. A non-expert attempting to repair the unit could be dangerous and potentially cause
a fire hazard.
Keep away from rodents. Rodents (and also cockatiels) enjoy biting into electric flexes.
The animal can cause a short cut (fire hazard!) and receive a fatal electric shock.
Always hold plug when pulling out plug from power mains supply system. Do not pull on flex.The flex can
become overloaded and cause a short cut.
Never wet clean. Only use a damp cloth, the same as when cleaning furniture.
Do not submerge in or under water!
Set up unit so that no one is able to trip over the flex.
Only use the unit on a stable, shock-free base in order to avoid any danger from falling.
Take note that toddlers can pull the unit down from the table or cupboard by means of its flex. Children
can hurt themselves when doing this.
Do not use the unit near heat sources.The casing and flex could be damaged by the impact of heat.
Watch out for kiddies copying what adults do! Do not stick any objects through the vents!
The vents must remain open! No newspapers or covers should be put on the unit!
The remote control is not a toy! Toddlers could swallow the batteries. If a battery has been swallowed,
please seek out a doctor immediately.
The screen is made of glass and can break if damage is done to it. Be careful when collecting sharp-
edged glass splitters.
You could be hurt or the unit could be damaged.
Taking fall-prevention measures
- If these measures are not taken, the unit can fall and you could be injured.
- Contact the shop where you purchased the unit to obtain full details of the measures.
When a TV stand is used,
- Ensure the unit is fully on the stand and placed in the centre.
- Do not leave the stand doors open.
- You could be hurt as a result of the unit falling or breaking, or your fingers being caught or jammed.Take
extra precautions if you have children.
Please pay attention to the following instructions in order to avoid receiving a life-threatening
electric shock:
Protect against moisture. Never use in the bath or sauna.
Never use near a bath, shower or swimming pool.
Never use the unit if it has got wet. This can also mean condensation moisture, which occurs in the winter
when the cold unit is brought into a heated flat. Wait before operating the unit especially after it has been
transported in the winter, until the cold unit has adjusted to the room temperature.
Do not place any heavy objects on the flex. Electrical isolation could be damaged.
Never wrap insulating tape around damaged flexes or on damaged plugs. These should be repaired or
replaced by qualified service personnel.
Never use this unit if the cabinet is defective. Do not make provisional repairs if the cabinet is damaged
- this should be replaced by a new cabinet if necessary.
Unplug the unit from the mains power supply prior to the cleaning of the unit.
•
•
•
•
•
•
•
•
•
•
•
•
•
•
•
•
•
•
•
•
•
•
•
•
•
•
•
•
•
32W0346A_ENG.indd 432W0346A_ENG.indd 4 5/28/07 9:40:12 AM5/28/07 9:40:12 AM

5
Important safety information
To protect the unit during a thunder storm unplug the AC
power cord and disconnect the antenna. Caution: Do
not touch the antenna connector.
When you leave your home for a long period of time, unplug
the AC power cord for safety reasons.
The unit becomes warm when in operation. Do not place any
covers or blankets on the unit in order to prevent
overheating. The ventilation holes are not to be blocked. Do
not set up near radiators. Do not place in direct sunshine.
When placing on a shelf leave 10 cm free space around the
whole unit.
Make some space around TV (Correct shelf assembly).
The apparatus shall not be exposed to dripping or splashing
and that no objects filled with liquids, such as vases, shall be
placed on the apparatus.
Liquids spilled into the unit can cause serious damage.
Switch the set OFF and disconnect the mains power supply,
then consult a qualified service person before attempting to
use the unit again.
Avoid placing the unit on any surfaces that may be subject to
vibrations or shocks.
10cm
OK !
OK !
32W0346A_ENG.indd 532W0346A_ENG.indd 5 5/28/07 9:40:12 AM5/28/07 9:40:12 AM

6
Important safety information
Moving the unit or carrying by hand
When the unit is moved a long way, unplug the power cord and disconnect the antenna, con-
necting cables and any fall-prevention apparatus.
• Moving without doing so could result in damage to the power cord, a fire, electric shocks or injuries
from dropping the unit.
When the TV stand has casters, remove caster cups from the stand and push it while support-
ing the unit.
• Ensure that you support the unit when the stand is pushed, as this can cause the unit to fall and you
could be injured.
• The appliance could leave indentations in wooden tables with extremely soft wooden surfaces due to
its heavy weight.
• Furniture polish could corrode and dissolve rubber feet. Black imprints could be
visible on the table.You should therefore only use TV benches, which have been
constructed for this specific purpose.
Secure the casters when the unit is installed on a TV stand with casters.
• The stand can move and you could be hurt if the casters are not secured.
Remove casters when the stand is placed on a soft surface such as a mat and
carpet.
The distance between eyes and the screen should be about 5 ~ 7 times as
long as diagonal length of the screen.
• Viewing from too close a distance can cause strain for your eyes.
When installing the Monitor on a table, be careful not to place the edge of its
stand.
• This may cause the Monitor to fall, causing serious injury to a child or adult, and
serious damage to the Monitor.
Possible Adverse Effects on LCD Screen: If a fixed (non-moving) pattern remains on the LCD screen for
long periods of time, the image can become permanently engrained in the LCD TV panel and cause subtle
but permanent ghost images.This type of damage is NOT COVERED BY YOUR WARRANTY. Never leave
your TV on for long periods of time while it is displaying the following formats or images:
• Fixed Images, such as stock tickers, video game patterns, TV station logos, and websites.
• Special Formats that do not use the entire screen. For example, viewing letterbox style (16:9) media on
a normal (4:3) display (Black bars at top and bottom of screen); or viewing normal style (4:3) media on
a widescreen (16:9) display (Black bars on left and right sides of screen).
Attention!
Cleaning instructions for your LCD TV.
Safety note:
Before you start to clean, switch the set’s power off completely and disconnect the plug from the mains
power supply.
Be careful not to scratch the plastic coated front panel - it is highly vulnerable to accidental scratching (e.g.
by fingernails or other sharp items). (While cleaning, do not wear jewelry) that could cause surface scratch-
ing (such as rings, wrist-watch, etc.). Use a lint-free cloth and pure water to clean with, but make sure the
cloth is thoroughly wrung out so that it is just damp and not soaking wet - also make sure that the cloth is
free from any dirt that could cause scratching to the surface.
Wipe the set clean using minimal pressure.
Do not use standard window cleaning fluid. Its alcohol / ammonia will dissolve the front window’s coating.
Never use solvent or thinner. Never use special cleaners which are designed for cleaning PC Monitors or
CRT TVs. Finally carefully rub dry with a clean dry lint-free cloth.
Do not use paper towels or tissues to clean the set - paper can disintegrate when wet or may leave a trail of
dust behind. Some paper can also be abrasive and scratch your screen.
32W0346A_ENG.indd 632W0346A_ENG.indd 6 5/28/07 9:40:13 AM5/28/07 9:40:13 AM

7
Location of controls
Front Side
Description of Indicators and Controls
1. Loudspeakers
2. Remote sensor
3. (Standby/Timer/On) indicator: The LED indicator lights up red in standby mode, orange in
standby mode when the timer is activated, and green in the power ON mode.
4. (Volume)+/– buttons / In Menu: Setting.
5. (Channel) ▲/▼buttons: Press ▲to change to a higher numbered channel set into memory. Press
▼to change to a lower numbered channel set into memory. In Menu: Setting. In Standby: Turning on
the unit.
6. MENU button: To display the menu screen.
7. TV/AV button: Select input mode for TV/AV. In Menu : Using as ENTER button.
8. (Power) button: To turn the unit on or off. Power is still used unless the AC power cord is discon-
nected from the supply.
TOP
23
1
45678
32W0346A_ENG.indd 732W0346A_ENG.indd 7 5/28/07 9:40:13 AM5/28/07 9:40:13 AM

8
Remote Control
Function Page
Enter standby mode or turn on the power 11
Display program position number
Teletext time display
40,42
Activate the analogue menu 11
Activate the digital menu 26
Select channel
Select Teletext page
Enter password
Activate the channel organizer function
18
19
Select an input source 12, 44, 45
Switches between the analogue TV and
the digital TV
26
Display the EPG (Electronic Progr. Guide) 43
Sleep Timer 17
Turn the sound on/off 17
Exit the menu screen
Volume 17
Change the TV channel or Teletext page
up or down
In Standby: Turn on the power
17, 18, 32
12
Cursor buttons
Memorize
Teletext page 100
CH LIST
19
17
Toggle between the TV and radio mode 40
Teletext ON / TV+Text / OFF 18
Switches between the present channel
and the last selected channel
Sub Page selection
17
19
Select picture format 24
Display the subtitle 41
Still picture
Hold the text page
17
19
Teletext enlargement 19
Reveal quiz page answers 19
Select between the available broadcast
audio
Display the multi audio menu
20
41
Fastext/TOPtext buttons 18
32W0146A_ENG.indd 832W0146A_ENG.indd 8 6/8/07 11:03:26 AM6/8/07 11:03:26 AM

9
Remote Control
Install the batteries
Use batteries type UM3 (AA-Size).
Do not use old or weak batteries. The remote control may not work properly with a weak voltage from such
batteries. Replace exhausted batteries with new ones. Never try to recharge normal batteries - this could
cause an explosion.
Note:
Exhausted batteries can leak corrosive electrolyte, which may cause damage to the remote control -
therefore remove exhausted batteries immediately.
1Open the battery
compartment. 2Install the batteries as shown
below, ensuring the correct
polarity.
3Close the battery
compartment.
The remote control handset will not work properly in the following cases:
If bright sunlight directly beams onto the unit front. If an obstacle is placed between the unit and the
handset.
Z
Z
Z
Z
Z
Z
If the batteries have not been installed according to
their polarities.
If the batteries are weak.
Distance of Remote Control Operation
Point the remote control
directly at the remote sensor.
Transmitter window
Maximum distance approx. 5m
Remote sensor
30 30
32W0346A_ENG.indd 932W0346A_ENG.indd 9 5/28/07 9:40:15 AM5/28/07 9:40:15 AM

10
Antenna connection
Note: Before you connect other appliances:
To avoid potentially damaging your set, make sure all items are switched off and disconnected from the
mains power when you make the connections.
Arrange the desired connection.
When you have finished making the connections, reconnect the mains power to the unit and switch it
back on.
Connect your antenna as shown below (E). Connections to other equipment is explained further on
P.44~46. If you have problems with reception, consult a specialist of antenna.
•
•
•
(A) Digital audio output: digital output for DVB-T sound (see page 45).
(B) AV2 input: Input for analogue A/V-Signal (Composite or S-Video). See P.45.
(C) HEADPHONE jack: Plug headphones with a mini plug (3.5 mm) into this jack.
(D) Scart socket (AV1): For the connection of scart cables. See P.44.
(E) DVB-T antenna: Connect a DVB-T antenna if DVB-T is already available in your transmission area.
Special versions allow for simultaneous connection of the analogue cable TV network (F). Ask your
specialist retailer.
The built-in combi tuner receives all analogue cable programmes and DVB-T channels.
(G) C.I. slot: for DVB-T-PayTV (still no providers at present) (see page 39).
(H) Power supply: Connect the supplied power cable to an AC 220-240V/50/60Hz mains power supply
only - do not attempt to connect it to any other type of supply. Never try to repair a damaged AC power
cord with isolation-tape - this should be repaired by a specialist or replaced. Do not let your pet loose
near the cable. Animals biting into the cable could receive a fatal electric shock, and could cause a
hazard to others.
Back Side
(D)
(H)
(C)
(A)
(G)
(F)
(
B
)
(E)
32W0346A_ENG.indd 1032W0346A_ENG.indd 10 5/28/07 9:40:15 AM5/28/07 9:40:15 AM

11
Auto setup
Your unit has an Automatic
installation which makes installation
in your unit easy. When you turn
on the unit for the first time, the
Automatic installation routine is
activated. Using this routine, you
can select the on-screen language
and automatically search for and
store all the receivable analogue
and digital (DVB) channels.
The Automatic station presetting
feature is for the set’s built-in tuner
only. If you have a device such as
a digital decoder (eg. Satellite or
Digital Terrestrial) connected (see
P.16), you would need to tune it in
separately according to its own
instructions.
Preparation:
Press (Power) on the right hand side of the unit or press
(On/Standby) on the remote.
1AUTO INSTALLATION menu will
appear.
Press or to select LAN-
GUAGE, then press ENTER. Press
or to select desired language.
Then press ENTER.
LANGUAGE
ENGLISH
COUNTRY
UK
AUTO TUNING
AUTO INSTALLATION
ENGLISH
2Press or to select
COUNTRY, then press ENTER.
Press or to select your
country.
Then press ENTER.
LANGUAGE
ENGLISH
COUNTRY
UK
AUTO TUNING
AUTO INSTALLATION
UK
3Press or to select AUTO
TUNING, then press ENTER to start
automatic tuning.
Your TV will now automatically tune
in all available channels.
Your TV will tune the analogue
channels first, then tune the digital
channels.
Note:
Please be patient - the Auto
Tuning process can take several
minutes to complete.
When the programme on the
screen stops changing and the
sound comes on, the search
process is complete.
LANGUAGE
ENGLISH
COUNTRY
UK
AUTO TUNING
AUTO INSTALLATION
10 %
AUTO TUNING
(ANALOGUE)
Auto Scan
TV
Progress
Searching...
Carrier :1
Frequency (kHz) :562000
:003
DVB-T 16QAM
Radio
070 BBC Radio 1
:001
001 BBC ONE
002 BBC TWO
007 BBC THREE
Navigate
Exit
(DIGITAL)
It is important to enter “DEUTSCH” and “GERMANY” in Step
1 for correct operation of the appliance in Germany.
The DVB-T tuner arranges the DVB-T channels in an order
customary in the country e.g. 1-ARD, 2-ZDF, etc.
Umlaut vowels in the EPG text are only indicated correctly when
country and language (Deutsch) have been properly set.
•
•
Notes:
To cancel the Auto Tuning, press
ANALOG MENU during the process.
If on the “AUTO INSTALLATION
(COUNTRY)” screen “UK” is
selected, “Move To” cannot be used
in UK (see page 35).
THE AUTOMATIC Tuning PROCESS
WILL ONLY START BY ITSELF THE
FIRST TIME YOU SWITCH THE SET
ON. HOWEVER YOU CAN RESTART
THIS PROCESS VIA THE MENU
SYSTEM (see page 13 for analogue
channels, and page 27 for digital
channels).
•
•
32W0146A_ENG.indd 1132W0146A_ENG.indd 11 6/8/07 11:03:31 AM6/8/07 11:03:31 AM

12
Quick guide for ANALOG MENU operation/Selecting the
video input source/On-screen Language Selection
Make sure the antenna connection
and power supply are connected
as per the description on previous
page.
Preparations:
Turn on the unit with the (Power)
button on the unit. The (On/Timer/
Standby) indicator will light up in
green.
To change the unit to standby mode,
press on the remote control.
(On/Timer/Standby) indicator will
change from green to red. To turn on
the unit from standby mode, press
on the remote control again.
In standby mode, you can also turn
the unit on with (Channel) ▲/▼
on the unit or P + / – on the remote
control.
To turn off the unit press (Power)
button on the unit - to completely
switch it off, disconnect the mains
power supply.
Press TV/DVB-T to select the TV
mode.
•
•
Quick guide for ANALOG MENU operation
Call ANALOG MENU and for example: Select AUTO
TUNING.
1Press 1on the remote control, then press ANALOG MENU.
2Press or to select .
AUTO TUNING
MANUAL TUNING
CH ALLOCATION
LANGUAGE
ENGLISH
AV1 OUTPUT TV
AV COLOUR
AUTO
3Press or to select AUTO
TUNING, then press ENTER to
enter the AUTO TUNING menu.
... on the following pages the MENU
can be called in the same way as
here.
AUTO TUNING
MANUAL TUNING
CH ALLOCATION
LANGUAGE
ENGLISH
AV1 OUTPUT TV
AV COLOUR
AUTO
4Press EXIT to return to the normal screen.
Selecting the video input source
Press INPUT SELECT to view a signal
from another device connected to your
TV, such as a VCR or DVD player. You
can select each input source depending
on which input jacks you used to connect
your devices.
To select the video input source, press
/. Then press ENTER within 6
seconds.
On-screen Language Selection
1Select LANGUAGE (unless you
have already selected when the set
was first switched on).
Then press ENTER.
ENGLISH
AUTO TUNING
MANUAL TUNING
CH ALLOCATION
LANGUAGE
ENGLISH
AV1 OUTPUT TV
AV COLOUR
AUTO
2Press or to select the desired language.
3Press EXIT to return to the normal screen.
Note:
If no buttons are pressed for more
than approx. 60 seconds, the MENU
disappears automatically.
TV
AV1
AV2
INPUT SELECT
32W0346A_ENG.indd 1232W0346A_ENG.indd 12 5/29/07 2:36:26 PM5/29/07 2:36:26 PM

13
Automatic station presetting with the built-in Tuner
Perform this feature to search for and store new analogue TV programmes after the Automatic
installation. (P.11)
Preparation:
Make sure your antenna is connected to the antenna input (see
P.10).
Press 1to switch to channel1 to begin with.
1Select AUTO TUNING, then press
ENTER.
AUTO TUNING
MANUAL TUNING
CH ALLOCATION
LANGUAGE
ENGLISH
AV1 OUTPUT TV
AV COLOUR
AUTO
2Select COUNTRY, then press
ENTER.
Press or to select your
country, then press ENTER.
COUNTRY
START
UK
UK
3Select START. Then press ENTER.
The automatic tuning will search for
available broadcasts and should
store the channels in the correct
order. During the search the sound
is muted. When all programs have
been stored, the normal TV screen
will appear.
COUNTRY
START
AUTO TUNING
3%
UK
Note:
To restart digital auto tuning, see page
29.
32W0346A_ENG.indd 1332W0346A_ENG.indd 13 5/28/07 9:40:17 AM5/28/07 9:40:17 AM

14
1Preparation: connect analog rf-cable-supply. Select
memory-cell 2. Press key 2(see page 17). OSD will indicate
2in right upper corner. Eventually recently stored TV-
channel’s name might also appear.
2Press ANALOG MENU. Press
or to select tool-page (see here).
Press or to select MANUAL
TUNING.
Press ENTER.
AUTO TUNING
MANUAL TUNING
CH ALLOCATION
LANGUAGE
ENGLISH
AV1 OUTPUT TV
AV COLOUR
AUTO
3COLOUR SYSTEM and SOUND
SYSTEM has already been preset
to AUTO.
Do not touch.
AUTO
SEARCH
FINE 168.30MHz
COLOUR SYSTEM
AUTO
AUTO
SOUND SYSTEM
VOX 168.30MHz
4Press or to select SEARCH.
Press ENTER. Press -key, to start
tuning. Tuning will stop automatically
at next available station. If this does
not happen to be the ZDF, press
-key again to continue tuning for the
ZDF. Tuning will work only in forward
direction.
Then press ENTER.
SEARCH
FINE 168.30MHz
COLOUR SYSTEM
AUTO
SOUND SYSTEM
AUTO
ZDF
175.30MHz
5If you like use fine-tuning. Select
FINE and press ENTER. Press
or , to fine tune. See the note on
this page.
ZDF 175.30MHz
SEARCH
FINE 175.30MHz
COLOUR SYSTEM
AUTO
AUTO
SOUND SYSTEM
6To store other stations in additional memory-cells, repeat
steps 1 to 5.
7Press EXIT to return to the normal screen.
Manual TV station presetting
If you like, you may manually tune a certain station into a selected memory-cell, without deleting
or modifying other memory-cell’s contents. Example: Store the ZDF into memory-cell 2.
Notes:
Usually fine tuning is not necessary,
due to tuning’s automatically
stopping at the very best position. If
you fine-tune anyway, proper working
of teletext-reception with built-in
tuner is no longer guaranteed.
Tuning does work only in direction
of higher frequencies (up). Tuning
towards lower frequencies (down)
is not supported. However, when
tuning has reached tuning-range’s
end (highest frequency), it will restart
automatically from the starting
position (lowest frequency).
•
•
32W0146A_ENG.indd 1432W0146A_ENG.indd 14 6/6/07 10:54:00 AM6/6/07 10:54:00 AM

15
Changing the order of stored channels
Note:
When changing the order of the
channels, it is best to start with Ch1.
The Automatic station presetting
stores the stations in a specific
order. However, this order can be
changed if you wish.
1Select CH ALLOCATION.
Then press ENTER.
AUTO TUNING
MANUAL TUNING
CH ALLOCATION
LANGUAGE
ENGLISH
AV1 OUTPUT TV
AV COLOUR
AUTO
2Select desired option, then press
ENTER.
SORT
ERASE PROGRAM
SKIP
CH LABEL
3After setting the each option, press ANALOG MENU to
return to CH ALLOCATION memu.
4Press EXIT to return to the normal screen.
Description about the each setting option:
SORT: Press or to select the channel that you want to
move, then press ENTER.
Press or to select the position that you want to move the
channel to, then press ENTER.
ERASE PROGRAM: Press or to select the channel that
you want to erase, then press ENTER.
SKIP: Press or to select the channel that you want to
skip, then press ENTER. mark will appear.
CH LABEL: Press or to select channel that you want
to rename, then press ENTER. Press or to select
character, then press or . The cursor will move to the next
position. Press ENTER to set the channel label.
32W0346A_ENG.indd 1532W0346A_ENG.indd 15 5/28/07 9:40:18 AM5/28/07 9:40:18 AM

16
Connect with Satellite receiver as shown below.
Select the TV-Program at the satellite receiver. To do this, use the remote control of the satellite
receiver. You can not store the same station once again additionally in LCD-Monitor which already
stored in satellite receiver.
Connection to Satellite Receiver
TV
Satellite
Receiver
Scart-cable (not supplied)
To AV 1
32W0346A_ENG.indd 1632W0346A_ENG.indd 16 5/28/07 9:40:19 AM5/28/07 9:40:19 AM

17
Basic Operation
Note:
If the built-in tuner does not receive
anything (e.g. if no antenna is
connected) during TV-operation, then
the TV-unit will change to standby after
approx. 15 minutes.
Channel selection
With the numbered buttons.
Example:
No. 2: Press 0and within 2 seconds, press 2.
No. 29: Press 2and within 2 seconds, press 9.
Press P + or –to change up or down a channel. This
takes approx. 2 seconds. If the auto search only
stored 5 stations, only these 5 will appear. Skipped
channels will not appear (see P.15).
•
•
CH LIST
The CH LIST shows a list of all receivable
programmes. They are located in channels 1 to 99.
Press CH LIST to display the CH LIST.
Press or to select the desired channel.
Press CH LIST to display the selected channel.
Press EXIT to exit.
QuickView
button allows you to go back to the last selected channel.
Volume adjusting
Press + or – to adjust the volume. The volume level indicator
disappears after 4 seconds.
MUTE
Press . The sound will be cut off. MUTE will appear for
approx. 4 seconds.
The muting can be released by pressing again or +or –.
Information display
In the analogue TV mode: Press .
Channel number and picture size
setting will appear for approx. 4
seconds.
In the digital TV mode: Press . The
program information will appear
(see ‘Channel banner’ on page 40).
SLEEP TIMER
To set the sleep timer press . SLEEP and the minutes until
shut-off will appear. Each time you press the SLEEP time
shown will change. When the displayed time runs out, the unit
will switch to standby. The display will disappear after approx. 4
seconds
To cancel the sleep timer:
Press repeatedly until ‘0’ appears.
Still picture
Press FREEZE to make a still picture. To cancel the still picture,
press FREEZE again.
Note:
The still image automatically goes out after 30 minutes.
STEREO 1
ARD
4:3
32W0146A_ENG.indd 1732W0146A_ENG.indd 17 6/8/07 11:03:32 AM6/8/07 11:03:32 AM

18
Teletext
Teletext is sent page by page. This unit is able to automatically store up to 256 pages, but they can only be
accessed once they have been stored. This can take a few moments.
Fastext/TOPtext
The Fastext/TOPtext is teletext with a special directory.
On the lower part of the screen there are four different coloured
fields (red, green, yellow and blue). These fields lead directly
to the pages shown within.The coloured buttons on the remote
control correspond to the coloured fields. Press the appropriate
coloured button in order to activate the desired colour field.
Switch on / off Teletext
Teletext is not transmitted by all channels.
Select a channel that shows teletext.
Press .You will now see a teletext page. (If “100” is shown
without any text information, it may mean that the channel you
have selected does not support teletext.)
Press again in order to switch off teletext.
Press again in order to switch on teletext again.The last
page which was stored is now shown.
Note:
You cannot select any other channels as long as teletext is
switched on. Switch teletext off when you want to switch over to
another channel.
Select Page
Press P+or –until the page you desire appears. Or ... enter the
requested page number by using the 10 Number Buttons.
And if you mistype something, just enter the complete 3-digit
wrong page number then enter the desired number again. Or ...
press one of the coloured teletext buttons so that a page from
Fastext/TOPtext is shown.
TELETEXT
32W0346A_ENG.indd 1832W0346A_ENG.indd 18 5/28/07 9:40:20 AM5/28/07 9:40:20 AM

19
Teletext
Hold Pages
Some pages are divided up into subpages by the channel.
Subpages are automatically shown in turn, as they are
transmitted. In order to hold the page, press . Press again
in order to display the next subpage.
Directly Select Subpages
You can directly select the subpages if required.
Example:
Page 667 from ARD (German teletext) comprises of 2
subpages. In the right upper corner you will, for example, see
1/2. That means that page one of 2 subpages is being shown at
the moment.
667 667 ARD-Text 21.07.03 15:01:38
1/2
Press in order to select subpage 2. 4 dashes (----) are
shown. Enter 0 0 0 2. It can take a minute before subpage 0002
appears.
Press again in order to switch off the subpage feature.
You can only select other teletext pages when the subpage
feature is switched off.
Enlargement
In order to enlarge the display, press .
Either the upper or lower half of the screen is enlarged.
Each time you press you switch between the display of the
upper or lower half of the screen or the full picture.
Answering Quiz Questions
Some pages contain quiz questions with concealed answers.
Press in order to show the answers.
Page 100
Press ENTER in order to show page 100.
32W0346A_ENG.indd 1932W0346A_ENG.indd 19 5/28/07 9:40:20 AM5/28/07 9:40:20 AM

20
Stereo reception with the built-in analogue tuner
The built-in Tuner can detect and
receive NICAM stereo broadcasts
automatically.
Note:
In case of bad reception, the stereo
sound also can be disturbed.
NICAM stereo sound reception:
1Select NICAM, then press ENTER.
Press or to select AUTO or
OFF.
Select OFF if you do not want to
receive NICAM sound.
NICAM AUTO
BASS 25
TREBLE 25
BALANCE 0
SURROUND OFF
RESET
AUTO
2Press EXIT to return to the normal screen.
The following types of broadcast are possible with
NICAM transmissions
‘NICAM ST’ illuminates for approx.
4 seconds when a NICAM STEREO
broadcast signal is received.
‘NICAM M1’ illuminates for approx.
4 seconds when a NICAM MONO A
broadcast signal is received.
‘NICAM M1/M2’ illuminates for
approx. 4 seconds when a NICAM
MONO A and MONO B broadcast
signal is received.
This will be displayed for approx.
4 seconds if a NICAM signal is
received when the ‘NICAM OFF’
option is selected.
Stereo reception in Germany
‘STEREO’ illuminates for approx. 4
seconds when a STEREO broadcast
signal is received.
When 2-channel sound reception is available, you can
select your preferred audio with the AUDIO I/II button.
Each time you press AUDIO I/II, the sound channel will switch
to the alternative channel available.
NICAM 2-channel sound reception (not available in
Germany)
NICAM M1/M2 NICAM M1/M2
2-channel sound reception in Germany
SOUND 1 / 2 SOUND 1 / 2
NICAM M1
NICAM OFF
NICAM M1 / M2
NICAM ST
STEREO
32W0346A_ENG.indd 2032W0346A_ENG.indd 20 5/28/07 9:40:20 AM5/28/07 9:40:20 AM
Table of contents
Other Orion TV manuals

Orion
Orion TV37RN10D User manual

Orion
Orion Color CRT TV User manual

Orion
Orion LED 3241 User manual

Orion
Orion LCD2028D User manual

Orion
Orion MD17 User manual

Orion
Orion LCD T22-DVDC User manual

Orion
Orion 14ARX User manual

Orion
Orion TV1329 User manual

Orion
Orion LCD PIF26-D User manual

Orion
Orion TV32LB2000(H) User manual