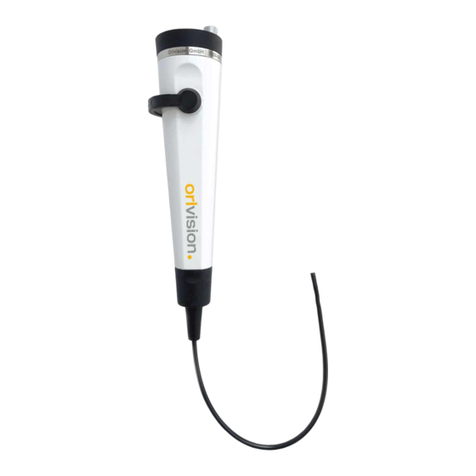
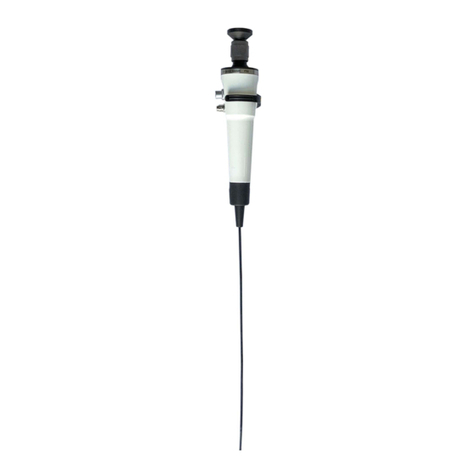
orlvision RX1 User manual

1
Instructions for use
Video Rhino Laryngoscope
RX1, RS1-PAL, RS1-NTSC

2
Content
1 Risks and hazard warnings .............................................................................................................. 3
1.1 Notes ....................................................................................................................................... 3
2 Intended use ..................................................................................................................................... 4
3 Symbols used ................................................................................................................................... 5
4 Functionality and application ............................................................................................................ 6
4.1 General .................................................................................................................................... 6
4.2 Notes on use............................................................................................................................ 6
4.3 Application ............................................................................................................................... 6
4.4 How it works ............................................................................................................................ 6
4.5 Scope of delivery ..................................................................................................................... 7
5 Technical data .................................................................................................................................. 7
5.1 Data Video Rhino Laryngoscope ............................................................................................. 7
5.2 Electromagnetic radiation ........................................................................................................ 8
6 Manufacturer .................................................................................................................................... 8
7 Recommended accessories ............................................................................................................. 9
7.1 Cold light source ...................................................................................................................... 9
7.2 Monitor ..................................................................................................................................... 9
8 Connection of the Video Rhino Laryngoscope ................................................................................. 9
9 Use of the Video Rhino Laryngoscope........................................................................................... 10
9.1 White balance ........................................................................................................................ 10
9.2 Insert, angle and retract the insertion tube. ........................................................................... 10
9.3 Switch off ............................................................................................................................... 11
10 Cleaning, care and disinfection ................................................................................................. 11
10.1 Manual procedures ................................................................................................................ 11
10.1.1. Cleaning ......................................................................................................................... 11
10.1.2. Disinfection .................................................................................................................... 11
10.1.3. Final rinse ...................................................................................................................... 12
10.2 Machine processes ................................................................................................................ 12
10.3 Leak test ................................................................................................................................ 14
10.4 Care ....................................................................................................................................... 15
11 Maintenance and repairs ........................................................................................................... 15
11.1 Return .................................................................................................................................... 15
12 Disposal ..................................................................................................................................... 15
13 Reporting of serious incidents ................................................................................................... 15

3
1 Risks and hazard warnings
1.1 Notes
1. The Video Rhino Laryngoscopes RS1 and RX1 are only designed for use in hospitals and clinics
without direct connection to the public supply network.
2. Please first check the packaging, the Video Rhino Laryngoscope and the accessories for complete-
ness and shipping damage. In case of damage, make a note of the damage and notify your dealer
or the manufacturer.
3. Before each treatment, take a test image of a known object so that
you can be convinced of the correct image quality, the correct image orientation (even when the
angulation unit is moving) and the proper functioning of the Video Rhino Laryngoscope. Pay partic-
ular attention to the colour fidelity and the correct transmission of the images without too many im-
perfections.
4. Only use the Video Rhino Laryngoscope for its intended purpose in accordance with the regula-
tions of the MPG, in accordance with the generally recognised rules of technology, and in accord-
ance with the valid occupational safety and accident prevention regulations.
5. Before using the Video Rhino Laryngoscope, visually inspect it to ensure that it is in good working
order and in proper condition, including the power supply. The Video Rhino Laryngoscope is a
high-quality precision mechanical-optical instrument; treat it with care.
Caution:
Do not use the Video Rhino Laryngoscope if it has any defects that may endanger patients, users or
third parties, e.g. sharp edges due to damage.
Caution:
Avoid direct sunlight, X-rays, sudden sharp temperature changes or heating above 60°C and mechani-
cal stresses such as hard impacts and kinking of the insertion tube.
Caution:
Only use the enclosed accessories or accessories approved by the manufacturer to connect the Video
Rhino Laryngoscope to the mains and to other devices.
Caution:
Only use medically approved devices (monitor, PC, cold light source, etc.) together with the Video
Rhino Laryngoscope. Otherwise, the patient or user could be endangered in unfavourable cases. Ob-
serve the instructions in chapter 5.
Caution:
Handle pointed or sharp objects such as scalpels or needles carefully near the Video Rhino Laryngo-
scope so that no mechanical damage could be caused to the endoscope.
Caution:
When used with high-power light sources, light with high energy can escape from a light guide cable
or laryngoscope. Deposits at the light exit area, insufficient working distances or direct tissue contact
can thus lead to strong heating above 41C° and even tissue damage due to absorption.

4
Therefore, avoid direct contact of tissue with the light emission area.
Caution:
Use the automatic control of the light source, if available, or manually adjust the light source to the -
minimum light output required for the application to minimise burn risks.
Caution:
The high light energy emitted at the distal end can lead to high heating or even ignition when the laryn-
goscope is placed on heat-sensitive or combustible surfaces. Therefore, always store the laryngo-
scope in a suitable holder.
Remove dirt from the optical surfaces of the laryngoscope to prevent accidental heat build-up.
Reduce the intensity at the light source or switch it off when the laryngoscope is not in use.
Switch off the light source if the laryngoscope will not be used for a long time!
Caution:
Do not look directly into the light output of the light source or a connected light guide! The energy of
powerful light sources can cause serious and permanent eye damage.
Caution:
The Video Rhino Laryngoscope may only be used by persons who, on the basis of their training or
knowledge and practical experience, can guarantee proper handling.
The operational safety and usability of the medical device depend not only on your skill, but also on
the care of the device. Regular cleaning and care are therefore necessary (see chapter Cleaning,
care and disinfection).
Qualified service and the use of original spare parts give you the guarantee that the operational
safety, the operational capability and the value of your medical device are maintained.
2 Intended use
The Video Rhino Laryngoscope RX1, RS1-PAL, RS1-NTSC is used for endoscopic examina-
tions in human ear, nose and throat medicine. The flexible Video Rhino Laryngoscopes can be
used to examine the nose, pharynx and larynx, nasal cavities and nasopharynx. The examina-
tion regions can be displayed on high-resolution screens via a (panel) PC.
The Video Rhino Laryngoscope is not intended for examination of the paranasal sinuses and
lower larynx.
It is used exclusively in medical practices and clinics by staff specially trained in handling en-
doscopes.
Caution:
The Video Rhino Laryngoscope RX1, RS1-PAL, RS1-NTSC may only be used on persons who have a
sufficiently large body opening for the insertion of the insertion tube. This is especially important for
nasal examinations in children.

5
3 Symbols used
The symbols used have the following meaning
On the type plate: Attention, follow instructions for use
Symbol for separate collection of electrical and electronic equipment
Applied part type BF
In the instructions for use: Caution, general danger area
IP 68 Unit is dust-tight and protected against permanent submersion
Unit complies with protection class II
Device is a medical device

6
4 Functionality and application
4.1 General
It is an electronic system that must be protected from penetrating moisture.
The type designations stand for the following variants:
RS1-PAL Unit with CCD chip; video interface PAL format
RS1-NTSC Unit with CCD chip; video interface NTSC format
RX1 Unit with CMOS chip; video interface NTSC format
4.2 Notes on use
The instructions for use explain how to operate the medical device safely, properly and effectively.
Please read the instructions for use before putting the device into operation, starting with the chapter
on risks and hazard warnings. Keep the instructions close to the device. Observe the ambient condi-
tions specified in the technical data.
The instructions for use do not replace the corresponding basic medical and technical knowledge. The
user may have to acquire such knowledge in special advanced training courses.
orlvision accepts no liability for diagnoses and interpretations of findings made with the aid of medical
products acquired from orlvision. The acquisition of medical expertise and its diagnostic and thera-
peutic consequences are solely the responsibility of the user of the medical product.
Before each use, test the direction of movement of the bounce unit by operating the adjustment lever
to avoid incorrect bounce direction. Check a test image to verify colour fidelity.
We recommend the use of a lubricant on the shaft before inserting the shaft into the nasal cavity to be
examined.
4.3 Application
The flexible Video Rhino Laryngoscopes from orlvision GmbH (hereinafter referred to as orlvision)
are high-quality medical products. They are used for endoscopic examinations in human ear, nose
and throat medicine. The flexible Video Rhino Laryngoscopes can be used to examine the nasophar-
ynx. The image of the examination region can be displayed on a high-resolution screen and saved.
The RS1/RX1 laryngoscope is intended exclusively for use in clinics and may only be used by person-
nel specially trained in handling endoscopes!
Perform a white balance before each use (see section 7.1). Proceed with cleaning and disinfection as
described in these operating instructions.
4.4 How it works
At the distal end of the Video Rhino Laryngoscope is the exit of a light guide that illuminates the obser-
vation region. An attached lens enables imaging at a viewing angle of 90 °. The image thus captured
is recorded by a video camera, converted into an electrical signal and made available at the output of
the Video Rhino Laryngoscope as an analogue video signal for display on a monitor.
The light for illuminating the observation region is obtained from a cold light source. The distal end of
the insertion tube can be angled in a range of 130 ° by operating the adjustment lever.
The supply of electrical energy is ensured by a medical power supply unit included in the delivery.

7
4.5 Scope of delivery
The scope of delivery for the flexible Video Rhino Laryngoscope includes
the Video Rhino Laryngoscope with insertion tube and the connector plug for the cold light source
(connected to the handpiece)
a connection cable for connecting a monitor and the power supply unit
a medically approved power supply unit for power supply
a leak tester
one cinch cable and one S-video cable
an adapter of the ACMI type for connection to the light source (adapters of the STORZ, WOLF and
OLYMPUS types are not included in the scope of delivery)
Plug Cap Naso
this operating manual
5 Technical data
5.1 Data Video Rhino Laryngoscope
Parameter RX1 / RS1
Focus area 10 - 55 mm
Angle of view 90°
Diameter distal end 3.9 mm
Diameter insertion tube 3.9 mm
Distal angulation up / down 130°/130°
Working length 310 mm
Total length 540 mm
Video format NTSC/ PAL and NTSC
Resolution in pixels 320x240 / 500x582 and 510x492
White balance manual
Illumination: Cold light source Fibre optic cable
Power supply 100-240V / 50-60Hz
Power max. 1.5 W
Interface Cinch Video / Y_C Video, Cinch
Weight in g approx. 540g handpiece
Risk class according to MPG 1
Transport and storage temperature in ° Cel-
sius
- 10°C to + 60°C
Operating temperature in ° Celsius
The distal end can warm up to 9°C above
room temperature.
0° to + 40°
Relative humidity 0 to 100%
Air pressure 950 to 1050 hPa
Protection class against environmental influ-
ences
IP 68
Protection class against electric shock Class II
Operating mode Continuous operation
Table1

8
5.2 Electromagnetic radiation
With regard to radiation and interference immunity, the RS1 laryngoscope fulfils the conditions of the
EN 60601-1-2:2007 (IEC 60601-1-2:2007, modified), Emission class A
Intended for use in hospitals without direct connection to the public supply network!
The RX1 laryngoscope complies with EN 60601-1-2:2007 (IEC 60601-1-2:2007, modified) with regard
to radiation and immunity.
6 Manufacturer
The manufacturer of the Video Rhino Laryngoscope is
orlvision GmbH
Gewerbestraße 17
D-35633 Lahnau
Tel: +49(0) 64 41 67 92 98 - 0
Fax: +49(0) 64 41 67 92 98-99
www.orlvision.de

9
7 Recommended accessories
7.1 Cold light source
Only use a medically approved cold light source!
For example:
Light source orlLED 180, ILO
Laryngeal Stroboscope HighLight Plus, Inventis
7.2 Monitor
Only use a medically approved monitor!
8 Connection of the Video Rhino Laryngoscope
1 Handpiece 2 White balance 3 Capture Button
4 Adjustment lever 5 Light guide plug 6 LED display
7 Supply hose 8 Valve for pressure test 9 Multipoint connector
10
Multipoint socket 11
Connection for cold light
source
12
Handpiece
13
Adjustment lever 14
Connection cable for power
supply and video
15
Composite video out
16
12V input 17
Medical power supply 12V 18
Angle unit
19
Distal end 20
Camera head
Figure 1: Connection laryngoscope

10
The Video Rhino Laryngoscope should be connected as follows. See also figure 1. Plug the power
supply unit into a mains socket (100 - 240 V AC, 50 - 60 Hz). The secondary connection of the power
supply unit must be plugged into the connector into which the video cable for the monitor is also
plugged.
Then the connection cable must be plugged into the light guide plug and this in turn must be inserted
into the cold light source.
An external monitor for displaying the video signal is connected to the Video Out connector, then the
image captured by the camera appears on the screen.
Now the Video Rhino Laryngoscope can be used for its intended purpose, the green LED on the light
guide plug is lit.
Caution:
Monitor and light source must meet the requirements of the DIN EN 60601 standard!
9 Use of the Video Rhino Laryngoscope
9.1 White balance
Attention: Before each examination, a white balance should be carried out so that the camera repro-
duces the natural colours.
Handpiece
1 Handpiece 2 White balance 3 Capture Button
4 Adjustment lever
Figure 2
: White balance
To do this, point the distal end straight at a white sheet of paper, take up the working range (10 - 55
mm distance) and briefly press the white balance button on the handpiece. See also figure 2.
9.2 Insert, angle and retract the insertion tube.
Carefully insert the insertion tube into the corresponding regions to be examined (nasal and pharyn-
geal cavities). If necessary, the distal end can be adjusted by 130°with the adjustment lever (see fig-
ure 3). The level of adjustment should be tested in a free trial. The examining doctor holds the laryngo-
scope in his hand to check the adjustment of the distal end and observes the image on the screen.
After the examination, return the control lever to the rest position and carefully withdraw the insertion
tube.

11
9.3 Switch off
After use, the laryngoscope must be taken out of service by disconnecting it from the supply, the cold
light source must be switched off and then the necessary cleaning and disinfection work must be car-
ried out. See chapter 8.
10 Cleaning, care and disinfection
In accordance with KRINKO/BfArM recommendations, the machine method is always the preferred
method for reprocessing.
10.1 Manual procedures
10.1.1. Cleaning
After each use, the Video Rhino Laryngoscope must be carefully cleaned. To do this, wipe it with a
clean disposable cloth soaked in an appropriate disinfectant on all accessible external parts.
We recommend for cleaning: 2% Sekusept® active (manufacturer Ecolab). Leave on for 5 minutes.
Make sure that the surfaces remain moist. Wipe with a dry disposable cloth afterwards.
Alternatively, we recommend Triamin disinfectant wipes from Wet Wipe (available from Orlvision).
Contact time depending on possible organisms 5-15 minutes, see separate data sheet, available at
www.wetwipe.eu .
Caution:
Please do not exert any great mechanical forces on the flexible end of the endoscope when wiping it.
endoscope, the light guides inside could be damaged (breakage).
10.1.2. Disinfection
Disinfection may only be carried out by trained personnel and in accordance with the specifications of
the Robert Koch Institute.
Caution:
Before each disinfection / insertion, a leak test (see chapter 9.3) must be carried out. In case of
the Rhino Laryngoscope must be discarded immediately and sent to the manufacturer for repair.
manufacturer for repair. In case of leaks, the immersion disinfection becomes ineffective!
We recommend the following disinfection: Immersion disinfection with 2% Sekusept® active.
(manufacturer Ecolab). Immersion time 30 minutes.

12
Caution:
To protect the 9-pole plug connection, we recommend using the enclosed cover cap “Plug Cap Naso“.
Fig. 4: Cover cap “Plug Cap Naso“
Caution:
Permanent immersion of the laryngoscope in concentrated alcohol will cause irreversible damage. If
necessary, perform a short wipe disinfection. However, make absolutely sure that the alcohol can
evaporate immediately after the wipe disinfection.
Caution:
Never put the USB cable into the immersion disinfection. The cable may only be cleaned and disin-
fected by wipe disinfection / surface disinfection.
10.1.3. Final rinse
Remove the Rhino laryngoscope and accessories from the disinfectant solution with fresh disposable
gloves. Place the disinfected laryngoscope in a basin / tub with microbiologically safe water (drinking
water quality). Use fresh water for each instrument. Rinse the Rhino laryngoscope outer surfaces thor-
oughly with microbiologically safe water.
10.2 Machine processes
We recommend the following procedures with the washer-disinfector BHT INNOVA® E3 CMS DC
from CANTEL GmbH or an equivalent machine with the settings given below.
Cleaning
Cleaning agent: 0.5 % Dr. Weigert neodisher Mediclean forte®
Automatic cleaning process with programme no. 24 with the following settings:
Step Pre-cleaning for 4 minutes
Step Emptying
Step Cleaning 0.5% at 37°C for 6 minutes
Step Cleaning 0.5% at 43°C for 6 minutes
Step Emptying
Step Intermediate rinse for 2 minutes

13
Caution:
Before each cleaning or disinfection / insertion, a leak test (see chapter 9.3) must be carried out. In
case of leakage, the Rhino Laryngoscope must be discarded immediately and sent to the manufac-
turer for repair. In case of leakage, the disinfection will be ineffective!
Pre-cleaning:
Pre-cleaning with pre-soaked cloths with 0.5 % Dr. Weigert neodisher Mediclean forte® until the in-
strument is visually clean.
Caution:
Please do not exert great mechanical forces on the flexible end of the endoscope when wiping it, the
light guides inside could be damaged (breakage).
Cleaning
Cleaning agent: 0.5 % Dr. Weigert neodisher Mediclean forte®.
Disinfection
Disinfectant: 1.0 % Dr. Weigert neodisher endo SEPT PAC
Automatic cleaning and disinfection process with programme no. 22 NORMAL-PAA with the following
settings:
Step Pre-cleaning for 4 minutes
Step Emptying
Step Cleaning 0.5% at 37°C for 6 minutes
Step Cleaning 0.5% at 43°C for 6 minutes
Step Emptying
Step Intermediate rinse for 2 minutes
Step chemical disinfection with 1% disinfectant at 25°C for 10 minutes.
Step Emptying
Step Final cleaning at 20°C for 4 minutes
Caution:
Usually the laryngoscope is connected to the automatic pressure monitoring system during machine
cleaning. If this is not done, we recommend using the optionally available cover cap M-860-0003-
0086-P to protect the valve connection.
It is also recommended to use this cover cap for manual cleaning.
Fig. 5, Cover cap Article number M-860-0003-0086-P

14
Figure 6: Valve cover cap fitted
10.3 Leak test
Caution:
The leak test must be carried out before each reprocessing!
Caution:
The connection tube of the leak tester and the tester connection on the laryngoscope must be dry!
Place the tester connector cap firmly on the tester connector and turn it clockwise a quarter turn (see
figure 3). The tester is now firmly connected to the laryngoscope and cannot be pulled off.
Close the valve on the leak tester.
Create a test pressure of 160 (±10) mmHg by pumping the leak tester.
Figure 7: Connection pressure tester
Caution:
If the manometer reading drops by more than 10 mmHg within one minute, do not place the laryngo-
scope in liquid.
In this case, wipe the outer sheath with instrument disinfectant or isopropanol 70 %, wrap the laryngo-
scope in a protective foil cover, pack it in the original packaging and label it "leaking, not disinfected".
Then hand it over to the service workshop or the manufacturer.

15
Caution:
Never connect or disconnect the tester under water, otherwise moisture may enter the unit and repair
may be necessary.
After completing the leak test, open the valve on the leak tester to release the excess pressure. Then
turn the tester connection cap to the left and then pull off the tester connection. To protect the 9-pin
connector, we recommend using the optionally available cover cap.
After completing the leak test, open the valve on the leak tester to release the excess pressure. Then
turn the tester connection cap to the left and pull off the tester connection.
10.4 Care
The Video Rhino Laryngoscope is easy to care for. Apart from thorough cleaning and regular inspec-
tion for damage, no special care is required. The laryngoscope should be stored in a dry place, safe
from dust.
11 Maintenance and repairs
The components of the Video Rhino Laryngoscope are maintenance-free for their users. Repairs and
maintenance work may only be carried out by the company orlvision or by specialist companies au-
thorised by it. The company orlvision provides the authorised companies with all necessary product
documentation.
Caution:
Unauthorised opening, repairs and modifications to the laryngoscope release orlvision from any liabil-
ity for operational safety. This will void any warranty claims during the warranty period.
11.1 Return
In order to avoid damage due to transport and shipping in the event of a return, please use only the
original shipping packaging.
Caution:
For shipping and transport, always connect the pressure tester to the light connection with the valve
open!
12 Disposal
Environmentally friendly disposal according to EU Directive 2012/19/EU. The appliance
contains electronic components. To prevent environmental risks or hazards due to im-
proper disposal, the product, including accessories, must be disposed of in accordance
with the applicable EU directives 2012/19/EU. Disposal can be carried out by the manu-
facturer.
For this purpose, please send to the manufacturer at:
Orlvision GmbH, Gewerbestraße 17, D-35633 Lahnau.
Disposal in household waste is prohibited.
13 Reporting of serious incidents
All serious incidents related to this product shall be reported to the manufacturer and to the competent
authority of the Member State in which the user and/or the patient is established.

16
These instructions for use have been machine translated.
Orlvision GmbH
Gewerbestrasse 17
D-35633 Lahnau
Tel. +49(0)6441679298-0
Fax +49(0)6441679298-99
info@orlvision.com
www.orlvision.com
Rev. 25, 25.11.2021
This manual suits for next models
2
Table of contents
Other orlvision Medical Equipment manuals
Popular Medical Equipment manuals by other brands

Getinge
Getinge Arjohuntleigh Nimbus 3 Professional Instructions for use

Mettler Electronics
Mettler Electronics Sonicator 730 Maintenance manual

Pressalit Care
Pressalit Care R1100 Mounting instruction

Denas MS
Denas MS DENAS-T operating manual

bort medical
bort medical ActiveColor quick guide

AccuVein
AccuVein AV400 user manual