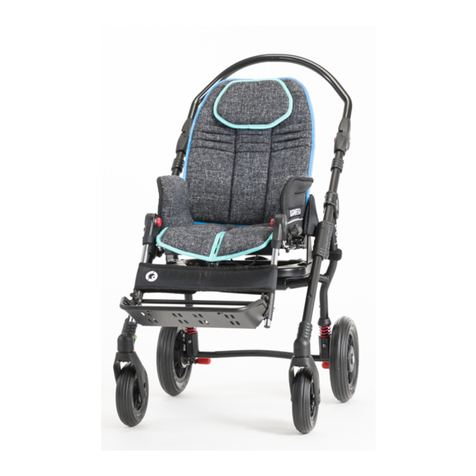
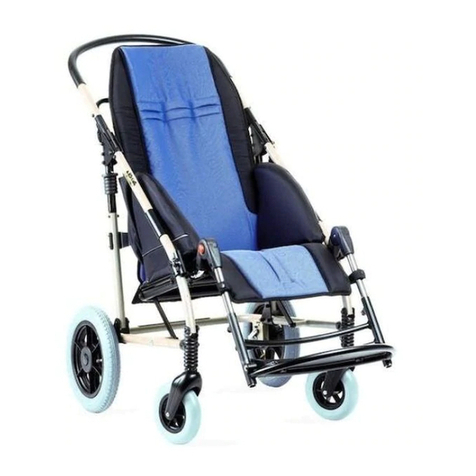
Ormesa Clip 4 Manual

4
PUSHCHAIR
PUSHCHAIR
INGLESE Cod. 22497 - 05/04/07
USE AND MAINTENANCE HANDBOOK

Page 2 of 33
TABLE OF CONTENTS
WARNINGS............................................................................................................ 3
SOME EXAMPLES OF WHAT NOT TO DO WITH CLIP-4.................................... 4
LABELS AND PLATES.......................................................................................... 5
TECHNICAL FEATURES....................................................................................... 6
INITIAL PREPARATION......................................................................................... 7
PACKING INFORMATION.................................................................................. 7
OPENING THE PUSHCHAIR ............................................................................. 8
HOW CLIP-4 WORKS AND HOW TO USE IT ....................................................... 10
HOW TO TILT THE PUSHCHAIR TO CLIMB UP PAVEMENTS........................ 10
BRAKING THE PUSHCHAIR.............................................................................. 11
RECLINING THE BACKREST............................................................................ 12
FOLDING the PUSHCHAIR for TRANSPORT.................................................... 13
ADJUSTING the HEIGHT of the FOOTRESTS................................................... 15
MOUNTING ACCESSORIES.................................................................................. 16
FRONT WHEEL DIRECTION LOCKS 812..................................................... 16
LEG DIVIDING INGUINAL STRAPS 817........................................................ 17
THERMIC COVER 818................................................................................... 17
CANOPY 819.................................................................................................. 18
RAIN COVER 825........................................................................................... 19
FOOTSTRAPS 827......................................................................................... 20
PADDED BODY SIDE SUPPORTS 816......................................................... 20
ADJUSTABLE HEAD SIDE SUPPORTS 835................................................. 21
VEST HARNESS 853..................................................................................... 21
SET OF 4 FIXING HOOKS 891...................................................................... 22
45° SEAT BELT 894...................................................................................... 23
5-POINT VEST HARNESS 903...................................................................... 24
5-POINT HARNESS 906................................................................................. 26
SEAT BELT 828............................................................................................. 28
TAKING OFF AND FIXING THE UPHOLSTERY................................................... 30
MAINTENANCE AND CLEANING ......................................................................... 32
SERVICE AND REPLACEMENT PARTS .............................................................. 33

Page 3 of 33
WARNINGS
- Carefully read and understand the instructions in this manual before using the device
because they have been written with the user's safety in mind and they will help the carer use
the product safely and keep it in good working order. The Use and Maintenance Manual is an
integral part of the product and must be carefully preserved for future reference.
− THE MANUAL IS INTENDED FOR TECHNICALLY QUALIFIED RETAILERS AND USERS AND
THEIR ASSISTANTS; it provides instructions for using the product correctly and must be
supplemented by adequate knowledge of the rehabilitation program for which it has been
prescribed
− THE MANUAL REFLECTS THE TECHNICAL STATE OF THE PRODUCT AT THE TIME IT WAS
SOLD. ORMESA reserves the right to make any changes to the product or manual suggested by
experience, technical considerations or regulatory developments without any obligation to update
its previous production and relevant manuals.
− THE DOCTOR MUST CHECK THE USE OF CLIP-4 AND ITS ACCESSORIES in conformity with
current laws, regulations and standards.
− THE PUSHCHAIR IS INTENDED FOR USE BY PEOPLE WHOSE SIZE AND WEIGHT fall within
the range of the "Technical Features" on page 6, and was exclusively designed for the transport
and placement of children.
− CLIP-4 MUST BE MANOEUVRED BY PEOPLE WITH THE HEIGHT AND STRENGTH TO
CONTROL ITS MOVEMENTS.
− CLIP-4 CAN ONLY BE USED BY PEOPLE who have read the rules and instructions in this
manual.
− BEFORE EACH USE ALWAYS CHECK that the brakes are working, the wheels are not
excessively worn and that the frame is locked.
− MAKE SURE THAT ALL ADJUSTABLE PARTS ARE LOCKED before each use.
− To climb up pavements, CLIMB FACING FORWARD AND DESCEND FACING BACKWARD,
TILTING THE PUSHCHAIR ON ITS REAR WHEELS (see page 10).
- The 812 direction locks on the front wheels were exclusively designed for using the
pushchair on rough terrain: in all other cases, they must be disengaged to avoid difficulty in
manoeuvring the device
− WHEN PAUSING, ALWAYS LOCKS BOTH BRAKES, even on level ground. (see page 11)
− ALWAYS LOCK THE BRAKES BEFORE MAKING ANY TYPE ADJUSTMENT (see page 11)
- CLEAN THE PUSHCHAIR AND UPHOLSTERY following the instructions shown in the
“MAINTENANCE” chapter on pages 32 and 33.
- The operating environment has no particular influence on the device unless it is used incorrectly
such as by leaving it parked for a long time in direct sunlight or exposed to bad weather
such as rain or in marine environments where the salt air could corrode the paint and sliding
parts. In this case, we recommend carefully cleaning the frame following the instructions shown
in the “Maintenance” chapter on pages 32 and 33.
- The upholsteries are not fire proof. For this reason Clip-4 must be kept far from fires, cigarettes
and flames.
PRODUCT REPAIRS OR CORRECTIONS other than the regular maintenance shown on pages
32 and 33 of the manual MUST ONLY BE MADE BY ORMESA S.R.L. OR AN AUTHORIZED
SERVICE CENTRE, FAILING THAT THE WARRANTY AND CE MARKING WILL LAPSE.

Page 4 of 33
Perform regular maintenance and cleaning following the instructions shown in the "Maintenance"
chapter on pages 32 and 33 and have the device inspected at the intervals indicated to verify that it is
working properly and in good condition, such as, for example, the absence of scraped paint or
worn brakes, failing the warranty and CE marking will lapse
− Keeping the cushion and child clean will prevent bedsores.
− ORMESA s.r.l. guarantees the product for 2 years: in the case of problems, contact the retailer
where you purchased it. Always demand original replacement parts or you will risk voiding the
warranty.
− ORMESA will not be liable for damage in the following cases:
- use by an unsuitable person;
- incorrect assembly of parts or accessories;
- unauthorized modifications or service;
- use of other than original replacement parts and parts subject to wear (seat and backrest, wheels, etc);
- improper use (such as, transporting objects or loads larger or heavier than those shown in the instruction
handbook);
- damage caused by incorrect use and lack of regular maintenance, as shown in the instruction handbook;
- exceptional events;
- failure to follow the instructions in this manual.
SOME EXAMPLES OF WHAT NOT TO DO WITH CLIP-4
DO NOT CARRY THE CHILD OVER ROUGH OR STEEP SURFACES OR STAIRS
- DO NOT ALLOW CHILDREN TO USE THE PUSHCHAIR OR EVEN PLAY WITH IT
- NEVER LEAVE THE CHILD IN THE PUSHCHAIR UNATTENDED
- NEVER STOP CLIP-4 ON SLOPING GROUND
- DO NOT LET ANYONE CLIMB ON THE FOOTREST OR STAND ON THE BACK
- DO NOT LIFT THE PUSHCHAIR BY THE LEG SUPPORT FRAME OR FOOTREST TO CLIMB
OVER OBSTACLES
- DO NOT USE CLIP-4 TO CLIMB OR DESCEND STAIRS: ITS STRUCTURE WAS NOT
DESIGNED FOR THIS PURPOSE
- NEVER LEAVE THE PUSHCHAIR PARKED FOR A LONG TIME IN DIRECT SUNLIGHT OR
NEAR SOURCES OF HEAT: THIS WILL AVOID OVERHEATING THE DEVICE AND
DISCOLOURING THE UPHOLSTERY
WHEN TRAVELLING BY PLANE, OR IN THE CAR, DO NOT SUBJECT THE FOLDED FRAME TO
LOADS THAT, ESPECIALLY WITH ROAD BUMPS, COULD DAMAGE ITS STRUCTURE
- DO NOT USE THE PRODUCT IF PARTS ARE MISSING OR DAMAGED. INSIST THAT ONLY
ORIGINAL REPLACEMENT PARTS ARE USED BECAUSE ANY OTHER TYPE WILL VOID THE
WARRANTY
- DO NOT CLIMB PAVEMENTS OR STEPS WITH JUST THE PUSHCHAIR’S SIDE WHEELS
(FRONT AND BACK), BECAUSE THE PUSHCHAIR COULD TIP OVER (SEE FIG. ON PAGE 6)

Page 5 of 33
LABELS AND PLATES
THE CE MARK CERTIFIES THAT THE CLIP-4 PUSHCHAIR CONFORMS TO THE EUROPEAN UNION’S SAFETY
REQUIREMENTS AND, IN PARTICULAR, DIRECTIVE 93/42/EECREGARDING “MEDICAL DEVICES”.
Series number Article number
Max load
Date of
production
Warning! Read the
useand maintenance
handbook before use
Conformity with the
European safety
standards
LOT code
®
s.r.l.
Via A. Da Sangallo, 1 06034 Foligno (PG) ITALY Tel. +39 074222927 Fax +39 074222637
MODEL. PART N°
SN
LOT MAX. KG
!
Name of the model

Page 6 of 33
TECHNICAL FEATURES
Frame: folds like an umbrella, in aluminium painted with non-toxic epoxy paint
Backrest: semi-rigid, reclines in 3 positions with zippers
Seat bottom: semi-rigid
Upholstery: removable for washing with padding and removable aluminium reinforcement
ribs; slots for attaching accessories
Footrests: removable, height adjustable
Leg support band
Solid wheels : front 17.5-cm, swivelling; rear 20-cm, sliding on ball bearings with independent
drum brakes
Measures in cm and weights in kg
HYPHEN-SEPARATED NUMBERS
INDICATE THE MINIMUM AND MAXIMUM
RANGE OF ADJUSTMENT
CLIP 4 WEIGHT OF THE AID KG. 12,5 MAX. LOAD KG. 76

Page 7 of 33
INITIAL PREPARATION
PACKING INFORMATION
pushchair A
cm B
cm C
cm VOLUME
m3 WEIGHT
kg
CLIP 4 118 63 40 0,297 15
HOW TO REMOVE THE PUSHCHAIR FROM THE BOX
ATTENTION!
CUT WITHOUT PRESSING TOO HARD
SO AS NOT TO DAMAGE
THE CONTENTS OF THE BOX
REMOVE CLIP 4 FROM THE BOX

Page 8 of 33
OPENING THE PUSHCHAIR
1. RAISE THE PUSHCHAIR TO A VERTICAL POSITION
2. OPEN THE PUSHCHAIR
3. LOCK THE REAR TENSIONERS BY PUSHING THEM TO THE END OF THEIR TRAVEL
4. OPEN THE FOOTRESTS

Page 9 of 33

Page 10 of 33
HOW CLIP-4 WORKS AND HOW TO USE IT
HOW TO TILT THE PUSHCHAIR TO CLIMB UP PAVEMENTS
CLIMB FACING FORWARD DESCEND FACING BACKWARD

Page 11 of 33
BRAKING THE PUSHCHAIR
ATTENTION!
YOU MUST ENGAGE THE BRAKES
BEFORE PLACING OR REMOVING
THE CHILD FROM THE PUSHCHAIR
OR MAKING ANY ADJUSTMENTS.
LOCKS
UNLOCKS

Page 12 of 33
RECLINING THE BACKREST
REAR VIEW
TO CHANGE THE BACK’S RECLINING POSITION
ADJUST THE RED ZIPPERS ON THE BACKREST
REAR VIEW

Page 13 of 33
FOLDING the PUSHCHAIR for TRANSPORT
1. 2. TIP UP THE FOOTRESTS
3. UNLOCK THE REAR TENSIONERS
4. FOLD THE PUSHCHAIR
5. PUSHCHAIR FOLDED

Page 14 of 33

Page 15 of 33
ADJUSTING the HEIGHT of the FOOTRESTS
1. UNSCREW AND TAKE
THE TWO BOLTS OFF
2. POSITION THE
FOOTRESTS AT THE
DESIRED HEIGHT
3. INSERT AND SCREW
THE TWO BOLTS

Page 16 of 33
MOUNTING ACCESSORIES
FRONT WHEEL DIRECTION LOCKS 812
SPRING LOCK
SPRING LOCK
"OPEN" POSITION
"CLOSED" POSITION

Page 17 of 33
LEG DIVIDING INGUINAL STRAPS 817
LOOP VELCRO
HOOK VELCRO
HOOK VELCRO
LOOP VELCRO
THERMIC COVER 818
VIEW FROM BEHIND

Page 18 of 33
CANOPY 819

Page 19 of 33
RAIN COVER 825
ATTENTION! THE RAIN COVER CAN ONLY BE
ATTACHED AFTER THE CANOPY (819) IS IN PLACE
1.ATTACH THE RAIN COVER POUCH WITH THE TWO BUTTONS LOCATED ON THE
BACK OF THE CANOPY
2. OPEN THE ZIPPER ON THE POUCH
3. REMOVE THE RAIN COVER FROM THE POUCH AND POSITION IT SO THAT IT
COVERS THE PUSHCHAIR
4. ATTACH THE RAIN COVER TO THE FRAME WITH THE STRAPS
REAR VIEW OF
THE CANOPY

Page 20 of 33
FOOTSTRAPS 827
PADDED BODY SIDE SUPPORTS 816
Other manuals for Clip 4
1
Table of contents
Other Ormesa Stroller manuals
