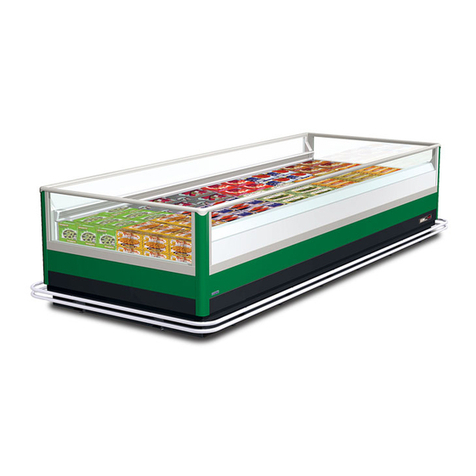
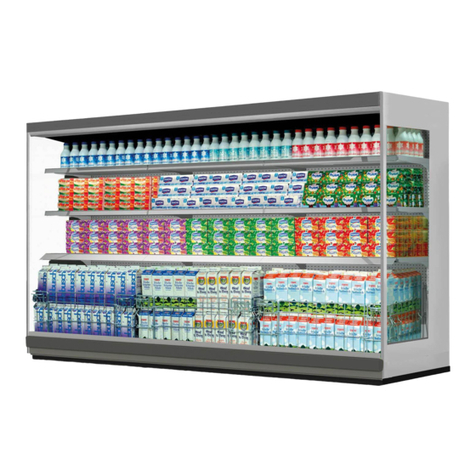
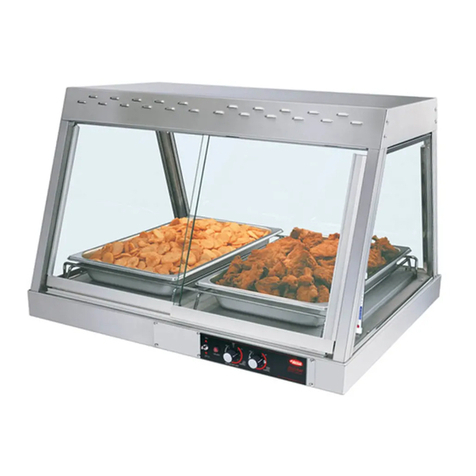
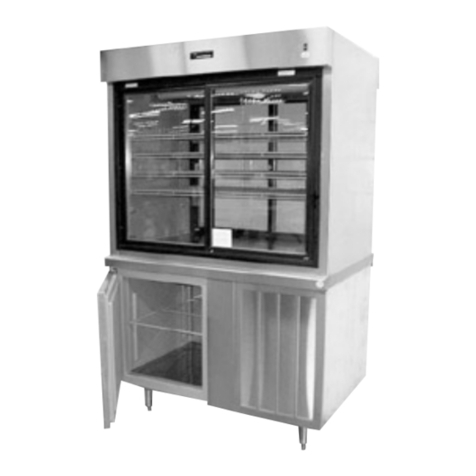
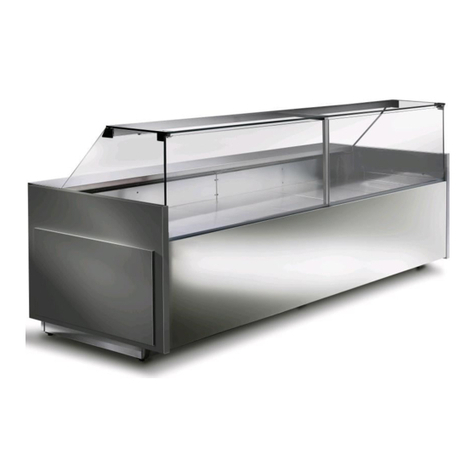
Oscartielle MARTE Series User manual

INSTRUCTION MANUAL
BETRIEBSANLEITUNG
INSTRUCCIONES DE USO
MARTE

OSCARTIELLE S.p.A. Via Boffalora, 1/A
24048 Treviolo (Bergamo) Italy
Tel. +39 035 377911 Fax +39 035 693200
www.oscartielle.it
MARTE REFRIGERATED DISPLAY UNITS
ITALIANO .............................................................................................................................................................................. 10
ENGLISH .............................................................................................................................................................................. 18
FRANÇAIS ............................................................................................................................................................................ 25
DEUTSCH ............................................................................................................................................................................. 33
ESPAÑOL ............................................................................................................................................................................. 41
............................................................................................................................................................................. 49
Il presente manuale contiene le informazioni necessarie all'installazione, al corretto uso e alla manutenzione del mobile
refrigerato. Si raccomanda di conservare il manuale unitamente al mobile affinché la persona che ne fa utilizzo ne prenda visione. Il
costruttore declina ogni responsabilità per danni causati a persone o cose dovuti alla mancata osservanza delle avvertenze contenute
, può
rivolgersi al servizio assistenza Oscartielle. Oscartielle dichiara che i propri mobili refrigerati sono conformi alle vigenti norme relative ai
requisiti igienico sanitari e perfettamente idonei quindi alla conservazione di prodotti alimentari.
This manual contains all the information needed for the installation, correct use and maintenance of the refrigerated display
unit. We recommend keeping the manual together with the display unit for fast consultation by the person using this. The Manufacturer
cannot be held liable for any injury or damage caused as a result of non-compliance with the warnings in this manual. If there is
something in the manual that the purchaser of the refrigerated display unit doesn't understand, he should contact Oscartielle Customer
Service. Oscartielle states that its refrigerated display units comply with the current hygiene and sanitary laws and regulations and is
therefore perfectly suitable for storing food products.
Ce manuel contient les informations nécessaires pour l'installation, l'utilisation correcte et l'entretien du meuble frigorifique. Il
est recommandé de bien conserver ce manuel avec le meuble frigorifique, afin que la personne qui l'utilise puisse en prendre
connaissance. Le fabricant décline toute responsabilité pour tout dommage causé à des personnes ou à des choses qui serait dû au
non-respect des instructions contenues dans ce manuel. Au cas où l'acquéreur du meuble frigorifique ne comprendrait pas une
quelconque instruction mentionnée dans ce manuel d'utilisation, il est prié de s'adresser au service après-vente Oscartielle. Oscartielle
déclare que ses meubles frigorifiques sont conformes aux normes en vigueur concernant les qualités requises pour le respect et le
maintien de l'hygiène et de la santé et qu'ils sont donc parfaitement appropriés pour la conservation des produits alimentaires.
In dem vorliegenden Handbuch werden die erforderlichen Informationen für die Aufstellung, den korrekten Einsatz und die
Wartung der Kühlmöbel erläutert. Das vorliegende Handbuch ist zusammen mit den Kühlmöbeln aufzubewahren, damit die für die
Kühlmöbel zuständige Person Einsicht nehmen kann. Der Hersteller lehnt jegliche Verantwortung für Personen- und Sachschäden ab,
die auf eine mangelnde Beachtung der im Handbuch angegebenen Hinweise zurückzuführen sind. Sollte dem Käufer der Kühlmöbel
eine bestimmte, im Betriebshandbuch wiedergegebene Vorschrift unverständlich sein, bitten wir Ihn sich an den Kundendienst
Oscartielle zu wenden. Fa. Oscartielle erklärt hiermit, daß das von ihr hergestellte Kühlmöbelsortiment den geltenden Normen
bezüglich den hygienischen und gesundheitlichen Anforderungen entspricht und sich perfekt für die Konservierung von
Lebensmittelprodukten.eignet.
El presente manual contiene las informaciónes necesarias para la instalación, el correcto uso y el mantenimiento de la
exhibidora refrigerada. Se aconseja conservar el manual cerca de la exhibidora para que la persona que la utiliza pueda tenerlo a
mano. El fabricante declina toda responsabilidad de los daños causados a personas o cosas por incumplimiento de las advertencias
contenidas en el manual. Si el comprador de la exhibidora no entendiera una determinada prescripción incluida en el manual de
utilización, se le ruega ponerse en contacto con el servicio de asistencia Oscartielle. Oscartielle declara que sus exhibidoras están
conformes con las normas vigentes referentes a los requisitos higiénico-sanitarios y que por lo tanto son perfectamente adecuadas
para la conservación de géneros alimentarios.
-
Oscartielle». «Oscartielle
-
ES
DE
FR
EN
IT
RU

1
Descrizione del mobile - Cabinet description Description du meuble -
Beschreibung der
Bedientheke - Descripción de la cámara
Marte Ventilated Marte Static
Trasporto del mobile Cabinet handling Transport du meuble - Transport des Kühlmöbels -
Desplazamiento de la cámara
MARTE
135 200 260 320 385
Lunghezza totale / Total lenght (mm) 1250 1875 2500 3125 3750
Peso /
Weight
(kg)
150 210 255 310 410
FIG. 1
FIG. 2
LIFTING POINT
POINTS DE SOULEVEMENT
ANSATSPUNKTE FUR HUBKARREN
PONTOS PARA EL LEVANTAMIENTO
TAB. 1

2
Installazione e condizioni ambientali - Installation and environmental conditions
Installation
et conditions ambiantes - Inbetriebnahme und Einsatzbedingungen -
Instalación y
condiciones ambientales
Montaggio del mobile - Cabinet assembly Assemblage du meuble -
Montage des
Kühlmöbels - Montaje de la cámara
FIG. 3 FIG. 4
FIG. 5
FIG. 6 FIG. 7

3
FIG. 8 FIG. 9
FIG. 10 FIG. 11
FIG.12 FIG. 13

4
Collegamento elettrico e dati tecnici Cabling elettrical and tecnical data
Branchement
électrique et données techniques Elektrischer Anschluss und technische daten-
Conexión
eléctrica y datos tecnico
MARTE Ventilated G.I. MARTE Static G.I.
135 200 260 320 385 135 200 260 320 385
Potenza assorbita (W)
Absorbed Power (W) 433 521 724 871 1059 415 451 552 688 888
Potenza assorbita (W)
in sbrinamento elettrico (Optional)
Absorbed Power (W)
in electric defrost (Optional)
292 314 481 522 643 274 331 445 495 589
Working temperature 0°C/+2°C +2°C/+4°C +2°C/+8°C
MARTE
Ventilated G.E
.
MARTE
Static
G.E.
135 200 260 320 385 135 200 260 320 385
Potenza assorbita (W)
Absorbed Power (W) 92 114 181 172 243 74 131 145 145 189
Potenza assorbita (W)
in sbrinamento elettrico (Optional)
Absorbed Power (W)
in electric defrost (Optional)
292 314 481 522 643 274 331 445 495 589
Working temperature 0°C/+2°C +2°C/+4°C +2°C/+8°C
FIG. 14
FIG. 16
TAB. 2
FIG. 15

5
Manutenzione ordinaria Routine maintenance Entretien de routine - Ordentliche Wartung-
Mantenimiento de rutina
Manutenzione straordinaria Special maintenance Entretien extraordinaire
Außerordentliche Wartung - Mantenimiento extraordinario
FIG. 18
FIG. 17a FIG. 17b

6
Canalizzazione del mobile Multiplexing Canalisation du meuble - Zusammenbau-
Ensamblaje de cámaras
FIG. 19

7
Schema elettrico - Electrical diagram Schéma électrique Schalt plan- Esquema eléctrico

8
Istruzioni per sincronizzare gli sbrinamenti di banchi frigoriferi canalizzati dotati di strumenti
EVRS -
Instructions for the defrosts synchronization of multiplexed cabinets with instrument
EVRS - Instructions pour la synchronisation des dé
givrages des meubles canalisés avec
instrument EVRS -
Anleitungen für die Synchronisierung der Abtauungen bei Möbeln im Kanal
mit Instrument EVRS -
Instruciónes para la sincronisación de los desescarches de los
muebles in canal con instrumento EVRS -
EVRS
1. Collegare il primo quadro Master ai quadri Slave dei banchi canalizzati utilizzando il cavo cod.705278 tramite i
faston predisposti per la sincronizzazione degli sbrinamenti. Faston n°7 su quadro Master con n°7 su quadro
Slave e faston n°8 su quadro master con°8 su quadro slave.
In questo modo il primo quadro comanda gli sbrinamenti degli altri banchi canalizzati.
2. Per sincronizzare gli sbrinamenti in un canale di due o più banchi frigoriferi, impostare il parametro "i0=6" sul
primo quadro Master. Impostare i parametri "i0=6" e "d0=0" sui quadri Slave.
Per la regolazione dei parametri seguire le indicazioni riportate sulle istruzioni dell'interfaccia EVRS, allegate al
manuale d'istruzioni.
1. Connect the first Master control board with the slave ones of the multiplexed cabinets by using the cable item no.
705278 and the faston already arranged for the defrosts synchronization. Faston no. 7 on master connected to
no. 7 on slave and faston no. 8 on master connected to no. 8 on slave.
In this way the first instrument controls the defrosts of all multiplexed cabinets.
2. In order to synchronize the defrosts in a line-up of two or more refrigerated cabinets, set the parameter i0 = 6 on
the first Master instrument. Set the parameter i0 = 6 and d0 = 0 on the Slave instruments.
For the setting of the parameters follow the instructions in the interface EVRS booklet, enclosed to the instruction
manual of the cabinet.
1. Brancher le premier instrument Master avec les Slave des meubles en canal avec le câble 705278 et les faston
déjà prédisposées pour la synchronisation des dégivrages des meubles canalisés. Faston n. 7 sur le panneau
master branché avec n. 7 sur le panneau slave et Faston n. 8 sur le panneau master branché avec n. 8 sur le
panneau slave.
De cette façon le premier instrument règle les dégivrages des autres meubles canalisés.
2. Pour synchroniser les dégivrages dans un canal d'un ou plus meubles frigorifiques, afficher le paramètre i0 = 6
sur le premier instrument Master. Afficher le paramètre i0 = 6 et d0 = 0 sur les instruments Slave.
meuble.
1. Der erste Instrument Master anschließen mit den Slave bei der kanalisierten Möbeln durch den Kabel Art. Nr.
705278 und die Faston für die Synchronisierung der Abtauungen. Faston Nr. 7 auf Master Steuerung mit Faston
Nr. 7 auf Slave Steuerung verbinden. Faston Nr. 8 auf Master Steuerung mit Faston Nr. 8 auf Slave Steuerung
verbinden.
In solchen Art der erste Instrument kontrolliert die Abtauungen von den kanalisierten Regalen.
2. Um die Abtauungen bei einem Kanal von eins oder mehr Kühlmöbeln zu synchronisieren, einstellen den
Parameter i0 = 6 auf der erste Master Steuerung. Einstellen der Parameter i0 = 6 und d0 = 0 auf die Slave
Steuerung.
Um die Parametern zu regulieren, die Anleitungen der Schnittstelle EVRS folgen, beiliegend der
Betriebsanleitung.

9
1. Enchufar el primero instrumento Master con los Slave de los muebles canalizados usando el cable Art. 705278 y
los faston deja predispuestos para la sincronisación de los desescarches. Conectar el Faston n. 7 del cuadro
master con el faston n. 7 del cuadro slave. Conectar el Faston n. 8 del cuadro master con el faston n. 8 del
cuadro slave.
De esta manera el primero instrumento comanda los desescarches de los meubles en canal.
2. Para sincronizar los desescarches en un canal de dos o más muebles frigoríficos, regular el parámetro i0 = 6
sobre el primero instrumento Master. Regular el parámetro i0 = 6 y d0 = 0 sobre los instrumentos slave.
Para la regulación de los parametros, seguir la guía de la interfaz EVRS, encluido en el manual de uso.
1. faston Master
Slave
Faston n Master n Slave faston n master
slave.
2.
Master i0 Slave i0 d0=0".
EVRS,

18
ENGLISH
1 - Description of cabinet
The cabinets MARTE are built in units with a usable internal length of 1250 mm (MODEL 135), 1875 mm (MODEL 200),
2500 mm (MODEL 260), 3125 mm (MODEL 320), 3750 mm (MODEL 385), with endwalls 40 mm thick and are also
available with internal and external angles of 90° and 45°.
The cabinets can be multiplexed to obtain compositions of the desired length and layout, they are available both with
incorporated compressor (I.C.) and remote compressor (E.C.), with a vast range of accessories and optionals.
The middle front glass of corner versions can be opened only by open corner 90°. The right and left front glasses are
fixed. The front glasses are fixed by closed and open corner 45° and closed corner 90°.
The MARTE FISH cabinet is a display case suitable for the presentation and sale of every type of fresh fish.
The general features and dimensions are clearly illustrated in FIG. 1 on page 1.
2 - Transport of the unit
The cabinets are provided with wooden runners (or packed in wooden crates on request) to facilitate handling by forklift.
The insertion points of the forks for handling are shown in FIG. 2 on page 1. The weights of the cabinets in the different
lengths are listed in TAB. 1 on page 1.
Important: handling should be done by authorized personnel only.
3 - Arrival and storage
On delivery, make sure the cabinet has not been damaged, and check the conditions of the packing. If it shows any
damage, check the contents in the presence of the carrier. The cabinet should be protected from atmospheric agents and
stored at a temperature between -25°C and +55°C, with relative humidity between 30% and 95%.
Disconnect the cabinet from the fastening brackets and remove the padding around it. Position the cabinet exactly where
you plan to install it. Move the cabinet carefully, never pull it by the end walls!
Unpack the cabinet with care because the glass parts and all the accessories are packed inside it.
Important: if the goods are delivered damaged, notify the manufacturer at once: any delay in reporting damage will
relieve the manufacturer of all liability.
Any damage to the cabinet occurring during shipment and storage may not be attributed to the manufacturer.
4 - Installation and environmental conditions
For correct operation, make sure the cabinet is absolutely levelled and, if necessary, adjust it by screwing or unscrewing
the feet (FIG. 3 page 2).
Do not install the cabinet in rooms where there are explosive gasses.
Do not use the cabinet out of doors or expose it to rain (FIG. 4 page 2).
The performance of the cabinet refers (according to the international standard EN ISO 23953-1/2) to environmental
climatic class 3 which consists of a room temperature of 25°C with relative humidity of 60%. If the environmental
conditions are different, or the cabinets are exposed to drafts in excess of 0.2m/sec., or heat radiations, the user must
accept inferior performance. It is possible to overcome this problem by informing the manufacturer of the effective
environmental conditions prior to drawing up the final project, in order to make possible alterations to the technical
optionals of the cabinet.
Adequate space should be provided in front (client side), and in back (operator side) of the cabinet to permit maintenance
and cooling of the condenser (FIG. 5 page 2). In case of a rear platform, we suggest providing a removable part near the
control panel to facilitate maintenance.
5 - Assembly of cabinet
The operations of assembly of the cabinet should be carried out exclusively by authorized personnel.
Assemble the superstructure proceeding according to the following sequence:
- Position the superstructure on the working shelf and fasten the uprights with the screws provided, inserting them in
the holes drilled (FIG. 6 page 2). After fastening them, close the upright with its rear covering (FIG. 7 page 2).
- Insert the front curved support: first slide the cut and beveled part into the slot on the inside front of the basin, then fit
the remaining part into the adjustable pin on the upright (FIG. 8 page 3).
- Position the glass end walls in their housing, fasten them using the end covers on the outside part of the
superstructure (FIG. 9 page 3).
- Insert the curved glass panels centering them accurately on the aluminum profile and fasten them by tightening the
dowels with a hexagonal wrench (FIG. 10 page 3).
If necessary, you can multiplex the cabinet as described in par. 17.
Complete assembly of the cabinet by applying the front bottom plate (FIG. 11 page 3) the top glass shelf (FIG. 12 page 3)
and the anti-mist glass in fan assisted version (FIG. 13 page 3).
The interior surfaces (bottom shelves, air intake and delivery strips, etc.) as well as the external surfaces (front trims and
counter in stainless steel, etc.) are covered with a protective film that has to be removed before starting to use the
cabinet.

19
6 - Electric connection
Important: installation should be made following the manufacturer's instructions, by qualified personnel only, in conformity
with the electric safety regulations in force. Please refer to the electrical diagram at page 7.
At the input of the supply it is necessary to install an omni-polar magnetothermic/differential device with contact opening
equal to 3 mm and adequate cutoff power.
Caution: Before connecting the cabinet to the power mains make sure the supply voltage corresponds to the rating on
the serial number plate (consider that the maximum voltage variations admissible are +/- 10%). Make sure the electric
connection is made with cables of a diameter and length capable of withstanding the power and current absorbed by the
display cabinet (TAB. 2 page 4). Cabinets with incorporated compressor are supplied with a cable and plug 2,5 mt long
(FIG. 14 page 4) therefore, it is essential not to exceed this measure in connecting the cabinet to the wall socket. The
cable should be fully extended in a safe position away from possible impact and at a distance from liquids or water and
heat sources. In case of breakage of the power cable of the cabinet, it must be replaced by the manufacturer or by
institution in charge of it. The plug should be accessible even after installation of the cabinet.
Important: installation should be made following the manufacturer's instructions, by qualified personnel in conformity with
the electric safety regulations in force in the country where the cabinet is installed (electric safety regulations and laws,
accident prevention laws, fire prevention regulations, directives).
Always ground the cabinet.
The manufacturer is not liable for any injuries caused by failure to respect this regulation.
If there is no wall socket near where the cabinet is to be installed, provide for connection in conformity with the regulations
in force.
Do not use adapter plugs.
The manufacturer has no liability for any damage to personnel or property caused by improper installation.
7 - Technical features
The cabinet is supplied with a plastic bag containing this manual of instructions that must be kept. It contains technical
data, wiring diagrams and tables concerning the cabinet.
The technical data are also shown on the rating plate (FIG. 15 page 4). It indicates:
1. Name and address of the manufacturer
2. Commercial name of the cabinet
3. Cabinet code
4. Cabinet serial number
5. Rating
6. Frequency
7. Max absorbed current
8. Max absorbed power
9. Max absorbed power during defrosting
10. Standard lighting power
11. Net display area
12. Type of cooling gas used
13. Weight of cooling gas loaded in each unit
14. Climate class and reference temperature (dry bulb)
15. Electrical safety factor
16. Work schedule number
17. Work order number
18. Year of manufacture
19. Heating capacity
20. QR code
21. EAC marking
Important: The rating plate and warning labels should never be removed. The manufacturer is not liable for any damages
caused by failure to respect this regulation.
This is to certify that the product complies with Legislative Decree no. 108 of 25/01/1992 applying EEC Directive 89/109
concerning materials and objects expected to come into contact with food products.
8 - Filling with products and use of the cabinet (startup)
With the cabinet off, remove the plastic film protection on the inside and outside and clean the cabinet according to the
instructions in paragraph 11.
After correctly assembling the cabinet (Par. 5) plug it into the mains (as described in Par. 6) and switch the cabinet on,
switch the light on using the switches on the control panel on the rear (FIG. 16 page 4). The gentle hum of the motor and
illumination of the display will indicate that the cabinet is working. The display (FIG. 16 page 4) on the rear casing shows
the working temperature of the display case. The instruction manual for the electronic control to which the display refers is
enclosed with the instruction booklet (tampering with this device is impossible because a password is required and only a
specialized expert can intervene on it). The thermostat and gas charge are set in the factory. Tampering with the factory
settings relieves the manufacturer of any liability.
About three hours after switching the cabinet on, you can start filling it with products. Always check that the temperature
reading on the display of the electronic control is suitable for the conservation of the products placed in the display
cabinet.

20
The cabinet is designed for the display of food products, which are stored at the temperature of the product, and does not
lower it. The product should therefore be placed in the cabinet only after it has been chilled to its proper storage
temperature.
For better conservation of the product we recommend:
- Do not obstruct the cold recycle vents that ensure a correct air flow.
- Leave some room between products to ensure good air circulation.
- When placing more products inside a partially filled cabinet, in addition to following the above instructions, it is a good
rule to place the new products underneath the existing ones.
- Use the sliding rear closures (available on request), that in addition to storing products better, save energy.
8.1 - Conservation of the fish in the store
A number of important rules should be followed in loading the cabinet:
- use a layer of granular type ice;
- arrange the products so as not to obstruct the correct circulation of chilled air;
- uniform arrangement of the goods, without empty zones, will ensure better operation of the cabinet.
For proper conservation of fish it is necessary to follow these important rules:
- Fresh fish should always be kept refrigerated, when it is delivered, when it is stored in the warehouse and when it is
displayed for sale.
- Live shellfish (clams, oysters, mussels) should be kept separate from the other products and not allowed to come into
contact with ice or cold water that would kill them.
- Leave oysters and other crustaceans free to breathe.
- Seafood products, after the skin, shell or scales have been removed, should never come into contact with ice or
unwashed ornamental elements. Ice, as it melts, may release soluble aromas making the water impure.
- Fillets should be placed on sheets of paper, plastic bags or metal trays and nested in ice.The layers should be thin so
that no part of the fillet is ever more than 40 mm from the ice, to ensure adequate chilling.
- Trays, if used, should be completely nested in the ice up to the rim.
- If the fish has been gutted or the head removed, place it with the tail higher than the head to facilitate drainage of the
cavity. The residual moisture inside the cavity favors rapid bacterial proliferation and accelerates the process of
deterioration of the product.
- Rinse the fish under cold water before displaying it.
- Constantly replace the goods as they are sold.
- Display only as much fish as necessary to prepare the window.
- Fish is a poor conductor of heat. Do not stack them one on top of the other to prevent insufficient chilling.
- To keep the fish fresh, use abundant ice also between the layers.
- Never stick the price markers directly in the fish because they can cause bacterial proliferation.
- Spraying the fish frequently with ice water will contribute to keep it fresh-looking for longer.Tiny crystals of ice
scattered on the fish also have a detergent action that prolongs the duration of whole fish (NEVER ON FILLETS).
- Never let a product drip, ooze or drain onto another.
9 - Prohibitions and regulations
Caution: disconnect the cabinet from the power supply in case it is not used. The power supply has to be disconnected
by the remote-control switch fitted upstream from the power socket.
Caution: do not expose the cabinet to atmospheric agents, never use jets of water to clean it, do not touch and use the
cabinet with wet or damp feet or hands.
Caution: do not remove guards or covers that require tools to remove them, never remove the cover on the power panel.
Caution: do not place heavy loads on the shelves and in the cabinet, and never climb on the counter top.
Caution: the refrigerator system does not chemically alter the defrost water produced by the cabinet in any way. This
water is condensed steam from the air that circulates inside the cabinet. In any case, the water produced by the systems
should always be drained into the sewer system or treatment plant in accordance with the laws in force.
Caution: any possible use not explicitly indicated in this manual is to be considered hazardous and the manufacturer
cannot be held responsible for any damage caused by improper, erroneous and unreasonable use of the cabinet.
Caution: Do not damage the refrigerant circuit (IEC60335-2-89 and changes)
Caution: Do not use electrical appliances inside the food storage compartments of the appliance, unless they are of the
type recommended by the manufacturer (IEC60335-2-89 and changes)
Caution: This appliance is not intended for use by persons (including children) with reduced physical, sensory or mental
capabilities, or lack of experience and knowledge, unless they have been given supervision or instruction concerning use
of the appliance by a person responsible for their safety.
Caution: Children should be supervised to ensure that they do not play with the appliance.
Caution: Do not store explosive substances such as aerosol cans with a flammable propellant in this appliance.
10 - Defrosting cabinet and evaporation of condensation
The defrost cycle, which is indispensable for proper operation of the refrigerated cabinet, is under the control of the
electronic device, that temporarily stops the compressor and allows the evaporator to eliminate any accumulated ice (this
operation can be simplified by introducing armored heating elements that help the ice on the evaporator to melt when the
defrost cycle is on. These heating elements are optional and are supplied on request. The number of defrost cycles

21
(standard is 4 cycles every 24 hours) is set in the factory. Check periodically to make sure the cabinets are defrosted
automatically and in case of any malfunction call an expert.
Marte cabinets are equipped with an automatic evaporation system which eliminates the defrost water. At least once a
month check the level in the evaporator tray close to the motor compartment (this should be done with the cabinet off).
Warning: any adjustments or alterations should only be made by the service personnel.
Warning: Do not use electrical appliances inside the food storage compartments of the appliance, unless they are of the
type recommended by the manufacturer (IEC60335-2-89 and changes)
11 - Cleaning the cabinet
Periodically clean the cabinet with mild detergent and dry with a soft cloth. Do not use inflammable or abrasive products.
Do not clean the cabinet with direct jets of water. When you clean the evaporator wear gloves to protect the hands from
possible cuts.
Caution: before cleaning the cabinet unplug it from the power mains.
12 Maintenance of the cabinet
Routine maintenance:
The cabinet is equipped with a battery-operated digital thermometer with liquid crystal display inside the basin. If the
thermometer does not display the temperature because of a dead battery, replace it with a new one of the same voltage.
Always dispose of dead batteries at authorized disposal centers. (Batteries should never be disposed of with ordinary
waste).
Replacement of the battery: using a screwdriver pry up one side of the thermometer to raise it and take it out of its
housing (FIG. 17a. page 5). The battery housing is on the back of the thermometer; twist the cover counterclockwise and
remove the dead battery (FIG. 17b page 5).
Special maintenance:
Clean the condenser once a month, after removing the protective grid on the rear of the cabinet (FIG. 18 page 5). Use a
brush with stiff bristles (not metal) or a vacuum device, which is even better, to eliminate any deposits of dust between the
fins. When you clean the condenser wear gloves to protect the hands from possible cuts. After cleaning, replace the grid
previously removed. Leaving the condenser dirty for long periods leads to higher energy consumption and poor
performance of the cabinet.
We recommend having a refrigerator expert check the cabinet completely once a year.
Ice may form on the evaporator after long periods of use preventing proper operation. Every three months, clean the
cabinet thoroughly: unplug it and empty it completely. Wait for the ice on the fins of the evaporator to dissolve completely
and clean all parts of the cabinet as described in Par. 10 (before switching it back on, make sure it is completely dry).
Caution: before cleaning the cabinet unplug it from the power mains.
Caution: Other maintenance operations, (not described herein) including replacement of lamps with lamps of the same
model, have to be commissioned to authorised centres of assistance or qualified personnel.
13 - Emergency situations
Caution: if the cabinet should stop or fail to start
- Make sure there is not a situation of electrical black-out
- Make sure the switch on the control panel has been pressed
If the stoppage is not due to one of these causes, call the nearest service center and empty the cabinet. Place the
products in cold rooms designed for maintenance and storage.
Caution: if the cabinet does not chill sufficiently
- Make sure the condenser is clean and capable of performing its heat exchange function. If not, read Par. 12.
- Make sure the cabinet is correctly loaded and that the air vents are unobstructed. If not read Par. 8.
- Make sure the evaporator is not covered with ice. If not read Par. 12.
- Make sure the cabinet is not close to a draft or heat source (see Par. 4).
- Make sure the cabinet is level and the environmental conditions listed in Par. 4 are respected.
If after checking all these things the problem persists, call the nearest service center.
Caution: in case of a gas leak or fire, do not go near the motor compartment. Disconnect power to the cabinet. Do not
use water to extinguish flames. Use only a dry fire extinguisher.
14 - Service
If you require the services of an expert, and whenever you have to replace mechanical, electrical or compressors, the
user can contact the distributor where the cabinet was purchased, to order original spare parts.
15 - Dismantling and elimination of cabinet
For environmental reasons and in compliance with the regulations in your country, separate the parts of the cabinet for
disposal and/or recycling.
All the parts that make up the cabinet are made of materials that are not classifiable as urban waste except for the
metallic parts that are not classified as special waste in most countries. As regards the parts of the refrigeration circuit,
that is the refrigerating gas and lubricating oil, these should not be disposed of carelessly and can be recycled by
specialized centers.
This product contains HFC, namely fluoridated gasses, a refrigerating gas with a high Global Warming Potential
(GWP) regulated by the Kyoto protocol.

22
The gas contained in foam polystyrene for thermal insulation of the cabinet is (R134A).
Oscartielle equips its plug-in cabinets with the following types of refrigerating gasses:
R 290; GWP (100) = 3
R 134A; GWP (100) = 1300
R 452A; GWP (100) = 2140
R 404A; GWP (100) = 3750
This unit is hermetically sealed and the refrigerating gas load is under 3 kg.
For this reason it is not subject to the requisite of an installation booklet and periodic inspections for leakage of
the refrigerating gas (presidential Decree no. 147 of February 15th 2006, Art. 3 and 4).
16 - Manufacturer's declaration (Prohibition to use)
The models described above are constructed for possible assembly with other machines to form a processing line,
considered by Directive 2006/42/CE. Therefore the manufacturer declares that the equipment may not be used until the
line in which it is incorporated and of which it will be considered a part has been identified and declared to comply with the
terms of Directive 2006/42/CE and the national legislation that applies it, that is, until the machinery that is the subject of
this declaration becomes a single unit with the final processing equipment.
17 - Multiplexing cabinets
To multiplex two or more Marte cabinets, follow the instructions below (FIG. 19 page 6)
1. Move the cabinets together on their feet to obtain perfect alignment (Ref. 1).
2. Fit the three iron prongs in the housings on the aluminum profile on the front of the basin (Ref. 2).
3. Fit the rectangular pin in the profile closing the superstructure (Ref. 3).
4. Fasten the bases together with the four threaded bars M8x125, the eight nuts and eight washers supplied (Ref. 4).
5. Join the working shelves with the M8x60 screw and nut (Ref. 5).
6. Fasten the basin fronts together with the M6x45 screw and nut (Ref. 2).
7. Align the superstructures by joining the uprights with an M6x45 screw and nut (Ref. 3).
Complete assembly of the cabinet as described in Par. 5 (FIG. 11-12-13 page 3).
18 - Wiring diagrams
The diagram can be seen on page 7
Legend:
AP = Output 230V
CA = Main power supply cable
CE = Electronic control
CS = Connecting cable
D = Defrosting heating element (Optional)
IG = Main switch
IL = Light switch
K1, K2, K3 = Relay
L = Phase
LV = Display case lights
M = Motor
N = Neuter
PC = Control panel
QE = Control board
SS = Defrost probe
ST = Temperature probe
Vm = Fan motor
Vv = Display case fan
19 - Instructions for the defrosts synchronization of multiplexed cabinets with instrument EVZ000
Please refer to the explanation at page 8. The connecting cable is supplied in the multiplexing kit.
20 - Conformity Declaration
A copy of the declaration of product conformity can be requested by filling in the form available a the internet address:
http://www.oscartielle.it/conformity

23
Installatione, maintenance
The installation of the refrigerated cabinet, as well as maintenance, must be performed by skilled technicians.
During the execution of the maintenance officers are required to operate in accordance with the instructions
contained in the instruction manual.
Before performing any ELECTRICAL or MECHANICAL maintenance on the refrigerator, th
e technician in charge
must be sure that there is no power supply.
The technicians in charge of performing maintenance and needs to work on the components and parts inside the
refrigerated cabinet are exposed to mechanical hazards.
Periodic cleaning of the refrigerated cabinet
Periodic cleaning of the refrigerated cabinet must be carried out on the cabinet that is not working and with power
switched off.
The following personal protective equipment are compulsory for technicians who work on the counter
Symbol Description
Eyes protection
Protective gloves
Safety Shoes
Safety Symbols for immediate notification of dangerous situations and prohibitions
Symbol Description
Forbidden to carry out repairs and adjustments on moving objects
Do not remove the safety guards of the refrigerated cabinet
Do not extinguish with water
May not operate on objects under tension
Risk of crushing hands
Safety
The refrigerated cabinet and its instruction manual were made in compliance with the directive
s, harmonized
standards and regulations applicable to safety.
If the customer or technicians who make service on the refrigerated cabinet should find residual risks, they must
promptly report it to the manufacturer, who after verifying the effective size of the risks, will remove them properly.
Protection devices
The counter refrigerator is equipped with protective devices for users.

IMPORTANT NOTICE
Read prior to installation and keep this information
This product made by Oscartielle S.p.A. is covered by Directive 2012/19/CE WEEE
(Waste Electrical and Electronic Equipment) known in Italy as RAEE (Rifiuti da
Apparecchiature Elettriche ed Elettroniche) designed to halt the increase of this type
of waste and promote recycling as well as decreasing disposal.
The symbol of the crossed-out waste bin that appears on the rating plate declares:
- that the product was put in circulation after January 1, 2011 (reference date valid in
Italy only, Law 25/2010, LD 194/2009)
- that the product is subject to separate collection and must not be treated like normal
domestic waste or sent to dumps for disposal.
The user is required to delivery the product for disposal to the collection center specified by the local
authorities for recovery and recycling of professional WEEE (RAEE). In case of trade-in of the old product for
a new one, the user can ask the seller to take delivery of the old one, no matter what the brand.
The manufacturer is responsible for making recovery, disposal and treatment of its products feasible at the
end of their useful life, either directly or via a collective system.
Violations of the regulation call for specific sanctions, to be established autonomously by each EU member
country with its own legislation, binding equally on all those subject to its laws.
Oscartielle S.p.A. in considering this product a WEEE (RAEE), interprets the guidelines of Orgalime, which
takes account of the application, in Italian legislation, with Legislative Decree no.49/2014 and no.27/2014, of
directives 2012/19/CE, and 2011/65/CE (RoHS), relative to the use of hazardous substances in electric and
electronic devices.
For further information see your Municipal Authorities, the Seller or the Manufacturer.
The directive does not apply to products sold outside the European Community.
This manual suits for next models
4
Table of contents
Other Oscartielle Display Case manuals
Popular Display Case manuals by other brands

Vibocold
Vibocold OSC OSLO SELF SERVE user manual

Arctic
Arctic 233825 user manual

Zero Zone
Zero Zone HYBRID Installation, operation & maintenance manual

Bonnet Neve
Bonnet Neve BRISK 83 User instructions

Nuttall
Nuttall Flexeserve Zone How-to guide

BKI
BKI Multi-Deck Warmer MDW Installation and operation manual