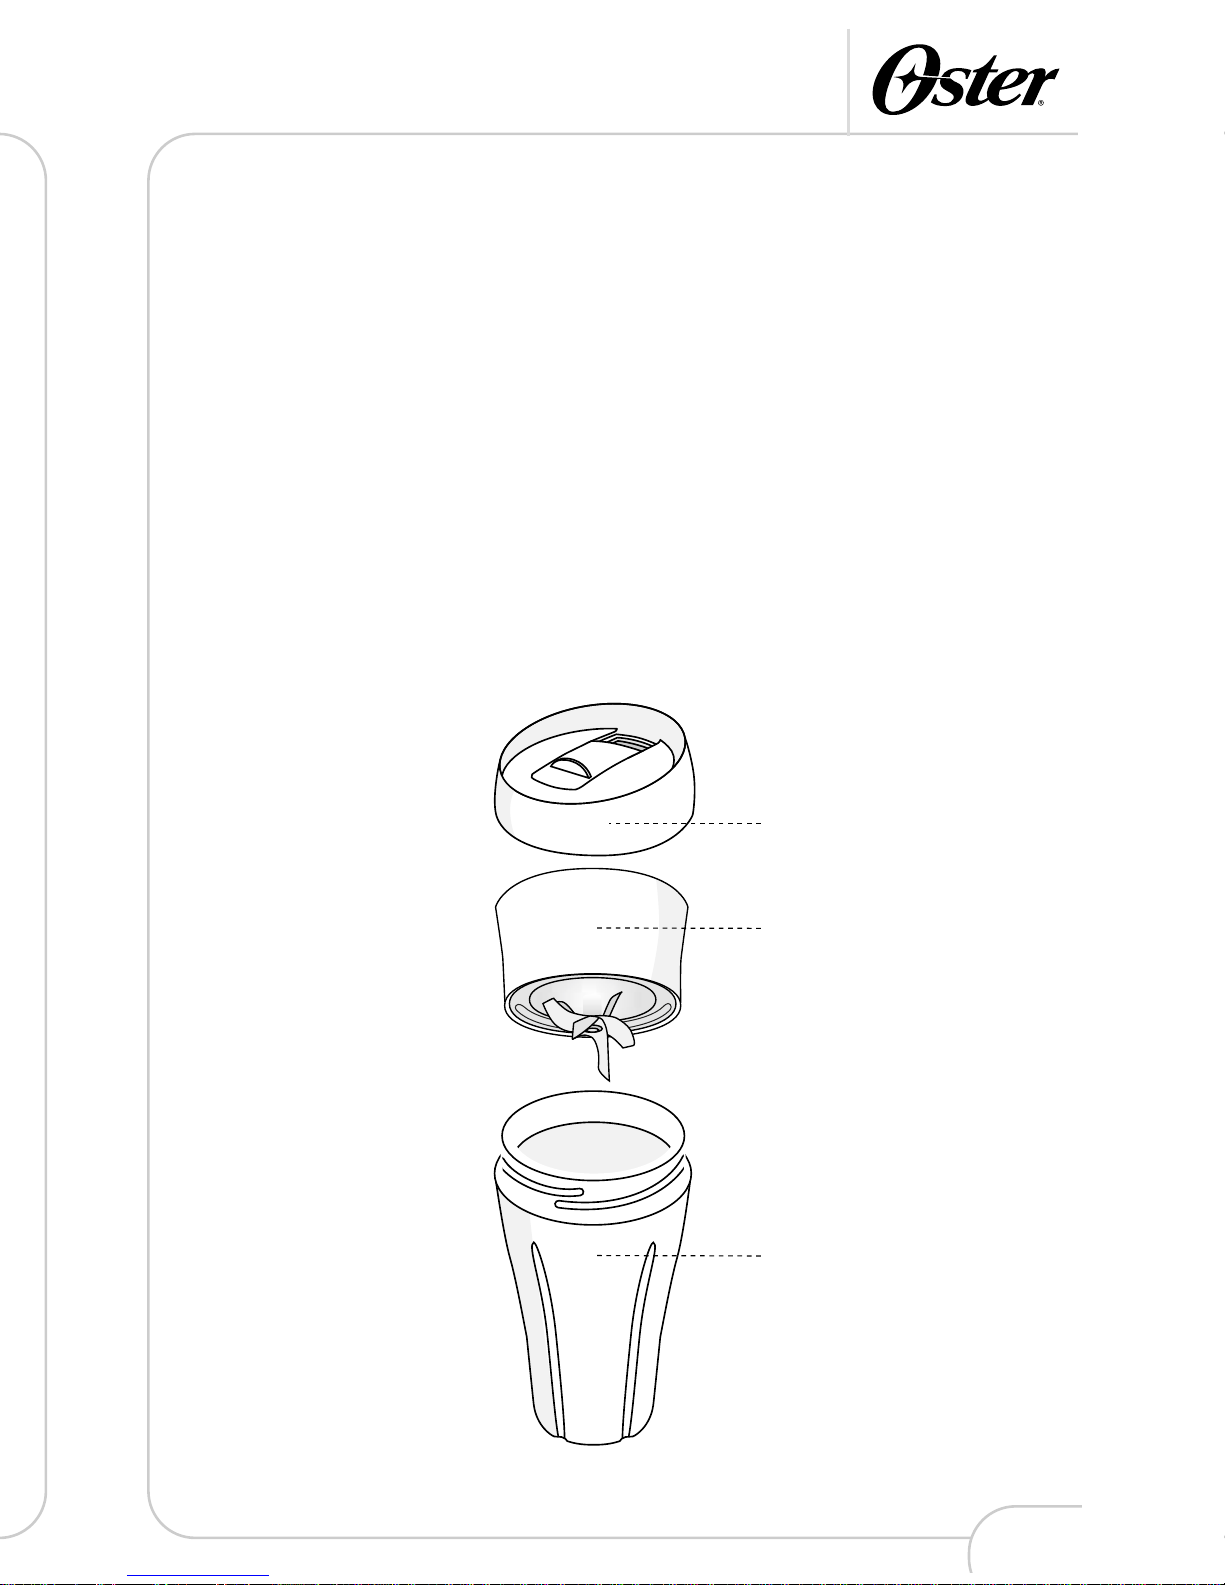
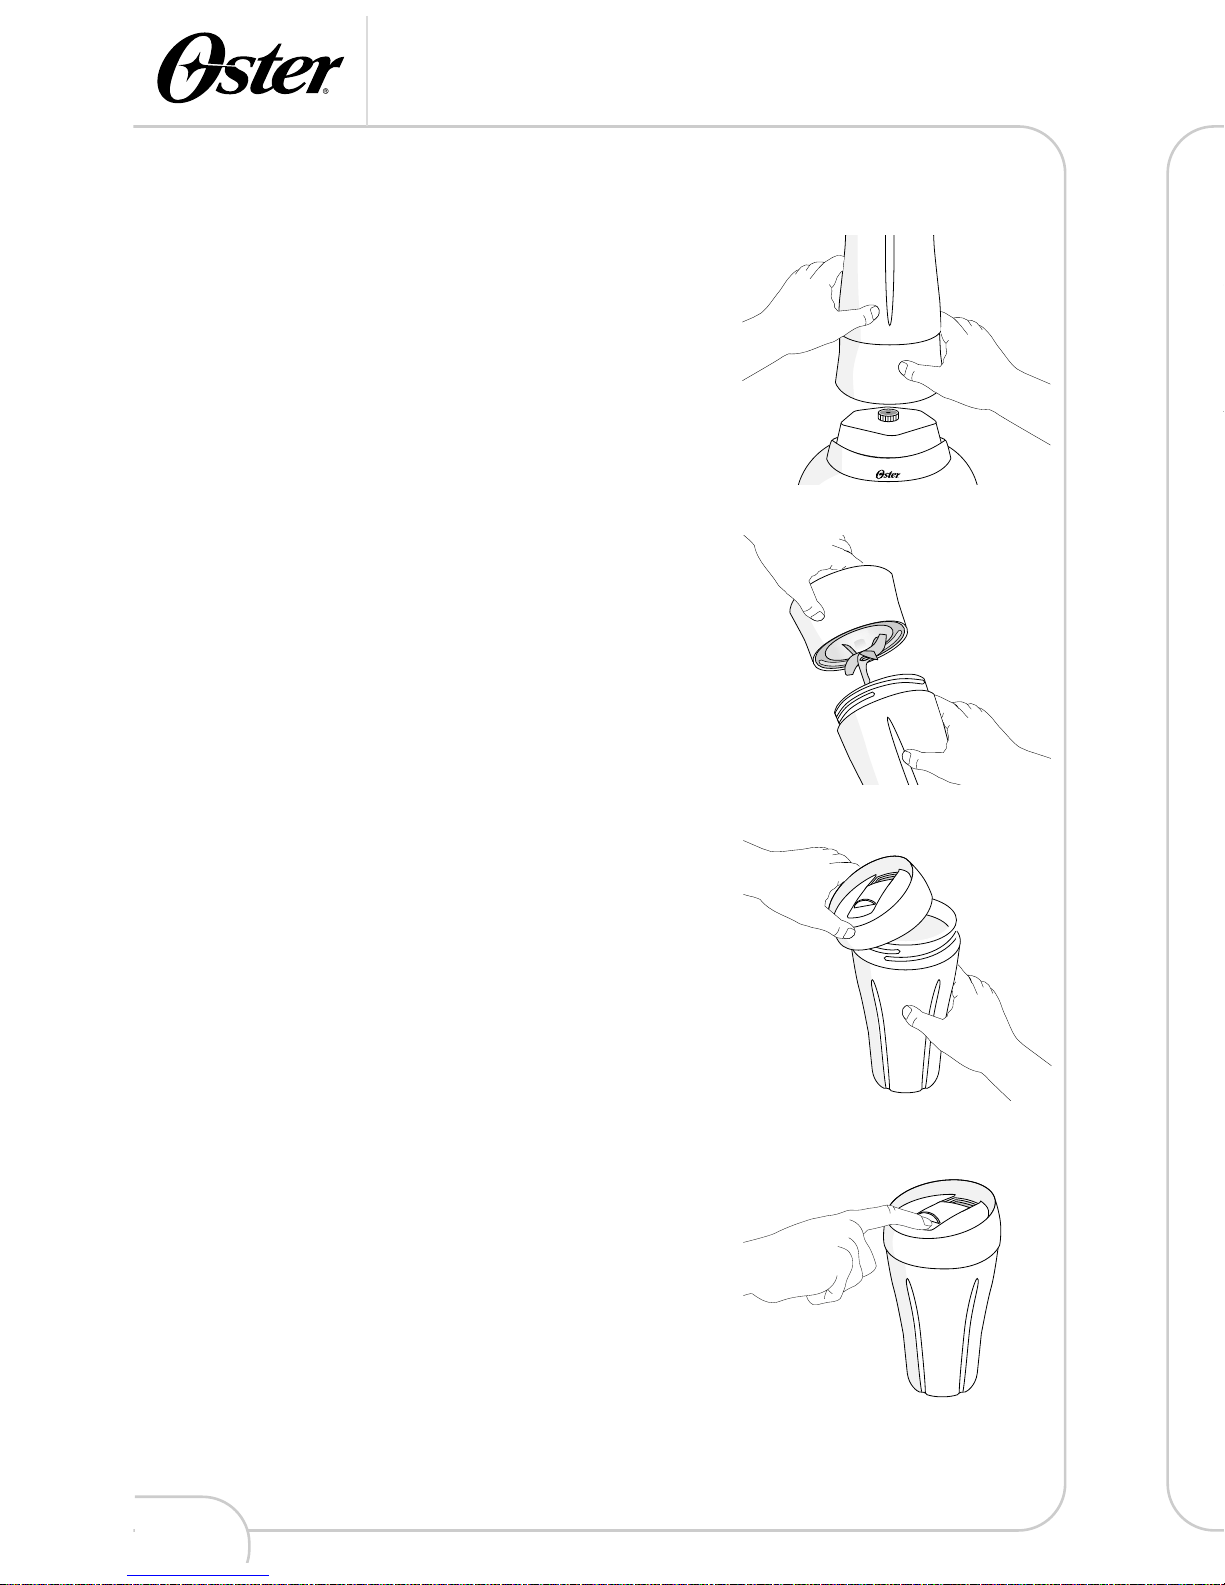
Using Your Blend-N-Go™Cup
5
2From the MAIN MENU, press the arrow button
beside Drinks.
3Choose a drink from the drink categories.
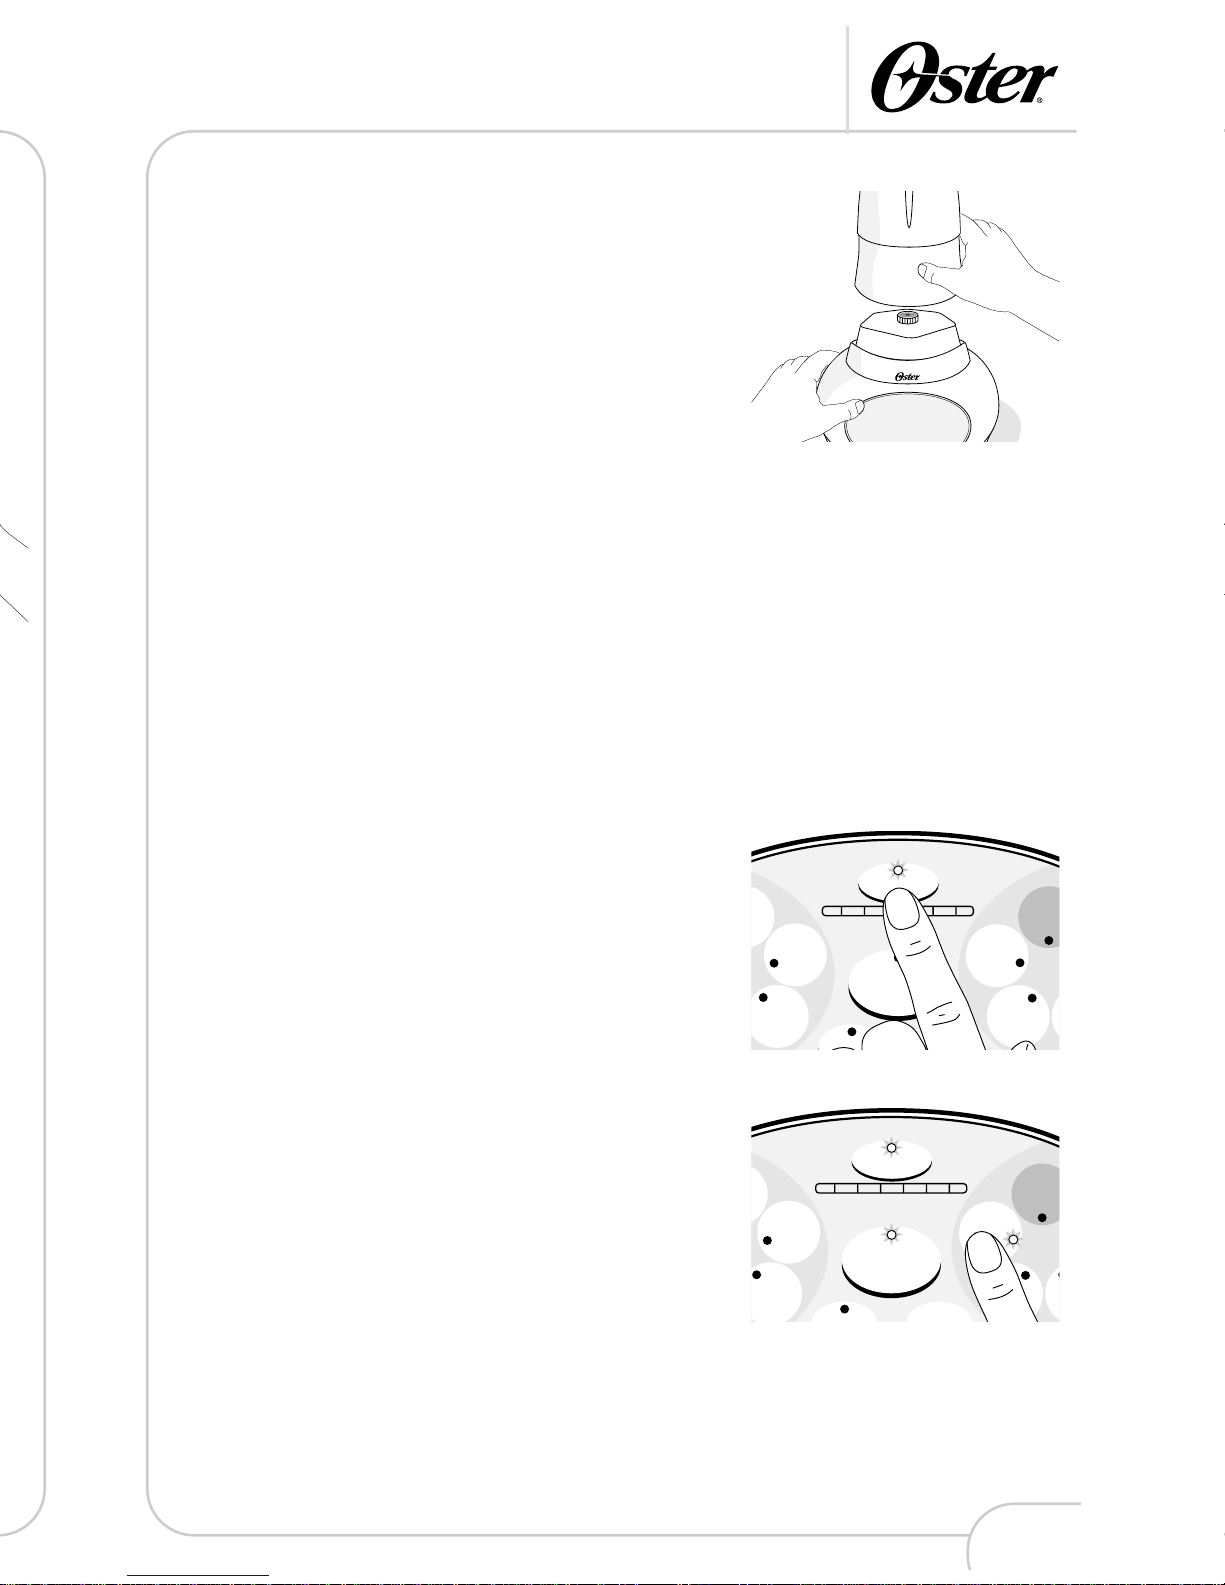
4Hold the top of the Blend-N-Go™Cup. Press the
START/STOP button. The product will begin to
operate. The PROGRESS indicator will show the
progress of the AUTOMATIC program.
5Once the program is finished, you will hear a tone
as the product AUTOMATICALLY stops.
The PROGRESS indicator will flash for about 20
seconds. You will then hear a second tone.
6While the PROGRESS indicator flashes and
before the second tone, you can process
ingredients longer by pressing and holding in the
Pulse button. Be careful you do not over-process
your drink.
7Press the POWER button to turn the product off.
If the jar is ever removed from the base while the
product is running, the motor will stop as quickly
as possible and 3 error tones will sound.
Using Your Blend-N-Go™Cup
4
3Hold the top of the Blend-N-Go™Cup. Press the
START/STOP button. The product will begin to
operate. The PROGRESS indicator will show the
progress of the AUTOMATIC program.
4Once the program is finished, you will hear a
tone as the product AUTOMATICALLY stops.
The PROGRESS indicator will flash for about 20
seconds. You will then hear a second tone.
5While the PROGRESS indicator flashes and
before the second tone, you can process
ingredients longer by pressing and holding in the
Pulse button. Be careful you do not over-process
your drink.
6Press the POWER button to turn the product off.
If the jar is ever removed from the base while the
product is running, the motor will stop as quickly
as possible and 3 error tones will sound.
Use with the Model 6710 on AUTOMATIC
1Press the POWER button.