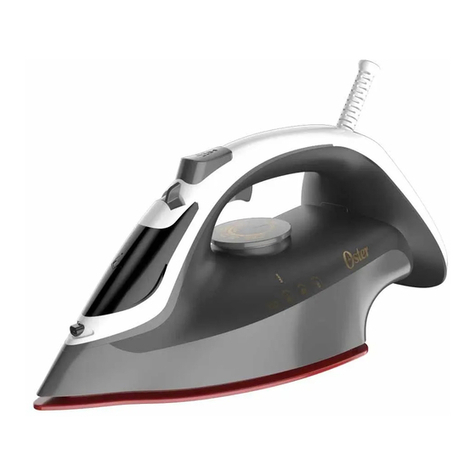
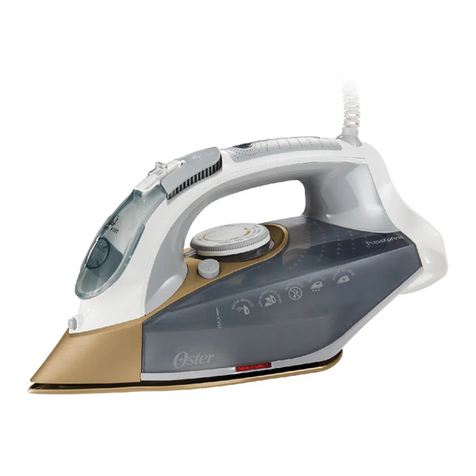
Oster GCSTSP6101 User manual

Instruction Manual
FULL SIZE STEAM IRON
READ ALL INSTRUCTIONS BEFORE USING THIS APPLIANCE
Manuel d’Instructions
FER À REPASSER VAPEUR DE TAILLE NORMAL
LIRE TOUTES LES INSTRUCTIONS AVANT D ’ UTILISER CET APPAREIL
Manual de Instrucciones
PLANCHA DE VAPOR DE TAMAÑO COMPLETO
LEA TODAS LAS INSTRUCCIONES ANTES DE USAR ESTE APARATO
Manual de Instruções
FERRO A VAPOR
LEIA TODAS AS INSTRUÇÕES ANTES DE USAR ESTE APARELHO
MODEL/MODÈLE
MODELO
MODEL/MODÈLE
MODELO
GCSTSP6101, GCSTSP6102,
GCSTSP6103, GCSTSP6104
GCSTSP6101, GCSTSP6102,
GCSTSP6103, GCSTSP6104

English - 1
IMPORTANT SAFEGUARDS
When using electrical appliances, basic safety instructions should always be followed,
including the following:
READ ALL INSTRUCTIONS BEFORE USING THE STEAM IRON.
1. The Iron should always be turned to the “OFF” position before plugging or unplugging
from outlet. Never yank Cord to disconnect from outlet; grasp Plug and pull to
disconnect.
2. Before connecting the Steam Iron, make sure the voltage in your outlet is the same
as the voltage indicated on the appliance’s rating label. Use it with wall receptacle
only.
3. To protect against risk of electrical shock, do not immerse the Power Cord, plug or the
Steam Iron in water or other liquid.
4. Never use the Steam Iron if you have wet hands.
5. This appliance should not be used by children.
6. Never leave the Steam Iron unattended while it is turned on or is on top of the ironing
board.
7. Unplug from outlet while not in use.
8. Let Steam Iron completely cool off in the upright position before storing it. Wind the
Power Cord around the Heel Rest before storing.
9. Burns may occur by touching hot parts, the hot water or the steam. Be careful if you
have to turn the Steam Iron upside down, since there still may be hot water in the
Reservoir.
10. Do not operate Iron with a damaged cord or if the Iron has been dropped or
damaged. To avoid the risk of electric shock, do not disassemble the Iron. Take it to
an Authorized Oster Service Center for examination and repair. Incorrect reassembly
can cause a risk of electric shock when the Iron is used.
11. Do not use it outdoors.
12. Do not let the Power Cord come in contact with hot surfaces.
13. This Steam Iron is intended for household use only.
14. Use the Steam Iron only for the purpose intended.
15. Do not leave Steam Iron unattended while using it. Be careful; if you leave the Steam
Iron unattended, always turn it off, disconnect the unit from the electric outlet and set
the Iron in an upright position.
16. Repairs to the appliance may only be carried out by trained personnel. As a result
of incorrect repairs considerable dangers for the user may result. Please contact an
Authorized Oster Service Center in the event of repairs being necessary.
emptying it out.
19. In order to avoid overloading the circuits, never use another appliance with high
wattage on the same circuit.

English - 2
20. The manufacturer is not liable for any damages, which are caused by using the
appliance incorrectly or for any other purpose than that intended.
21. If an extension cord is absolutely necessary, a cord with the same amperage or
higher than that of your iron should be used. Cords rated for less amperage may
overheat. Care should be taken to arrange the cord so that it cannot be pulled or
tripped over.
22. This appliance is not intended for use by persons (including children) with reduced
physical, sensory or mental capabilities, or lack of experience and knowledge, unless
they have been given supervision or instruction concerning use of the appliance by a
person responsible for their safety. Children should be supervised to ensure that they
do not play with the appliance.
23. Close supervision is necessary when any appliance is used by or near children, or
incapacitated individuals.
SAVE THESE INSTRUCTIONS
To reduce the risk of electrical shock, this appliance has a polarized plug (one blade
attempt to defeat this safety feature.

English - 3
DESCRIPTION OF THE APPLIANCE
1. Water Reservoir Lid
2. Spray Mist Button
3.
Dual Shot of Steam Button
4. Steam Select Switch
5. Temperature Control Dial
6. 360oSwivel Cord
7. Power Cord
8. Indicator Light
9. Wide Heel Rest
GCSTSP6101 & GCSTSP6102,
stainless steel on GCSTSP6103,
ceramic on GCSTSP6104
11. Self Clean Button
12. See Through Water Window
13. Water cup
1
4
2 3
5 6
7
9
12 10
8
13
11

Before First Use
Soleplate and the Water Reservoir are clean.
completely normal and will stop shortly afterwards.
position .
Instructions For Use
USING THE STEAM IRON
will go off and you can begin to Iron. The Indicator Light will be on every time the Iron
is heating. Once it reaches the temperature setting, the Indicator Light will turn off.
The Light will turn on and off from time to time while you are ironing since the
thermostat automatically maintains the Soleplate at the same temperature.
tangling and allows for easy use by both right and left handed people.
CHOOSING THE RIGHT WATER
region in which you live is especially hard, it is recommended to use distilled water to
prolong the life of your Iron.
English - 4

Filling With Water
the Iron with water.
.
Dry Ironing
.
Steam Ironing
”, “ ”), as indicated
on the Temperature Control Dial.
temperatures included in the steam area of the dial.
English - 5

ready to start steam ironing. The steam will be released evenly through vents located in
the soleplate for easier ironing.
Spray Mist
The Spray Mist feature is a powerful water spray mist that dampens the fabric to help
remove wrinkles from heavy fabrics and to set creases.
Dual Shot of Steam
This feature allows you to use shot of steam while ironing horizontally or vertically, as the
next two sections describe.
Shot of Steam
stubborn wrinkles. The Shot of Steam feature can be used with dry or steam ironing
provided it has at least a ¼ tank of water and the Temperature Control Dial is set
within the steam band.
be used continuously with just a short pause between shots. The Shot of Steam
feature is most effective with the Iron held in a horizontal position just above the fabric
being ironed.
using the Shot of Steam feature again.
English - 6

Vertical Shot of Steam
The vertical shot steam feature allows your iron to function as a garment steamer.
When using the vertical shot of steam on clothing, hang the clothing on a clothes
hanger for best results. Hanging curtains and drapes may also be steamed.
1. Allow iron to warm up (2 minutes).
2. Hold the iron in a vertical position, with the iron close to but not touching the fabric you
want to steam.
3. With your other hand, pull the fabric tight.
4. Press the Shot of Steam button in approximately 3-second intervals as you move the
iron across the wrinkled area.
To prevent the risk of burns, keep your hand away from the area being
steamed.
steam garments while wearing them; this may result in injuries.
Ironing Temperature
temperature settings table for further instructions.
the temperature settings table. This table is only valid for the fabrics indicated and does
as gloss, relief wrinkles, etc.) are best ironed at very low temperatures. If the textile
example, if the composition consists of 60% polyester and 40% cotton, you should iron
at the temperature indicated for polyester).
Setting The Temperature
indicated on the label or the temperature settings table.
English - 7

Temperature Settings Table
Kind of Textile
DRY
synthetic
synthetic
synthetic
Acrylic, modacryl
polypropylene,
polyurethane
acetate, triacetate
metalized, cupro,
polyamide (nylon),
polyester
STEAM
silk
wool
cotton
silk
wool
cotton
linen linen
Non-Stick Finish
(Models GCSTSP6101 & GCSTSP
Scratches in the non-stick Soleplate do not affect the performance of the Iron.
Stainless Steel Soleplate
(Model GCSTSP
Provides more durability than a non-stick or aluminum soleplate.
Ceramic Soleplate
(Model GCSTSP6104
Provides a smoother glide for quick and easy ironing with superior resistance.
Anti-Calc
The anti-calc feature helps prevent the build up of mineral deposits in your iron. This
prolongs its life and improves the iron’s performance.
English - 8

Anti-Drip
Produces steam without dripping, spitting, or leaking through the soleplate, even at low
temperatures.
3Way Auto-Off Feature
When the iron is plugged in, the Power Indicator will light steadily, indicating that there is
power to the iron.
over, it will automatically stop heating after 30 seconds. The Indicator
light will turn green, beep 6 times and then blink to let you know that
the iron has stopped heating.
automatically turn off after 15 minutes. The Indicator light will turn
green, beep 6 times and then blink to let you know that the iron has
stopped heating.
The Indicator light will continue to blink until the iron is unplugged or reset.
blinking and the iron will start heating again.
The 3 Way Auto-Off is a safety feature, not a recommended means for turning
your iron off.
Maintenance and Cleaning
Before cleaning the Iron, always make sure that it is disconnected from the electrical
wall socket and is completely cool.
SOLEPLATE
and vinegar.
HOUSING
yourself. Send it to an Oster Authorized Service Center.
English - 9

Self-Cleaning Feature
your iron. The Self Cleaning feature will clean the water reservoir and steam vents of
accumulated minerals, dust and lint.
1. Move the Steam Control back and forth several times to remove debris and minerals
from the steam valve. This keeps water flowing into the steam chamber.
2. Fill the water reservoir with tap water to the “MAX” line.
3. Plug in the iron and move the temperature control dial to the “Linen” position, and
allow the iron to heat for two minutes.
4. Unplug the iron.
5. Hold the iron over a sink in a horizontal position.
Be careful not to touch the iron’s hot surfaces.
6. Press the Self-Clean button and hold. Water will begin dripping from the steam vents.
Slowly rock the iron side-to-side and front to back for 30 seconds. When rocking
the iron, dip the nose of the iron slightly below the rear to make certain the water
circulates completely.
7. Turn the iron upside down and allow the remaining water to flow out of the fill hole.
8. Dry the soleplate with a towel.
9. Plug in the iron and turn the Temperature Control Dial to the “Linen” position. Let the
iron heat for two minutes and dry out the iron completely.
10. Turn the Temperature Control Dial to the “Off” position. The light will go out, indicating
that the iron has turned itself off. Unplug the iron and allow it to cool before storing.
Storing the Iron
Reservoir Lid and inverting the Iron over the sink.
the unit has cooled down. The Iron should always be stored in an upright position.
English - 10

PRÉCAUTIONS IMPORTANTES
L’utilisation d’un appareil électrique exige certaines précautions fondamentales, y compris
celles qui suivent:
LISEZ TOUTES LES INSTRUCTIONS AVANT D’UTILISER LE FER À REPASSER À
LA VAPEUR.
1. Veillez à régler le fer à repasser toujours à la position «OFF» (Arrêt) avant de le
tirez doucement pour débrancher le fer de la prise murale.
2. Avant de brancher le fer à vapeur sur la prise murale, assurez-vous que la tension
de la prise est identique à la tension indiquée sur l’étiquette de l’appareil. Branchez
l’appareil directement sur la prise murale. N’utilisez jamais de rallonge.
3. Pour écarter les risques d’électrocution, n’immergez pas le cordon d’alimentation,
liquide.
4. N’utilisez jamais le fer à vapeur si vous avez les mains mouillées.
5. Cet appareil ne doit pas être utilisé par des enfants.
6. Ne laissez jamais le fer sans surveillance pendant qu’il est en marche ou après l’avoir
posé sur la planche à repasser lorsqu’il est encore chaud.
7. Débranchez toujours le fer à vapeur lorsqu’il n’est pas utilisé.
8. Permettez au fer à vapeur de refroidir complètement en position verticale avant de
le ranger. Avant de l’entreposer, enroulez le cordon d’alimentation autour du talon
d’appui.
9. Pour écarter les risques de brûlure, ne touchez pas les parties du fer qui sont
chaudes et évitez le contact avec l’eau chaude ou la vapeur qui s’échappe des
réservoir pourrait encore contenir de l’eau chaude.
10. N’utilisez jamais le fer si son cordon est abîmé, s’il est tombé à terre ou s’il a été
remontage incorrect constitue un risque d’électrocution lors de l’utilisation du fer.
11. N’utilisez pas le fer à vapeur à l’extérieur.
12. Ne laissez pas le cordon d’alimentation entrer en contact avec des surfaces chaudes.
13. Ce fer à vapeur a été conçu uniquement pour un usage ménager.
15. Ne laissez jamais le fer à vapeur sans surveillance pendant le repassage. Agissez
avec prudence. Si vous devez laisser le fer sans surveillance, mettez-le toujours hors
tension, débranchez-le de la prise murale et placez-le en position verticale.
16. Les réparations du fer à vapeur doivent toujours être effectuées par un technicien
inadéquates. Veuillez communiquer avec un centre de service agréé Oster lorsque
des réparations s’avèrent nécessaires.
17. Veillez à toujours débrancher le fer à vapeur de la prise murale avant de le remplir
avec de l’eau ou avant de le vider.

18. Évitez de faire déborder le réservoir. Ne le remplissez jamais au-dessus de la marque
de niveau d’eau maximal.
appareils à haute puissance sur le même circuit.
20. Le fabricant n’est responsable d’aucun dommage résultant d’une utilisation de
d’une utilisation inadéquate.
21. S’il vous faut absolument une rallonge, assurez-vous d’en utiliser une de 10 ampères.
Les cordons dont l’indication d’ampères est inférieure risquent de surchauffer. Veillez
à disposer le cordon de telle sorte qu’il soit impossible de le tirer par inadvertance ou
de trébucher dessus.
22. Cet appareil n’est pas destiné à être utilisé par des personnes (enfants y compris)
dont les capacités physiques, sensorielles ou mentales sont diminuées, ou qui ne
disposent pas des connaissances ou de l’expérience nécessaire, à moins qu’elles
n’aient été formées et encadrées pour l’utilisation de cet appareil par une personne
responsable de leur sécurité. Les enfants doivent être surveillés pour s’assurer qu’ils
23. Les enfants et personnes handicapées doivent être surveillés lorsqu’ils utilisent
l’appareil ou que l’appareil est utilisé à côté d’eux.
VEUILLEZ CONSERVER CES INSTRUCTIONS
Cette précaution pour but de diminuer les risques d’électrocution. Il n’y a qu’une seule
celle-ci ne se branche pas parfaitement dans la prise. Communiquez avec un électricien
caractéristique de sécurité.

DESCRIPTION DE L’APPAREIL
1
4
2 3
5 6
7
9
12 10
8
13
11
1. Couvercle du Réservoir d’eau
2. Bouton de Spray
3. Bouton de Double Jet de Vapeur
4. Bouton de Sélection de Vapeur
5. Cadran du Régulateur de Température
7. Cordon Alimentation
8. Témoin Lumineux
9. Talon d’appui Grand Format
10. Semelle - avec revêtement antiadhésif
pour modèles GCSTSP6101 &
GCSTSP6102, Acier Inoxydable pour
modèle GCSTSP6103, Céramique
pour modèle GCSTSP6104
11. Bouton Auto Nettoyage
12. Repère Transparent du Niveau d’eau
13. Gobelet

Première Utilisation - Conseils
-
morceau de tissu pour vous assurer que la semelle et le réservoir d’eau sont propres.
utilisation. Cela est causé par le fait que le matériel se chauffe pour la première fois. Il
s’agit d’un phénomène tout à fait normal et passager.
vapeursur la position fermée .
Mode D’emploi
UTILISER LE FER À VAPEUR
témoin s’éteint et le fer est prêt à utiliser. Le témoin se rallume chaque fois que le fer est
en train de se réchauffer et il s’éteint chaque fois que la température voulue est atteinte.
Pendant que vous faites le repassage, le témoin s’allume et s’éteint alternativement en
fonction du thermostat qui maintient la semelle à une température uniforme.
à vapeur. Il ne s’emmêle pas et permet un maniement facile tant pour les personnes
droitières que pour les personnes gauchères.
CHOISIR LE BON TYPE D’EAU
localité est très dure, il est recommandé d’utiliser de l’eau distillée pour prolonger la vie
utile du fer.

Remplir Le Réservoir D’eau
réservoir d’eau.
.
pas dépasser la marque de niveau d’eau maximal sur le repère transparent du niveau
d’eau.
Repasser À Sec
.
Repasser À La Vapeur
(“ ”, “ ”), indiquées sur le Cadran du Régulateur de Température.
position désirée comprise dans la plage des températures de la zone “ vapeur “ du
cadran.

désormais prêt à commencer le repassage à la vapeur. La vapeur est diffusée de façon
Spray
tissus épais et pour faire le pli.
Fonction Double Jet de Vapeur
Cette fonction vous permet d’utiliser un jet de vapeur pendant que vous repassez
horizontalement ou verticalement, comme les deux sections suivantes le décrivent.
Jet de Vapeur
les plis rebelles. Cette fonction sert au repassage à sec ou à la vapeur lorsque le réservoir
est rempli d’eau au moins au quart et que le cadran du régulateur de température est
positionné dans la plage des températures de la zone vapeur.
tenez le fer en position horizontale tout en laissant un petit écart juste au-dessus du
tissu à repasser.
pouvez remplir le fer d’eau lorsqu’il est chaud. Remarque: il se peut que vous deviez
réinitialiser la pompe avant d’activer à nouveau la fonction jet de vapeur Shot of Steam.

Jet de Vapeur Verticale
La caractéristique de vapeur verticale permet d’utiliser votre fer comme un presseur de
vêtements.
Accrochez le vêtement sur un cintre pour obtenir de meilleurs résultats
lorsque vous utilisez la vapeur verticale sur un vêtement. Les draperies et les rideaux
suspendus peuvent aussi être traités à la vapeur.
1. Assurez-vous que le fer est réchauffé (2 minutes).
2. Tenez le fer en position verticale et proche du tissu que vous
voulez vaporiser mais sans le toucher.
3. Tenez le tissu bien tendu avec votre autre main.
4. Appuyez sur le bouton du jet de vapeur durant des intervalles de 3 secondes pendant
que vous déplacez le fer d’un côté à l’autre de la région froissée.
risques de brûlures.
vaporiser des vêtements pendant que vous les portez; cela
peut occasionner des blessures.
Réglage De La Température
amples renseignements, reportez-vous au tableau.
lustré, ridé ou plissé se repassent le mieux à des températures faibles. Si le tissu
exemple, si le tissu comporte 60% de polyester et 40% de coton, réglez le fer sur la
température indiquée pour le polyester.
Pour Régler La Température
sur l’étiquette ou dans le tableau suivant.

Tableau De Réglage Des Températures
S E C
synthétique
synthétique
synthétique
acrylique, modcrylique,
polypropylène,
polyuréthane
acétate, triacétate
Métallique, cupro,
polyamide (nylon)
polyester
VAPEUR
soie
laine
coton
soie
laine
coton
lin lin
Revêtement Antiadhésif
semelle du fer.
les égratignures sur la semelle antiadhésive ne nuisent pas aux
performances du fer à vapeur.
Semelle en Acier Inoxydable
Semelle Céramique
(Modèle GCSTSP6104
Glisse doucement sur le tissu pour un repassage rapide et facile avec une durée de vie
supérieure.
Anti-Calcaire
La fonction anti-calcaire aide à empêcher l’accumulation de dépôts minéraux dans votre
fer. Cela prolonge sa vie utile et améliore la performance du fer.

Anti-Goutte
Permet la production de vapeur sans égouttement, crachement ou fuite d’eau à travers
de la semelle, même à de basses températures.
Fonction D’Arrêt Automatique de 3Position
(Modèles
Le témoin d’alimentation va s’allumer sans arrêt pour vous signifier que le fer est
alimenté lorsque celui-ci est branché.
s’arrêtera automatiquement après 30 secondes. Le Voyant lumineux
passera au vert, émettra un bip sonore 6 fois puis clignotera pour vous
indiquer que le fer à repasser a fini de chauffer.
automatiquement après 15 minutes. Le Voyant lumineux passera au
vert, émettra un bip sonore 6 fois puis clignotera pour vous indiquer
que le fer à repasser a fini de chauffer.
Le Voyant lumineux continuera de clignoter jusqu’à ce que le
fer à repasser soit débranché ou réinitialisé.
Voyant lumineux s’arrêtera de clignoter et le fer à repasser recommencera à chauffer.
La fonction brevetée d’arrêt automatique est une caractéristique de
sécurité, non pas un moyen recommandé de fermer votre fer.
Entretien Et Nettoyage
murale et qu’il est complètement refroidi.
SEMELLE
et de vinaigre.
ils pourraient endommager le revêtement antiadhésif.
BOÎTIER
sec pour bien le sécher.
Si pour une raison quelconque, votre Fer à Repasser Vapeur a besoin d’être réparé,
agréé Oster
This manual suits for next models
3
Table of contents
Languages:
Other Oster Iron manuals

Oster
Oster GCSTPM7001 User manual

Oster
Oster GCSTSP6212 User manual

Oster
Oster GCSTCS-412 User manual

Oster
Oster GCSTBS5802 User manual

Oster
Oster GCSTUP8201 User manual

Oster
Oster GCSTDR1804 User manual

Oster
Oster PRESSXPRESS GCSTPX4060 User manual

Oster
Oster GCSTBS5001 User manual

Oster
Oster 5002 User manual

Oster
Oster GCSTBS4951L User manual

Oster
Oster GCSTCM2001 User manual

Oster
Oster GCSTAC6901 User manual

Oster
Oster 4420-449 User manual

Oster
Oster GCSTTS7010 User manual

Oster
Oster GCSTCC3000 User manual

Oster
Oster GCSTPM7201 User manual

Oster
Oster 6014 User manual

Oster
Oster GDSTCM2001 User manual

Oster
Oster GCSTBS3801 User manual

Oster
Oster GCSTBS5902 User manual