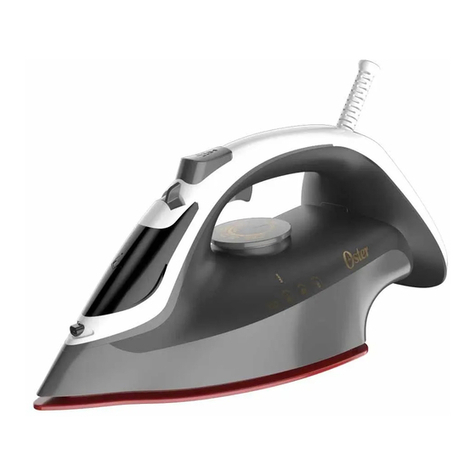
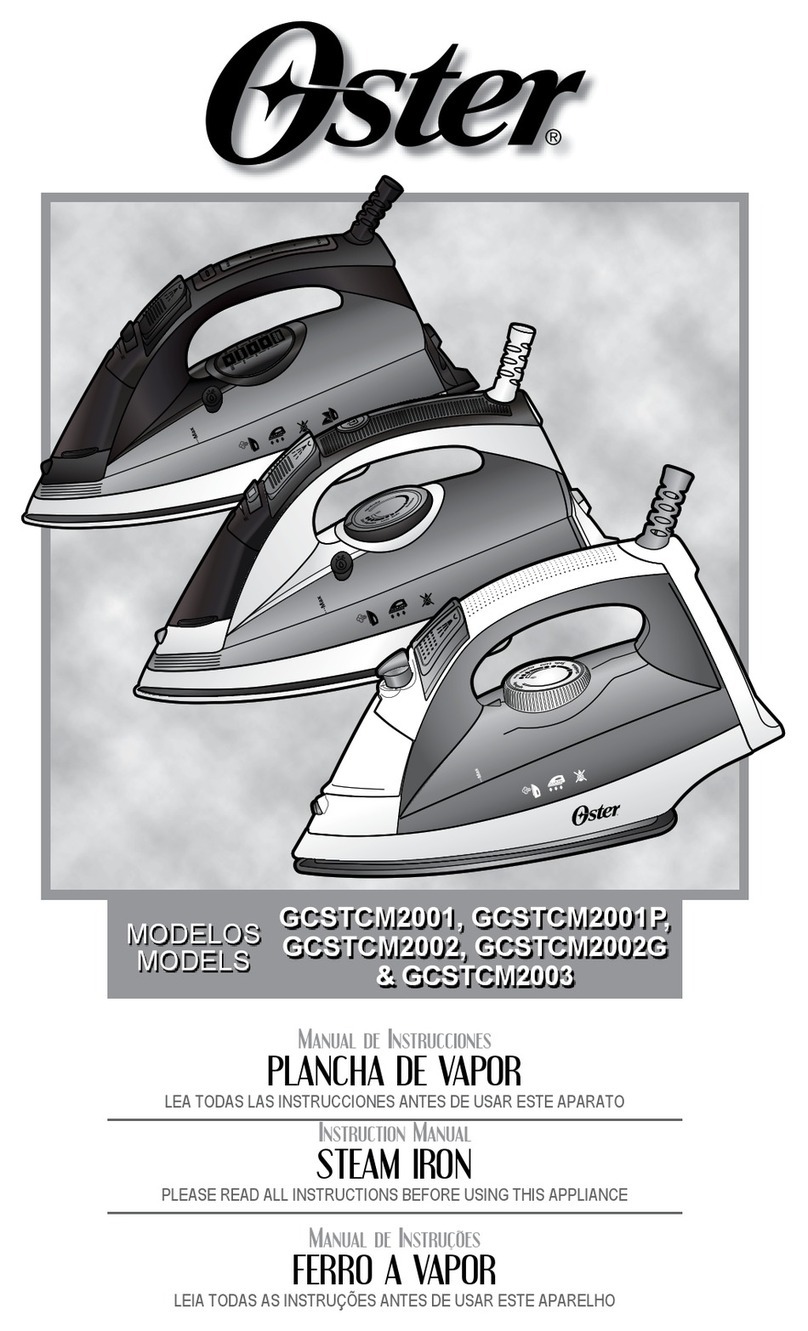
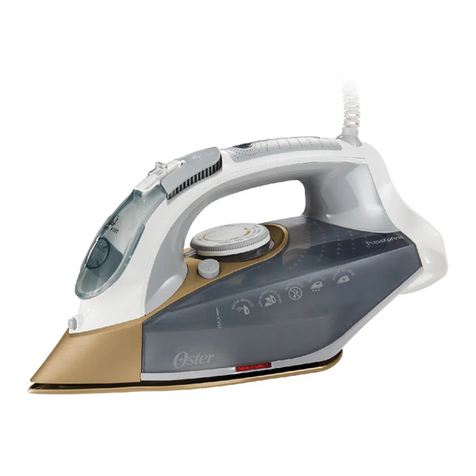
Oster GCSTPM7001 User manual

Instruction Manual
STEAM IRON WITH ANTI-SCRATCH TIP
PLEASE READ ALL INSTRUCTIONS BEFORE USING THIS APPLIANCE
Manual d’ Instructions
FER A VAPEUR AVEC POINTE ANTIRAYURES
LIRE TOUTES LES INSTRUCTIONS AVANT D’ UTILISER CET APPAREIL
Manual de instrucciones
PLANCHA DE VAPOR CON PUNTA RESISTENTE
LEA TODAS LAS INSTRUCCIONES ANTES DE USAR ESTE APARATO
Manual de Instruções
FERRO A VAPOR COM PONTA RESISTENTE ANTI-ARRANHÕES
LEIA TODAS AS INSTRUçõES ANTES DE USAR ESTE APARELHO
GCSTPM7001
GCSTPM7001
MODEL/ MODÉLE
MODELO
MODEL/ MODÉLE
MODELO

English - 1
IMPORTANT SAFEGUARDS
When using electrical appliances, basic safety instructions should always be followed,
including the following:
• READ ALL INSTRUCTIONS BEFORE USING THE STEAM IRON.
• Useirononlyforitsintendeduse.
• Toprotectagainstriskofelectricshock,donotimmerseironinwaterorotherliquids.
• TheFabricSelectandSteamDialsshouldalwaysbeturnedtooffO/ before plugging or
unpluggingfromoutlet.Neveryankcordtodisconnectfromoutlet;instead,graspplugand
pulltodisconnect.
• DO NOTallowcordtotouchhotsurfaces.Letironcoolcompletelybeforeputtingaway.
Loopcordlooselyaroundironwhenstoring.
• Alwaysdisconnectironfromelectricaloutletwhenfillingwithwateroremptyingandwhen
notinuse.
• DO NOToperateironwithadamagedcordoriftheironhasbeendroppedordamaged.
Toavoidtheriskofelectricshock,donotdisassembletheIron.TakeittoanOster®
AuthorizedServiceCenterforexaminationand/orrepair.Incorrectreassemblycancausea
riskofelectricshockwhentheironisused.
• DO NOTleaveIronunattendedwhilepluggedinorturnedonoronanironingboard.
• Burnscanoccurfromtouchinghotmetalparts,hotwaterorsteam.Usecautionwhenyou
turnasteamironupsidedown-theremaybehotwaterintheReservoir.
• IftheIronisnotoperatingnormally,disconnectfromthepowersupplyandhavetheIron
servicedbyanOster®AuthorizedServiceCenter.
• YourOster®ironisdesignedtorestontheheelrest.DO NOT leavetheIronunattended.
DO NOTsetirononanunprotectedsurface,evenifitisonitsheelrest.
• Thisisahighwattageappliance.Toavoidacircuitoverload,donotoperateanotherhigh
wattageapplianceonthesamecircuit.
• Ifanextensioncordisabsolutelynecessaryacordwiththesameamperageshouldbe
used.Cordsratedforlessamperagemayoverheat.Careshouldbetakentoarrangethe
extensioncordsothatitcannotbepulledortrippedover.
• Thisapplianceisnotintendedforusebypersons(includingchildren)withreducedphysical,
sensoryormentalcapabilities,orlackofexperienceandknowledge,unlesstheyhavebeen
givensupervisionorinstructionconcerninguseoftheappliancebyapersonresponsiblefor
theirsafety.Childrenshouldbesupervisedtoensurethattheydonotplaywiththe
appliance.
• Closesupervisionisnecessarywhenanyapplianceisusedbyornearchildren,or
incapacitatedindividuals.
SAVE THESE INSTRUCTIONS
(For 120 & 127 Volts with two at pins only)Toreducetheriskofelectricalshock,this
appliancehasapolarizedplug(onebladeiswiderthantheother).Thisplugfitsapolarized
outletonlyoneway.Thisisasafetyfeatureintendedtohelpreducetheriskofelectrical
shock.Iftheplugdoesnotfitfullyintotheoutlet,reversetheplug.Ifitstilldoesnotfit,
contactaqualifiedelectrician.Donotattempttodefeatthissafetyfeature.

English - 2
1. SprayMistRelease
2. CoveredWaterFillHole
3. Auto-OffIndicator/Wait/ReadyLight
4. SteamSelectionDial
5. SprayMistButton
6. ShotofSteamButton
7. FabricSelectDial
8. Handle
9. 360°Tangle-FreeSwivelCord
10. Anti-CalciumSystem
11. See-ThroughWaterReservoir
12. Self-CleanButton
13. ResistantHardAnodizedAnti-ScratchTip
14. Non-StickSoleplatewithmicroholes
15. Watercupincluded
DESCRIPTION OF THE APPLIANCE
1
2
3
4
756
8 9
11
10
12
14
13
15

English - 3
INSTRUCTIONS FOR USE
Before First Use
• Whenusingtheironforthefirsttime,testitonapieceofclothtobesurethatthe
soleplateandthewaterreservoirareclean.
• Itispossiblethattheironwilldischargesomesmokeandreleasesomeodorduringits
firstuse.Thisisduetotheinitialheatingofthematerialsused.Thisiscompletely
normalandwillstopshortlyafterwards.
FILLING WITH WATER
YoumustfillthereservoirwithwatertousetheShotofSteamandSprayMistfeatures
andtogetsteamoutofyouriron.
TIP:Eachironistestedatthefactorytoensurethattheyfunctioncorrectly.Thetest
mayleaveasmall,harmlessamountofwaterwithinthewaterreservoir.
Beforeyoufillthewaterreservoir,pleaseconsiderthefollowing:
• Thisironwasdesignedforusewithtapwater,veryhardwater.
SincetheAnti-CalciumSystemisapermanentsystemlocated
insidethewaterreservoir.Thissystemremovescalciumfrom
thewaterandreducescalciumbuild-uponthesoleplate.
Thereforeyourironacceptstapwatereliminatingtheneedof
keepingdistilledwateronhandforironing.
IMPORTANT:Whennotironing,alwayssettheSteamLeverto
the closed position “ ”andtheFabricSelectDialtotheoff
position“O”.
Tofillthewaterreservoir:
1.Liftthewaterfillholecover.
2.Makesuretheironisunplugged.SettheSteamDialtoclosedposition“ ” and the
FabricSelectDial/Buttonstooffposition“O”.
3.Fillwatercupwithwater.Pourwaterintoiron’swaterreservoir.Donotfillwater
reservoirbeyondmaximumfilllevel“MAX”.
WARNING: Topreventtheriskofburns,becarefulwhenfillingahotironwithwater.
Hotmetalparts,hotwaterandsteamcancauseinjuries.

English - 4
SELECTING FABRIC SETTINGS
Toselectafabricsetting,turntheFabricSelectDialtothedesiredfabricselection.
Thewaitlightwillglowredwhiletheironheatsup.Thelightwillthenchangetogreen
indicatingthattheironisreadytobeused.
Dry Ironing
1.MakesuretheSteamDialisturnedtotheclosedposition“ ”.
2.Plugthecordintotheappropriateoutlet.
3.TurntheFabricSelectDialtothefabricsettingyoudesire
(Silk“Seda”orSynthetics“Sintet”).
Allowtheirontoheatfor2minutes.Whiletheironisheating,
makesureitissittingonitsheelrestonastable,protected
surface.
NOTE: WhiletheSteamDialisturnedtotheclosedposition“ ”,
youmaystillusetheShotofSteamorSprayMistfeatures.Please
makesurethewaterreservoiris1/4fullofwater.
TIP: Refertothe“IroningGuide”fortherecommendedsettingforyourfabric.
Steam Ironing
1.Followtheinstructionsfor“FillingWithWater”.
2.Plugthecordintotheoutlet.Thepowerindicatorlightwill
illuminate.
3.TurntheFabricSelectDialtothesteamironingfabricsettingyou
desire(Linen“Lin”,Cotton“Algod”,Wool“Lana”orSilk“Seda”)
andallowirontoheatfor2minutes.Whiletheironisheating,
makesureitissittingonitsheelrestonastable,protected
surface.
TIP:Refertothe“IroningGuide”fortherecommendedsettingfor
yourfabric.
4.Aftertheironhasheated(2minutes),turnthesteamdialtothedesiredsteamsetting.
IMPORTANT:Whennotironing,alwayssettheSteamDialtoclosedposition“ ” and
theFabricSelectDialtooffposition“O”.

English - 5
IRONING TIPS
• Alwaysreadgarmentlabelsandfollowthemanufacturer’sironinginstructions.
• Sortthearticlestobeironedaccordingtothetypeoffabric.
• Youshouldfirstirongarmentsrequiringlowtemperature(e.g.,silksandsynthetics)toavoid
damagingthemwithanironthatistoohot.
• Ifyouareunsureofthefabriccontentofthegarment,testasmallarea,suchasaseamor
facing,beforeironingavisiblearea.Startwithalowtemperatureandgraduallyincreasethe
heattofindthebestsetting.
• Whenchangingthetemperaturefromahighsettingtoalowsetting,allowapproximately5
minutesforthelowertemperaturetobereached.
• Whensteamironing,uselong,slowpassesoverthefabric.Thiswillallowthesteamto
penetratethefabricwhileallowingtheheatofthesoleplatetodryoutthemoisture.
• Toironlinens,turngarmentinsideout.Becarefulnottouseanironthatistoohotbecause
theliningmaymeltorsticktothesoleplate.
• Toironzippers,useanironingclothormakesurethezipperisclosedandironovertheflap.
Neverirondirectlyoveranunprotectedzipper.
• Usethe“IroningGuide”toselectthebestsettingandmethodforthefabricyouplantoiron.

English - 6
IRONING GUIDE
Suggested Fabric Salect
Fabric Steam Setting Dial/Buttons Ironing Recommendations
Acrylic Synthetic“Sintet” Irongarmentinsideout.
Acetate Synthetic“Sintet” Irongarmentinsideoutwhilestill
damp.
Silk Silk“Seda” Irongarmentinsideout.Usean
ironingcloth*topreventshine
marks.
Viscose Silk“Seda” Mainlydryiron;steammaybe
usedundergarment
manufacturer’sinstructions.
Nylon Synthetic“Sintet” Irongarmentinsideoutwhilestill
damp.
Polyester Synthetic“Sintet” Irongarmentinsideoutwhilestill
damp.
Rayon Synthetic“Sintet” Irongarmentinsideout.
Wool Wool“Lana” Irongarmentinsideoutorusean
ironingcloth.*
WoolBlends Wool“Lana” Irongarmentinsideoutorusean
ironingcloth.*
CottonBlends Cotton“Algod” Followgarmentmanufacturer’s
instructions.Usesettingforthe
fiberrequiringthelowestsetting.
Corduroy Cotton“Algod” Irongarmentinsideoutorusean
ironing cloth* and then brush the
garmentwithyourhandtoraise
thetextureofthefabric.
Cotton Cotton“Algod” Irondarkfabricsinsideoutto
preventshinemarks.
Linen Linen“Lin” Irongarmentinsideoutorusean
ironingcloth*topreventshine
marks(especiallyondarkfabrics).
Denim Linen“Lin” Irondarkfabricsinsideoutto
preventshinemarks.
*Anironingclothismadewithcotton,dry-cleanedcloththatyouplaceoverthegarmentyouare
ironingtopreventthefabricfromlookingshiny.
Note: UsetheSprayMistand/ortheShotofSteamfeaturefordeeperpenetrationtoremove
wrinkles.
Note: Somefabricsmayrequiremoresteamthanothers.Yourironhasthecapabilitytoadjuststeam
asneeded.

English - 7
USING THE IRON’S SPECIAL FEATURES
Wehavedesignedyoursteamirontoprovidetheutmostinquality,easeofuseand
convenience.Yoursteamironoffersthefollowingspecialfeatures:
Spray Mist Feature
TheSprayMistisapowerfulwaterspraymistthatdampensthefabrictoaidinremoving
wrinklesfromheavyfabricsandforsettingcreases.
To use the Spray Mist Feature:
PresstheSprayMistbuttonfirmlyapplyingwaterinthedesiredarea.Ironoverthefabric
todry.
Shot of Steam Feature
TheShotofSteamfeatureprovidesanextraburstofsteamfordeeppenetrationof
stubbornwrinkles.YoucanusethisfeaturewhileDryorSteamironing,butthewater
reservoirmustatleast¼fullofwater.
To use the Shot of Steam Feature:
PlacetheironontopofthewrinklyandpresstheShotofSteambuttoneachtimeyou
wouldlikeanextraburstofsteam.TheShotofSteamfeaturemaybeusedcontinuously
withjustthree-secondintervalsbetweenshots.

English - 8
Vertical Shot of Steam
Theverticalsteamfeatureallowsyourirontofunctionasa
garmentsteamer.
Tip: Whenusingtheverticalshotofsteamonclothing,hangthe
clothingonaclotheshangerforbestresults.Hangingcurtains
anddrapesmayalsobesteamed.
1.Holdtheironinaverticalposition,withtheironclosetobutnot
touchingthefabricyouwanttosteam.
2.Withyourotherhand,pullthefabrictight.
3.PresstheShotofSteambuttoninapproximately3-second
intervalsasyoumovetheironacrossthewrinkledarea.
WARNING: Topreventtheriskofburns,keepyourhandawayfromtheareabeing
steamed.
WARNING: DO NOTsteamgarmentswhilewearingthem;thismayresultininjuries.
3-Way Motion Smart Auto-Off Feature
When the iron is plugged in, the power indicator will light steadily, indicating there is
powertotheiron.Ifyouleavetheiron:
• Inahorizontalpositionwithoutmovingit,oraccidentallytiptheironover,itwill
automaticallystopheatingafter30seconds.Theredwaitlightwillblinktoletyouknow
thattheironhasstoppedheating.
• Inaverticalposition(onitsheelrest)withoutmovingit,theironwillautomaticallyturn
offafter15minutes.Theredwaitlightwillblinktoletyouknowthattheironhas
stoppedheating.
IMPORTANT:Theredwaitlightwillcontinuetoblinkfor5minutes,thenturntotallyoff.
To reset the iron:
• Movetheironbackandforth.Theredwaitlightwillstopblinkingandtheironwillstart
heatingagain(allowittoreheatfor2minutes);theironisnowreadytouse.
WARNING: Motionsmartauto-offisasafetyfeature,notarecommendedmeansfor
turningyourironoff.See”CaringforYourIronAfterUse”forinformationonturningoff
yourironandstoringitsafelybetweenuses.

English - 9
Wait/Ready Light
Indicateswhenyourironreachesthedesiredtemperature.Whenafabricsettinghas
beenselected,theredwaitlightwillilluminate.Oncetheironheatsuptothedesired
fabricselection,thelightwillchangefromred(Wait)togreen(Ready).Thisoccurseach
timethefabricsettingischanged.Itwillalsooccurwhentheironhasbeenresetafterthe
Auto-Offisdeactivated.
Anti-Calcium System
TheAnti-CalciumSystemisapermanentsystemlocatedinsidethewaterreservoir.This
systemremovescalciumfromthewaterandreducescalciumbuild-uponthesoleplate.
Thereforeyourironacceptstapwatereliminatingtheneedofkeepingdistilledwateron
handforironing.
Self-Cleaning
Preventsmineralbuildupthatcanreducethelifeofyouriron.Seethe“CaringForYour
Iron”sectionforinstructionsonhowtousethisfeature.
Anti-Drip
Producessteamwithoutdripping,spitting,orleakingthroughthesoleplate,evenatlow
temperatures.
Anti-Scratch Tip
Theresistanthardanodizedanti-scratchtipprovidesgreaterdurability.
Micro Holes
Themicroholesinthesoleplategrantmoreconcentratedsteamdiffusion.
360° Tangle-Free Swivel Cord
Keeps the power cord off of the fabric and out of your way, whether you are right or
left-handed.
Longer Power Cord
Provides2.5meters(8feet)ofpowercordtogiveyouaddedflexibilitywhenironing.

English - 10
CARING FOR YOUR IRON AFTER USE
TURNING OFF YOUR IRON
1. Turnthefabricselectordialuntilthelightturnsoff.Unplugtheironfromthepower
source.
WARNING: NEVERyankthepowercordwhenunpluggingtheIron.Thiscan
damagethecord.
CLEANING THE SOLEPLATE
Cleanthesoleplateifstarchorotherresidueaccumulates.
Tocleanthesoleplate:
1.Allowtheirontocoolandthenwipeitwithasoft,dampcloth.
WARNING: DONOTuseabrasivecleansers,scouringpadsorvinegartocleanthe
soleplate.Thiswilldamagethefinish.
2.Runtheironoveranall-cottonclothtoremoveanyresidue.
USING THE SELF-CLEANING FEATURE
YoushouldusetheSelf-Cleaningfeaturetomaintaintheoptimalperformanceof
youriron.TheSelfCleaningfeaturewillcleanthewaterreservoirandsteamventsof
accumulatedminerals,dustandlint.
To use the Self-Cleaning feature:
1. MovetheSteamDialbackandforthseveraltimestoremovedebrisandminerals
fromthesteamvalve.Thiskeepswaterflowingintothesteamchamber.
2. Fillthewaterreservoirwithtapwatertothe“MAX”line.
3. Plugintheironandmovethefabricselectdialtolinenposition“Lin”,andallowthe
irontoheatuntilthewait/readylightturnsgreen.
4. Unplugtheiron.
5. Holdtheironoverasinkinahorizontalposition.
WARNING:Becarefulnottotouchtheiron’shotsurfaces.
6. PresstheSelf-Cleanbuttonandhold.Waterwillbegindrippingfromthesteamvents.
Slowlyrocktheironside-to-sideandfronttobackfor30seconds.Whenrockingthe
iron,dipthenoseoftheironslightlybelowthereartomakecertainthewater
circulatescompletely.
7. Turntheironupsidedownandallowtheremainingwatertoflowoutofthefillhole.
8. Drythesoleplatewithatowel.
9. PlugintheironandturntheFabricSelectDialtothelinenposition“Lin”.Lettheiron
heatuntilthewaitlightturnsgreenanddryouttheironcompletely.
10.Turnthefabricselectdialtotheoffposition“O”.Thelightwillgoout,indicatingthat
theironhasturneditselfoff.Unplugtheironandallowittocoolbeforestoring.

English - 11
CLEANING THE ANTI-CALC SYSTEM
YourSteamIronhousesanAnti-CalcFilterintheReservoir,whicheliminatesimpurities
fromthewater.
To prolong the efciency of this lter:
1. Unplugtheironandallowittocool.
2. Locatethewatercupthataccompaniedtheiron.FillitwithwatertotheMaxFillmark.
Add1teaspoonofsalttothewaterandfillthewaterreservoirwiththissolution.
3. Leavethesolutioninthewaterreservoirfor15minutes,thenemptyit.
4. Fillthewaterreservoirasecondtimewiththesalt-watersolutionandemptyitagain
after15minutes.
5. Fillthereservoirwithfreshwatertorinseandempty.TheAnti-CalcSystemshouldbe
cleanedapproximatelyonceamonth.
STORING YOUR IRON
1. Allowtheirontocool.
2. Ifyoudonotuseyourirononadailybasis,emptythewaterreservoiraftereachuse
foralongerironlife.Todoso,unplugtheIron,turntheironupsidedown,openthe
fillholecover,andallowwatertoflowfromthefillhole.Shaketheirongentlyto
removetrappedwaterdrops.
3. LooselyloopthepowercordaroundtheheelrestandstoretheIrononitsheelrest.
IMPORTANT:WrappingthecordaroundtheIrontootightlycandamagethecord.
TIP:Whennotironing,alwayssetthesteamdialtoclosedposition“ ”and the fabric
selectdialtooffposition“O”.

Français - 1
MESURES PRÉVENTIVES IMPORTANTES
Lesmesuresdesécuritédebasedoiventtoujoursêtresuivies,lorsquevousutilisezdes
appareilsélectriques,etellescomprennentcequisuit:
• LIRE TOUTES LES DIRECTIVES AVANT L’UTILISATION.
• N’utilisezleferquepourl’usageauquelilaétéconçu.
• Veillezànepassubmergerleferdansl’eauoudansd’autresliquidesafindevousprotégercontrele
risqued’électrocution.
• LescadransdesélectionduTissuouduModeVapeurdoiventtoujoursêtretournersurarrêt
“O/ ”avantdebrancheroudedébrancherl’appareil.Nejamaistirersurlecordonélectriquepour
débrancher,maisplutôtsaisirlaficheélectriqueettirersurlafichepourdébrancher.
• VeillezàNE PASpermettreaucordondetoucherdessurfaceschaudes.Laissezleferrefroidir
parfaitementavantdeleranger.Enroulezdefaçonlâchelecordonautourduferaumomentdele
ranger.
• Débrancheztoujoursleferdelapriseélectriquelorsduremplissageavecdel’eau,lorsdelavidange
etlorsqu’iln’estpasutilisé.
• VeillezàNE PASfairefonctionnerleferavecuncordondétérioréoulorsqueleferaétééchappéou
endommagé.Nedémontezpasleferafindevousprotégercontrelerisqued’électrocution.Apportez-
leàunCentredeServiceAutoriséOster®pourunexamenet/ouuneréparation.Unré-assemblage
inappropriépeutoccasionnerunrisqued’électrocutionlorsdel’utilisationdufer.
• NElaissezPASlefersanssurveillancelorsqu’ilestbranchéouenmarcheousuruneplancheà
repasser.
• Lefaitdetoucherlespartiesmétalliqueschaudes,l’eauchaudeoulavapeurpeutoccasionnerdes
brûlures.Soyezprudentlorsquevousretournezunferàvapeuràl’envers-del’eauchaudepourrait
setrouverdansleréservoir.
• Débranchezleferdel’alimentationélectriqueetfaites-leexaminerdansuncentredeserviceautorisé
Oster®s’ilnefonctionnepascorrectement.
• VotreferOster®estconçupours’appuyersurlesupportdetalon.Nelaissezpaslefersans
surveillance.Nedéposezpaslefersurunesurfacenonprotégéemêmes’ilreposesurlesupportde
talon.
• Getappareilconsommebeaucoupd’énergie.Nefaitespasfonctionnerunautreappareilàhaute
consommationd’énergiesurlemêmecircuit.
• Sil’utilisationd’unerallongeestabsolumentnécessaire,ilestrecommandéd’utiliserunerallonge
aveclemêmeampérage.Lesfilsélectriquesavecunpluspetitampéragepourraientsurchauffer.Ilest
aussirecommandédeplacerlefilélectriquedetellefaçonquepersonnenepuisseparaccidenttirer
dessusous’enchevêtrerettomber.
• Cetappareiln’estpasdestinéàêtreutilisépardespersonnes(enfantsycompris)dontlescapacités
physiques,sensoriellesoumentalessontdiminuées,ouquinedisposentpasdesconnaissances
oudel’expériencenécessaire,àmoinsqu’ellesn’aientétéforméesetencadréespourl’utilisationde
cetappareilparunepersonneresponsabledeleursécurité.Lesenfantsdoiventêtresurveilléspour
s’assurerqu’ilsNEjouentPASavecl’appareil.
• Lesenfantsetpersonneshandicapéesdoiventêtresurveilléslorsqu’ilsutilisentl’appareilouque
l’appareilestutiliséàcôtéd’eux.
CONSERVER CES DIRECTIVES
(Seulement pour appareils de 120 & 127 V avec deux fiches plates)
Cetappareilpossèdeunefiche
polarisée(unelameestpluslargequel’autre)afindevousprotégercontrelerisqued’électrocution.Cette
fichenes’adaptequed’uneseulefaçonàuneprisepolarisée.Ceciestunecaractéristiquedesécuritéconçue
pouraideràréduirelerisqued’électrocution.Inversezlafichesiellenes’insèrepasparfaitementdansla
prise.Consultezunélectricienqualifiésilafichenes’adaptetoujourspascorrectement.Necherchezpasà
contournercettecaractéristiquedesécurité.

Français - 2
1. Brumisateur
2. OrificeCouvertdeRemplissagedel’Eau
3. VoyantLumineuxdeMarche/Arrêt/Attente/Adisposition
4. CadrandeRéglagedelaVapeur
5. BoutonBrumisateur
6. Boutond’ArrêtdelaVapeur
7. CadrandeSélectionduTissu
8. Poignée
9. CordonPivotantà360°quines’emmêlepas
10.SystèmeAnti-Calcaire
11.Réservoird’EauTransparent
12.BoutonAutoNettoyage
13.PointeDureAnodiséerésistanteauxrayures
14.Semellenonadhérenteavecmicroorifices
15.GobeletInclus
DESCRIPTION DE L’APPAREIL
1
2
3
4
756
8 9
11
10
12
14
13
15

Français - 3
DIRECTIVES D’UTILISATION
AVANT PREMIER USAGE
• Lapremièrefoisquevousutilisezvotreferàrepasser,ilestrecommandédefaire
unessaisurunmorceaudetissupours’assurerquelasemelleetleréservoirsont
propres.
• Ilestpossiblequ’àlapremièreutilisation,unpeudefuméesorteduferetqu’ildégage
unecertaineodeur.Ceciestprovoquéparlapremièrechauffedesmatériauxutilisés
àl’intérieurdufer.C’estparfaitementnormaletcephénomènes’arrêteraenquelques
minutes.
REMPLISSAGE AVEC DE L’EAU
Vousdevezremplirleréservoird’eauavecdel’eaupourutiliserlescaractéristiquesdu
jetdevapeuretdujetpulvériséetpourobtenirdelavapeurdevotrefer.
CONSEIL:Chaqueferesttestéàl’usinepourassurerqu’ilfonctionnecorrectement.
L’essaipeutlaisserunepetitequantitéinoffensived’eauàl’intérieurduréservoir.
Prièrederéfléchiràcequisuitavantderemplirleréservoird’eau:
• Ceferaétéconçupourpouvoirêtreutiliséavecdel’eaudurobinet,trèscalcaire.
LeSystèmeAnti-Calcaireestpermanentetsituéàl’intérieurduréservoird’eau.Ce
systèmeéliminelecalciumquis’accumulesurlasemelle.Votreferacceptedoncl’eau
durobinetetiln’estpasnécessairedemainteniruneréserved’eaudistilléepourleferà
repasser.
IMPORTANTE:Aumomentderepasser,maintenirleCadranenpositionfermée“ ” et
leCadransurlapositiond’arrêt“O”.
Pourremplirleréservoird’eau:
1.Soulevezlecouvercledel’ouverturederemplissaged’eau.
2.Assurez-vousqueleferestbiendébranché.TournerleCadran
surlapositionfermée“ ”etleCadransurlapositiond’arrêt
“O”.
3.Remplissezlegobeletavecdel’eau.Versezl’eaudansle
réservoird’eauenfer.Neremplissezpasleréservoird’eaude
façonàdépasserleniveaumaximumderemplissage“MAX”.
AVERTISSEMENT : Soyezprudentlorsquevousremplissezunferchaudavecdel’eau
afind’éviterlerisquedebrûlures.Lespartiesmétalliqueschaudes,l’eauchaudeetla
vapeurpeuventoccasionnerdesblessures.

Français - 4
REGLAGES DE SELECTION DU TISSU
Pourchoisiruncertaintypedetissu,tournerleCadransurletissuquevousdésirez.
Levoyantdepréparationpasseraaurougependantqueleferchauffe.Puislevoyant
passeraauvertpourvousindiquerqueleferestprêtàêtreutilisé.
REPASSAGE À SEC
1.Assurez-vousquelecadranestbientournésurlapositiond’arrêt“ ”.
2.Brancherlecordondanslaprise.
3.TournerleCadransurleréglagequevousdésirez(Soie“Seda”
ouSynthétique“Sintet”).
Laissezchaufferleferpendant2minutes.Pendantquelefer
chauffe,assurez-vousquecelui-cireposesursonsupportde
talonsurunesurfacestableetprotégée.
NOTA:AvecleCadranenpositionfermée“ ”,ilvousestencore
possibled’utiliserleJetdeVapeuroulebrumisateur.Assurez-vousqueleréservoiraau
moins¼.
CONSEIL: Référez-vousauguidederepassagepourobtenirleréglagerecommandé
pourvotretissu.
REPASSAGE À LA VAPEUR
1.Suivezlesdirectivesdu“RemplissageDuRéservoirD’Eau”.
2.Branchezlecordondanslaprise.Levoyantd’alimentations’allumera.
3.TournerleCadransurleréglagedutissuàrepasseràlavapeurquevousdésirez
(Lin“Lin”,Coton“Algod”,Laine“Lana”orSoie“Seda”)etattendre2minutesquelefer
chauffe.Pendantqueleferchauffe,assurez-vousqueleferest
bienassissursontalonetsurunesurfacestableetprotégée.
CONSEIL:Référez-vousauguidederepassagepourobtenirle
réglagerecommandépourvotretissu.
4.Unefoisqueleferestchaud(2minutes),tournerlecadransurle
réglagedevapeurquevousdésirez.
IMPORTANT:Quandvousnerepassezpas,toujoursmaintenirleCadranenposition
fermée“ ”etleCadransurlapositiond’arrêt“O”.

Français - 5
CONSEILS DE REPASSAGE
• Liseztoujourslesétiquettesdesvêtementsetsuiveztoujourslesdirectivesderepassagedu
fabricant.
• Triezlesarticlesàrepasserselonletypedetissu.
• Vousdevriezrepasserenpremierlesvêtementsquidemandentunetempératurepeuélevée
(parexemplelasoieetlessynthétiques)afind’éviterdelesabîmeravecunfertropchaud.
• Faitesl’essaisurunepetitepartietellequ’unecoutureouunrevers,sivousêtesincertaindu
contenudutissu,avantderepasserunepartievisible.Commencezavecunetempérature
peuélevéeetaugmentezgraduellementlachaleurpourtrouverlemeilleurréglage.
• Attendezenviron5minutespouratteindreleréglagedetempératuremoinsélevélorsque
vouschangezleréglaged’unetempératureplusélevéeàunetempératuremoinsélevée.
• Employezdelongsetlentsmouvementsdeva-et-vientsurletissulorsquevousrepassezà
lavapeur.Cecivapermettreàlavapeurdepénétreràtraversletissutoutenpermettantque
lachaleurdelasemellepuisseassécherl’humidité.
• Tournezlevêtementàl’enverspourrepasserlalingerie.Surveillezprudemmentquelefer
n’estpastropchaudcarladoublurepeutfondreoucolleràlasemelle.
• Lorsquevousrepassezunefermeture-éclair,utilisezunlingederepassageouassurez-vous
quelafermeture-éclairestferméeetrepassezpar-dessuslerabat.Nerepassezjamais
directementpar-dessusunefermeture-éclairnonprotégée.
• Utilisez“LeGuideDeRepassage”pourchoisirlemeilleurréglageetlameilleureméthode
pourletissuquevousdésirezrepasser.

Français - 6
GUIDE DE REPASSAGE
Tissu Sélection Du Réglage Du Recommandations
Suggéré Tissu Réglage Cadran De Repassage
De La Vapeur
Acrylique Synthétique“Sintet” Repasserlevêtementàl’envers.
Acétate Synthétique“Sintet” Repasserlevêtementàl’envers
pendantqu’ilestencorehumide.
Soie Soie“Seda” Utiliserunlingederepassage*
pouréviterlesmarquesluisantes.
Viscose Soie“Seda” Repassageprincipalementàsec;
lavapeurpeutêtreutiliséeselon
lesdirectivesdufabricant.
Nylon Synthétique“Sintet” Repasserlevêtementàl’envers
pendantqu’ilestencorehumide.
Laine,laineetvapeur,repasser
levêtementàl’enversouutiliser
unlingederepassage*.
Polyester Synthétique“Sintet” Repasserlevêtementàl’envers
pendantqu’ilestencorehumide.
Rayonne Synthétique“Sintet” Repasserlevêtementàl’envers.
Laine Laines“Lana” Repasserlevêtementàl’envers
ouutiliserunlingederepassage*.
Laines Laines“Lana” Repasserlevêtementàl’envers
variées ouutiliserunlingederepassage*.
Cotons Coton“Algod” Suivrelesdirectivesdufabricant
variés duvêtement.Utiliserleréglagedu
tissuquidemandeleréglagele
moinsélevé.
Velours Coton“Algod” Repasserlevêtementàl’envers
côtelé ouutiliserunlingederepassage*
etbrosserensuitelevêtement
aveclamainpoursouleverlegrain
dutissu.
Coton Coton“Algod” Repasserlesvêtementsfoncésà
l’enverspouréviterlesmarques
luisantes.
Lingerie Lingerie“Lin” Repasserlevêtementàl’envers
ouutilisezunlingederepassage*
pouréviterlesmarquesluisantes
(surtoutlestissusfoncés).
Toile Lingerie“Lin” Repasserlesvêtementsfoncésà
(jeans) l’enverspouréviterlesmarques
luisantes.
*Unlingederepassageestuncoton,untissunettoyéàsecquevousplacezpar-dessuslevêtement
quevousrepassezafindeprévenirlesmarquesluisantessurletissu.
NOTE: UtiliserlacaractéristiqueBrumisateuret/ouleJetdeVapeurpourunepénétrationpluspro-
fondeafind’enleverlesfauxplis.
NOTE:Certainstissuspeuventréclamerplusdevapeurqued’autres.Votreferpossèdelacapacitéde
réglerlavapeurcommecelaestnécessaire.

Français - 7
COMMENT UTILISER LES FONCTIONS
SPECIALES DU FER A REPASSER
Nousavonsconçuvotreferàrepasseràvapeurpourqu’ilvousdonnedesrésultatsde
qualitéetqu’ilsoitfacileetpratiqueàutiliser.Votreferàvapeurvousoffrelesfonctions
suivantes:
Brumisateur
LeBrumisateurestunvaporisateurd’eauquihumidifieletissupouraideràrepasserles
tissuslourdsetfripésmaisaussipouraccentuerlesplisdutissu.
Pour utiliser la Fonction de Brumisateur:
AppuyersurleBoutonBrumisateurpourhumidifierlazonedésirée.Repasserletissu
humidifiépourlesécher.
Fonction Jet de Vapeur
LaFonctionJetdeVapeurvousdonneunjetpuissantdevapeurpourpénétrerplusen
profondeurlesfroissuresrésistantesdutissu.Vouspouvezutilisercettefonctionlorsque
vousrepassezàsecouàlavapeur,maisleréservoird’eaudoitpleinàaumoins1/4de
sacapacité.
Pour utiliser la Fonction Jet de Vapeur:
PoserleferaudessusdelafroissureetappuyersurleboutonduJetdeVapeurchaque
foisquevousdésirezunjetpluspuissantdevapeur.LafonctionJetdeVapeurpeutêtre
utiliséedefaçoncontinueavecunintervalledeseulement3secondesentrechaquejet.

Français - 8
Jet de Vapeur Verticale
Lacaractéristiquedevapeurverticalepermetd’utiliservotrefer
commeunpresseurdevêtements.
CONSEIL:Accrochezlevêtementsuruncintrepourobtenirde
meilleursrésultatslorsquevousutilisezlavapeurverticalesurun
vêtement.Lesdraperiesetlesrideauxsuspenduspeuventaussi
êtretraitésàlavapeur.
Si Vous Désirez Utiliser la Vapeur Verticale:
1.Tenezleferenpositionverticaleetprochedutissuquevous
voulezvaporisermaissansletoucher.
2.Tenezletissubientenduavecvotreautremain.
3.Appuyezsurleboutondujetdevapeurdurantdesintervallesde3secondespendant
quevousdéplacezleferd’uncôtéàl’autredelarégionfroissée.
AVERTISSEMENT:Gardezvosmainséloignéesdelarégionvaporiséeafind’éviterles
risquesdebrûlures.
AVERTISSEMENT: NEPASvaporiserdesvêtementspendantquevouslesportez;cela
peutoccasionnerdesblessures.
Fonction Arrêt Automatique Intelligent à Détection
de Mouvement
Letémoind’alimentationvas’allumersansarrêtpourvoussignifierqueleferestalimentélorsque
celui-ciestbranché.
Si vous laissez le fer:
• Enpositionhorizontalesanslebouger,ousivouslebousculeraccidentellement,ils’arrêtera
automatiquementaprès30secondes.Levoyantrouged’attentecommencerontàclignoterpour
quevoussachiezquelefers’estarrêtédechauffer.
• Enpositionverticale(sursontalon)sansbouger,lefers’arrêteraautomatiquementaprès15
minutes.Levoyantrouged’attentecommencerontàclignoterpourquevoussachiezquelefer
s’estarrêtédechauffer.
IMPORTANT: Levoyantrouged’attentecontinuerontdeclignoterpendant5minutes,puis
s’éteindrontcomplètement.
Pour réactiver le fer:
• Bougerleferd’avantenarrière.Levoyantrouged’attentes’arrêterontdeclignoteretlefer
recommenceraàchauffer(laisserchaufferpendant2minutes);leferestmaintenantprêtàêtre
utilisé.
AVERTISSEMENT: Lafonctionbrevetéed’arrêtautomatiqueestunecaractéristiquedesécurité,nonpas
unmoyenrecommandédefermervotrefer.Voir“LesSoinsPourVotreFerAprèsSonUtilisation”pour
l’informationcommentfermervotreferetlerangerdefaçonsécuritaireentrelesutilisations.
Table of contents
Languages:
Other Oster Iron manuals

Oster
Oster GCSTEP2501 User manual

Oster
Oster GCSTBS4901L User manual

Oster
Oster GCSTCS-412 User manual

Oster
Oster GCSTCS-401 User manual

Oster
Oster GCSTTS7010 User manual

Oster
Oster 6020 User manual

Oster
Oster GCSTBS5902 User manual

Oster
Oster 4019 User manual

Oster
Oster GCSTPM7201 User manual

Oster
Oster GCSTCC5000 User manual

Oster
Oster GCSTBV4112 User manual

Oster
Oster GCSTBS5802 User manual

Oster
Oster 4415-449 User manual

Oster
Oster GCSTTS7001 User manual

Oster
Oster GCSTUP8201 User manual

Oster
Oster GCSTBV4119 User manual

Oster
Oster 5104 User manual

Oster
Oster GCSTBS3801 User manual

Oster
Oster GCSTSP6201 User manual

Oster
Oster GCSTCM2001P User manual